When renovating or building, making furniture, and in other situations that require processing lumber, you may need a circular saw. Craftsmen who work with wood note that a sawing table is much more convenient and safer to use compared to a hand saw. Moreover, the accuracy of performing actions is much higher. You can make such a machine with your own hands - it is often more profitable and faster. In addition, a self-made design will more accurately meet the requirements of the master.
Design Features
Structurally, a homemade sawing table looks quite simple. The machine consists of a supporting frame for mounting the motor, a transmission unit and a work table with a slot for the cutting disk. The design is equipped with stops for guiding the workpiece and a protective screen that prevents chips from entering and also increases work safety.
Mandatory requirements for a sawing table:
- rigid, stable design;
- smooth surface of the tabletop;
- secure disk mounting;
- fencing protecting the operator of the machine (table);
- easy access to the control device (start and stop buttons).
The equipment must be installed on a frame supported not on solid sheets, but on legs. This improves ease of use, although it makes the saw table less stable. To increase durability, the frame can be made of metal or reinforced with metal elements. Safety is ensured not only by the protective screen, but also by securing the disk from the bottom (inner) side. Additional requirements depend on the specifics of the work - auxiliary elements help to process parts more accurately, saw longer boards, as well as thick logs.
By making a saw table with your own hands, you can get a number of advantages - from reduced costs to the ability to change the design as the master needs it. If desired, you can replace some of the parts with more economical ones, or use materials left over from repairs or construction. The only disadvantage of a circular saw independently fixed to the machine is a decrease in the accuracy of workpiece positioning. But this moment still largely depends on the skill of the performer himself.
Rigid, stable construction
Smooth countertop surface
Secure disk mounting
Guard protecting the operator of the machine (table)
Safety requirements
One of the most common causes of injuries when using a circular saw is a cluttered workplace.
In addition, it is important to monitor the stability and strength of absolutely all components of the system, and if there is imbalance, take measures to eliminate difficulties. Before connecting the saw, you must make sure that it is well secured. If necessary, tighten the screws/bolts. It is strictly forbidden to hold the material close to the cutting site! This is dangerous due to the rebound of knots and shavings into the eyes or onto open parts of the body.
Be sure to wear glasses before work and clothes with sleeves.
Making your own saw table is not as difficult a task as it might seem. If you have good material at hand, its characteristics are chosen correctly, and the power of the device ranges from 500 to 1000 W, the above instructions will be the basis of the work.
You should not lose sight of the fact that at any stage of table production you should control the accuracy of your own operations. Otherwise, if deviations in size or deformation of the legs appear when the ribs are tightened, it will be very difficult to restore stability. Nevertheless, making a table for a circular table with your own hands is an absolutely realistic task that will take several hours.
Materials
When assembling a cutting table from chipboard with your own hands, you should maintain an optimal balance between functionality, safety, time and money. This can be achieved by selecting parts and materials with the necessary parameters. It is possible to reduce costs by using old parts of other structures - furniture, frames of wooden houses and outbuildings.
Tabletop
The main requirements for a saw table are resistance to heavy loads, shocks and vibration. The tabletop must be smooth enough to move and not bend under a weight of 50 kg or more. Suitable options might be:
- Metal (steel or duralumin) 3–5 mm thick. The advantages of metal countertops are high strength, almost unlimited service life, the disadvantages are heavy weight, decent cost.
- Laminated chipboard or moisture-resistant plywood with a thickness of at least 2 cm. The cost of this option will be the most profitable, but the strength is noticeably reduced.
- Textolite 15–20 mm thick. The material is more durable than plywood, but inferior to metal. In terms of cost, textolite countertops are also between metal and plywood sheets.
Plastic, chipboard or OSB are not recommended as countertop materials. A structure made from this raw material will be unstable to vibration from the saw. It is possible to make a table entirely from natural wood, but it is too expensive.
You can reduce costs while increasing strength by using combinations of materials—for example, thick plywood covered with sheet metal.
Metal
laminated chipboard
Textolite
bed
At the base of the table for sawing boards there can be wooden beams, secured under the lid to increase rigidity. Elements with a cross-section of at least 5 x 5 cm are placed at a distance of 50–90 mm from the edge of the tabletop. For the sawing table, it is recommended to choose bars made of hard wood - beech, hornbeam, oak. The advantages of wood are low cost, easy installation using self-tapping screws. Disadvantages - less strength and service life, high probability of fire.
The upper part of the table frame for cutting chipboard and other materials is often made by hand from the same sheets that were chosen for the table top. For the legs of a wooden structure, it is recommended to use timber, securing it with metal corners. The pros and cons of wooden supports are similar to the features of a frame made of the same material.
The basis of the table for cutting and sawing boards can be metal. Stability increases when choosing metal corners or channels with sides of 25–50 mm. To save money, they are purchased at scrap metal collection points or replaced with profile pipes. The frame parts are connected by welding. The use of bolted connections is not recommended due to the possibility of loosening due to vibration. The reasons for choosing a metal frame are maximum strength, reliability, and easy maintenance. Disadvantages: high cost, need to use a welding machine.
Metal
Wooden beams
Plywood
laminated chipboard
Step-by-step instruction
A durable, comfortable table for a manual circular saw will work if you stick to the action plan.
Its points are as follows:
- Determine the dimensions of the tabletop and supporting frame;
- Prepare drawings of parts indicating dimensions, material, quantity; you can use the examples, adjusting the shapes and sizes to suit your needs;
- Calculate the required amount of materials and fasteners; determine where scrap materials can be used and what needs to be purchased;
- The frame parts are connected sequentially, the top plate is prepared, and it is attached to the frame;
- At the bottom, through the prepared holes, a circular saw is attached, protection and guide stops are installed;
- The assembled apparatus is tested and modified if necessary.
Selection of dimensions
It is worth choosing the size of the sawing table depending on the square footage of the workshop. The small area of the room allows you to use a tabletop of 50 x 50 cm. Making the sawing table smaller does not make sense - it will be difficult to use it when processing long workpieces. The universal size, ensuring convenient sawing of laminated chipboards, is 80 x 80 cm.
The maximum recommended dimensions of the sawing machine are 120 x 120 cm.
To comply with safety requirements, it is recommended to place the saw in the middle of the tabletop at a distance of at least 25 cm from the edge - it is this indicator that leads to the minimum width of 500 mm. The location of the saw blade also depends on how it will be used. There are three types of design:
- for longitudinal sawing;
- for cross cutting;
- universal.
The depth and location of the disk installation depend on the workpieces processed on the machine. For boards and plywood, it should protrude above the tabletop by 50-80 mm, for logs - by 110-125 mm. The height of the upper part of the frame made of sheets of plywood or chipboard can be in the range of 35–40 cm. If you make the frame only from timber, this parameter depends on the cross-section. The remaining part of the structure consists of wooden legs, the size of which craftsmen usually choose to suit their height. The overall height of the sawing table is about 1.0–1.1 m, but can be reduced to 900 mm.
Desktop device
The design of a table for a manual circular saw is so elementary that most specialists produce it without preparatory drawings and techniques. This is a dense workbench that is created from wood and plywood.
The most durable table bases are made from alloy. They are the heaviest and require the presence of welding skills. Therefore, stands are often made from leftover lumber. A circular saw is attached under the tabletop, and the drive protrudes above it through a specially made slot. The lumber is advanced along the table top and sawn with a disk. For convenience and correct operation, the table is equipped with additional devices: an angular and longitudinal stop.
The tabletop “absorbs” part of the working plane of the disk; the depth of cut will decrease by the thickness of the tabletop. For this reason, it is preferable to choose a circular saw with the largest disk diameter, and a table cover that is thin but rigid.
If you have not purchased an electric saw yet, choose modifications with high power (from 1200 W). They can handle cutting large-sized wood. Holes will be drilled to secure the base. The solid base may burst. For this reason, it is advisable to select a mechanism of a different type.
Create a drawing
The first stage of creating a machine for processing wood is drawings of a sawing table. You don’t have to compile them by choosing the appropriate option on thematic sites or forums. But it’s better to make at least the simplest diagram yourself, taking into account the available materials and the selected sizes.
The drawing notes all the nuances that will be needed to prepare the materials, indicate the mounting locations for the supports and their angles of inclination if the table legs are not perpendicular to the table top. In the figure it is also worth noting the place for attaching the unit to turn the saw on and off. When drawing up a diagram yourself, maintaining scale and exact proportions is not necessary. The main thing is to correctly indicate the dimensions of all future parts for the sawing machine.
Drawings with dimensions for homemade products
There are dozens of drawings and examples of a wide variety of designs online. However, no two homemade machines are alike. Even if they are made according to the same drawing, there will still be any differences in materials, sections, fasteners, and dimensions. Although no one forbids a master to accurately copy any machine. As an example, here are drawings of a simple frame for a circular saw.
Manufacturing stages
Before assembling the machine for cutting boards, logs and blanks, you should prepare all the necessary materials and tools. To work you will need:
- moisture-resistant plywood;
- sheet material suitable for making the body;
- elements for the body and legs (bars 40 by 40 mm).
Fastening will be done with self-tapping screws using a screwdriver. All necessary parts are cut with a jigsaw. A saw with a disk of suitable diameter is also prepared.
Algorithm for creating a table:
- Sawing all parts into pieces with the required dimensions.
- Marking the mounting areas for the saw and legs on the table top.
- Making a case, which is usually a rectangular box without a lid or bottom.
- Installation of countertops.
- Cutting a hole that should be 5–10 mm longer and 4–6 mm wider than the disc.
If you cut the material at a certain angle, the resulting slot should resemble a trapezoid (inverted) in shape. For smooth sawing, a regular hole is made. Before cutting out the groove, you should apply a saw and adjust the marks.
Sawing all parts into pieces with the required dimensions
Marking the mounting areas for the saw and legs on the tabletop
Case manufacturing
Installing the countertop and cutting the hole
Preparing to install the saw
Stationary machine with your own hands
To perform everyday or one-time tasks, a hand-made circular saw is quite suitable. Small-volume sawing work does not imply heavy loads on the disk drive. The compact tool has small dimensions, which makes it possible to put it away after finishing work in a certain place. An experienced carpenter will need to make a large stationary type circular saw.
Circulation table
The main condition for making a table is the selected material. It is recommended to use a solid steel sheet, duralumin or silumin alloy. Materials such as moisture-resistant plywood, plexiglass and textolite require processing and installation on top of a galvanized sheet. The use of any material in manufacturing must meet the main conditions:
- increased vibration resistance;
- sagging with a load exceeding 50-60 kg is unacceptable;
- the presence of a perfectly flat surface.
In cases where the conditions are not met, a DIY circular saw may stop due to a jammed disk or a broken drive. The consequences can be different, from a damaged part to injury to a person.
There are several options for making a circular table. Stationary tables can be sawed or made from two parts. The circular saw blade should protrude no more than a third of its diameter.
Saw blade
Saw blade
The design of a DIY circular saw must contain a saw blade. The working surface of the disk is set to one third of the total diameter. For example, with a diameter of 210 mm, the disk should protrude 70 mm from the table. Parts with greater thickness will require a powerful motor, from 1 kW. A miniature circular saw will not cope with such tasks.
The splitting knife installed on some models serves to prevent short circuits and jamming during operation. It is located at the back a few millimeters from the teeth of the saw blade. The device may also be needed when making a circular saw with your own hands.
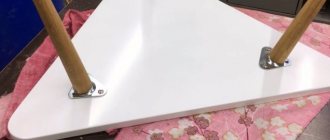
Adjustable side support
Any type of work will require a stop. The side support is made of a block of dense wood. In other cases, it is possible to make it from a metal corner. The arrangement should be slightly longer than the table structure. The stop is installed using bolts. The template is installed between the table and the cutter for precise installation and better settings.
Shaft
Homemade shaft
The most important part of the design is the shaft mounted on the circular saw. A self-made shaft for a circular saw can damage the structure and cause injury. The reason for this is runout, which cannot be avoided when making a shaft using artisanal methods. The manufacture of the shaft should be entrusted to a specialist with good turning equipment. You should remember that there is a cutter that needs a seat. The holes must be symmetrically machined and machined.
Finished shafts are sold in specialized markets. Preference should be given to parts with a self-aligning bearing. Otherwise, the conventional mechanism may soon render the circular machine unusable.
Broadcast
There are several types of gears that can be used in the design of a DIY circular saw:
- V-belt transmission;
- mechanism consisting of gears.
The preferred option is to use a belt drive. Using a mechanism with gears can lead to jamming if a foreign body enters and injury to the worker. When choosing the pulley diameter, the maximum number of revolutions of the saw blade is taken into account.
Motor
Electric motor for circular saw
In most cases, homemade machines are equipped with an engine from an old washing machine. The main features are increased service life and efficiency. The speed of such engines is not high, which makes working on a circular saw assembled with your own hands safer, longer, and has a positive effect on the result. The use of a special three-phase motor implies the presence of a 380 Volt network. If one is not available, you will have to use a starting and running capacitor, which leads to additional costs.
How to install the saw correctly
The next step is to properly position the saw on the top surface of the saw table. To do this, the contractor must perform the following actions:
- Install the tool so that its working part fits into the pre-prepared groove.
- Mark the locations for the M8 plowshare bolts with countersunk heads (they will be used to secure the saw blade).
- Drill the plywood from the top to make equal holes with a diameter of about 8 mm.
- Make a countersink to countersink the bolt heads.
- Carefully install the metal saw blade and carefully tighten the bolts from the bottom using nuts and lock washers.
The work of making a machine requires great concentration and concentration. The slightest mistake can lead to having to start all over again.
After securing the structure to the table, you need to install a block to turn the circular saw motor on and off. A hole is cut in the housing, the switch is secured with bolts and universal glue. There should be two separate cables coming from the unit. One to the instrument, the other to the nearest electrical outlet.
When assembling such a unit yourself, it is worth taking into account the performance of the motor, as well as the maximum power of the electric motor. In this case, experts advise choosing a motor whose power does not exceed 1000–1200 W, otherwise operation may be unsafe. And a more powerful saw means a heavier and more stable table.
Install the tool so that its working part fits into the pre-prepared groove
Mark the locations for the M8 countersunk plowshare bolts
Install the metal saw blade and carefully tighten the bolts from below
Install a block to turn the circular saw motor on and off
Which circular saw to choose for installation
Long cuts, for example when cutting boards into timber or cutting wane, require prolonged work under significant load. In this mode, only high-quality circular saws can serve for a long time.
The same is true when working in stationary mode. When the circular saw is turned upside down by the saw blade and secured in the table, it turns on and works for a long time. At the same time, the graphite brushes actively wear out, the contacts of the rotor and the gears of the transmission mechanism are erased.
Attention! To work in a stationary mode, you should choose a tool from trusted brands, semi- or professional class.
Optimal power is from 1.2 kW to 2.2 kW. There are large models with a power of up to 5.5 kW. But they are expensive and consume a lot of energy, and their power can be excessive.
Making stops
The last stage of making a sawing table with your own hands is installing stops. A standard part of most circular saws is a rip guide. Traditionally, the stop is made from an aluminum cornice or a wooden block. Its size is chosen so that the part runs across the entire table - parallel to the saw and from edge to edge.
Cross stops are also often used on sawing tables. They are used to cut parts at an angle of 90 degrees and trim boards. To make a stop, follow these steps:
- Prepare an ordinary plywood sheet 1 cm thick.
- Secure a block at least 2 cm high to it.
- Attach a second rail perpendicular to the first on the bottom side of the base.
- Cut off excess base.
The transverse stops are attached to the workpieces using clamps or fastening devices made from wooden washers. Such homemade clamps provide fastening of guides to parts of almost any width. If you fix the block on the underside of the base at an angle of 45 degrees, you get a corner stop. After all work is completed, the surface of the circular table can be treated with a grinding machine and coated with a layer of protective varnish. This will protect it from various mechanical damage, and in general will extend its service life.
Perhaps such a table does not look as attractive in appearance as a factory one. However, from a technical point of view, it is in no way inferior to it, so even a novice carpenter can safely take on its manufacture.
Prepare parts for the longitudinal stop
Assemble mounting brackets
Place the bar on the table
Clamp the crosscut pieces together
Attach the cross supports using clamps
Cross stop is ready
Ready-made solutions from the store
In addition to the simplest small beds for stationary work in the kits of some models, there are many other ready-made solutions on sale. Among them are folding workbenches priced from 1.5 to 10 thousand rubles, which can be adapted (modified) for working with a manual circular saw in a stationary mode.
Disadvantages of such solutions: folding workbenches are not designed specifically for circular saws and require modification. These are often flimsy structures, especially cheap ones, and may not be suitable in principle. Because they won't withstand the load.
There are also special tables that allow you to mount both a circular saw and other power tools: jigsaws, milling cutters. But the price for such products is high, sometimes more than 40 thousand rubles.
As an example, in the photo there is a WOLFCRAFT Master cut 1500 workbench:
Special tables are a serious decision, but at a serious price.
In addition, the special table has a small area. And when making a homemade version, it is possible to make a desktop of exactly the dimensions that a particular master requires for his tasks.
The important thing is that you can assemble both the simplest version of the machine and a more complex one - with a carriage (sled) that moves along guides, with a marking ruler along the edge of the table, etc.
Types of workbenches for trimming
It all depends on the tasks. Meanwhile, tables are divided into types according to external characteristics:
- Small, half a meter in size. Blanks for crafts are cut onto them. The side stop, which is often combined with a miter box for hand sawing, is suitable for small circular saws.
- The average table size starts from half a meter in length and one and a half meters in width. It is equipped with a wooden fence for a medium-sized hand-held circular saw.
- Large workbenches are designed for trimming furniture panels. Length and width start from two meters. Such tables are equipped with metal stops on bearings.
And then the flight of fantasy begins. After all, if everything is clear with the dimensions of the tabletop, then the stop devices can be different:
- Simple wooden ones of four elements: two legs, a platform, a side ledge.
- Metal from welded corners.
- On bearings, the number of which is four or more.
- On rod guides.
- Return springs and saw clamps complicate the design, but simplify operation.
DIY circular saw table. Drawings, photos, tips.
A circular saw is used to cut wood.
Using a hand saw is not always comfortable; using a table allows you to make the sawing process smoother and more accurate.
The cutting base has a disc-like plane equipped with an outer edge with teeth. There are models not only of the manual type, but also with the ability to be fixed on the table.
It is difficult to work with large volumes of wood with a regular circular saw, so it is better to place it on a table
There are several ways to acquire the latter for ease of manipulation. You can build a table for a circular saw yourself, strictly following a certain pattern.
Table arrangement for a circular saw