Preparing walls for painting is a long and labor-intensive process. It requires great skill and deep knowledge. Paint is not able to hide visible flaws and is only a finishing decorative coating. Therefore, it is important that the base is level and smooth. True, recently designers have recommended not to attach much importance to the quality of surfaces. But this is a matter of taste and it is quite possible that in a couple of years the mood will change. If you want smooth and neat walls that will serve faithfully for decades, pay special attention to their preparation.
Advantages and disadvantages of painting
Painted walls avoid many problems. They are easy to care for - wash, repair, decorate. Defects that appear can be easily eliminated with your own hands, unlike wallpaper, which cannot be made whole again.
What is the superiority of painting over other technologies?
- During the preparation process, the walls will change qualitatively, they will become solid, smooth, and there will be no cracks on them.
- If necessary, you can repaint the room in any color, and it will cost much less than putting on new wallpaper.
- Restoring chips or scratches requires minimal investment.
- Stained areas are easy to wash, and even easier - wipe with a melamine sponge, which removes traces of ink, coffee, and tea.
- Painted walls are the best choice for cat lovers. Clawed pets are not interested in such a surface.
The disadvantages of this technology include:
- the need for preliminary preparation of walls - and this is expensive, difficult and time-consuming;
- Producing a high-quality initial painting is also not easy. To do this, you need to own special equipment;
- the paint is a real “dust collector”. Its pores become clogged with tiny particles over time, so the walls must be washed regularly;
- monochromatic colors may seem boring, and the room may resemble an office. But this effect is successfully neutralized by decorative and textile interior items.
How to properly prepare walls for painting
Preliminary preparation of walls involves an impressive range of work. The result of their consistent and careful implementation will be perfectly smooth surfaces. The list includes cleaning the wall from the old coating, removing crumbled plaster and applying new one, leveling the base, filling potholes, cracks, priming, and treating with an antiseptic solution. Owners of new buildings with so-called “gray” renovations are luckier - at least they won’t have to remove the old finishing and organize garbage removal.
A new house may settle in the first few years and eventually cracks will appear in the paint. The situation will be saved by fiberglass or facade mesh for exterior use, glued to the wall at the plastering stage.
The first step is to clear the room of furniture, curtains, and hanging structures. After this, you need to carefully examine the surfaces and choose the right algorithm of action.
Preparatory work
Preparing the base for puttying and subsequent painting is no less important than the procedure for leveling the walls itself. Careful pre-treatment of the surface will increase the adhesion of the base and leveling layer, resulting in a smooth and durable surface after painting.
The technology for this type of work involves the following preparatory actions:
- the base is cleaned of old coating, nails and screws;
- It is recommended to plaster large chips and holes found with cement-sand or gypsum mortar;
- The cleaned and repaired base is coated with a primer. For concrete walls, choose a deep penetration primer. The primer must dry completely and saturate the base, and therefore the next steps begin no earlier than after 5-6 hours.
Removing old coating
Before you start preparing the wall for painting, you need to get rid of the old finish, and this is not easy. Our tips will help you do this quickly and without unnecessary labor.
Wallpaper
At first glance, removing wallpaper is not difficult, but sometimes you have to work hard to get rid of all the remnants of the coating. The base must be cleaned completely, and only then can you proceed to the next stage.
Paper sheets are quite easy to remove. Pry them from below with a spatula and they will easily come away from the surface. If the material has firmly grown into the base, arm yourself with a spray bottle. Fill it with warm water and treat the old finish. Do not skimp on water - the more the wallpaper is soaked, the better. When the paper gets wet, it can be easily removed with a trowel.
Modern options are non-woven, vinyl ones cannot be removed so easily. Such wallpaper, especially the latter, is almost impossible to get wet through. Therefore, all that remains is to literally “punch” the way for the water using a toothed roller or knife. Moisture will penetrate through the damaged surface and soak the dried glue. If the toothed roller fails, a steamer will come to the rescue, of course, if you have one at hand.
Try replacing the steamer with a powerful hairdryer. Warm the moistened problem areas with it and remove the sheets with a knife.
If your household does not have such units, you will have to prepare yourself for the long and painstaking process of scraping off wallpaper and glue. If you need to clean the wall down to the concrete or brick base, you have every right to skip this unpleasant process and remove the wallpaper along with the old plaster.
Whitewash
Cleaning walls from whitewash is an incredibly difficult and tedious task. It is necessary to get rid of even the reminder that this material was present on the walls. Remains of lime or chalk will not allow the new finishing layer to be applied evenly and efficiently. A lot of pellets will form on the walls that will need to be cleaned off.
The following will help completely remove whitewash residues:
- warm water - spray the wall with a spray bottle and remove the composition with a spatula. Water is quickly absorbed, so you need to repeat wetting from time to time. Compositions that do not contain special hardeners and other additives can simply be washed off with plenty of water;
- tools that can be used to scrape off whitewash - a grinder, sandpaper, an iron brush and a spatula. During grinding, a large amount of construction dust is generated in the room. From time to time you should take breaks and leave the room until the suspension settles;
- a folk remedy consisting of soda, crushed laundry soap and water. A thoroughly mixed solution is applied to the surface, after which the finishing layer is removed using a spatula or sponge.
The main requirement is thorough cleaning of the base. If you do not pay due attention to this stage, you will have to say goodbye to the dream of beautiful walls.
Plasters and ceramic tiles
Old plaster can sometimes be left behind. If there are small defects, it is more profitable to simply repair them and thereby save a lot of money. Sometimes the putty comes off and voids form between it and the plaster. Then you can remove only this thin layer, after moistening it with water. If, after a thorough study of the formation, you find places of shedding, this is a sure sign of the presence of voids. It is better to get rid of a weak foundation. Often the problem is removing stubborn areas, but don't let that fool you. It is impossible to guarantee their reliability subsequently.
The tiles must be removed along with the tile adhesive. Cleaning the walls from ceramic cladding is done using a hammer drill equipped with a chisel-shaped attachment. First, the tile is knocked down, then the fixing material is removed. If there are defects in the exposed layer of plaster, you need to clean it down to the concrete base. There is no need to give up durable coating.
Old paint
The paint is removed using special solvents. The composition must be applied to the wall, then scraped off with a spatula. It is not recommended to cover old paint with new one, since it is impossible to guarantee a perfect result.
A hair dryer will be an excellent helper. When the painted area is heated with hot air, the paint swells with bubbles and is easily removed.
Surface Preparation Tools
For each specific stage, depending on the characteristics of the surface, a certain set of tools is required. It may vary in different cases, but there is a standard list that can be useful at all stages of preparation.
Among the main tools:
- Drill. Must be supplemented with a special nozzle for getting rid of a layer of plaster;
- Grinding machine. Can be replaced with sandpaper. Allows you to remove minor defects;
- Vacuum cleaner for quickly cleaning up dust;
- Rollers and brushes for applying primers and putty compounds.
The rest of the list depends on the nature of the old cladding. When removing paint, you will need a spatula, special solvents or a hair dryer.
There is a standard list that can be useful at all stages of preparation.
Elimination of serious defects
The solid base does not need to be removed. Sometimes, to save the situation, it is enough to carry out a series of simple manipulations, after which you can be confident in the reliability of the intermediate layer. Most often, the integrity of the coating is compromised by cracks. How to get rid of them?
- We “expand” the crack – we increase its dimensions – width and depth. You will need a chisel, hammer and spatula.
- We clean the resulting depression from dust and pieces of plaster using a brush.
- We prime the improvised “gorge” using compounds with maximum penetration ability.
- Fill the hole with putty using a spatula.
- We glue the reinforcing material - press it into the putty layer, coat it and leave it until completely dry.
- We sand the restored area.
It makes sense to carry out spot restorations only if the amount of damage does not exceed 25% of the wall area.
Ways to level walls
Under the old finishing layer, a surprise may await you in the form of uneven walls. For high-quality painting of walls, a flat base is necessary. It is not advisable to proceed to the next steps if this condition is not met. There are various ways to level walls, each of which will be optimal in each specific case. Surfaces can be adjusted using plaster, putty or drywall.
Drywall
A great way to quickly level up. Smooth material does not require plastering. The paint can be applied directly to gypsum boards, or to a thin layer of putty. For large rooms this method is ideal. But it is worth mentioning that to cover walls with plasterboard, you need to build a frame of metal profiles. The structure will serve as a basis for sheets of material, but at the same time it will “eat up” a lot of space. It is better not to resort to this technology if every cm is important to you. The material is not strong enough, it is impossible to place heavy suspended structures on it.
Plaster
Plaster is the most successful intermediate finishing option if the walls are to be painted. It is applied directly to the wall and allows you to create a perfectly flat surface. To form a thick leveling layer, work is carried out in several stages using beacons.
Step-by-step instruction:
- Mark the wall by setting and fixing landmarks at 60 cm intervals using a plaster mixture.
- Apply a primer to improve the adhesive properties of the surface.
- Prepare the solution by combining the contents of the bag with water according to the instructions.
- Apply the mixture to the surface using sharp strokes using a trowel.
- Spread the plaster using the rule. Your movements should be short and zigzag.
- We glue strips of façade mesh or fiberglass and leave the wall until completely dry. This must be done to prevent cracks in the finish coat.
Do not try to achieve a perfect surface with plaster. This is the function of the next layer - putty.
Putty
Sometimes you can do without plaster altogether. Replace it with putty, which comes in the form of a dry mixture. On relatively flat walls it is enough to apply two layers of this material.
Before you start puttingty, you need to prime the wall. This can be done with a roller, but a spray gun can handle this task faster and better. Next, apply the putty using top-to-bottom movements. After drying, sand each layer with a spatula. It is necessary to eliminate transitions and tubercles formed during the distribution of the composition. The second layer is sanded using 150-grit sandpaper attached to a special platform. The next step is re-priming the wall and gluing the fiberglass.
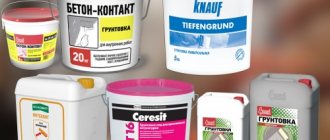
Primer
Preparing walls for painting requires their mandatory treatment with primers. The primer allows you to achieve several results:
Adhesive primer compositions are used to treat smooth surfaces and increase the adhesion of the wall to the paint. This is achieved by introducing quartz into the primer composition, which makes it possible to make any perfectly smooth surface slightly rough to the touch.
Antiseptic compounds should be used in rooms with high dampness - they prevent mold and mildew from developing on the treated wall. The adhesive included in the primers strengthens the surface and prevents it from cracking and peeling.
Thanks to its increased fluidity, the primer penetrates into the smallest cracks and pores, filling them. Thus, the access paths for water into the thickness of the wall are blocked, and its premature destruction is prevented. Together, all this significantly increases the service life of the painted surface. The technology for preparing walls for painting involves applying a primer before applying each subsequent layer of finishing.
To increase efficiency, the primer should be applied in several layers. Each subsequent layer is applied only after the previous one has completely dried. This usually takes from 3 to 10 hours and depends on the type of soil composition, air humidity and room temperature.
Experienced finishers recommend applying layers crosswise: if the first layer was applied with vertical strokes, then the second should be applied in a horizontal direction. Thus, the entire surface of the wall is better primed.
When choosing primers and putties, one more point needs to be taken into account: their compositions must be compatible with each other. It is better if they are created on the basis of the same material as the paint that you plan to use.
Puttying with finishing putty
The finishing putty has a finely dispersed structure and forms a perfectly smooth base. It will not help to hide serious defects. Therefore, it is only good in combination with a starting mixture, provided that the base is properly prepared. If the finished material is too thick, dilute it with water. It is very convenient to work with white putty on a gray base, since areas where there is not enough material immediately become visible. It is necessary to form an opaque and dense coating. Two layers will be enough.
Sanding and priming
The final stage of work is sanding the last layer with 240-grit sandpaper. A portable light source will help you control the quality of sanding. During work, a lot of dust is generated, so you should wear a respirator and special glasses. This will protect your lungs and eyes. After sanding, carefully inspect the wall and mark any defects found with pieces of masking tape. Do not use a pencil for this purpose, as it will be difficult to paint over.
Before applying paint, it is necessary to prime the surface again with a special compound. If this is not done, you may end up with poor adhesion of the paint to the wall.
How to treat walls when fungus appears
Black spots on or under the wallpaper indicate the presence of a problem such as fungus. It cannot be removed using detergents. Even if you wash the stains, the fungus will appear again. If the walls are infected, it is necessary to get rid of the finishing and treat the entire surface with a special antibacterial composition. To do this, you can use a regular brush or roller. There are products on sale that come with a spray bottle for ease of application. During processing, protect your respiratory tract with a respirator. After cleaning, the walls need to be thoroughly dried, and only then can the repairs begin.
To prevent the fungus from returning, take care of high-quality ventilation of the room and refuse to install furniture close to freezing walls.
Advice from professionals
To obtain high-quality preparation of walls for wallpapering or painting, professionals recommend adhering to good construction practices, which involve the use of plasters, primers and putties for the work that are appropriate for the wall materials and operating conditions. It is also necessary to maintain the time intervals necessary for complete drying of the layers of applied compositions. For a customer who does not have the professional knowledge of a finisher, the following rule will help to evaluate the quality of the wall preparation: “The prepared wall surface should be similar in evenness and smoothness to the surface of the refrigerator.”
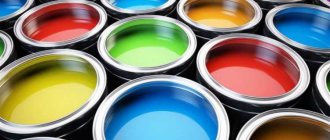
Types of wall paints
The arsenal of paints that the modern construction market offers will make any non-professional at a loss. Let's consider the proposed options and find out which of them will be optimal for use in a residential area.
Types of paints:
- Oil based – made from mineral and vegetable oils. They form an airtight film and quickly crack.
- Alkyd - the base is similar to the previous version, but here acidic and organic components are added to the composition, due to which the enamels become elastic, resistant to wear, exposure to ultraviolet radiation, moisture and temperature changes. Disadvantages - they are fire hazardous, have a strong odor and low vapor permeability. Alkyd varnishes are used when painting wood.
- Silicate – the base contains liquid glass, which ensures strength and resistance to moisture and fungus. The main disadvantage is the aggressive impact on human health during application. When staining, it is necessary to protect the mucous membranes and skin. The coating cannot be repainted; it must be completely removed.
- Water-soluble is the most suitable material for painting walls. The mixtures are diluted with water and contain components that form a dense layer. The desired color is obtained by adding pigments.
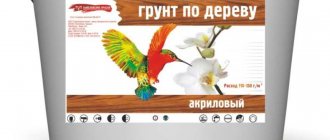
- Acrylic – the composition contains acrylic resins. The material has high elasticity, strength, resistance to moisture and sunlight, and anti-corrosion. Easily washable acrylic paints are relatively expensive, but are ideal for decorating the interiors of children's rooms. Such materials must have zero emissions.
- Latex is a washable, quick-drying material. An excellent choice for the kitchen, hallway and bathroom. Latex gives the paint a water-repellent effect. It is optimal for applying to wallpaper before painting. Easily masks small surface imperfections.
- Water-based paints are quick-drying, easy to apply, but not durable enough. Available in a wide range of colors, they can hide minor defects. Suitable for painting the ceiling in the living room or bedroom.
- Water-dispersed - form a matte surface that can be washed. The proposed base is white or black. With the help of color you can get any shades. It has excellent vapor permeability and resistance to damage. Safe for humans and the environment. Weak point is instability to frost.
- Silicone – combines the advantages of all available types of water-dispersed paints. They have high hiding power and hide defects well. When dry, a film is formed, which makes it possible to carry out wet processing. Perfect for decorating a balcony.
- Polyurethane – the composition contains polyurethane resins and hardening components. The composition is prepared immediately before painting the wall. The material is far from budget, but it can eliminate the cost of paint in the next 20 years. Resistant to any vibrations, mechanical stress, directed rays and temperature changes.
Methods of painting walls
In addition to the usual method of painting, which is understandable to everyone, there are non-standard techniques that allow you to turn a room into a work of art. Interesting textures and patterns can be created using budget materials available to everyone.
Color options:
- stippling - the effect of shabbyness. First of all, you need to paint the base. Then we apply contrasting acrylic paint. Next comes the turn of colored glaze to shade the wall. It needs to be smoothed with a brush over the entire surface. Then we give it an aged effect by touching the wall with a brush and a small round brush;
- leather - paint the wall with latex paint. After this, we prepare a mixture of the same paint of a darker shade and glaze. We apply the composition to a small area of the surface and make stains with a suede brush, partially removing the top layer;
- Venetian plaster – add dark and light pigment on both sides to a container with latex paint. Apply the light-colored mixture to the wall using a plastic spatula, similar to plaster. We select a dark shade and cover part of the wall. Spread the colors evenly to achieve a harmonious finish. After drying, sand with fine sandpaper and rub with wax;
- wrinkled skin - you need to prepare a piece of paper. We paint a section of the wall no larger in size than a leaf. We crumple the piece and apply it to the wall. Smooth out the paper, imprinting the folds on the paint;
- painting with a fabric roller - paint the wall and leave until completely dry. We make a rope of fabric and wrap it around the roller. We wet the homemade “tool” in paint of a darker shade and use it to apply a texture pattern to the first layer.
Step by step guide
After the surfaces and all the necessary tools are prepared, it is necessary to carry out the actual painting. To do this you need:
provide an appropriate atmosphere in the room
The room should be warm and dry (humidity no more than 40...50%), it is also important to exclude drafts, especially when painting wallpaper; dilute and stir the paint, adding (if necessary) the desired pigment to obtain the desired shade. It is best to do this using a construction mixer or a special attachment for a drill/screwdriver.
The paint should be diluted in accordance with the manufacturer's recommendations, taking into account the tool used;
prepare protective clothing and headgear, a respirator and goggles (if necessary, especially when painting the ceiling), ensure protection of all non-painted surfaces; Apply the first coat of paint using even movements, without trying to make the layer too thick. Small color unevenness is possible - they are compensated by applying a second or third layer. First, “go through” the corners and perimeter of the surface to be painted, difficult areas with a brush, then paint over the main planes with a roller; After the first layer has completely dried, apply the second. The technology is the same - the perimeter and difficult places, painting the main surface.
Important: the direction of movement of the roller (brush) in the first and second layers is perpendicular!
When working with a roller, you should consider the following nuances:
- You can’t put on a lot of paint at once; the textured surface of the tray is designed to remove excess;
- movements should be smooth, in one direction, without strong overlaps and gaps between stripes;
- if you have doubts about the chosen color, you can make the tone lighter than intended in the first layer;
- Painting begins from the most illuminated area - the block with the window.