Good afternoon, dear readers, Andrey Noak is in touch! Welcome to the site dedicated to wood and its use in home comfort. There comes a time in everyone’s life when they really want to change something in the interior of their apartment or house. Re-glue the wallpaper, repaint the ceilings, or even change the furniture. However, it’s no secret that such transformations cost money, and sometimes quite a lot.
This is where I am ready to come to your aid. I am glad to inform you that even when buying furniture you can save your money and time. In addition, you will be able to take an active part in the creation of your future interior. To do this, you will have to get acquainted with edging technology or, in other words, how to glue an edge to a chipboard. I have every right to talk about this, because as a technologist I have produced more than one hundred thousand cubic meters of particle board!
When it comes to high-quality edging of chipboards, the question arises: how to glue the edge to the chipboard? In order to answer this, let’s look at the concept of edge tape.
In the factory production of furniture panels, as a rule, the following types of edge tapes are used: decorative paper tape impregnated with polyester resins, ABS tape, aluminum edges, as well as 3D tapes installed on expensive furniture supplied to order.
In the factory production of furniture panels, as a rule, the following types of edge tapes are used: decorative paper tape impregnated with polyester resins, ABS tape, aluminum edges, as well as 3D tapes installed on expensive furniture supplied to order.
The width of the edge tape is 38 mm. It is intended for processing the end parts of chipboard parts, and is necessary to maintain the aesthetics of the entire product. In addition, it serves to protect chipboard from moisture, from evaporation of furniture impregnation, as well as to increase the strength and durability of the product.
The edge on chipboard also has an aesthetic purpose. As mentioned earlier, it is made from different materials. In addition, it comes in different textures, qualities and has a variety of colors. There is a wide range of colors and reproducible textures. PVC tape adds an elegant look to the furniture. Also, it is important to note that edging chipboard furniture sections is the cheapest and most accessible way to give furniture elements a finished look.
Edge gluing
The work of gluing edges on chipboard can be done not only in industrial conditions, but also at home. To do this, we will need available materials: a hairdryer, an iron, wet wipes, scissors, a sharp knife, a 35-150mm wooden block with sandpaper glued over its entire surface. We take the most suitable edge with glue applied to it. Gluing is carried out to a previously cleaned, burr-free surface. After that, straighten the edge and press it with a heated iron. Gradually smoothing the surface, press the edge tightly against the ends of the part. Under the influence of temperature, the glue heats up and polymerizes, gluing the parts together.
The work of gluing edges on chipboard can be done not only in industrial conditions, but also at home. To do this, we will need available materials: a hairdryer, an iron, wet wipes, scissors, a sharp knife, a 35-150mm wooden block with sandpaper glued over its entire surface.
We make sure that the tape is glued to the tabletop evenly, so that its edges do not extend beyond the boundaries of the product. Afterwards, cool the surface, trying to avoid swelling or shifting. After finishing the edging, its edges should be smooth and free of glue residues.
Preparation
In order for the melamine end edge to stick efficiently and evenly, you need an iron with a flat and thick sole. The best option would be a Teflon coated iron. Also, its surface must be clean and smooth.
For convenient work, it is better to take a sharp knife with a thin handle or find an old knife blade and make a cutter out of it. You can use a spatula.
An ordinary chipboard piece with sandpaper glued to one side (grit size P120) is suitable as a block.
The melamine end edge comes with a pre-applied layer of adhesive. If it suddenly turns out that it does not have an adhesive layer, then it must be applied to the part.
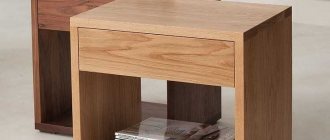
For this operation, we will also need a part holder, which can be made from the remains of chipboard. It looks like this:
Checking work
Often, facing flaws are revealed after gluing. They look like bubbles, displacement of the edge relative to the part, and glue coming out. In this case, they must be eliminated, applying a different approach to each flaw. For example, bubbles can be eliminated by heating with a hairdryer, followed by ironing. In the same way, edge displacement is eliminated. Only instead of perpendicular pressure, longitudinal pressure is applied. As for the glue residues, everything is generally simple. When heated, it is easily removed from the surface of the facing edge.
Removing excess edge material with a sharp object
Often, facing flaws are revealed after gluing. They look like bubbles, displacement of the edge relative to the part, and glue coming out.
What tools are needed for the job?
Before gluing the melamine edging tape, you need to prepare the necessary tools. To work you will need:
- Special construction hairdryer. It is distinguished by its heating temperature, which reaches 250 degrees. The glue begins to melt. When it cools, the edge is securely mounted on the surface of the part.
- A construction knife is required to remove excess part of the edge.
- Thick gloves.
Video of gluing edges to chipboard
Finally, the ends of the edges should be trimmed with a sharp object and then with an emery block in order to give the product completeness and aesthetic beauty. And let the beauty and comfort in the house depend on you. Surround yourself with exclusive, high-quality, and most importantly – useful things. Well, I, in turn, am always happy to help you create beauty and harmony in your home.
In many ways, the quality of edge gluing depends on the quality of chipboard cutting. When cutting a slab, two saws are used: one main one that cuts and a small scoring saw that cuts the slab from the bottom side. The cut of the scoring saw is slightly wider than the main one, as a result of which the so-called “tooth” remains. The tooth should ideally be a cut on the part 1.5-2mm high and up to 0.5mm deep. Unfortunately, I was apparently unable to photograph it, but I will show you the shortcomings when edging, as some call it, or edging, if the tooth exceeds the parameters written above. You can fight the “tooth” with sandpaper. That is, grind the entire plane of the chipboard end to the required quality. 1.Quality tooth. 2. Poor quality. This option will lead to undermining and peeling of the edge.
What you need for edging: 1.Edge. 2.Iron. 3. A piece of felt or thick fabric. 4.Metal ruler. 5. Wallpaper knife or other. 6.Moisture-resistant sandpaper, grit 160-240.
What you need for edging: 1.Edge. 2.Iron. 3. A piece of felt or thick fabric. 4.Metal ruler. 5. Wallpaper knife or other. 6.Moisture-resistant sandpaper, grit 160-240.
1.The edge can be purchased at any store specializing in the sale of furniture fittings. Thermal glue has already been applied to the edge, in the form of a mesh on the reverse side. So you can put the PVA bottle aside.
2. It is advisable to glue with an old iron, as the sole of the iron can be damaged. Experimentally, we set the temperature at which the glue melts well and the edge does not burn (the appearance of white spots that cannot be cleaned off). The iron may oxidize and black dirt may appear on the edge. This is not scary; it can be easily removed with a cloth soaked in solvent.
3. Take the part, select the side with the smaller tooth (if you need one-sided gluing). It is advisable to firmly fix the part using a vice. Place cardboard or fiberboard between the jaws and the part.
4. Apply an edge with a small protrusion of 3-5 mm to the side. And warm it up a little with an iron. When laying the edge, it is desirable that the excess edge goes evenly to both sides of the part.
5. We move the iron backwards in a smooth zigzag motion, making sure that the sole of the iron rests completely on the part. At the same time, with the other hand, we press the edge through the felt.
6. Leave to cool for 15-20 minutes.
7.Using a knife, trim off the excess edge at the end of the part.
8.Using a ruler, carefully trim off the excess along the plane. The main thing here is to choose the right angle of the ruler to the part. The video also shows the second option, which is more professional, but it’s better not to even try this, you can seriously cut your fingers on the edge of the edge. I was just bragging a little. Sorry))…..
9. Using sandpaper packed onto a block at an angle of 45 degrees, we sand the edge. If there is a little edge or glue left, we clean it again.
Here is a video of this process. I saved on the director and cameraman, so forgive me if anything happens.)) If you have any questions, ask in the comments. I will definitely answer.
Furniture is an important element not only in the apartment, but also in other rooms. It is used in offices, educational and medical institutions, etc. Today the choice is quite large. Products differ in design, size, materials from which they are made, and more. Thus, choosing the option that you specifically need will not be difficult.
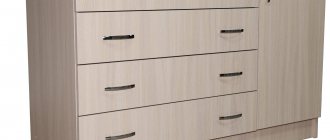
Based on what material is used in the manufacture of furniture, its cost is determined. If we talk about inexpensive products, they are mainly made from chipboard. This material is quite durable and wear-resistant. Excellent for furniture production.
But its interior does not look entirely aesthetically pleasing. To hide this, additional actions are carried out, which are called edging. They consist of installing special decorative panels on the end side. Various types of synthetic plastics cope well with these tasks. For example, melanin, PVC, etc.
Advice from professionals
If bubbles appear on the surface after finishing work, they must be eliminated in a timely manner. You can heat the area with a hairdryer while the glue is heating up and straighten the surface, thereby removing the bubble. If the edge has moved, it is also heated with a hairdryer. After this, you need to smooth the area with longitudinal movements of your hand.
Remaining glue must be removed while the surface is hot. Once it hardens, it will be more difficult to remove the excess. It is important to wear gloves.
Craftsmen advise to be sure to glue the edge tape onto the chipboard. It increases the strength of the material. Thanks to the tape, the protective impregnation does not evaporate. It is recommended to use edge tape for restoration work.
You can also sand the edge with improvised means, for example, sandpaper. Many people use sandpaper for sanding, which has a sticky base.
It is worth buying products only from trusted manufacturers. The tape “Tilit Super” and “Energoflo” have proven themselves well. The cost of edge tape of these brands will be from 600 to 700 rubles per meter. It is available to consumers with average income levels. Ribbons come in a wide range of colors and shades. It's easy to find the right color for your home.
Melamine edge with glue: advantages
The choice of edge materials that can be used in furniture production is large. If we talk about which one is the most popular, then this is melamine edge. Basically, this is what they prefer. No wonder. After all, it has a lot of advantages. The main one is the cost of the product. It is low enough that it is accessible to everyone. In addition, it is worth noting the simple technology of use. To carry it out, you need simple tools that are found in almost every home. At the same time, to perform edging with this material, no special skills or knowledge are required. Everyone can do it.
In addition, it is worth noting such advantages as reliability and practicality. It is resistant to moisture and other adverse conditions. Perfectly protects furniture from them. At the same time, its choice is huge. Different textures, colors, etc. will help you choose it for any type of chipboard.
Of course, like any other material, this one has its drawbacks. Firstly, it is very thin. Secondly, the drawing does not hold up well. Thus, you should not count on its long service life.
Algorithm for gluing tape
To understand how to glue edge tape for furniture, you need to strictly follow a certain algorithm. From the roll you need to cut a part longer than necessary, a few centimeters. The beginning of the segment that was glued must be trimmed. Any scissors you have at home will do for this.
The edge must be attached to the end of the slab. When people ask how to glue edge tape to chipboard, the thing to remember is that the edge is wider than the board. It is available in a standard width of 20 millimeters. It will be slightly wider than a sheet of chipboard. It needs to be leveled. It is best to cut along one edge. The next step is to use glue and install the tape in the right place.
Melamine tape with glue: features of edging
Before you get started, you need to decide which tools will help you get the job done. If melamine tape is chosen for edging, an iron is required. It is better to give preference to a small device. It is important that the sole is thick and free of damage and stains. An iron that was produced 30-40 years ago is perfect for such purposes. These products meet these requirements.
Another tool you will need for this job is a knife. But an ordinary kitchen one will not work here. It must be shoemaker's or stationery. You can also use a planer knife. There are also special tools that are designed for these purposes. Such knives are produced by Virutex.
And, of course, a block of sandpaper. You can purchase it or make it yourself. If the second option is chosen, then you need to glue sandpaper to a block of a certain size. In this case, you can use different grain sizes. Glue paper on all sides of the block. The most suitable grit size is 150 units for these purposes.
Installation technology
Before starting work, you will need to prepare the surface and collect the necessary accessories.
Glue Moment, Liquid Nails or construction PVA (if not a self-adhesive type of edge).
The edge itself (calculate the quantity in advance around the perimeter with a margin of at least 20 cm).
Sanding block or fine sandpaper.
A file and wood putty may be needed if the end has large defects.
The main task of preparing an object is to remove all burrs, seal large holes, and level the surface as much as possible. When using sandpaper, the surface must be completely dry. If putty is used, it must be given time to completely cure. Then start gluing the tape.
How to glue melamine edge?
The process of gluing the melamine edge is simple. Therefore, there is no need to turn to the experts for help. You can do it yourself. You can see how to do this in the video below.
The quality of edging is influenced by various factors. The first and, perhaps, main thing is how the chipboard slab is cut. There are a number of requirements for the end that it must meet. So, it should be smooth, without steps or other defects formed after processing the sheet under the saw blade. Only in this case will the adhesion of the tape be strong and reliable.
When choosing an edge, you should give preference to the one on which glue has already been applied. You can find it in many construction stores. It is presented in the form of a bay of 200 pm. But this does not mean that you need to buy everything. You can take the size that you need.
How to remove a seam when cutting an edge?
When people learn how to apply edge tape, they wonder how to remove the seam when cutting. Since the edge is made of paper, a white seam is inevitable if part of the tape is cut off. To remove it, use a special stain designed for wood. The product is absorbed into the edge and becomes a certain color. For each chipboard, you need to select the color individually. For example, if the sheet is presented in the color “cherry”, then the stain should be bought in the color “mahogany”.
There is a water-based stain. If you rub it on a fresh cut, the color of the seam will change. To ensure that the seam is not very noticeable, before gluing the edge tape, you need to find a knife with a thick blade. Even a shoemaker will do. It must be held at a certain angle to the edge. The angle is usually 40 degrees. In hardware stores you can find a special device for cutting edges.
Process steps
To glue the tape, you need to place the part correctly. That is, vertically. In this case, the end that is being processed should be at the top. Provide a stable position for the sheet so that it does not move. In this case, you can use a special device.
Then prepare the required piece of edge. To do this, it is carefully measured and cut from the general tape. Moreover, its length should be 3-5 cm longer than the side that is being processed.
You need to start gluing from the middle. The tape is laid on it, and the edges should be as smooth as possible. Then, holding it with one hand, iron it with the other with an iron that is preheated. You choose its temperature experimentally. As practice shows, a high one can lead to the appearance of bubbles on the edge, and a low one does not ensure adhesion.
Do not put too much pressure on the iron, as this may cause the edge to move out of place. As a result, the gluing will be crooked. But if you press weakly, it will not stick. Moderate force must be applied.
The quality of gluing can be determined during the process. When ironing the surface, the glue should be squeezed out from under the tape. Particular care must be taken at the ends of the product and the place where it comes into contact with the surface that is pre-laminated, since these areas adhere less well than others.
Now you need to leave the edge to cool. At this time, you need to smooth the surface with a rag. This way, the tape will not peel off when it cools. The duration of this procedure is short. As soon as the base reaches a temperature of 50 degrees, you can remove the excess that has formed around the edges.
Start from the edges. The ends that end up remaining must also be removed. Since the material has become hard, they break off easily. Then take a block of sandpaper and sand them down. This will give the timber an attractive appearance.
If you approach this work responsibly and carefully, the quality of its implementation will be at a high level. Moreover, it will be impossible to distinguish the result from the one obtained when using special edging equipment.
In furniture production, edging is necessary to protect the end edges of the product from chips, cracks and other damage, and it also protects against moisture and formaldehyde vapors.
You will learn about what types of edges there are, as well as methods for gluing them and how to glue the edges with an iron and hairdryer from this article.
Types of profiles
The edges of furniture are not only processed with edgebanding. One of the decorative and protective methods of finishing cuts is profiles - special linings that are put on the cut or inserted into pre-cut grooves in the chipboard. Profiles change the look of the furniture, serve as an additional decorative element, and effectively protect the inside of the chipboard from the effects of the external environment.
T-shaped
To process the edges with a T-shaped profile, a groove is pre-cut in the slab using a milling cutter. At the final stage of furniture assembly, the profile is inserted into the prepared hole (hammered with a soft hammer). T-shaped profiles are made with a girth or with simple overlays on the edge. Typically aluminum or PVC is used.
U-shaped
C- or U-shaped profiles do not require cutting a groove in the slab; they are simply put on the edge and secured with glue. It is important to choose a good adhesive and attach the trim tightly to avoid voids. U-shaped pads are produced from soft and hard materials. Rigid parts are stronger, but installation on rounded edges is more difficult. The profile will have to be heated to give it flexibility and secured with tape until the glue dries.
Important: the edges on the profile hide poor-quality edge cuts and small chips on the surface of the facades. The profile not only protects the chipboard, but also decorates the furniture.
Types of edges - why are they needed?
- The most common type is melamine edge with paper-based glue
. Used for finishing interior areas of furniture. Available, inexpensive, but not the highest quality option. Does not tolerate moisture and wears out quickly. Easily glued at home with a simple iron. - T-shaped flexible profile - is a T-shaped strip, it is inserted into a slot in the side of chipboard or MDF. It is convenient to replace the damaged element in the future without disassembling the furniture. Installation requires a milling machine.
- PVC edging - reliably protects the ends of furniture from damage, is wear-resistant and resistant to moisture. To glue PVC edging, you will need an edge processing machine, so using this type of edges at home is difficult.
- ABS plastic is an eco-friendly option without chlorine. Valued for its resistance to high temperatures and physical damage.
All options can be divided into two subtypes - edges without glue
and with glue.
The most common type is melamine edge with paper-based glue. Used for finishing interior areas of furniture. Available, inexpensive, but not the highest quality option.
Average cost of a profile per linear meter:
- PVC 0.4 mm thick - about 25 rubles,
- PVC 2 mm thick - about 40 rubles,
- Melamine material for chipboard – about 25 rubles.
In our country, products from the Rehau company are actively used, which offers a large selection of colors, as well as different tape widths from 15 to 45 mm.
To simplify the work, you can use various specialized furniture programs that will calculate how much material is required for gluing the edges.
To simplify the work, you can use various specialized furniture programs that will calculate how much material is required for gluing the edges.
What types of edges are there for furniture?
Edge materials hide the inside of the chipboard and extend the life of the furniture. Another task of the edges is to reduce the evaporation of the resins with which the slab material is impregnated. There are several requirements for edge materials:
- decent appearance - aesthetics;
- strength and durability;
- reliable fixation on the edge of furniture;
- ease of installation.
The materials offered by the industry fully comply with these requirements. All that remains is to choose.
Paper and melamine
A border made of paper impregnated with a special resin (melamine) is the most economical option for edge processing. Thick grades of paper are given additional strength and resistance to external influences using melamine. It is easy to work with such material - it does not break and bends at any angle.
The most common material thickness is 0.2 and 0.4 millimeters. For ease of use, the melamine edge is coated with adhesive that is activated when heated.
Melamine paper is not afraid of water and does not fade under the influence of the sun, and is resistant to scratches and household chemicals. The main disadvantage is that it wears out due to friction and is not durable. It is advisable to install such edges on areas of furniture that are not constantly exposed - on the back of shelves, tabletops.
PVC
Polyvinyl chloride is a durable material that has found application in various fields of activity, including medicine. PVC edges are suitable for finishing façade areas of furniture. The manufacturer produces the material in different colors, it is easy to choose an edge that matches the color of the product or a contrasting one.
Advantages:
- strength, long service life with high-quality stickers;
- flexibility - the ability to attach to furniture with any edge curvature;
- resistance to any type of influence - chemicals, sun, friction.
See also
Description and technical characteristics of Uranium glue, rules of use
A large selection of materials in thickness (from 0.4 to 4 millimeters) and width allows you to create different types of furniture design. Polyvinyl chloride edging materials are available with an adhesive component or simple. The disadvantage of PVC edges is their sensitivity to temperatures - furniture should not be left in the cold, and when gluing it should not be heated too much.
Made from ABS plastic
Expensive types of edge material include ABS plastic. It is usually used on more expensive furniture models. The advantages of thermoplastic edges include:
- high quality material, absence of harmful components in the composition;
- impact and wear resistance;
- does not lose color or appearance during long-term use.
The edge is available in matte and glossy versions. The disadvantage of the material is the high price. ABS plastic is used when high durability is required, operation in aggressive environments - temperature, chemical exposure.
Veneer
Veneered edges are made from a thin layer of wood, in most cases, in the production of furniture. Working with the material at home is difficult - it requires experience and knowledge. The material is expensive; it is used to decorate veneer furniture.
Acrylic or 3D
A two-layer edge is made from acrylic - the lower part has a three-dimensional pattern that performs a decorative function, the upper part is removed after gluing and serves for protection.
The 3D effect around the edge adds beauty and continues the pattern of the main part of the furniture. Things look more cohesive, the edge works to create the overall look and doesn't look like a simple edge treatment. The downside is the high price, but there are many advantages - from aesthetics to high strength.
PVC edge - how to glue it step by step at home
To work you will need:
- iron or hair dryer,
- and of course buy PVC edges with glue
- hard roller,
- newspaper or paper sheet
The material is heated to make the glue sticky. Heating is performed with an iron in the “Synthetic” mode.
- The profile is applied to the end so that it overlaps the end of the section.
- Next, the iron is used to heat again through the newspaper. Since the glue dissolves quickly, the process is quite active, and it is convenient to move the iron along the PVC edge.
- The edge itself must be carefully pressed and ironed until it sticks along its entire length.
- Gluing using a hair dryer. Instead of an iron, you can use a hair dryer. The PVC edge is heated from the adhesive side and when the composition becomes sticky, the material is applied to the end of the desired area, clamped and gently smoothed.
- Gluing with Moment glue. This method is suitable if there is no adhesive layer on the edge. The quality of the end is checked manually, sawdust, debris, and dust are removed until the surface is clean. Then glue is applied to both the material and the end and wait until it sets. After this, apply and press. Using a roller, roll the area so that the glue sets faster.
VIDEO
How to remove excess material
If it was not possible to carefully glue the edge the first time, the procedure will have to be repeated. To do this, apply glue to the area again and clamp the profile using a roller or manually.
Since the width of PVC edges is usually taken with a margin, you need to carefully remove the excess along the edges. To do this, use a regular stationery knife or file. Take it with both hands and press on the protruding fragment. As a result, the excess parts break off and an edge remains that matches the width of the area.
Shutdown
After everything is glued, all that remains is to sand the uneven surfaces with sandpaper.
Since the width of PVC edges is usually taken with a margin, you need to carefully remove the excess along the edges. To do this, use a regular stationery knife or file.
How to glue an edge to chipboard - description
Melamine edging is the best option for use at home when you need to restore old furniture at minimal cost. If the furniture is expensive, it is better to turn to professionals who use other more expensive and high-quality materials.
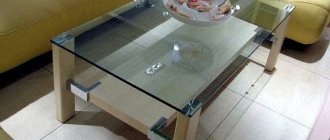
Let's look at how to glue an edge to a chipboard tabletop
at home.
EXCELLENT VIDEO ON THE TOPIC
For work you will need the following materials:
- skin,
- sharpened knife-jamb,
- wallpaper roller,
- melamine edge,
- hair dryer or iron.
Algorithm of actions:
- choose the operating mode of the iron so that it does not heat up too much and does not burn the chipboard and at the same time ensures proper melting of the glue,
- Process the edges of the chipboard for gluing with sandpaper, remove irregularities,
- measure the profile,
- heat it with an iron and press it tightly to the area using a roller (if there is no adhesive layer, you will need to apply glue to the edge yourself, for example, “Moment” glue),
- cut off the overhanging edges of the edge with a knife.
It is necessary to cut at an angle along the edge, slightly bending the material. Then all that remains is to sand the edges so that there are no burrs or irregularities left.
If the cut of the edge and the chipboard part itself are slightly different, stain will help correct the difference.
If the part has a complex shape and the edge of the surface is characterized by complex relief, it is not always possible to glue the material evenly the first time. In such a situation, it is worth turning to professionals so as not to damage the product.
Types of edging glue
Which glue to choose for edges
Furniture production professionals actively use hot melt adhesives for edges
. They are convenient if production is to be put on stream and both high quality results and fast speed are required.
Hot melt adhesives are thermoplastics, which means they become very elastic when heated and quickly harden when cooled. The ethylene polymer with vinyl acetate included in the adhesive is responsible for these properties. The disadvantage of using it is the need to use special equipment, namely appropriate machines or hand guns for applying glue to parts and heating it.
- At home, PVC glue is often used, which glues paper materials well to various surfaces. The homogeneous, lump-free, light-colored mass glues surfaces well, but is susceptible to moisture. It does not require the use of additional equipment, therefore it is convenient for use by non-professional craftsmen.
- Universal adhesives “Moment” and “88-lux” are suitable, which will reliably glue the material to the surface of chipboard and PVC. After 3-4 hours the product can be used. Adhesives are inexpensive, safe and available.
- Among professional furniture adhesives for edges, it is worth noting products from Kleiberit. The company offers hot melt adhesives for cladding, for gluing material using the soft-forming method (if the surface is embossed), as well as for cladding.
Melamine edging is a traditional edging material used in the manufacture of cabinet furniture from laminated chipboard. Despite the fact that today there are more wear-resistant edge materials, for example, based on PVC or ABS, melamine edge is one of the first places in terms of applicability. There are two main reasons for this: low price and simplicity of edging technology. We will show you how, using simple and accessible tools, you can qualitatively edge a part made of chipboard.
Edging tools:
- Iron. Any one will do, but preferably small in size, without steam holes and with a thick sole. It is important that the soleplate of the iron is clean and free of deep scratches.
- Knife. You can work with an ordinary stationery (construction) knife, which will be discussed below. A shoe knife and a plane knife will also work. There are special ready-made devices for quick edge cutting, for example, from Virutex.
- A block of sandpaper. You can buy a ready-made one or make it yourself by gluing a piece of sandpaper onto a workpiece of suitable size (it’s convenient when the block has sandpaper of different grain sizes on different sides). Recommended grain size is 150 units.
Edge technology.
It should be said that the quality of edging largely depends on how well the laminated chipboard is cut. The surface of the end of the part should be smooth, without a visible step from the scoring (sawing) disk of the format-cutting machine, there should be no obvious chips of the laminate and “lifting” of the laminate when a chip has just begun to form. High-quality and fast cutting of laminated chipboards is performed only on special equipment. The edge must be used with pre-applied adhesive. The edge is sold in rolls of 200 rm, but you can almost always buy it in lengths of 1 rm. A typical melamine edge is 19 mm wide and 0.3-0.4 mm thick (excluding adhesive thickness). The process of edge processing of one end of a part consists of the following steps:
- The part is installed vertically in an improvised holding device so that the processed end is on top.
- An edge segment is measured 2-4 cm longer than the length of the processed side of the part.
- The edge is placed exactly in the center on the end of the part, with equal releases along the edges.
- Holding the position of the edge on the part with one hand, the edge is smoothed with a hot iron (the temperature of the iron is selected experimentally; at too high a temperature, the edge begins to bubble; at low temperature, it does not stick well or takes a long time). Press the iron with moderate force. Excessive pressure can cause the edge to move, but not enough pressure can cause the glue to fail. Indirect confirmation of good heating of the edge can be slightly squeezed out glue from under the edge. Particular attention should be paid to the ends of the edge and where it contacts the laminated surfaces of the part.
- After warming up the edge, it needs to be cooled. A small cloth will do for this operation. Smooth the edge with a cloth, pressing lightly so that when it cools, the edge does not come off. After the edge has cooled to about 50°C (there is no point in waiting until the edge reaches room temperature), you can start cutting off the excess.
- First, remove excess from the ends. To do this, the free ends of the edge are carefully bent down, the edge is broken, the break point is lightly sanded using an emery block and the excess is simply torn off. All that remains is to work a little more with the sanding block so that the edge is flush with the mating side (does not protrude or catch).
- To cut off excess edge length, you need to set the knife blade at approximately 45° (see photo) and run the knife along the end of the part. The angle of inclination (adjacent) relative to the plane of the part is determined experimentally (depending on the knife). This operation requires skill and practice. It is important not to damage the laminate (do not cause chips). After cutting off all the overhangs, you need to lightly process the edges of the end of the part with a block of sandpaper, and the edging can be considered complete. Excess glue can be easily removed with a cloth soaked in acetone or gasoline. If a local gap is noticed, the problem area should be heated with an iron and pressed again with a cloth. Also, by reheating, the edge can be completely removed from the part.
The part is installed vertically in an improvised holding device so that the processed end is on top. An edge segment is measured 2-4 cm longer than the length of the processed side of the part.
The part is installed vertically in an improvised holding device so that the processed end is on top. An edge segment is measured 2-4 cm longer than the length of the processed side of the part.
Let's start gluing
We unwind the edge tape from the coil (it’s more convenient to unwind from the inside) and apply it to the end of the chipboard, first leaving a margin for trimming.
Its standard width is 21 mm, and the chipboard is 16 or 18, leaving a margin for trimming and rubbing. In order to avoid the need to cut on both sides, it is better to immediately align it on one side, and on the other side it will overlap.
After we have applied it, we begin to heat it right along the end and iron it with an iron. You need to iron the edges of the ends especially carefully.
Short parts can be ironed entirely, and if the part is long, we warm up 40 cm sections one by one. After that, cool the end with a slightly damp cloth.
The temperature of the iron is adjusted depending on the quality of our tape. It should glide quickly, easily and without friction, without scratching the surface or resisting movement.
High-quality heating will be indicated by uniform spreading of the glue under the edge. If it overheats, bubbles will appear and it will deteriorate, so monitor the temperature and do not overexpose the iron in one place.
If you suddenly damage the edge, it will need to be replaced. Using heat with an iron and a knife, remove the old one, clean the end of any remaining glue and start all over again.
The edge will stick well only after it has completely cooled. ONLY after the end has completely cooled can you begin trimming and finishing the edges.
In order to cut off the excess efficiently and evenly, you must first bend the edge with your finger, tap along the edge and rub it several times with a block until you see a white chamfer (this is the paper backing). And you can start cutting off the excess.
Next, carefully and slowly we rub the edges of the end with a block, check with our finger to see if there are any protrusions and burrs, and this completes our work on gluing the melamine edge.