The standard of living of a modern person, with due diligence, is very high. As a result, we acquire a huge number of things we need in everyday life: outerwear, underwear, accessories, interior items, some things dear to our hearts, etc.
When the amount of said kitsch becomes unimaginable, and the closets placed around the apartment run out of space, we begin to think about where to put all these trinkets.
The answer immediately comes to mind: we need to make a built-in wardrobe in the hallway with our own hands. Let's get started with the article in which we discuss the advantages of sliding wardrobes, the main nuances of their installation, and give detailed instructions on how to independently assemble a spacious wardrobe for a small hallway.
DIY built-in wardrobe in the hallway
The main advantages of a built-in wardrobe
The prefix “compartment” was added to the piece of furniture we are considering for a reason. The fact is that the doors of this cabinet are not quite ordinary. So, it closes with a system of sliding panels, which makes it:
- functional;
- compact;
- convenient to use;
- very roomy.
The main advantages of such a piece of furniture are the compactness and capacity of the piece of furniture.
If you also take into account that the doors of this cabinet can be decorated in absolutely any way you want, then it becomes not only a household item, but also a successfully fitting part of the interior.
But the main advantage remains, of course, its compactness. A sliding door system saves space that would normally be wasted when door partitions are opened. In addition, this provides constant access to things, regardless of whether your hallway is small or spacious.
The cabinet can be built into a niche on only one side
Inside one cabinet you can place various compartments for:
- boxes;
- shelves;
- hangers.
Inside the wardrobe there are many functional compartments designed to store various things.
You can combine compartments at your own request, and at the same time not be afraid that they will not look symmetrical or simply ugly, since no one will see the inside of your wardrobe - everything will be closed by a sliding door door system.
As you can see, no matter what space you have in your hallway to install a cabinet, whether it is a niche, or you just have a bare wall that needs to be occupied, you can choose the ideal built-in cabinet for yourself.
Drawing of the most common wardrobe that you can use to create your own product
Choosing a cabinet design and placement option
Placing a closet in the hallway. Home designers are sometimes very creative, which is why half of typical homes have niches in the hallway of unknown purpose. It's in this niche and you can make a wardrobe. To do this, you need to install door rails and order the doors themselves with fittings. This saves space, time and money.
Complete wardrobe. A good solution is to have a full-size wardrobe. Firstly, the room does not break down due to the corners of the furniture and does not visually lose space. Secondly, such a wardrobe can serve not only as a wardrobe, but also as a storage room where skates, skateboards, skis and even car tires are stored.
A closet can separate the hallway from the living room in a one-room apartment. The wardrobe is installed across the entire width of the room, in the middle there is a walk-through compartment door, on the sides there are compartments for clothes. Some people prefer to have all doors on both sides, allowing clothing access from the hallway and bedroom at the same time. A very convenient option is access to outerwear from the hallway and access to bedding from the living room.
Internal filling of the wardrobe
So, before we start making our own piece of furniture that interests us, we need to decide on the zoning inside it.
Parameters of a regular wardrobe
So, you need to think about filling the closet, determining where specific items will be stored in it. To make the most efficient use of the space available to you, we suggest following the following list of rules.
Rule 1. Outerwear should be placed in a closet in vertical niches on both sides of the closet, or only on one side. It is better, of course, that these niches are not too narrow, however, if they are, they will still be able to accommodate a significant part of your wardrobe.
Outerwear is stored at the edge
Each of these vertical niches should be equipped with a crossbar for hangers, on which we will place our outerwear.
The location along the edge is due to the fact that you need to protect items constantly stored in the closet from moisture and dirt that can drain from outerwear you take off in bad weather.
Rule 2. It is better to place valuable items, for example, documents, as well as various small things (cosmetics, curling iron, comb, etc.) in closed drawers, located approximately at the level of the groin or lower segment of the abdomen of a person, so that they it was convenient to look in and find what you needed.
At the same time, you need to take into account that you don’t need to make the drawers too wide, but you shouldn’t narrow them either, as they will lose all their capacity. If you want to make several wide and deep drawers, then it would be best to arrange them in tiers on top of each other.
Linen and accessories are stored at a height of no less than 40 centimeters from the floor
Dry clothes, that is, those that you put on under your outerwear, will need to be placed in niches at the top of the closet. So, nuda can be laid or hung:
- dresses;
- shirts;
- T-shirts;
- trousers and jeans;
- shorts;
- skirts, etc.
As for underwear, bedding, tights, socks and other accessories, they should not be placed in compartments that are located at the very bottom of the closet or at a height less than 40 centimeters from the floor, since it is to this distance that dirt and dust rise from its surface.
Traditional wardrobe
As a result, you will have to find swelling for all these small clothes at chest level, but not higher, since each time reaching, for example, to the very top for clean socks, or taking a stool for this is very inconvenient and dreary.
In the lowest section of the closet, it is wise to place a large number of nets and drawers, inside of which clean shoes that are not suitable for the season, and those shoes that are being used immediately will be stored.
The sizes of all mentioned compartments should be adjusted based on how many things you have that are supposed to be stored in one of them.
What materials to choose
The standard material for cabinet walls is chipboard. Its thickness should be no more than 16 millimeters. But if you really want to save money, you can use cheaper materials. True, in the future they will need to be specifically processed: painted, glued, finished, for example, with laminate. But in general, you can’t argue here: what material we choose, this is the result we get.
When choosing materials for a shelf, it is important to consider what load will be placed on the shelf.
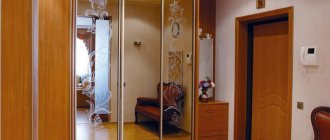
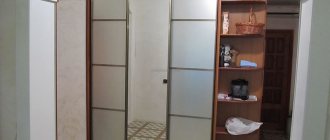
There is such a material as laminated chipboard. It has harmful emissions, but thanks to edging it is possible to reduce the harm caused to the average person. In fact, the level of excretion decreases, but does not disappear forever. It is no secret that most domestic manufacturers do not pay due attention to the environmental friendliness of the product. In accordance with this, the level of concentration of harmful substances increases. Previously, foreign manufacturers produced a product called class E1. Here, the release of formaldehyde exceeded its limit by 8 times. Therefore, over time, they began to produce Super E chipboard. It is very practical for corridors and hallways. Of course, this product is not inferior in price to domestic options. When it comes to doors, forget about easily soiled materials. A popular option is the arrangement with a mirror and additional laminated chipboard inserts.
A large mirror on the closet door will visually increase the space in the hallway.
Planning is the basis for further work
In fact, making a built-in wardrobe yourself is a process that will be the same in each case. Only the parameters of the parts used for installation work, the position of the placed piece of furniture, and the placement of certain compartments will change. Let's see what important steps everyone who decides to make their own cabinet will need to go through.
Think about filling your closet in advance
Choosing a material for making a built-in wardrobe in the hallway
So, before you start making furniture, you need to purchase the material from which its body will actually be made.
You will be surprised, but the tree is completely unsuitable for our purposes, since it:
- heavy;
- bulky;
- absorbs moisture, etc.
materials suitable for the job
, and we are left with several winning options, which we will use:
- laminated particle boards;
- fine wood slabs;
- ordinary chipboards.
It is very important to pay attention to the density of the products produced. So, we only need those that are characterized by:
- medium density;
- high density.
The stores sell laminated chipboard for every taste and color
In addition, all material must comply with the relevant GOST and the requirements specified therein. The fact is that products that cannot boast of such compliance can cause formaldehyde poisoning in you.
Wardrobe filling layout
We have already discussed filling the closet a little higher. To avoid having to redo anything, it is better to implement the plan you have drawn up in your head in the form of a diagram sketched out on specialized paper.
Think again about where to put things, remembering the basic rules:
- outerwear is placed away from dry items;
- pastel and underwear, as well as accessories are placed at a height of at least 40 centimeters from the floor;
- valuable and small items are stored in boxes arranged in a tiered manner;
- Everyday clothes are put away upstairs;
- shoes for all seasons go down the closet.
Carefully consider the segments in the closet.
Having decided where everything will be, draw it on paper, and you can use it in the future as a guide to action.
Door parameters
Now you need to think about what the sliding doors will be like. So, the following points need to be considered:
- fastening method;
- valve parameters;
- ease of installation.
Door installation diagram
The ideal and simplest type of door available would be a sliding system, built on two rails, with a support at the bottom. This one is easy to assemble even with your own hands, which is especially beneficial if you have not yet had such experience.
Sliding system device
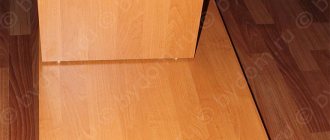
The width of each door will vary depending on the original size of your niche and the cabinet installed in it, however, we do not advise you to install doors larger than 60 centimeters, as parts that are too voluminous can put too much pressure on the floor (especially cork and wood), which will subsequently lead to subsidence of the coating.
How do doors move?
Also, think carefully about how many doors you will have in total. Keep in mind that if there are more than two of them, you will have to additionally purchase and install mechanical-type fixing devices for built-in cabinets. When using them, no matter how you level the floor, loosening will occur over time, and the door system will begin to freely “move” back and forth. And on the contrary, if there are only two leaves left, then you will only need to install fixing magnets for them on each edge.
Selection of fastening devices for shelves and drawers
So, the next point that we will have to think about is how we will attach the finished shelves and drawers inside the cabinet. Here you won’t be able to act as with cabinet furniture, since the built-in wardrobe simply does not have side walls.
High-quality fastening devices are the key to long service life of the product
That is why, in this case, other fastening methods will be used:
- placing shelves on a rigid frame (the most expensive of the methods, however, and the most reliable);
- use of an installation with adjustable suspension;
- using pieces of skirting boards (the cheapest and most reliable option).
The fittings are thought out to the smallest detail.
Now we have thought through all the important points that we should have. You are free to choose those options from the available ones that correspond to:
- your financial capabilities;
- the assortment offered in the store;
- the taste of the future owners of the cabinet, etc.
After you have decided on all the nuances, we will finally start working on installing our product.
Sliding wardrobe in the hallway: diagram
Key points
Often hallways have a small area. Accordingly, it is recommended to install narrow furniture, the depth of which is no more than 50 cm. The main thing is that the passage in the corridor is not blocked. Otherwise, such a cabinet will simply be inappropriate. You can immediately remove a couple of cm from the total depth, as they will be eaten by the doors. However, if the hallway is of an accessible size, you can afford a larger wardrobe (depth 60 cm).
For hallways with a small area, narrow cabinets of small depth (up to 50 cm) are ideal.
Be sure to take into account the fact of filling. For example, in a bedroom or living room, shelves and laundry baskets serve as standard filling elements. The closet in the hallway requires you to allocate space in addition to clothes for service items. The more additional components and elements for filling are present, the higher the cost of the product. Therefore, before purchasing, think about how many things you are going to store.
One example of filling the space of a hallway closet.
Instructions - how to install a built-in wardrobe in the hallway with your own hands
Step No. 1 – preparing the niche into which the wardrobe will be built
So, first we need to level our niche. For this purpose, its vertical and horizontal planes are processed.
So, you need to remove from them:
- old wallpaper;
- paint;
- remnants of other coatings.
The more carefully this surface is treated, the harder your cabinet door system will stand. By making completely flat surfaces, you will directly influence how the product will function throughout its life.
Carefully level the niche surfaces
Please note: if you make a cabinet on untreated surfaces, adjusting the doors in the future will be impossible, and even if carried out by the most venerable craftsman, it will not bring results.
It will be necessary to level not only the walls, but also:
- floor;
- ceiling.
The ceiling is treated if you use a double-rail door system with a ceiling support. But even if it doesn’t exist, it never hurts to thoroughly clean the ceiling.
The cabinet should fit neatly into the niche when assembled.
Step No. 2 - draw up a drawing of our cabinet
The design drawing should not be done with calligraphic clarity. You can draw it the way you want, however, you need to do it in order to:
- check the identity of the heights on different segments of the mounted structure;
- determine the exact dimensions of the valves;
- clarify the location of drawers and compartments.
Of course, the drawing will vary for each of us, since handmade lovers have completely different niche spaces, ideas and materials at their disposal.
You can also take a drawing of the cabinet from the Internet.
Step No. 3 – purchase building materials
So, at this stage we will need to go to the store to purchase:
- accessories;
- material for the cabinet body.
By the way, if you have the skills to draw up high-quality drawings, or decide to use one of the options presented in the article, you can immediately contact furniture companies who, according to your parameters, will cut out the corresponding measurements:
- shelves;
- partitions.
We purchase the required parts from furniture makers.
It would be reasonable to go to Leroy Merlin to purchase the material, which is available in almost every city today. If for some reason you cannot buy materials there, then try to bypass stores of a similar nature with a similar request.
Buying parts from furniture companies is more profitable than buying ready-made cabinets, because:
- it is much cheaper, since furniture companies purchase material in bulk;
- you don’t have to cut anything out yourself, which means everything in your apartment or house will remain clean;
- cutting on modern machines will serve as a method for obtaining accurate and beautiful parts with smooth edges.
You can purchase the parts directly from the furniture company.
In addition, you can immediately think through the details and make moves for installing interior lighting in the closet.
Please note: standard wiring is never installed inside the structures under consideration; only 12 V halogen bulbs are installed there.
Step No. 4 – collect in one place the tools and materials for assembling the furniture structure
So, let’s assume that we need to fit a spacious wardrobe into a small niche, which will serve as storage for outerwear and other outdoor accessories.
First, let's collect the tools:
- square;
- construction measuring tape;
- screwdriver;
- roulette;
- pencil;
- building level;
- drill for confirmation.
We collect the necessary tools.
We will also need to prepare the parts purchased from furniture makers. In the case of our example, they will be the following cabinet segments.
Table 2. What parts need to be prepared for installation in a niche
| Detail | Characteristics |
| Schlegels | Prepare five-meter long frames with two sides for the door system. |
| Laminated chipboard shelves | Next, you need to prepare six sectoral shelves made of laminated chipboard, measuring 350x350x16. |
| Guides | You will need to purchase one set of 1,383 mm guides in advance. |
| One compartment door | Since in our example the closet should fit into a small niche, we will prepare one sliding door 2455x604 mm. |
| Parts for a cabinet made of laminated chipboard | Next, we will also need to prepare parts made from laminated chipboard panels:
|
| Accessories | You will also need to prepare accessories, preferably in large quantities. So, we will need during the construction process:
|
Cabinet fittings
Having collected everything you need, you can finally proceed directly to installation.
Step No. 5 – assembling corner elements
In our niche we will insert an unusual cabinet equipped with corner elements. This is not a completely traditional installation, however, using this method it will be even easier to install the cabinet.
So, first we need to collect the required mentioned side elements. For this:
- we will combine laminated chipboard sheets, the width of which is 350 and 366 millimeters, just as shown in the figure;
- Let's pull together our blanks using confirmatom.
We assemble the corner elements.
This work must be carried out on a flat surface, preferably on a table for installation, however, if you don’t have one at home, then you can place the parts on stools.
For each sector we attach two confirmations per side. In order to evenly position these parts, it is advisable to first make markings on the material.
We apply the parts to the wall to check whether they coincide with its surface
For a wide sheet, for now it will be enough to use one sector according to the confirmation. We carry out a similar procedure for a symmetrically located element of the wardrobe.
To check whether you did everything correctly, you can remove the wide side panel from the assembled structure so that it simply does not interfere with us, and place it carefully against the wall so as not to scratch the ceiling.
Then we assemble all the elements again, and then, installing them strictly vertically, we attach them to:
- semi;
- ceiling;
- wall.
Next, we finally fix the parts in the opening.
Step No. 6 - continue assembling the case
Now, at the very center of the distance located between the parts we have fixed, with the end side we install a vertical sheet, the width of which is 30 centimeters.
At the same moment, we install rectangular shelves, using furniture corners for installation to the vertical riser. At the same time, it is imperative to take into account that the required shelves are installed at the same level with sector-type segments, therefore, confirmations from the required segments will be closed.
We mount a vertical separating part and shelves to the assembled structure
At this stage, the structure is finally secured to the following surfaces:
- ceiling;
- walls
Since the cabinet turned out to be compact, but still not so small, you will need to use at least 2 fasteners for each vertical element. As a result, there will be 6 of them in total.
Step No. 7 - installation of guides and fittings
Now you need to install the guide element, as well as attach hooks or a crossbar to the closet, on which clothes will be placed a little later.
You can vary the number of hooks yourself, however, in this case we recommend installing:
- two hooks for each corner;
- There are 4 hooks inside the cabinet.
You can vary the number of hooks you install at your own discretion.
Now you need to cut the guides. So, half of the upper segment prepared by us is sawed off, since the cabinet model we manufacture assumes the presence of only one door.
The upper part is fixed, the lower part is currently simply equipped with nesting door stops.
Step No. 8 - installing the door
Next we will need to put the doors in place. Check that it moves well along the upper guide segment, without falling out of it if moved carelessly.
To lift the door, you can place a thin piece of laminated chipboard under the lower guide element, having previously purchased a sheet 100 millimeters wide from any hardware store.
We install the door sequentially
In addition, the height can be changed by adjusting the rollers. Carefully monitoring that the door is always in a vertical position, we finally attach it to the lower guide.
Step No. 9 – install the door and supplement the structure with the necessary details
Now we need to finally install our door in place, using the screws on the lower rollers, which serve to adjust the position of this element in relation to the entire body of our piece of furniture.
Then we attach a schlegel to the door to prevent them from being knocked off and destroyed, and then, if desired, we install a mirror.
We add the final details to the finished piece of furniture, and we can start using it!
Video - How to fasten a Schlegel
Varieties by shape
There are several varieties, they have structural and external differences:
- built-in;
- free-standing;
- corner;
- diagonal-angular.
Let's consider each of them separately.
Built-in
Built-in furniture saves space
When constructing such a cabinet, there is no top, back wall and base. Only partitions are manufactured. The entire structure is screwed directly to the ceiling, walls and floor. Metal corners are used for fixation.
This is a stationary structure, and it is an invariable part of the created interior.
Standing separately
In this case, the cabinet is not tied to the wall
Has sides, top, bottom, back and sliding doors. This is a complete separate piece of furniture. It can be moved and is not tied to any design elements.
Angular
Placing it in a corner also saves space
An excellent solution for small apartments where every meter is valuable. Repeats the shape of the corner and allows you to rationally use the space of the room.
Diagonal corner
A diagonal corner cabinet looks original in the room
This is a type of corner, but the facade does not follow the shape of the corner, but is made diagonal. The increased capacity of this design determines its frequent use as a dressing room.
Let's sum it up
So, we learned how to assemble a wardrobe with our own hands. It can easily be built into any free niche you have in your home. Of course, we have considered the simplest possible option, since it is represented by a small design, however, having acquired the initial skills by reviewing the step-by-step instructions associated with it, you will get a general idea of the process and will be able to install the model that you need, having previously purchased the necessary details for her.
Small-sized apartments exist not only in old Khrushchev-era buildings; completely new housing projects, designed for the poorer category of our fellow citizens, also save on passerby space. The industry takes into account the situation in the housing market and produces small-sized but very functional furniture specifically for such situations. In a special article you will find tips on choosing a cabinet for a small hallway, as well as instructions for assembling a door cabinet.
Required Tools
To assemble a hallway cabinet with your own hands, you may need a classic set of tools:
- Screwdrivers and keys for hardware.
- Drill with a set of drills.
- Screwdriver.
- Hacksaw.
- Hand tools: mallet, hammer, clamp, square and level.
- Small things: tape measure, ruler, pencil, breadboard knife, core.
Depending on the chosen concept, you may need: hooks, furniture fittings (handles, door hinges, locks) or guides for drawers. In addition, you should take into account the type of connections of structural elements and make sure in advance that there are: hardware, confirmations, rafixes, furniture corners and plugs of various types.
When selecting materials for making a cabinet, you should take into account both its technical characteristics of the specific material and the level of humidity in the room.
Puttying
This is one of the most important stages in our work. Puttying will give our product the final look before painting: For those who have never done this before, it is better to purchase a ready-to-use mixture - putty. Craftsmen familiar with this type of work prefer to prepare it directly on the workplace from dry powder.
For beginners, the ready-made mixture is preferable, and in a sealed container it can be stored for quite a long time and can then be used for other projects. The work is done with one wide spatula. The small one is used for scooping putty onto the main tool and evenly distributing it over it, as well as for applying the mixture in corners and narrow places. First, it is necessary to repair large irregularities and potholes, putty the internal and external corners, as well as the edges of our corners overlay profiles with which we protected the edges of the drywall. In order to get a high-quality result, they need to be covered with a special mesh tape.
Paper masking tape is not very suitable; it can then swell along with the putty layer. Do not rush in this work, the putty must be applied in a thin and even layer, where necessary - several layers. Small irregularities and defects, which are inevitable at first, will be covered with applying final layers of mortar and sanding. After preliminary preparation of surfaces and corners, you should take a break so that the layer of putty mixture hardens well. It is better to postpone the final finishing to the next day. Before the main stage of puttying, you need to clean the surfaces of the walls and the areas we previously putty, removing all irregularities and protrusions. This can be done with the same spatula.
The use of sandpaper is not recommended. After it, a lot of dust remains, and we just need to get rid of dust. The surfaces of the walls need to be brushed with a brush or a dry cloth. You need to apply the mixture to the walls during the main passes with a wide spatula - after all, we have already prepared the corners. We repeat these steps several times.
Before each next layer, we equalize the previous one, apply the next portion of the putty mixture, wait for it to dry. We repeat 3, 4, 5 times - as many as necessary, until the result satisfies us. The most difficult and responsible thing here is the high-quality execution of the outer corner of our cabinet. It will catch your eye first and should be done especially carefully. Now you can begin the final sanding. This is done with sandpaper No. 200.
Having folded its piece several times, we carefully level all the corners and surfaces of the walls of our wardrobe. Then, after conscientiously removing all the dust, we can evaluate the final appearance of our project. Tip: For beginners, it is best to start the process of filling walls in an upward motion. It is worth placing paper or cardboard on the floor - drops and splashes will be inevitable.
The solution is applied in several layers until the desired result is achieved. Each layer must be performed changing direction: one - vertically, the next - horizontally, or at an angle: layer from left to right, the next - from right to left. Having laid one layer of putty, before applying the next you need to take a break until it dries. Return to content
Drywall cutting
Before assembling the built-in wardrobe completely, you need to cover it with plasterboard. For such small work it is not necessary to buy a whole sheet of material. You can purchase cuttings of fairly large sizes at a reduced price.
After sheathing, puttying and painting, all joints will be closed and will not be visible to the eye. Tip: To cut drywall, you need to clear a large, flat surface. This material is cut very easily with a sharp knife along a long ruler or strip. Having cut through on one side, you need to bend it, turn it over and then finally cut through the paper on the other side at the fold. Return to contents
Making shelves
For shelves, you need to mark the level and secure supporting slats or bars to the walls inside the cabinet. We can already do this work, so it shouldn’t cause any difficulties.
Shelves can be cut from any suitable material: chipboard, thick plywood, etc. Tip: When cutting off another shelf, you should once again measure the space for it inside the cabinet. Due to uneven walls, shelf sizes may differ from each other. Return to contents
We fix the drywall
Cutting off the necessary pieces of drywall, we cover the finished frame with it, using screws specially designed for this material. Drywall is a fragile material and is susceptible to impacts, especially at corners. Therefore, we cover them with a special aluminum corner that protects the casing from damage.
Return to content
Painting and installation of doors
Before painting, the wall surfaces must be primed. To do this, you can use a simple water-soluble primer. Then we paint our wardrobe inside and out in two layers. Tip: It’s best to choose the paint in a color that matches the walls of the hallway.
Now in building materials stores it is not at all difficult to do this - they will select any shade using a computer. At the end of all the work, we hang the doors. In our version, we used sliding doors, the installation of which required the fastening of special guides (upper and lower). The guides and their installation diagram are included with the set of doors purchased in the store. If you wish, you can make cabinet doors yourself, but this is a topic for another instruction. Return to contents