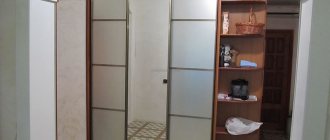
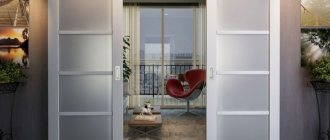
Wardrobe designs
Sliding wardrobes differ from other storage systems in the special design of their doors. The doors do not swing open, but move back, revealing the interior of the furniture. Structurally, cabinets can be divided into several groups.
Built in furniture
They are mounted in a niche that serves as the inside of the cabinet. Therefore, it is impossible to move the built-in structure to another place. Embedded systems are made to order. Their advantage is that the sizes can be very different, and the assembly is extremely simplified and, if necessary, can be done independently.
Photo: Instagram alyance_naydi_kzn
Freestanding wardrobe
The furniture is a standard wardrobe with sliding doors. The product is quite easy to install. Only the assembly of sliding doors poses a certain difficulty. The cabinet can be moved to another place, since it is not tied to a specific niche. Self-assembly of such furniture is a little more difficult than built-in furniture.
Corner design
Can be built-in or free-standing. In the first case, it is built into the corner part of the room. The main advantage is its compactness, but at the same time very good capacity. Doors can be straight or radial, which makes assembly much more difficult. Making such a design yourself is possible, but quite difficult.
Photo: Instagram elenachemebel
Photo: Instagram elenachemebel
Photo: Instagram elenachemebel
Photo: Instagram elenachemebel
Door system
The sliding system mechanism is a rather complex device. To make the design easy to use, you need to design doors with an optimal height to width ratio.
The calculation is quite simple: one part width to four or less parts height. So, if the product reaches a height of 240 cm, then each door should be at least 60 cm wide. The wider the door, the more stable it is and the softer its movement. But a door that is too wide can be too heavy. Therefore, the width should not exceed 100-120 cm.
Pros and cons of sliding wardrobes
Such furniture of any type is considered very practical and comfortable. Its main advantages:
- compactness;
- capacity;
- possibility of placement even in a small room;
- variety of models;
- possibility of self-assembly.
Among the disadvantages, it should be noted the need for regular maintenance of the sliding mechanism, otherwise it will quickly fail. In addition, it is advisable to purchase high-quality sliding systems. Otherwise, the cabinet will not last long.
Photo: Instagram alyance_naydi_kzn
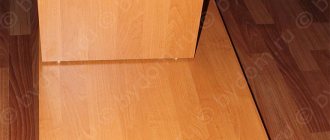
Base assembly
Among furniture makers, the base is the bottom of a cabinet with legs. It is with its assembly that the process of installing the structure begins.
First you need to calculate the distance of the legs from the edges of the bottom and make the appropriate markings. If you do the work yourself, it is recommended to fasten the base with confirmatories.
You can make your work easier with the help of stribucin.
Corners are easier to install, but they create certain inconveniences when using the cabinet. If you still prefer installing corners, then use 3.5 x 30 screws to secure them. They should not be screwed too tightly so that they do not pierce the fabric through.
What to assemble a wardrobe from
You can choose different materials to make furniture. But this must be done before design, since the assembly process may vary slightly.
Natural wood
This is a traditional material used to make furniture. In this case, not the best choice. The boards for assembling the cabinet must be thoroughly dried and soaked in special solutions: water-based polymer emulsion or hot drying oil. In addition, their surface must be free of any defects: knots, cracks, etc. Considering that the wooden surface is hygroscopic, it is not recommended to use it for the manufacture of built-in furniture. The wood will warp due to changes in humidity inside the niche.
Photo: Instagram almaty.mebel.kz
Lining
You can use various options: MDF, PVC or wood. It should be taken into account that the slats that make up the sash are inserted into a wooden frame. The wood from which the frame is assembled is selected only when it is dry and without defects. The lining is adjusted to size, the boards are glued together. This complicates the assembly process somewhat. In general, this solution is quite appropriate, but only for cabinet doors. It is often used for built-in structures.
Photo: Instagram alyance_naydi_kzn
Wood panels: MDF, chipboard, fiberboard
Perhaps the best choice for DIY cabinet installation. The materials have all the advantages of wood, but are completely insensitive to changes in humidity. High and medium density slabs are chosen for work; they are best suited for this. It is enough to simply cut the slabs into pieces of the required size. It is optimal to use cutting services for this.
Photo: Instagram good_wood_shop
Plywood
You can use standard or laminated sheets. The latter have an attractive appearance and are considered more environmentally friendly. The material is available in the form of slabs of various thicknesses. When working, you should take into account some softness of the sheets; when installing self-tapping screws, the plywood may be deformed. Therefore, it is recommended to use special gaskets.
Drawing up details
For your convenience, on our website you can “Cutting chipboard”.
The first size indicates the length (along the direction of the fibers of the material), the second the width of the part (across the direction of the fibers), then we indicate the number of identical parts, then comes the edge, we use PVC edges with a thickness of 2 mm (designation in the table - X) and 0.4 mm ( designation in the table - O), on the front side of the part we put a 2 mm edge, on the back side of the part we put a 0.4 mm edge. The sides of the part that are joined to another part do not need to be edged.
So, let's fill out our table:
This is the set of parts we received.
Note:
Part No. 1 and No. 2 - lower and upper false panels, since the cabinet is built-in and the width of our niche is different, we give the part with a margin of + 50 mm (we cut off the excess, adjusting the part to the width of the opening).
Part No. 3 - False side panels, also provided with a notch in height +50 mm, since the ceiling is different in height.
Part No. 4 – Mezzanine shelf, also provided with a +50mm undercut, adjusting their size to the location.
How to calculate boxes correctly? Let's take this example as a basis:
The width of the opening is 600, the height of the opening is 400, from these parameters we will consider 2 drawers, 2 mm - gaps in height and width.
- Drawer front 400-2-2-2/2=197mm (height size of the drawer front), 600-2-2=596mm (width of the drawer front).
- The side panel of the drawer is equal to the length of the guide, the height of the side panel is calculated: the height of the facade minus 30 mm.
- The drawer partition is calculated by the formula: the width of the opening for the drawers minus two thicknesses of the guide, minus two thicknesses of the sides. drawer panels, that is, 600-13.5*2-16*2=541mm.
- The bottom of the invoice is made according to the size of the box 450x573 mm
Let's make a table with dimensions for our second option (pictured below).
As we see in the photo above, when detailing a cabinet cabinet with your own hands, the parts are sawn without allowance, that is, to size.
I would like to note, as you can see in both the first and second tables, we enter the length and width of the parts without taking into account the thickness of the edge, that is, the thickness of the edge must be subtracted from the dimensions of the part, this applies to an edge of 2 mm.
I would also like to note the calculation of the rear walls made of hardboard. The rear wall is calculated as follows: cabinet width minus 2 mm, cabinet height minus base height minus 2 mm. If the cabinet is wide, then we divide the back walls into several parts, connect them at the back with partitions, in our case the height of the back walls is 2602-60-2=2540mm, the width of the first back wall is 638+15+8=661mm, the width of the second back wall is 718+ 8+8=734mm, width of the third rear wall 600+8+15=623mm.
Choosing a hanger for a wardrobe
Another important point is determining the type of suspension for the sliding mechanism. You can choose the appropriate one from the three options presented in the table.
| Advantages | Flaws | |
| Double-rail system, bottom support | Reliable in operation: the doors do not fall out, do not touch each other, and do not jam. Simple fittings and installation. | Sensitive to subsidence of the floor covering, which leads to system failure. Dust and dirt accumulate inside the bottom rail, which interferes with the normal operation of the mechanism. Regular cleaning is required. |
| Double rail system, top support | The absence of subsidence and other deformations of the base ensures the reliability of the structure; the rail located on top is much less dirty, so it has to be cleaned less often. Simple fittings and easy installation. | During installation, it is necessary to level the ceiling in the area where the suspension is installed. When pressure is applied to the sash, the roller may come out of the groove, and the door falls into the cabinet. A bottom guide is required, otherwise the sashes may hit each other. |
| Monorail | Paired rollers located in each carriage and an individual guide for the sash. Thanks to this, a guide from below is not needed. The high strength of the suspension allows the installation of wide sashes. There is no need to level the ceiling before installing the suspension. | Complex installation, after which it is necessary to correctly adjust the sashes. The fittings are complex and expensive. There is a wide gap between the rail and the sash, which requires the installation of a decorative trim. |
You need to know that the efficiency of the mechanism is determined not only by the type of suspension, but also by the material from which it is made. The most short-lived is plastic. The guides made from it cause the greatest number of complaints.
Photo: Instagram kompania_krslon.ru
Filling
If you make a transformer yourself, then you need to think about its contents. To make the task easier, you can use a ready-made drawing. Often shelves and drawers are made from plywood, but if finances allow, then they, like the frame of the device, can be made from natural wood.
Most often, a do-it-yourself wardrobe consists of two sections. In one of them there are shelves and drawers, and in the other there is a rod for trempels. If you are making a cabinet yourself, then do not forget that the drawers should be installed no higher than chest level and not near the floor, because the drawers have to be used quite often.
Calculating the size of a compartment with shelves is not difficult - its width is on average 40-50 cm. The size of a compartment with a rod is slightly larger - from 60 to 120 cm. At the same time, it is not advisable to make the compartment for tramples too large, because the rod can bend under the weight of clothes.
If the owners plan to hang a lot of things in the transformer, then a simple way out of the situation is to install the rods at two levels: near the ceiling and a few tens of centimeters from the floor.
The standard drawing provides for the installation of shelves at intervals of 30-35 cm. A compartment with a bar can be made with a height of 80 to 160 cm. To calculate the specific height of the compartment, you need to decide what things will be located in it. When you make a transformer yourself, you can change many parameters to suit the needs of your family.
Installing guides
One of the critical moments in the assembly process is the installation of door rails. The lower part is equipped with two grooves that ensure smooth movement of the rollers. There are also two compartments at the top of the part. The first step is to drill the compartments for the screws that will serve as fasteners to the base.
You need to drill holes in the guides yourself, since manufacturers do not do this.
When creating such holes, it is imperative that a chamfer is made for screwing in the screw. Four holes in each plank will be enough. Next steps include:
- fixing the bottom rail with preliminary marking of fastening points;
- leave two and a half centimeters from the edge of the pedestal to the front rail;
- to avoid jamming of doors and their uniform movement, the cabinet should be placed horizontally;
- The top rail is mounted identically. The only thing is that the holes are made in a checkerboard pattern.
The fixing elements are the screws that come with the furniture product.
The guides are attached to the body using self-tapping screws. It is necessary to make a 15 mm indentation of the bottom guide from the edge of the bottom part of the structure.
Note! The distance from the edge of the rail to the front of the cover must be at least two millimeters.
Summarizing
As can be seen from the described process of assembling a sliding wardrobe, the process is not complicated. To solve this issue you will need desire, a basic set of screwdrivers, tools and a tape measure. Further, following the instructions step by step, even a beginner in this matter will cope one hundred percent.
Any model of a sliding wardrobe is always equipped with an assembly diagram that is understandable even for a beginner.
The first steps in assembling the cabinet will be to prepare the parts after unpacking. Here it is important to put everything in its place; it is better to immediately highlight the small elements in a box. Then you can start making the frame. Shelves, internal partitions, fittings and guides will then be placed on it.
Try to fasten everything evenly without distortions. This is especially true for doors.
If you have doubts about the correct execution of all stages, you can periodically check the drawing, which will help you do everything properly. In addition, there are many video lessons on the Internet.
It is important to carefully and carefully approach the installation stages, check the calculations and work carefully.
Stationary
Most often, a do-it-yourself wardrobe in a hallway is made to be stationary. It can be moved and installed after the renovation is completed.
Doors can be either sliding or hinged. The downside is the large dimensions and the need to take into account the space in the room. Fitting such a cabinet into the interior is more difficult than a built-in one.
Furniture options
Depending on the room, its area, height and design, there are several types of wardrobes.
Built-in
A closet either extends from one wall of the room to another, or is limited by a physical partition. The name “wardrobe” in this case is very arbitrary, since in fact you are simply separating some part of the room for storing things.
Note!
Do-it-yourself screen: a step-by-step master class for creating it yourself. Types of screens, manufacturing materials + design ideasDo-it-yourself installation of interior doors - preparation of the structure, selection of doors, installation step by step + instructions from professionals
- DIY shoe rack - types of designs, manufacturing materials, step-by-step master class with simple diagrams and drawings
One of the advantages is that dust does not accumulate above the cabinet, since it goes from the floor to the ceiling, you save on materials. The downside is that such furniture cannot be moved, and its installation requires fastening to the wall and ceiling. Almost always the doors of such a cabinet are sliding.
Sidewall installation
At the next stage, you need to secure the side panels of the cabinet, and, using the drawing, install the partition and the top panel (roof).
You can fix the frame made of plywood or wood using minifixes. They are not noticeable in the finished product and at the same time provide reliable fastening of perpendicular structural elements.
If you have the opportunity to assemble the cabinet in a “lying” position, then you can use confirmations.
After this, make your own calculations of the points at which the parts will be fastened. Then drill holes in these places using a confirmation drill. The depth of the holes should be about 1 cm. Minifix rods must be screwed into the resulting holes.
Installing a cabinet at home requires special attention to the accuracy of all angles. Only in this case the design will be reliable and beautiful. You can level the base before installing the sides using a building level.
The side walls should be secured with screws and corners. Then you need to calculate the height of the plywood shelves and prepare holes in the walls for their installation.
If you are making a cabinet yourself, make sure that the shelves are screwed tightly enough. If the frame and shelves are weakly connected, then the stability of the structure may be reduced.