This article describes how to sew curtain tape to tulle, curtains, and drapes.
To make a new interior in a room, it is not necessary to make expensive repairs or change furniture. It will be enough to buy new curtains or tulle and decorate the window in the room with them. Such decoration using new textiles will add new accents to the interior and make it stylish and beautiful.
Many women buy new tulle and prefer to design the textiles themselves, as well as sew on the ribbon. In this article we will tell you how to choose the right ribbon for tulle and how to sew a wide or narrow ribbon. Read the tips, watch the video and you will be able to drape the window beautifully yourself.
Which curtain tape is best for tulle: how to choose?
Which curtain tape is best for tulle: how to choose?
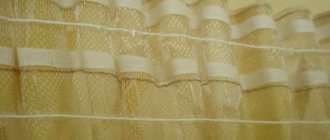
Curtain tape is a braid with special twisted cords sewn along its entire length. It is an excellent foundation for creating any folds. If you want to make beautiful folds on the tulle, you do not need to acquire special fashion designer skills; sew on curtain tape and beautiful window drapery will be ensured.
Which curtain tape is best for tulle: types of tape
Which curtain tape is best for tulle and how to choose it? Adviсe:
- First, decide on the type of folds you want to see on your tulle : waffle folds, pencil folds, bow folds, Flemish folds. But, if these names don’t mean anything to you, then just take several types of ribbons and assemble them. You will immediately see what kind of fold pattern you will get in the end.
- Remember that the folds on tulle will not be particularly visible, since the fabric is weightless and airy. But the general relief will still be visible.
- If you have made unusual and beautiful folds on the curtains, then you don’t have to bother with the tulle and choose a tape of uniform gathering.
- For tulle, use clear fishing line tape. The same tape is used for thin curtains.
- The type of curtain tape determines the amount of tulle. For convenience, the ratio used is 1:3, 1:2, 1:2.5 and 1:1.5. These figures indicate that for 1 meter of window opening you will need, for example, 3 meters of tulle plus another 10 centimeters.
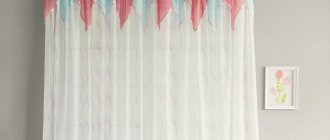
To make a plain tulle look beautiful on a window, you should use a coefficient of 2.5 or 3, since with a coefficient of 1.5 the tulle will be barely gathered.
Peculiarities
To attach curtains to curtains or ceiling cornices, fastenings are required. Fittings are made from various materials:
- metal-plastic;
- non-ferrous metal;
- aluminum;
- become;
- light and durable polymer.
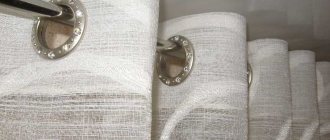
Hooks or rings usually come with curtain rods. Toothed crocodile clips are used for heavy materials, clips are used for organza and tulle.
How much curtain tape is needed for tulle?
How much curtain tape is needed for tulle?
The meter of the tape is calculated depending on how much tulle you need to drape. So, how much curtain tape do you need for tulle? Use the coefficients described above. The second number in the coefficient indicates how many meters of fabric will be needed to cover 1 meter of opening. For example, to buy a tape with a ratio of 1:3 for a window with a width of 2.5 meters, you will need 7.5 meters of tulle and the same amount of braid.
If you have already purchased curtains, then select a braid with a suitable coefficient. To do this, divide the width of the fabric by the width of the opening. For example, a curtain is 4 meters, and a window opening is 2 meters, then you need to divide 4 by 2. The result is a ratio of 2 or 1:2.
Material preparation process
Before you sew the braid onto the curtain, you need to prepare it. For this:
- The curtain is being ironed. There should be no folds left on it. The fabric is ironed in accordance with the rules for caring for the material from which it is made.
- If the edges of the product are not processed, then they are hemmed, bending them twice.
- The loops on the tape are checked using an awl, screwdriver or any thin object. This is done so as not to sew the braid on the wrong side.
How to properly assemble tulle on a curtain tape: rules, tips, photos
How to properly assemble tulle on a curtain tape: rules, tips, photos
Draping the fabric is the most crucial moment, so it is important to pull the tulle or curtain correctly. How to properly assemble tulle on a curtain tape - rules and tips:
- It’s better to pull together together , so ask someone to help. If there are several cords, then they need to be pulled together on both sides.
- When tightening, the cord will get in the way , since it is very long, so tie a piece of cardboard and wind the cord around such a bobbin. You can also buy a special retainer in the store that is used for these cases.
- While tightening, measure the curtain or tulle to achieve the desired width. It is better to do this with a soft measuring tape.
- When you have the desired width of the curtain , fix the edges and straighten the folds. Hang curtains or tulle on hooks.
How to properly assemble tulle on a curtain tape: rules
Important: For the curtain to look beautiful, the distance between the hooks must be at least 10 cm.
How to properly assemble tulle on a curtain tape: rules, tips
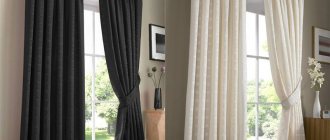
Self-drapery of curtains and tulle will help you decorate the room yourself, without resorting to the services of specialists. Give your interior an elegant and finished look, saving on the services of a fashion designer, especially since this is easy to do with different types of curtain tape.
Common mistakes made by newbies
In some cases, novice craftsmen may have problems. Lack of experience often leads to avoidable mistakes. The instructions below will help you get the firmware installed correctly the first time.
How to choose the right door to your apartment?- Kitchen design in Khrushchev: useful tips for those who have a small kitchen (100+ photos)
Which laminate to choose?
- After washing, the material may shrink and, in principle, cannot be used further. This can only be corrected later by cutting and re-stitching. However, this is easy to avoid - you just need to leave extra supply of tape.
- Often, laces fall out of place, causing irreparable damage. The best way is to tie strong knots on the sides that will prevent it from moving freely. The best solution would be to make pockets on the reverse side. The ropes are placed in them, after which they are fixed and will no longer be able to fall out.
- In the middle of the tape there is a tightening seam, which is easily damaged during operation. If you cut it, subsidence will occur. It will not give the proper tension.
Methods for attaching braid
There are different ways to sew curtain tape correctly. In any case, the work begins with processing the braid itself. In order to avoid shrinkage in the future, it must be wetted and then ironed, or even better, steamed. This way it will acquire its final form and will not bring unpleasant surprises in the future.
The easiest option
The simplest and most universal way is to sew a strip to the curtain using a sewing machine and then fold the edge of the fabric. This method allows you to sew braid onto any material of any thickness and density. Here are the instructions:
It is necessary to measure the required length of the curtain tape, taking into account seam allowances of 2-2.5 cm on each side. The edges of the curtains, except for the top, must be processed in a pre-selected method. The ribbon will be sewn to the right side of the fabric. We apply the wrong side of the braid to it, with the loops facing out. Its upper edge should protrude beyond the fabric by 2-3 mm. It is necessary to remove the cords from the tape allowances and bend them to the wrong side of the fabric. To make the work easier, it is better to sweep the product; you can pin it with tailor’s pins. Stepping back 2 mm from the bottom edge of the strip, machine stitch along the edge. If the width of the tape is up to 4 cm, it should be sewn with 2 seams, and if it is 5-10 cm - 3. Thus, if the tape is wide, the next seam runs along its center, and the final seam runs along the top edge
It is important that the stitches are made in the same direction, otherwise the fabric may curl. This is especially true for thin curtains. Sewn with one or two, if it is wide, we bend the curtain braid with seams onto the wrong side of the fabric, leaving a margin of 0.5 cm wide in order to hide its edge. Along the bottom edge of the strip we place the last seam at a distance of 2 mm from the edge
Thus, only one line will be visible on the front side of the canvas, and the folds will be lush.
You may also be interested in: Hanging curtains on curtain tape - methods and photos
Making drapery
For thin curtains made of tulle, organza, or veil, there is another way to properly sew a ribbon for drapery. The sequence of actions is as follows:
- Spread the canvas with raw edges on a flat surface.
- We fold an allowance equal to the width of the selected tape onto the wrong side of the fabric and fix the fold with an iron.
- We measure a piece of braid 6 cm shorter than the width of the fabric cut if a side hem is planned to be 1.5 cm wide, or 8 cm shorter if the hem width is 2 cm.
- We retreat 0.2-1 cm from the top edge of the curtain fold, lay the braid on the folded seam allowance facing towards you.
- For convenience, you can apply 1-2 rows of bastings.
- We lay the seams in one direction along the edges of the curtain tape, and if it is wide, add an additional line along its center.
- We bend the edges of the curtain twice by 1.5 or 2 cm, fix the folds with an iron, and then attach them, covering the free side edge of the braid, having previously freed the ends of the cords.
Tape with sticky sides
You can correctly sew curtain tape to tulle in the following way:
- Using double hems we process the side edges of the curtain.
- On the wrong side of the fabric we make a fold equal to the width of the tape and fix it with an iron.
- We cut off the curtain strip taking into account 4 cm for side allowances. We free its side edges from the cords, bend them 2 cm each, fix the folds with an iron or sweep them away.
- We lay the braid on the hem of the main fabric. Their side edges must match. An allowance of 1 cm wide is left between the top edge of the strip and the fold of the fabric; this will hide the side edge of the strip and also decorate the drapery.
- We lay a basting line or secure the product with tailor's pins.
- Apply stitches in one direction in the required quantity. All seams in this case will be visible, so it is better to choose a thread that matches the tone of the main fabric.
You may also be interested in: Choosing beautiful lambrequins for the hall
The Velcro strip is attached with 2 seams along the edges with a distance from the finished edge of the curtain of no more than 5 mm. The second part is mounted on a cornice or in a special niche. Such curtains usually do not drape due to the rigid edge.
Depending on the ribbon chosen, you can create a drapery with simple or complex folds, with small gathers or large flounces, and even form a pattern along the edge, tightening the cords in different ways. You cannot cut the loose ends of the laces, because before washing they will need to be untied and the wrinkles smoothed out. This will protect the fabric from damage and deformation. A high-quality sewn curtain braid will allow you to change the overall appearance of the drapery, and therefore its style again and again, without harm to thin curtains.
The final stage is consolidation
After stitching the seams, the cords on one side must be tied together with a knot. You cannot cut the cord on the other side. You may need to loosen the tie to hang the curtain over a wider window opening. There are 2 ways to hide the cords:
- in a bag made of braid;
- wrap the cord around a thick material and pin it to the fabric.
Sewing curtain tape requires some experience. If you are not confident in your skills, it is better to delegate the work to an experienced seamstress.
Tips from experienced seamstresses
Experienced seamstresses share small tricks for sewing high-quality and beautiful curtains:
- Choose your threads carefully. For thick curtains, choose colored threads to match; for braids, choose white threads of the same thickness. Thread two colors of thread into the machine.
- Adjust the sewing machine properly to the type of material. Set the appropriate thread tension, foot pressure and stitch size in 3-4mm increments.
- Check the machine needle. Strengthen a thin, even, sharp needle. Test it on a small piece of thin fabric. If there are no puffs, then you can sew.
- Choose the right textile tape. It is necessary that it be invisible and not seem like something foreign on the curtain.
- Pre-wash the braid and fabric in warm water without detergent to prevent shrinkage in the future.
- Wrap the long ends of the cords on a piece of paper and place them in the unsewn edge of the tape or in special pockets mounted on the curtain. This way the cords will not get tangled.
- Before you start sewing curtains from expensive material, try sewing a kitchen or garden curtain from plain cotton. Practice sewing techniques and try different types of draperies. Start with simple types of drapery and inexpensive materials.
- If it is not possible to sew the tape to the curtain (for example, the machine is broken), use tape with hot-melt adhesive. It just needs to be ironed.
Characteristics and purpose of using weighting materials
Even heavy curtains are not stable and are easily moved by the wind. To fix the curtains in one place, special weights are provided. Such devices have different weights, thicknesses, and modifications.
A special weighting device ensures the much-desired evenness of the lines.
Important! When choosing a weighting agent, you need to rely on the density of the fabric. The higher it is, the greater the mass of the element used should be.
Which curtain models need additional load.
- Roman. Curtains have a mechanism that lifts the fabric and rolls it onto the curtain rod. The design is additionally equipped with a wooden or plastic slats.
- Japanese. These are fabric sheets that are weighted with metal, wood or plastic slats. They are secured with glue.
- Curtains in the bathroom. Small magnets or plastic parts are used as weights to prevent deformation of the waterproof fabric.
- Tulle. Lightweight sheer fabric can only be finished with lace.
- Heavy curtains. Here it is recommended to use metal balls and cylinders.
You can make a weighting agent from available items (ribbon, cord, metal parts, slats are suitable).
In each specific case, the choice of weighting material is determined by the properties of the fabric.
The weighting material allows you to maintain the necessary shape of the curtains and prevents the curtains from deforming. In addition, this detail helps to quickly straighten the curtains. Thanks to a small load, the tulle will always look neat.
Cord and ribbon are used if the main material of the curtains is tulle, organza or other light fabrics.
What you will need
Prepare the material. The braid is selected taking into account the properties of the fabric (its density). There are special types of products for transparent fabrics. Thick curtains should be hemmed with a white stripe. The corsage option is used to increase the rigidity of the trouser waistband.
It is a product of medium width without fastening elements. Theoretically, you can attach it to curtains, but to fix it to the curtain rod you need to make loops. This option is being considered to hang very thick curtains.
Determine the amount of material. To do this, measure the length of the cornice and multiply the resulting value by the assembly factor. Also add 5-6 cm to the folds.
Other materials, tools:
- scissors;
- thread with a needle for basting;
- pencil or chalk.
Where and when are different types of SL used?
Let's take a closer look at how different types of braid are used:
1. Narrow fittings are sewn on if:
- the top of the curtain is hidden by a lambrequin;
- the cornice is covered with a baguette or recessed in the ceiling niche;
- for forming ruffles on delicate thin fabrics: tulle, veil, organza.
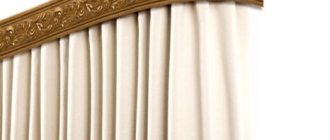
2. Wide, dense white braid with a rigid structure is sewn in the following cases:
- draperies of heavy massive curtains;
- if the cornice is open (string, profile or round cornices) - cover the curtains with a decorated top;
- with a small number of hooks, the dense tape does not allow sagging;
- to create folds of various configurations.
3. Multi-row braid for hook attachment.
A two-row ribbon forms simple “pencil” and “column” folds, while three- and four-row ribbons create complex folds in the form of glasses, bouquets, and butterflies. In addition, the rows help you adjust the length of the curtain without cutting it.
4. Wide fittings with special hooks - for creating heavy triple folds with a bow. 5. Adhesive tape with a layer of hot-melt adhesive - to seal the fabric and add rigidity. Such a SL is simply pressed with a hot iron to the edge of the curtain.
These simple recommendations will help you determine the type of curtain tape for sewing curtains of your style.
Types of folds
When choosing a curtain tape, pay attention to the type of folds it forms. The following types are popular:
- Pencil is a common type of gather in the form of repeating narrow, rounded folds. Tulle on tape is assembled mainly in this way.
- Columns are evenly spaced narrow folds.
- Buffs (wafer) are uneven folds that imitate a waffle surface.
- Butterfly - clear diamond-shaped figures formed by four laces.
- Bow folds are paired folds, the creases of which are directed in different directions.
- Counter folds - the folds are directed towards each other.
- Glasses - spectacular volumetric folds (can be filled), similar to a glass on a stem.
- Fan. When pulled together, beautiful folds are formed on the fabric, extending from a common point in the form of a fan.
The choice of drapery when designing curtains is influenced by the style of the room. In laconic interiors, simple solutions are appropriate: pencil, bow or counter folds. Pretentious styles correspond to original draperies: fan, glass, etc.