For those who have never done this before, it seems that there are no difficulties in such work; It’s not for nothing that they say that breaking is not building. However, hasty, careless dismantling of doors will cause a lot of trouble in the future. Not to mention the impossibility of reusing a sash or jamb with severe damage, you will have to deal with arranging the opening, restoring its geometry, strengthening and finishing. Especially when it comes to an interior partition (from gypsum plasterboard, plywood, cellular blocks).
Removing the door from its hinges
Removing a wooden interior structure from its hinges is easy if you know how. To do this you will need a mount. One of its edges needs to be slipped under the canvas to create a lever. Then you need to open it slightly and start pressing down on the top of the mount.
If the door leaf does not move, it means the hinges are rusty. They need to be treated with motor oil or use WD-40. When the canvas begins to move upward, you need to open it completely so that it does not rest against the top of the box.
Important! You need two or three people to remove old wooden panels. This is due to the large weight of the door leaf.
Differences in working with different types of structures
Certain differences in dismantling exist for a specific type of door:
- Sliding . Such doors operate on the principle of a compartment system. First, additional equipment is removed: automatic drive, closer or synchronizer. Then the stoppers located at the edges of the rail are removed. To do this, simply unscrew the bolts holding it. After removing the retaining elements, the canvas can be freely removed. All that remains is to remove the fasteners to remove the rail and dismantle the wooden beam, if it was installed.
- Swing . These are standard interior doors that can be dismantled in the usual way. First, the canvas is removed from the hinges, then the fittings or other elements holding the box are unscrewed. In some cases, you will have to knock down the plaster or use a grinder.
- Folding . A folding door is also called an accordion door or a book door. Dismantling such a structure is similar to working with a sliding structure. Therefore, first remove the fittings holding the canvas, and only after that remove the box.
If the door begins to sway, it means that the hardware holding the door leaf has become loose. Both dismantling and replacement must be carried out as soon as possible. During dismantling work, care must be taken to ensure that the swinging door does not accidentally fall on a worker.
Removing trim and sash
After removing the canvas, it is necessary to begin dismantling the trim and sash. To do this you will need a sharp ax and milk. You need to place the tip of the ax on the door frame so that the blade goes under the casing. You need to hammer the ax with a hammer and pull the handle towards you. The casing should come off the box.
You don't have to worry about old parts. Most often, they are in poor condition and are not suitable for reuse. Such actions must be done with all platbands.
Dismantling with preservation
Now let's look at the possibility of dismantling the structure while maintaining its performance qualities.
So:
- Place a nail puller or crowbar between the door leaf and the floor, and slightly lift the leaf; the hinges should begin to separate. If this does not happen, no matter how hard you try, then the elements will have to be lubricated with anti-corrosion spray and return to work after a while;
- The next stage is the dismantling of the platbands. Often these items are in very poor condition, so they are not preserved. Drive the ax between the box and the trim and press firmly on the handle. In the gap that appears, you can see the location of the nails. Now insert the pry bar into the slot and disconnect the element;
- After removing the trim, you can start working on the box. It may be difficult to pull out thick, rusty nails, but this can be done. Carefully inspect the rack; fastening points should be visible on the lower and upper parts. Step back 20 cm from the bottom and push the ax into the gap as deep as possible. Carefully move the element away from the wall - difficulties are likely to arise. As soon as the gap increases to a size that a nail puller can be inserted into it, dismantling will proceed very quickly. Both nails are pulled out at once, alternately. Once one rack is removed, all other elements can be removed without difficulty.
At the moment, there is no need to save the door frame, since similar structures are on sale in almost all hardware stores. But if it is important to you, and you are afraid to take on the dismantling yourself, then if you wish, you can always order the dismantling of the doors https://pro-expresspereezd.ru/, and experienced craftsmen will disassemble the structure while preserving it completely.
Advice! If the pillars are in good condition, there are no chips, cracks or rot, you can learn how to update the door frame with your own hands without disassembling the structure, and install a new door pillar in place of the old door leaf.
If the door was installed not so long ago and the fasteners are screws, then just pick up a screwdriver and unscrew all the fasteners. This design can be disassembled independently in less than an hour.
Removing the door frame
To dismantle the box you will need a hacksaw. With its help you need to saw through the frame on the left and right. The cutting height is about 80 cm from the floor. After the cut is made, you need to use a nail puller to tear the frame off the bars to which it is attached and gradually break it out of the doorway. If all the fasteners are torn off with a nail puller, this will be easy to do.
Advice! The cut can be made using a chainsaw. However, you should make sure that the chain does not go across the concrete wall.
What tools are needed?
To disassemble an interior door, you need to prepare the following tools:
- Hammer. Needed for leveling the opening and drilling holes for the anchor dowel.
- Drill. Used for drilling mounting holes, securing hinges, and screwing screws.
Before using this power tool, you need to make sure that the chuck is tightly secured inside the device.
If it is poorly secured, the drill may fly off during operation and damage the surface of the door leaf.
- Jigsaw. Performs wave cutting of platbands.
- Bulgarian. Carries out adjustment of platbands in case of severe deformation of the wall and the impossibility of correcting its curvature. Needed to adjust parts and elements when the verticality of the wall is highly distorted.
- Fraser. Helps with inserting hinges and door locks.
- Electric planer. Adjusts trims and platbands to the correct position.
You will need hand tools in the form of:
- hammer;
- ax;
- mounting slice;
- hacksaws;
- screwdrivers;
- pliers
Balcony door and interior door made of PVC
Plastic structures are installed on the balconies. This is due to the fact that PVC best withstands exposure to moisture, direct sunlight, and temperature changes. For dismantling a PVC model, the method used when disassembling a wooden structure is not suitable. Procedure:
- It is necessary to remove the protective caps from the hinges.
- It is necessary to close the door without lowering the handle.
- Using a hammer and screwdriver, carefully knock out the pin located in the top hinge. You need to knock it down. When the tip appears from below, you need to squeeze it with pliers and slowly pull it out of the loop.
- Tilt the door leaf towards you. At this moment it must be held firmly to prevent it from falling.
- Slowly lift the door up. The lower pin will pop out and the blade can be set aside.
If you need to perform reverse installation, you need to carry out the same sequence of actions, only in reverse order.
Why do this?
Interior doors require dismantling for several reasons.
- Firstly, several times during the periods of its operation it is necessary to carry out repair work at home (putting walls in order, plastering corners, making major repairs in the apartment).
This cannot but affect the door leaf, since changing the interior requires alterations to the appearance of the door structure itself. Important It is possible that the box will no longer correspond to the required dimensions or the hinges will protrude strongly in relation to the new walls with an updated finish. - Secondly, any product becomes unusable when it is used. Doors may become damaged if they are constantly opened/closed. To repair broken parts, you need to remove the box from its hinges and repair the necessary elements.
- Thirdly, the owner may want to replace the old structure with a new one. Renewal is usually carried out during major repairs and dismantling of the passage.
Entrance door
Entrance structures are made of metal and wood. They are fixed more securely than interior models. This makes dismantling more difficult. Disassembly of the structure is carried out depending on the material.
Steel structure
Such models are used in most new apartments or private houses. They provide better security. To replace a metal blade, you do not need to have additional skills. Procedure:
- First you need to knock down the plaster on the corners of the box.
- There should be mounting lugs underneath it. Through them, the box is secured to the concrete wall with anchor bolts. You need to try to unscrew them with a screwdriver or screwdriver.
- If you can’t unscrew the bolts using improvised means, you need to gouge them out with a hammer drill.
- It is necessary to remove the mounting foam that fills the space between the box and the wall.
- Remove the door leaf from the hinges, set it aside and pull out the frame.
It is better to do the work together. The metal model is heavy for one person.
Wooden or interior
Dismantling the wooden entrance model occurs in exactly the same way as interior structures. However, experienced finishers recommend starting to disassemble the box from the bottom threshold. You need to use a nail puller to remove all the nails that secure it. Remove the door frame from the opening.
When disassembling interior doors, you should pay special attention to the design of the hinges. If they are foldable and fixed with self-tapping screws, then it is enough to unscrew them with a Phillips screwdriver or a screwdriver. This way you can remove the canvas without much effort. Sliding doors are even easier to remove. They are fixed on guide rails and can be removed by simply lifting them up.
When using a screwdriver, you need to turn on a reduced speed so as not to damage the thread.
In conclusion, we can say that anyone can disassemble the door structure. It is important to know the sequence of actions. It is advisable to carry out the work with partners so as not to cause harm to yourself.
Preparing for work
Before dismantling, the condition of the interior door is assessed and it is determined whether it can be reinstalled. In any case, the work will have to be carried out carefully so as not to damage the walls.
Dismantling is a dusty and dirty job, so all fragile objects, such as mirrors, are removed from the room, and the floor and remaining furniture are covered with thick plastic film.
The distance near the opening is cleared of furniture. Dismantling involves the use of power tools, and additional pieces of furniture will simply get in the way. It is better to carry out the work not alone, but with an assistant: the box or canvas can be heavy, and removing it alone will be problematic.
How to remove a door lock?
- Once the rim lock is installed, it is easy to remove.
The mounting bolts are removed from both sides of the mechanism and then removed without additional tools. If the door has a mortise lock, then first the disc, consisting of two parts, is unscrewed. Two mounting screws will appear after turning it 30 degrees. This simple manipulation makes it easy to remove the lock from the canvas. Although this design is rare, this scheme of action helps to quickly remove the lock. - You can dismantle it with a rod. The lock has a small hole on the button side. A round rod is inserted there, and then the handle is removed. A solid disk opens. When scrolling it, you must be careful, as you can damage the surface.
- If the fastening bolts are located in the area where the crossbars are located, then first unscrew the bolts, and then release and remove the locking mechanism. When moving it tightly, the edges are lubricated with sunflower oil.
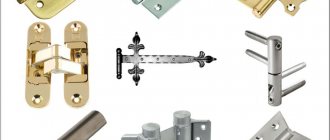
Removing hardware
Dismantling the hardware begins with removing the lock. The Guardian, KALE or their analogues are mounted primarily on self-tapping screws screwed in from the inside (where the tongue is located). After unscrewing the fasteners, you need to remove the secret part, the screw from which is hidden in the hole at the end (on the entrance doors).
Some locks have vertical bolts that prevent you from immediately removing the mechanism. If available, use tweezers or another thin but strong object and pry the bolts to compress them and pull out the lock body. Don't forget to remove the retaining ring and washer.
After dismantling the core and handles, the inner part is removed along with the locking bolts (from the end). The core is secured with a long vertical screw, accessible from the end of the lock. To dismantle it, you may need to turn the key in the keyhole so that the tongue takes the desired position. After unscrewing the decorative trims, use pliers to pull the handles by the metal cylinder that holds them. In some models, they are fixed on a thread, unscrewing from the base counterclockwise.
The easiest way is to remove the door peephole from the hardware. Its body can be removed by pulling the outer ring from inside the room and then pushing it out.
Ordering work from a master
If you are not sure that you can dismantle an iron entrance or interior door, then it is recommended to contact specialized companies that work in this area. Professional workers focus on dismantling different models of door structures. As a rule, the duration of dismantling is from 30 minutes to 1 hour.
If you plan to leave the doors intact, the price can range from 3,000 rubles. In case of using a sloppy method, the cost is set at 1800 rubles. The process of work involves removing the old dismantling depends on a careful or other method of work. Experienced workers should have tools with them, and upon completion of work, remove all debris and remove parts.
Dismantling the door frame and leaf can be done using “clean” and “sloppy” methods. The work process requires care to properly remove all parts and fasteners.
During repairs, when replacing doors, the frame is dismantled. The actions depend on the installed structure. If you need to keep the block intact, all work is done carefully. When the old door and frame are thrown away, completely different methods are used. Dismantling is not considered a simple job. To get a smooth opening for the new door frame, the old structure must be removed correctly.
Removing door frames
How to install a supporting frame
Installation of a pre-assembled door frame into the opening prepared for it is the most critical stage of work, on which the quality and service life of the door leaf will depend. In order to obtain the desired result, all work is carried out in accordance with certain stages:
- The finished structure is installed in the doorway so that an installation gap is formed on all 3 sides, and one of the edges of the frame is in plane with the wall.
- Next, the supporting frame is verified vertically and horizontally, as well as to ensure that the orthogonality of the angles at the junction of the racks and the lintel is maintained.
- If the structure has assumed the design position, wedges are driven into the mounting gaps until it is firmly fixed in the opening. Considering that the door threshold is not always arranged, an incomplete rectangle may lose its shape due to the spacer force. In such cases, you should use a mounting crossbar at the level of the bottom of the box.
Rice. 11. Arrangement of wedges
- After driving the wedges, you should once again make sure that the geometry of the structure is not violated. Thus, it is necessary to check the verticality of the racks, compliance with all 4 angles, as well as the straightness of the vertical structural elements, since when wedging they can become deformed, and it will no longer be possible to place the door in such a frame.
- If the geometry turns out to be broken, then it is worth adding 1–2 wooden crossbars along the height of the structure to compensate for deformations and create reverse force.
- If the structure is installed in a load-bearing wall made of stone materials, it must be fixed with self-tapping dowels, available in a wide range at any hardware store. The master drills holes along the height of the stand at a distance of 50 cm from each other, after which dowels with screws are inserted into them through the vertical element.
- Next, you will need a screwdriver to secure the hardware into the body of the wall. To ensure that there is no visible part of the screw head on the surface of the stand, before screwing it in, you should select a conical recess to a depth of 2 - 3 mm from the visible surface of the box. This action is performed with a drill with a thick drill, the diameter of which corresponds to the dimensions of the screw head.
- In order to give stability to the entire structure, before installing fasteners, wooden plugs should be installed in the mounting gap, which will add additional rigidity and prevent the elements from deforming.
- Upon completion of the fixation, the installation gaps must be filled with construction foam and the opening must be left in this state for several hours or a day.
Rice. 12. Filling with construction foam
- After the foam has hardened, the spacer structure must be dismantled, and the excess foam is carefully cut off with a construction knife.
- At the final stage, all that remains is to install plastic decorative plugs in order to hide the fastening elements, after which you can begin installing the door leaf, additional strips and trims.
Some novice craftsmen make mistakes when installing skirting boards, trying to bring these elements to the door frame. This decision is incorrect, and the plinth is installed only after installing the “cash-out”.
After completing the installation of the box, the craftsman should hang the canvas element and test it in action. If installed correctly, the blade cannot open or close under the influence of gravity, which indicates misalignment. In addition, the distance from the clean floor to the door leaf must be constant throughout the entire opening amplitude, and when closing the door must enter the rebate element without effort, followed by a latch.
Rice. 13. Installation result
Replacing cracked glass
Cracked or simply outdated cloudy glass is not difficult to replace with your own hands. In its place, you can install a new one, for example, matte or transparent, tinted or with a sandblasted pattern, embossed or smooth, colored or plain.
Note! If the glass has a thickness of 10 mm (triplex), then replacing it is impractical. Firstly, it is very expensive, and secondly, it is almost impossible for an inexperienced person to cope with such a task on their own.
Case 1. Glass fixed with glazing beads
The easiest way is to replace glass secured with glazing beads. It is enough to dismantle them and then remove the glass by hand. We arm ourselves with pliers and a metal spatula. We pry up the glazing bead with a spatula, and use pliers to carefully pull out the nails.
Use a chisel or knife to clean the glass bed. We take measurements. If the opening is non-standard, we make a figured pattern from cardboard. At the same time, we take into account that the size of the glass should be slightly smaller than the opening. We wipe the glass with a soapy sponge, dry it with a clean rag, transfer the design from the pattern and cut it.
Attention! Wear gloves to avoid cutting your hands. Carry out work on a flat surface with a working glass cutter.
We treat the perimeter of the glass opening with sealant, after which we insert the cut piece, saw new glazing beads with a jigsaw and fasten them with thin nails.
Case 2. The glass has a hidden fixation
If the glass has a hidden fixation, you will have to disassemble the door, unscrewing the bolts, removing the old glass and inserting the new one. Silicone cannot be used in this case, since it will be impossible to replace it later. A significant disadvantage of replacing glass in such doors is that after assembly, the panel may lose its geometry and will require editing with a plane.
By the way, instead of glass, you can use an acrylic unbreakable mirror. It is quite light, durable, highly decorative and easy to cut.
Find out about the 10 best options for making door decor with your own hands from our new article.
Features of installing a box with a threshold
There is a significant difference between installing framed interior doors for bathrooms: here frames must be installed together with thresholds. This type of box is different in that errors made during assembly cannot be eliminated during installation, so before installing the box with the threshold, be sure to check that the diagonal dimensions match. The installation of this box follows the same principle and procedure as described above. The only clarification: you will have to fix the threshold. It is on the threshold of the box that there will be constant pressure both from the box and from the residents of the house. It can be secured to the floor using self-tapping screws and dowels, and the attachment point can be hidden using a plug.
Useful tips and mistakes to avoid
Due attention should be paid to fastening the door frame on the side where the door is hung. You should not increase the number of screws or dowels more than two, because the entire load will be transferred through the hinges. No matter how many screws are attached between them, they will not change anything. There will only be extra holes in the box, sometimes very noticeable. Fastening hardware can be hidden. It is only necessary that they are securely installed. Even the most minor fluctuations must be corrected immediately.
The fact is that foam holds lateral load well, but is practically useless when compressed. It is not a problem if some of the fasteners are longer than necessary and come out slightly on the wrong side. This will not affect the strength of the fastening. If no cracks have formed on the frame, then everything is in order, all that remains is to slightly disguise the defect if it catches your eye. However, it may not be visible at all.
If the box is made of natural wood, then the screws are used with large pitches, and if they are made of microwood fiber, with small pitches.
Do-it-yourself door analysis
Entrance doors serve as the main protection of our home, in addition to providing sound insulation and thermal insulation of the room.
Situations arise when we need to replace, repair or upgrade some door parts. After all, technology does not stand still, and you always want to protect yourself with modern solutions. In most cases, to perform manipulations with the canvas, you have to disassemble the entire structure along with dismantling the fittings. Before disassembling the door, we recommend that you read this article and use the tips, instructions and useful tips described in it.
Video description
If you are wondering whether it is possible to restore interior doors that are over a hundred years old, watch this video:
Restoring cracked panel doors
If the panels dangle in the grooves of the main planks, the canvas will have to be disassembled and reassembled and glued.
The panels are held in place by a tongue and groove joint lubricated with glue, and are sometimes tightened with dowels or self-tapping screws, the caps of which are closed with wooden plugs. To restore the integrity of the door, you need to do the following:
- The removed canvas is placed on the edge, the plugs are removed and the screws are unscrewed;
- separate the frame elements and inserts;
Cost of dismantling and installation
Not everyone has the necessary tools and practical skills to independently dismantle old doors and install new ones.
In this case, it would be logical to resort to the help of professionals. Dismantling, as a separate service, will be inexpensive. On average prices start from:
In most cases, owners of houses and apartments prefer to order a comprehensive service, which includes dismantling and installing a new door leaf.
The cost of services depends on several factors:
Also, the cost of dismantling and reinstallation depends on the type of interior door chosen, the density of the walls and locking hardware.
You can easily dismantle the interior door yourself. The main thing is to carry out all work carefully and with minimal damage to the walls. The complexity of installing a new door leaf directly depends on this.
Source
Door block design
The interior door can be made in two versions: with and without a door frame. The second case involves installing the canvas into an old or simply ready-made frame, the first involves installing the entire block in the doorway.
The first option is preferable for many reasons.
- Deformation - the old box, even if the appearance was preserved, was deformed to some extent. The “native” canvas underwent changes along with her, which means that it somehow compensated. The new one does not contain suitable changes, and therefore it simply will not fit into the old door frame.
- Dimensions - opening parameters are rarely standard, especially after renovation. When installing a door, even a specially made one, difficulties arise. Fitting the box to the opening, and then to the canvas, means prolonging the installation work at least three times, and without guaranteeing the result.
- Load – the door frame, leaf, hinges and lock in the block are designed for certain loads. If the structure was manufactured as a single module, then the load distribution has already been calculated by the manufacturer and implemented. Otherwise, the owner will have to do it.
Such high demands are placed mainly on swing systems. Sliding structures are somewhat easier to install with your own hands, since, firstly, they are most often installed on the opening, and secondly, they are much more standardized.
Disassembling a door handle (round, with a latch, push-button)
Stationary handles on interior doors can be disassembled with a screwdriver. First, the screw on the main part must be unscrewed, and then the handle is removed. Round knobs have the simplest structure, so they are easy to unscrew. The screws in such models are unscrewed on one side.
Sometimes it happens that a stationary handle is supplemented with a mechanical latch. Installation in this case occurs according to the following scheme: the mounting screws are unscrewed, and the decorative trims are immediately removed. In this case, the rod with the cap must be removed from the metal jumper. On one side, remove the handle, and on the other, pull out the tetrahedral jumper.
The rotary handles have a latch. The fittings are simple, consisting of a knob that rotates around its axis and a halyard latch or bolt. Dismantling is carried out according to the following points:
- All decorative overlays are removed from the canvas.
- The sharp end of an awl or nail is carefully inserted into the technological hole on the side.
- The pin moves completely forward from its usual place.
- The handle and cap are removable.
- The latch is pryed off and the flange, which serves as a decorative element in the structure, is removed.
Attention
Dismantling the push fittings begins with removing the lining with the lever. To remove this part, press the rotary lock stopper, pull the handle and the axle at the same time. To quickly carry out this action, use a nail or awl.
After this, proceed according to the following scheme:
- unscrew all fixing parts of the handle;
- remove the tetrahedral rod;
- remove the second pad;
- the remaining parts of the handle are removed from the structure.
Final stage
The final stage includes the installation of platbands on the door frame. They give the door block an aesthetic appearance and hide minor installation flaws.
Completing the installation of the interior door
First of all, the length of the casing is determined. To do this, you can use the size table, or determine it yourself by measuring the length and width of the structure at the extreme point of the box. To join the platbands, it is necessary to make a side cut at an angle of 45°. You can use a miter box (a special device that allows you to cut wood products according to specified angle parameters) or a jigsaw, having previously measured the required angle with a protractor.
Next, each of the side trims is nailed to the box with two nails (bottom and middle). The upper horizontal casing is measured and sawed at an angle of 45°. After this, all 3 planks are finally nailed.
Advice. To ensure that the nails do not peek out from the platband, they must be recessed. Using a drill with a diameter corresponding to the size of the nail head, cut a recess of 1-1.5 mm.
Installing new doors - instructions
Interior doors are dismantled for the subsequent installation of new ones.
You can do this yourself if you have the necessary tools and work skills. If dismantling was carried out for the purpose of subsequently installing a new product in the same place, all work is carried out extremely carefully. The platbands are removed with a sharp chisel and pliers. The chisel is inserted into the gap between the platband and the wall in the place where the nail holds the structure. It is carefully pushed out and removed with pliers. A similar procedure is carried out with all the nails that hold the box.
Next, the box is removed from the opening and the walls are cleaned of foam residues. After this, the opening will be ready for installing a new interior door.
how to properly apply bark beetle to a wall in an apartment video
After this, they proceed to the direct installation of the new door:
At the final stage of installation, a handle is attached to the installed door. If you do not have practical skills for carrying out such work, it is better to attach the simplest round handle without a lock or latch.
If you do not have practical skills in dismantling and installing new doors, it is better to entrust this work to professionals. Otherwise, there is a high risk of damage to the wall, which will significantly complicate further installation.