I'm tired of the dust collector at home. The decision was made to do something special. The essence of the project is to develop a computer desk - aesthetics.
Now step by step:
The most ordinary and fairly cheap table was purchased for $35.
This table formed the basis of the future table.
Step 1: Cutting the legs.
The legs of this table are made at a slight angle. The cutting was done with a grinder.
Even though laptops are becoming more powerful, there are some tasks they can't handle. Gamers, graphic designers, and video content creators prefer to work on desktop computers. But creative people want to have something truly original. For example, a built-in PC in a desk can become not only a room decoration, but also a functional tool. With proper organization, it will be possible to significantly increase the technical capabilities of the computer.
Features and advantages of the design
Traditionally, the system unit is installed under a computer desk. But this takes up a lot of free space; a lot of dust gets inside through the ventilation holes, which negatively affects the operation of the equipment. The decision to move all the components inside the table, making a glass tabletop, has several reasons for its popularity:
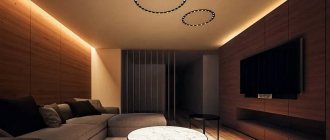
- The design is aesthetically attractive. The transparent coating visually dissolves the work surface. Recessed lighting can serve as an additional light source.
- Space saving. Non-standard placement of the system unit frees up space on the floor. One piece of furniture simultaneously solves several problems.
- Protection of mechanisms. When placed on the floor, a lot of dust penetrates into the interior of the unit through the ventilation holes, which impairs functionality. With regular cleaning, the built-in computer has less contact with external pollutants.
- Extended capabilities. PCs combined with a desk can be expanded almost unlimitedly. You can easily install an original custom cooling system and additional equipment.
A table with built-in computer components under glass will be an excellent addition to an interior in the styles of hi-tech, minimalism, fusion, and constructivism.
There are no ready-made versions of table-system units on the market. They are made to order or assembled yourself. The last option allows you to save a lot. The owner personally selects those components that best meet his needs. In addition, it is easy to make changes at almost any stage.
Original models of tables with a built-in computer
In recent years, such computer desks have become increasingly popular. Manufacturers are in no hurry to launch mass production of embedded system units, but talented craftsmen create different versions of original designs with their own hands.
Built-in computer.
Step-by-step manufacturing algorithm
First you need to develop a design project. If you have no experience in drawing up furniture drawings, you can use ready-made options. Below is a master class that will greatly facilitate self-assembly. Necessary materials:
- system unit;
- table of the required size;
- tempered glass (can be replaced with plexiglass);
- cooler (6 pcs.);
- speakers;
- LED Strip Light;
- necessary wires;
- carbon sheets;
- voltage regulator;
- jigsaw;
- sandpaper;
- dye;
- LED strip or LEDs;
- wood glue
- Creating a computer desk begins with removing the existing tabletop. We measure horizontally twice 10 cm - these are the blanks for the top and bottom panels. The same measurements are carried out vertically on the remaining surface. These strips will be attached to the sides.
- In the existing side parts of the table, three holes are drilled for coolers 80 x 80 with the same distance from each other. The edges must be sanded to remove any roughness.
- If desired, the side walls can be cut at an angle, the narrow part should be located at the bottom.
- We glue the panels cut from the tabletop. Everything except the top one. We fence off the cable channel with a width of up to 20 cm using a grid.
- Use a vacuum cleaner to remove all debris. Then all surfaces are painted. It is better to choose matte black. It will take about a day for the paint to dry completely. Afterwards you can cover it with carbon fiber.
- We fix the LED strip around the perimeter. We install and connect coolers. If necessary, the video card and motherboard are also equipped with backlighting. To prevent the glass table from tiring your eyes, all wiring is connected to the power button, which is displayed on the side panel.
- The speakers are inserted into the previously prepared holes. The contents of the system unit are moved into the internal space. The functionality of all systems is checked. All excess wires are removed into the cable channel.
- The necessary technical holes are made in the front of the table.
- The glass is installed using transparent glue.
Tables combined with system units are a rarity. This is not mass production, so finding drawings is extremely difficult.
The table-system unit, created by yourself, has no analogues. You should be very careful when placing your PC contents. If you do not have the necessary skills, it is better to contact a specialist who will help you correctly connect and fix all the parts.
How to make it yourself
Once all the requirements for the table have been determined, they move on to drawing and drafting the drawing. The diagram indicates the height, width, length of the product, as well as the place where the system unit will be located inside the structure. The layout is drawn in detail, the connection points and the location of the elements are noted. Further work consists of successive stages:
- On the table, which is taken as a basis, the board is removed. Cut two long strips 10 cm wide and two short strips.
- Three round holes with a diameter of 8 cm are cut in the upper part of the side panels. The perforations should be located at the same distance from each other.
- The edges of the holes are processed with sandpaper of different grain sizes so that there are no nicks or roughness on them.
- If necessary, the side walls are cut at an angle so that the taper is at the bottom of the panels.
- The cut-out tabletop strips are glued to the base. The cable channel is insulated with a 20 cm mesh.
- The required number of technical holes for installing buttons, switches and speakers is cut out in the front panel of the table.
- All debris is carefully removed from the surface. To do this, it is recommended to use a vacuum cleaner so that no dust particles remain inside the table.
- The PC cooling system is placed in the holes cut in the sides - three coolers on each side.
- On one of the side walls there is a button to turn on the backlight.
- Install speakers and all other office equipment components. The wiring is hidden in the cable channels.
- After completing the assembly of the system unit, check how the PC works on the table.
- The new plexiglass cover is cut to the size of the old table and glued to the table frame.
The most crucial moment is assembling the system unit. If you do not have the necessary skills in this matter, it is better to contact a specialist.
Features and advantages of the design
Traditionally, the system unit is installed under a computer desk. But this takes up a lot of free space; a lot of dust gets inside through the ventilation holes, which negatively affects the operation of the equipment. The decision to move all the components inside the table, making a glass tabletop, has several reasons for its popularity:
- The design is aesthetically attractive. The transparent coating visually dissolves the work surface. Recessed lighting can serve as an additional light source.
- Space saving. Non-standard placement of the system unit frees up space on the floor. One piece of furniture simultaneously solves several problems.
- Protection of mechanisms. When placed on the floor, a lot of dust penetrates into the interior of the unit through the ventilation holes, which impairs functionality. With regular cleaning, the built-in computer has less contact with external pollutants.
- Extended capabilities. PCs combined with a desk can be expanded almost unlimitedly. You can easily install an original custom cooling system and additional equipment.
A table with built-in computer components under glass will be an excellent addition to an interior in the styles of hi-tech, minimalism, fusion, and constructivism.
There are no ready-made versions of table-system units on the market. They are made to order or assembled yourself. The last option allows you to save a lot. The owner personally selects those components that best meet his needs. In addition, it is easy to make changes at almost any stage.
Why Monitor Position Matters
If you fall into that latter group, this may not be the first thing that comes to mind, but the placement of your computer screen has a lot of physiological significance.
Eye strain, carpal tunnel syndrome, neck pain and postural problems are just some of the problems that can arise from poor posture. This is why proper workplace ergonomics is so important.
Fortunately, these problems can be avoided with a few simple techniques.
Manufacturing materials and consumables
The basis for built-in structures is most often taken from a factory desk or computer desk. The first option is preferable because the working surface is larger. Another plus is that fewer modifications will be required due to the presence of side walls, into which it is convenient to integrate a cooling system and speakers. You can also find table options that have a metal frame completely covered with plexiglass.
What may be required for production:
- plexiglass in two versions - for the back wall, bottom and panels with increased load it is better to choose sheets with a thickness of 10 mm, and for partitions 5 mm is enough;
- self-tapping screws and a heat gun for fastening parts;
- jigsaw;
- drill;
- screwdriver;
- LEDs or LED strip.
Step-by-step manufacturing algorithm
First you need to develop a design project. If you have no experience in drawing up furniture drawings, you can use ready-made options. Below is a master class that will greatly facilitate self-assembly. Necessary materials:
- system unit;
- table of the required size;
- tempered glass (can be replaced with plexiglass);
- cooler (6 pcs.);
- speakers;
- LED Strip Light;
- necessary wires;
- carbon sheets;
- voltage regulator;
- jigsaw;
- sandpaper;
- dye;
- LED strip or LEDs;
- wood glue
- Creating a computer desk begins with removing the existing tabletop. We measure horizontally twice 10 cm - these are the blanks for the top and bottom panels. The same measurements are carried out vertically on the remaining surface. These strips will be attached to the sides.
- In the existing side parts of the table, three holes are drilled for coolers 80 x 80 with the same distance from each other. The edges must be sanded to remove any roughness.
- If desired, the side walls can be cut at an angle, the narrow part should be located at the bottom.
- We glue the panels cut from the tabletop. Everything except the top one. We fence off the cable channel with a width of up to 20 cm using a grid.
- Use a vacuum cleaner to remove all debris. Then all surfaces are painted. It is better to choose matte black. It will take about a day for the paint to dry completely. Afterwards you can cover it with carbon fiber.
- We fix the LED strip around the perimeter. We install and connect coolers. If necessary, the video card and motherboard are also equipped with backlighting. To prevent the glass table from tiring your eyes, all wiring is connected to the power button, which is displayed on the side panel.
- The speakers are inserted into the previously prepared holes. The contents of the system unit are moved into the internal space. The functionality of all systems is checked. All excess wires are removed into the cable channel.
- The necessary technical holes are made in the front of the table.
- The glass is installed using transparent glue.
Tables combined with system units are a rarity. This is not mass production, so finding drawings is extremely difficult.
The table-system unit, created by yourself, has no analogues. You should be very careful when placing your PC contents. If you do not have the necessary skills, it is better to contact a specialist who will help you correctly connect and fix all the parts.
What factors to consider when placing your monitor?
Screen height
When it comes to an acceptable screen position, it may vary slightly from person to person. This depends, among other things, on his height. Generally speaking, any screen position that forces you to tilt your chin or otherwise bend or tilt any part of your body is incorrect. These postures can not only cause the aforementioned tension, discomfort, and pain, but they can also affect your productivity.
Distance to screen
Viewing distance directly depends on how far you are from the computer screen. Too far and you won't be able to read freely. Too close and you'll have to deal with eye strain. When it comes to effective positioning, the key is to find a happy medium .
Moreover, distance is not only a problem for the eyes. If you are too close or too far away, you may subconsciously begin to lean back or forward, or stretch your arms too far. The fact is that a small miscalculation in the distance to the screen can ruin all your ergonomic efforts.
To set the ideal distance to the screen , first pay attention to accommodation and convergence of the eyes, which refer to the involuntary functions of the eyes when they are too close to an object. This is what causes eye strain. To avoid this and other similar problems, the solution is quite simple. When sitting in front of a computer screen, simply place the monitor at a length equal to the length of your fully extended arm.
Since computer screen sizes vary, be sure to double-check that your monitor is not too close or too far away. If done correctly, you will be able to see the entire screen and work comfortably without straining your eyes or moving any part of your body.
Viewing Angle
Not only should your computer screen be positioned directly in front of you, but it's also important to know what angle you're viewing it from. Place your computer screen at a bad angle for long enough and you could experience neck pain and possibly even injure it.
When it comes down to it, the angle of the screen more or less matches its height in relation to the user. For example, a person who is 186 cm tall should not have the screen in the same position as a person who is 175 cm tall.
In terms of numbers, your screen should be positioned anywhere from eye level to thirty degrees below your line of sight . This range is determined based on the fact that our eyes naturally stretch forward and downward when at rest.
With this in mind, the way to determine the optimal angle without breaking out a protractor is very simple. When you look at a computer monitor, your eyes should be at rest at the level of the browser's address bar. If this is not the case and you can see the trash can or the top toolbar, you should adjust the angle at which you are looking at the screen.
Ergonomic monitor stand
Ergonomic monitor stands are workplace accessories that aim to take the guesswork out of proper ergonomic screen placement. Thanks to the extendable and tilting bracket, angle, distance and glare issues are quickly resolved.
Ergonomic monitor stands are designed to provide ergonomic comfort to most monitor owners. Using a monitor mount like this will provide a wide range of height and angle adjustments, helping you more easily find the best position for your computer screen.
Dual Monitor Arm
Dual monitor arms, compared to basic ergonomic monitor stands, allow you to place two screens instead of one. With all the same benefits as ergonomic monitor stands, the eponymous dual aspect of these monitor arms is really what makes it interesting.
at least two monitors has recently become increasingly common . Dual monitoring provides the user with the same user experience as a single ultra-wide monitor. As the trend takes hold, research shows that this approach leads to increased user productivity.
From an ergonomics perspective, dual-monitor setups should be treated the same as their single-monitor counterparts— proper placement, spacing, and angle still matter .
Generally speaking, the most important factor in determining proper dual screen ergonomics has to do with the ratio of usage between the two monitors. Those who use both screens equally should treat them the same as a single monitor, with both positioned straight and at arm's length.
On the other hand, those who use one monitor significantly more than the other should pay more attention to the main monitor. A secondary monitor should follow the same rules, but at an angle that favors your dominant eye.