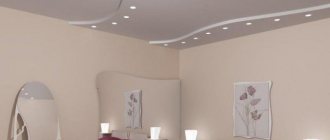
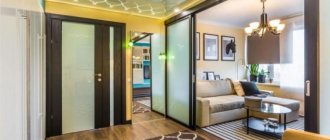
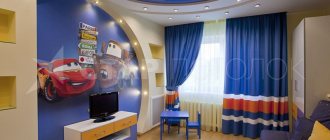
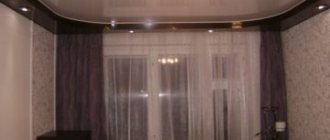
In recent years, suspended ceilings, due to their diversity, quick and easy installation, as well as low cost, have replaced other types of ceiling coverings. The canvas can be of any color, with drawings and any lighting fixtures. There is no need to get rid of old material, level the surface, and then paint it white. The most difficult thing is the process of choosing the required shade and design of the canvas.
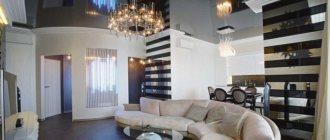
Ceiling decoration in the living room Source design-homes.ru
Lighting that complements the suspended ceiling allows you to zone the room, expand the space, and also fill it with an extraordinary atmosphere.
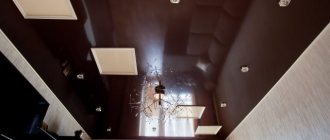
Stretch ceiling with lighting in the living room Source kazanpotolki.ru
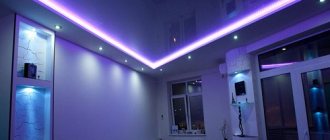
Professionals can easily turn even the most daring design ideas into reality. To create unique samples, a variety of fabrics, shades, shapes can be used, stretch ceiling material can be combined with plasterboard parts, and lighting fixtures of various shapes and sizes can be installed to decorate the surface. LED strip allows you to make the design of the ceiling interesting and unusual.
LED strip on the ceiling Source homeli.ru
LED lighting for stretch ceilings
Stretch ceilings with lighting can be installed in almost any room; they are not exposed to moisture and do not burn.
The installation process consists of installing a frame around the perimeter, onto which a film or special textile material is stretched. Lighting elements are attached to the frame in a pre-planned order.
During operation, a minimal amount of dust and dirt remains; all work takes only a few hours.
An LED strip is a flexible strip of guides that conduct electricity and LEDs are soldered to it. Its length can be arbitrary, due to separation or connection of the joints of individual elements.
LED lamps help to significantly save energy, which is another advantage. Stronger and brighter LED contour lighting can be used as a separate lighting element.
Such lighting, unlike light bulbs, has a number of advantages:
- Profitability;
- You can adjust the brightness using a power regulator (dimmer);
- The angle of inclination determines the angle of light scattering;
- Goes well with suspended ceiling lighting.
There are various modifications for recessed ceiling lights.
Principle of operation
a 0.2 mm dielectric is applied to the flexible tape, contacts with LEDs are fixed at the same distance, resistors are installed that limit the energy consumed - this is LED backlighting.
Each LED strip consists of modules of the same length (up to 10 cm). Sections 5 meters long are rolled into snails (into coils), after stopping points are made at a certain distance, the chain is cut into them. Often, double-sided tape is applied to the back of LED modules, which greatly simplifies installation. LED lighting requires constant current to operate. Available in black and white polychrome LED strips.
How to choose LED strip
This kind of lighting is the most popular, and if you choose it correctly, the suspended ceiling will delight you for many years and will not cause any trouble. To choose the appropriate type of LED strip, you need to know:
Location of LED strips
Indoors, on the terrace or in the lounge area, in a humid environment. Today, powerful LED strips are already used, so it is advisable and desirable to think about the need to install LED strips on a substrate using aluminum profiles.
Luminosity (luminous flux in lumens)
Low brightness - LED strips 4.8 W/m, suitable for design lighting, lighting of stairs, attics, suspended ceilings in rooms rarely used in the evenings.
Average brightness - LED strips with a power of 9.6 W, 10.8 W per 1 m for additional lighting of the bathroom, illumination of the suspended ceiling near the mirror, above the kitchen island.
High luminosity - LED strips completely replace, for example, fluorescent lamps.
- These are LED strips with a power of 12W, 14.4W, 16W.
- They are suitable for creating a continuous line of light, for places with high illumination and the main lighting in the room, such as the kitchen, bathroom, corridor.
- LED strips can be dimmed and thus adjust the brightness, so there is no need to worry about choosing more light, you can freely reduce the intensity of the strip using suitable controls.
Ultra-high brightness - LED strips with a power of 18 W, from 25 W to 33 W / 1 m. LED strips here are both 12V and now also 24V. Powerful 24V LED strips are one of the latest developments and contain the most modern microcircuits.
At 24V, you make better use of the LED chips' parameters and increase efficiency, expressed in lumens per watt, by 28%. Such strips are especially suitable for special applications such as the main lighting of linear luminaires.
LED strip light color:
- Cool white 6000K. Built for work environments;
- Neutral white 4000K. Designed for work, reading, office, under kitchen, wherever you are used to fluorescent lights;
- Warm white 2700K. The color of the light creates a pleasant, calm environment. Suitable for warm tones in the house, like wood;
- Red, yellow, blue, green. For an effective children's, music home studio;
- RGB. A combination of colors in one ribbon. Use the remote control to set one color - blue, green, purple and various color transitions, or you can choose from 120 color mixing programs.
By combining different LED strips with fiber optic lighting, you can achieve a unique lighting solution for a stretch ceiling that fully corresponds to the ideas of the owner of the room.
Location of lamps on the ceiling
The placement of lamps for each room is developed separately. It is necessary to take into account the geometry of the room, the location of windows, and the needs of different zones in the room. And all this should look beautiful. In general, this is a rather difficult task and can only be selected specifically according to the location.
Layout diagrams for chandeliers and spotlights around on a suspended or suspended ceiling
The main lighting placement options include a chandelier in the center. Spots are selected in the same style or neutral ones that do not attract attention.
In some interiors, chandeliers are not used (in small corridors, bathrooms, etc.). In this case, the number of necessary lamps is calculated using the above formula and can only be adjusted upward, otherwise it will be dark. Some examples are shown schematically in the photo below.
Illumination schemes from spotlights
As you understand, the process is creative, but there are certain recommendations for the placement of lamps on the ceiling for each room. These are not rules and, if desired, they can be broken, but they are formulated on the basis of experience, so there is a rational grain in them.
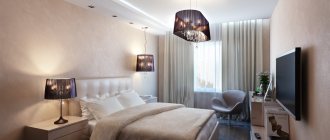
In the bedroom
In the bedroom, the atmosphere should be conducive to relaxation and bright light is usually not necessary. It should be soft, unobtrusive, warm. Therefore, choose lamps that produce light that is slightly yellowish, but not bright white or with a blue tint.
Fancy curls in one of the corners. An oval is often used. A combination of different types of lighting.
Chandelier in the center, square spotlights lined up along the wall
The placement of lamps on the ceiling in the bedroom is often made in the form of a circle or oval. Sometimes the spots are lined up in a straight line along the wall opposite the bed - if there is a TV on it. For a laconic design in a modern style, in the style of minimalism or hi-tech, a classic scheme is suitable - a chandelier in the center, spotlights lined up along the long walls.
In the living room
The living room requires multiple lighting options. At some moments it should be bright, at others - muted, sometimes, in general, twilight is required. All this can be realized using built-in or surface-mounted spotlights. As already said, they are divided into groups and connected to different switch keys. In other situations, a dimmer is installed that changes the brightness of the lamps.
If there are two zones in the living room, their separation can be emphasized with different lighting. You can choose not only different shaped lamp installation schemes, but the devices themselves can be different and produce light streams of different shapes.
Different lighting emphasizes zoning
If we talk about which arrangement of lamps on the ceiling to choose, it is largely dictated by the general style of decoration of the premises. For romantic styles, ovals, circles, and winding lines are more appropriate; for more rigid styles - modern, high-tech, minimalism - a linear arrangement is better, but along the walls, in the form of the letter X or something else - it depends on the situation.
Another example of zoning using lighting For strict styles, it is better to select a linear arrangement of lamps on the ceiling
Complex round shapes are suitable for spacious rooms. In a small area they will “crush” and clutter the interior
To emphasize the shape of the room, you can arrange the lighting on the ceiling in squares. The center of this interior is a sofa, which is emphasized by the composition on the ceiling
Another piece of advice: in small rooms you should not implement overly complex spot installation schemes. They are good in a large and spacious room. If it's small, it's better to choose a simpler option. Nested circles, ovals or squares will help to visually raise the ceiling a little. The effect will be enhanced if you use slightly smaller spotlights in the middle than on the outer perimeter.
Children's
A children's room is a rather difficult room to decorate, since it will require even more diverse lighting. The child will need to study and bright light is required in this area. There is also a play area, where the lighting should also be sufficient, but a lot of light is not always needed. And the third degree of illumination is when the child is getting ready for bed. At this time, dim soft light is required. This is a difficult task that you will have to solve when choosing the location of lamps on the ceiling for a children's room.
Ceiling lamps in the nursery should provide enough light. Most often, if the ceiling has two tiers or more, recessed lamps are placed along the edge of the “second tier”, and a chandelier is installed in the center of the first
An interesting option with spots along the perimeter of the ceiling. Multi-zone lighting, and even using lamps of different sizes and power. With such a layout of lamps on the ceiling, there are at least three options for the degree of illumination
If you plan to have a ceiling of two or more tiers, it is logical to place spotlights along the border of the two tiers. It looks quite organic. If the ceiling is flat, you will have to choose from existing schemes or come up with your own.
Kitchen
The placement of lamps on a suspended ceiling in the kitchen follows the same rules - in some areas the lighting should be brighter. In this case, an island of bright light is usually placed above the table. Here you can hang a chandelier (or even several chandeliers) on long cords directly above the table.
In the kitchen, you can hang a chandelier above the dining table, and illuminate the rest of the area with built-in lamps
The second most common option is that the line for installing spotlights on the ceiling follows the contours of the kitchen unit. Only in this case should the lamps be moved 15-20 centimeters deep into the room from the edge of the furniture. Then the light will be scattered more evenly.
Placing spots along kitchen cabinets is a logical step
In general, the choice of placement of lamps on the ceiling here depends more on the style of the room as a whole and on the tastes of the owners. If you want to add softness and intimacy to the interior, choose more rounded schemes. If you like laconicism, geometric designs are more suitable. You can also play around with the size and type of lamps. A few photos of interesting options for the placement of spotlights for the kitchen for inspiration.
Combination of straight and curved lines You can play around with sizes Clearer identification of zones due to lighting
Strictly designed chaos
Traditionally - along the perimeter of the room A smooth curve gives the interior more softness
Bathroom
It is necessary to carefully approach the choice of lamps for the bathroom: they must have a high degree of protection - they should not be afraid of vapors and splashes. And the choice of location depends on what other light sources you plan to use.
In small-sized ordinary bathrooms, even if they are combined, you won’t get much speed - the area is too small. Then, usually two or three lamps are installed above the bathtub or shower stall and several on the rest of the ceiling area. To prevent such a scheme from seeming too simple, you can choose interesting lamps or use two types that produce beams of light with different patterns.
There are recessed spotlights that create various lighting effects
If the spotlights in the bathroom are installed evenly over the entire area, additional lighting will be needed in the area of the mirror. Otherwise it will be too dark there. Another option is to add a couple of lighting points in the right place. This should be enough, although for “delicate” operations such as beating or “working” on the face, directional lighting on the wall is more suitable.
An oval or circle is an ideal option. In small rooms you can’t get too fancy. Moisture-proof lamps Plus wall lighting to create maximum comfort
Corridor and hallway
Only some new buildings can boast of a truly comfortable and good corridor. In most cases, the corridor is narrow, small and cramped, or long and uncomfortable. It can be straight or in the form of the letter “G”, but it differs in that it is very difficult to come up with something intelligible for its normal design. In corridors, the arrangement of lamps on the ceiling is usually linear - along the walls on one or both sides, in the form of the letter “X”. It's rare to see an S curve.
Complex designs can be made in relatively spacious hallways Interesting lamps will help diversify the interior
Along the perimeter or in the middle along - the two most common methods
Apparent chaos will help make the design more interesting
In square hallways, spots are usually installed around the perimeter; sometimes complex shapes are made here. Still, simple forms look better in very small areas.
Advantages of a stretch ceiling with lighting
The main advantages and reasons for the demand for suspended ceilings are:
- No dust;
- Ability to mask surface irregularities;
- Wide selection of mirror and matte surfaces;
- It does not require special care.
Due to the great popularity of suspended ceilings, new, more advanced lighting options have begun to appear on the market, which impress with their elegance and unique style.
Such products are intended for, among other things, partial lighting, only for illuminating the ceiling structure.
In most cases, contour lighting of the ceiling acts as a decorative element, because it is difficult to completely illuminate the room. If the light hits the glossy ceiling, the space can be visually enlarged.
Interior lighting options
The lighting looks impressive from the inside, as a soft light emits the entire fabric of the tension structure. The original type of such lighting is a design with elements in the form of stripes, curved lines or ornaments.
Through the canvas
The option with lighting through the canvas looks advantageous - a small room with such lighting will visually increase, and in a spacious room a cozy atmosphere will be created due to the soft diffusion of light.
Light lines and stripes
Translucent or translucent elements in the structure of the canvas can become a real art object in the room. They come in the form of parallel and chaotic stripes or with an unusual pattern - lightning.
In the photo, the design of the stretch ceiling uses unusual lighting with intersecting translucent stripes.
Design elements
Illuminated photographic suspended ceilings have many advantages, one of which is the ability to adjust the lighting inside, which helps create the desired unique effect.
To create interior lighting, several types of lamps are used, for example:
- Fiber optic lighting;
- Fluorescent lamps;
- LED strip.
Main types of tension systems and design options
In the interior of the living room, standard one-level, illuminated, photo printing and combined systems can be used.
They are based on the use of various models of ceiling panels. Conventionally, all models can be divided into two types depending on the base material. Film made from PVC. They have a variety of colors, it is possible to produce multi-colored canvases, and drawings can be applied to them. They have different textures of the front surface:
- glossy film. Thanks to its mirror ability, it visually creates a larger volume of the room. A room with a glossy ceiling looks taller and more spacious;
- matte film. If you prefer a classic interior, the rough surface (orange peel) of the film is best suited;
- satin film. Gives the impression of a perfectly leveled and painted ceiling.
Fabric, made from a fabric base impregnated with polymer compounds. The material has good sound insulation, and is also able to withstand temperature changes and is resistant to sagging.
An idea of the variety and properties of materials used for tension structures makes it easier to choose one or another design solution.
Work on installation and fastening of lighting
Installation of interior lighting can be done in absolutely any way. The tape can be hidden in a Velcro box with a special shelf for lighting, closed with translucent drywall, or installed without the use of additional equipment.
Having previously familiarized yourself with the stretch ceiling lighting system, you can install it very quickly and easily on your own.
- To do this, it is necessary to create a special frame from a galvanized profile on the ceiling in advance, in which the lighting elements are fixed and only then the suspended ceiling is mounted.
- The shelf design can be created using white PVC film with an image on it. You can print any image in a printing house that has machines for working with such materials.
When making a stretch ceiling with lighting and photo printing, it is best to place the light bulbs on canvas, as this can create a completely unusual perception of the printed image.
Before installing a stretch ceiling, it is very important to correctly create a layout of lamps, because the fabric is synthetic and heats up very quickly and can be seriously damaged due to high temperatures.
How to choose the color temperature of lamps for the interior
Artificial and natural light have a hue called color temperature, which is measured in Kelvin (K). Morning and evening light is warm (2700-3000 K). In winter, in cloudy weather, the tone is cold (5000-6500 K), during the day - neutral (4000-4100 K).
Color temperature affects people's mood and is selected based on the purpose of the room. So, in the office, bathroom, dressing room, you can install invigorating cold light. Warm, soothing lighting is more appropriate for the bedroom and nursery. Interior design is also taken into account. Lamps with a range of 2700-3000K provide rich colors with a warm component. Cold ones, on the contrary, darken and are perceived differently, for example, blue looks black.
This type of lighting is suitable for small rooms with a lot of wood and textiles. These materials are most often found in the following styles: eco, modern, rustic and classic. The range above 5000K makes the colors of the blue spectrum more saturated: gray, blue. Warm shades lose their brightness, yellow takes on a greenish tint.
Cool lighting is best suited for large rooms, filling them with “air” and is appropriate in simple interiors where there is a lot of geometry and contrast. This is inherent in the styles of minimalism, futurism and hi-tech.
If there is not enough experience in selecting lighting for suspended ceilings, then it is better to choose light bulbs with an indicator of 4000 K. Neutral lighting has a number of advantages:
- the color of the finish is not distorted;
- has an almost imperceptible effect on mood;
- a compromise option for a work and rest area.
Designers also have this rule: all light bulbs in a room should have a warm or cool color temperature for a consistent ambience. But it is permissible to make an exception for accent lighting if it is necessary to highlight a separate texture or object.
Photos of suspended ceilings with lighting
Pros and cons of a two-level ceiling
This type of ceiling has a large impressive list of advantages:
- Easy to install, minimum waste, no need to putty after installation;
- The ability to create an individual design for every taste;
- Low weight of the structure;
- Ability to create optimal lighting;
- Soundproofing;
- Long service life;
- Fire resistance;
- Use of environmentally friendly materials.
The disadvantages depend on the selected canvas material, which were described above.
Materials and tools
Installation of two-level ceilings involves the use of the following tools:
- Hammer – for mounting the profile and frame;
- Screwdriver - for connecting all frame elements, wall moldings;
- Laser level – simplifies alignment under the ceiling;
- Miter saw – if necessary, cut the profile;
- A hacksaw with a fine tooth – for cutting plastic baguettes;
- Heat gas gun – for heating PVC film.
To install the ceiling, the following materials are required:
- Stretch ceiling fabric;
- Foamed sheet plastic or plywood with a thickness of 15 mm - used to construct the frame of a curved or straight ceiling, respectively;
- Steel corners and metal profile PPN - act as the basis for the frame and are attached to the ceiling;
- Baguettes - wall, universal, corner, bumper - form planes and lines of level boundaries;
- Lipstick – prevents the cloth from coming into contact with the metal;
- Reinforced tape;
- Fasteners
