The hallway is the calling card of every apartment. It is important to choose the right finishing material for the corridor so that the non-residential area looks beautiful and interesting. You also need to take into account the characteristics of the room - humidity and pollution. Today, finishing the hallway with panels is considered a promising trend that is gaining momentum.
Advantages and disadvantages
Due to their quality characteristics and attractive appearance, wall panels have remained a widely used material for a long time. They are well suited for hallway walls as they are easy to clean. Moreover, they make the interior of the apartment more interesting.
Like all existing materials, wall panels have their advantages and disadvantages. Let's consider the main advantages of this material:
- it is resistant to various external influences and pollution;
- the panels are quite easy to install;
- if one of the panels deteriorates, it is easy to replace;
- It’s easy to hide wiring behind panels;
- they look interesting and sophisticated.
However, they have the following disadvantages:
- the panels cannot be attached to an uneven surface; first it will be necessary to install a frame that will reduce the area of the corridor;
- they have a fairly high price;
- are not always suitable for modern styles; for example, they are difficult to use to create a high-tech interior.
This is interesting: Repair and decoration of the corridor if there is a cat or dog in the house (57 photos)
Advantages of wall panels
Corridor wall panels have a number of advantages.
- Easy and quick installation.
A simple fastening system will help even a non-professional to cope with the repair. As a rule, walls do not require special preparation before installation; Wall panels are easy to install. - Appearance. Regardless of the material used, the panel finish looks neat and impressive. If it is installed correctly, the seams between the components are almost invisible, the surface is smooth;
All the beauty of a wall panel. - Resistant to damage. Most types of panels withstand animal claws well and are resistant to other mechanical damage;
- Possibility of heat and sound insulation. The installation system involves installing a sheathing behind which insulation can be laid;
- Alignment of walls. Panel finishing helps to mask wall defects;
- Possibility of laying wires. The distance between the wall and the frame allows you to lay the cable without gating;
- Ease of reconstruction. If one of the elements is damaged, it is easy to replace.
Design of panels for corridor renovation
We can say that finishing panels are mounted independently or in combination with other types. For example, only half of the wall can be covered with MDF sheets, and photo wallpaper can be used in the upper part of the corridor. Or vice versa.
Combinations can be different: stone with glass, wood with mirror polystyrene, etc. It all depends on the financial capabilities of the customer and the design solution.
Decorating the hallway with MDF panels - 70 photos of stylish and modern design
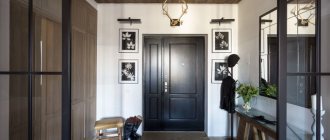
The hallway in every house or apartment is the calling card of the home, since already at the entrance you can form the first impression of the owners. And in order for this impression to be favorable, care should be taken to give the hallway a presentable appearance.
This can be done during renovation using modern finishing materials. Their variety allows you to make high-quality and at the same time not too expensive renovation of the hallway.
One of these commonly available finishing materials is MDF. Decorating the hallway with MDF panels has become very popular recently due to its reasonable cost and ease of working with the material.
Materials
Panels are a popular material, so the market is constantly updated with new models. This also led to a wide variety of materials used.
- MDF. This material is characterized by a high level of thermal insulation and soundproofing. Moreover, MDF is a fairly durable material that rarely cracks or chips. However, such models are afraid of high temperatures, since under its influence they expand and lose their original appearance.
- Plastic. Plastic panels have excellent sound insulation properties. Another advantage is that they are easy to clean; just a damp cloth is enough to remove any dirt. There is a wide range of design solutions. Panels can be glossy or matte. They are often decorated with various designs and textures.
- Natural wood. This expensive material has a long service life and is durable. It does not fade, does not lose its original shine and does not deform when exposed to moisture. Wooden panels always look expensive and original and go well with other materials. This is a natural and environmentally friendly finishing material. The most commonly used wood is walnut, oak or ash. There are options that are decorated with carvings or inlays.
- Fiberboard, PVC and chipboard. These options resemble natural wood in their appearance. They are characterized by low cost and availability. However, it is important to know that models made of fiberboard, PVC or chipboard have a short service life and are easily damaged or broken.
- Mirror polystyrene. Such options are covered with a thin glossy film that imitates a mirror surface. However, unlike real glass, they cannot be broken. Such panels are perfectly combined with other materials due to their appearance.
- Laminate. To finish the floor, you can use regular laminate sheets. Thin sheets of grade 31 are best suited. This is a relatively inexpensive material with excellent performance properties. It is resistant to damage and does not fade in the sun.
- Cork and bamboo. These soft, eco-friendly materials have a noble and rich appearance. Their special texture determines their heat and sound insulation qualities. They do not deform due to water and do not fade. Moreover, this material bends well, which makes it popular for finishing rooms of non-standard shape.
- Stone. Natural or artificial stone perfectly complements the interior of the corridor and makes it more stylish. This material is characterized by a high level of strength and resistance to damage. Moreover, it does not burn. The process of installing stone is quite simple, since there is no need to install a special frame. Such panels are attached directly to the wall. Their texture can replicate any natural stone or brickwork.
Artificial options are more affordable, and in terms of external characteristics they are not inferior to natural stone. Another advantage is that such panels visually expand the space.
- Metal . Such options are quite rare, because they appeared on the market not so long ago. They are used to decorate exclusively modern styles, for example, high-tech. They are characterized by an increased level of resistance to mechanical stress and chemical compositions. However, the installation process is quite complex and expensive.
- Glass . Glass panels look bright and unusual. These can be either glossy or matte options. Various sandblasting patterns are often applied to them. Their significant disadvantage is the need for daily careful and painstaking care, since the smallest dirt, stains and scratches are clearly visible on the surface.
In addition, these are very fragile panels that break easily, so it is better to install them in the upper half of the wall.
Types of MDF panels
Today there are many types of MDF panels - some naturally imitate other materials
MDF panels vary in type - it all depends on how exactly the front part of the finishing material is finished. For example, the most popular are laminated panels - PVC film is applied to them during the production process.
Advantages of laminated MDF panels
- The film guarantees excellent aesthetic characteristics;
- It can naturally imitate a variety of textures (natural wood is no exception), just look at how finishing a hallway with MDF panels looks like - photo below.
Your hallway can get just such a finish thanks to MDF
- This material has dust-repellent properties;
- It is resistant to mechanical damage (and the level of resistance is high);
- Veneered panels are finished with high-quality wood veneer - any shade can be added to it at the customer’s request;
- If the panel is painted, then high-quality compositions were chosen for painting it, the stability of which is beyond doubt.
If you need to cut these panels, it is best to use a jigsaw. The cut will come out clear, completely smooth, without any burrs.
Wall design options
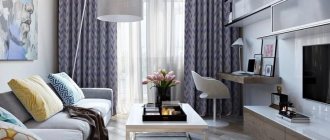
The panels are used to decorate interiors in various styles. Their colors and design options are varied. With their help, you can hide all the shortcomings of the room and highlight its advantages.
Light shade options are ideal for poorly lit rooms . They are able to visually enlarge the space and make it warmer and brighter. Moreover, a tandem of light panels and a dark floor covering will look good. The interior decoration of the hallway in dark colors requires the use of panels in the same color scheme. Such a room will look elegant and deep.
However, such an interior requires good lighting.
An interesting idea would be to use options with small patterns or designs. Panels in minimalism or loft style look very stylish. They have a simple but interesting design. But large patterns and prints are best suited for spacious hallways. They attract too much attention and will negatively affect the appearance of small rooms.
Glossy shiny and mirrored models make the space wider and more spacious. They are well suited for decorating narrow and long rooms. Vertical slats are suitable for rooms with low ceilings, but horizontal slats are suitable for narrow rooms.
For a classic style, it is better to use models with an unusual design. The panels can be decorated with stucco, moldings, cornices and other decorative elements. Panels with relief will help create a bright accent in the interior.
You can line the walls with natural stone or its imitation; this solution will ideally complement an interior in a country, loft, Provence or classic . Wooden wall panels will fit perfectly into a rustic or classic interior. Wood texture looks better on dark shades. The walls covered with colored glossy panels look beautiful.
They will make the room brighter and more stylish.
Advantages and disadvantages of MDF
The products are made from wood, which is highly processed. The resulting raw material acquires the desired shape under the influence of high pressure and temperature, after which decorative cladding is performed.
- Density. The finishing material can withstand significant mechanical stress.
- Environmental friendliness. Although the composition contains binder resins, the products fully comply with safety standards.
Classic MDF panels do not have harmful inclusions at all, since the binder in them is lignin (natural glue), which is released from wood dust when the boards are “frying” under high pressure
- Moisture resistance. All MDF wall panels tolerate changes in humidity well, and special options are impervious even to direct exposure to water over a long period of time.
- Decorative.
The cladding comes in a variety of colors and textures. The latest in fashion in MDF interior decoration are panels with 3D texture, but they are quite expensive - Additional sound and heat insulation. Although the parts are thin, they significantly reduce noise pollution and improve energy efficiency.
- Availability. This is a relatively inexpensive option.
The disadvantages include the possibility of deformation. This applies to the edges of parts that may get water from shoes or an umbrella. Another disadvantage is the abrasion of the coating from constant contact in the seating areas.
Colors
The color of the panels, like any other finish, is chosen depending on the overall interior design. Although the color range of this type of design is not as diverse as, say, wallpaper or decorative plaster. If we talk about a wide range of colors, then the advantage here is on the side of plastic models.
Plastic panels are made with various shades, designs and patterns. The remaining types are produced with an imitation of natural color.
The most common option is wood-look panels. Shades can range from light to dark. Suitable for the hallway of owners who do not want to highlight at least this part of the house in the eyes of guests. This design is unobtrusive, simple, calm. This classic design can be done in any style.
For modern decor, you can choose shades of bleached oak or wenge. But don’t forget that dark shades would be a bad choice for a small corridor.
If you prefer a wood color, try not to let the furniture blend in with the walls. Keep the contrast.
An original and quite popular design solution these days is stone finishing. The options are very diverse - from light, translucent minerals of blue, dark blue, green to brick, dark shades. Finishing with stone can give a room some luxury and elegance. You can, on the contrary, create an ascetic image, imitating a brick wall. This option is typical for the loft style. In any case, finishing with stone will give the room originality and will attract the attention of everyone entering the apartment or house.
This is interesting: Characteristics of water-type heated towel rails (22 photos)
Fiberboards and their characteristic properties
What is the hallway room in an apartment? This room is something of a calling card. And wall decoration is generally very important - after all, thanks to such cladding you can radically transform the entire style direction. Thanks to the texture and color of a specific finishing material, the same visual image appears on the basis of which a person draws a conclusion about your hallway and its design.
Decorating the hallway with MDF panels is often done
This is why it is so important to think through the design of the walls carefully. This detail is important.
What are the advantages of the panels, why are they popular in hallway decoration?
- First of all, installation work is easy. Any person can cope with such a task - if only they have the desire. Also, during the work there will be a minimum of dirt, dust and construction debris: which cannot be said about other cladding options.
Fixing MDF panels on the wall can be done in different ways. Due to this, you will always be able to choose the solution that will be the most suitable for your home.
- Another advantage of the panels that you should pay attention to: the strips are cut very simply - a jigsaw or hacksaw will help with this. And if you need to replace one or another part that is damaged: there will be no difficulties with disconnection - the elements come off the base easily, immediately;
- There are also other advantages: the sound insulation in the room will be good, as will the thermal insulation. There will simply be free space between the walls and slabs. Insulation is placed here, and any communications can be hidden here without any problems.
How to combine beautifully with other materials?
You can create a beautiful image of the hallway by combining different materials. It’s good if there is enough space in the corridor and there is room for your imagination to run wild. The panels can be combined with wallpaper, decorative plaster, paint, decorative stone, and frescoes.
It is sometimes appropriate to divide the hallway into two zones: the entrance and the vestibule. In this case, it is preferable to use different finishes for them. So, for example, a fragment at the front door can be finished with panels, and the rest with wallpaper or paint. Another design option is also possible. The owners can decorate the entrance area of the corridor with stone, and, in fact, the hallway with slatted panels.
When zoning, you can use not only different materials, but also different types of panels, for example, combining tile and sheet.
A good option for finishing one zone is a combination of wallpaper and wall panels. Especially if the hallway has high ceilings. In this case, wallpaper is usually placed on the upper part of the wall, and the lower part is covered with panels. The joint is hidden by molding. Instead of wallpaper, paint or decorative plaster can be used.
A combination of panels with frescoes is possible. For example, two or three walls are covered with panels, and on one wall a fresco is placed that fits into the interior design of the room. In the corridor, a good solution would be to make mirror inserts. They can be placed under the ceiling, above hanging shelves, if any, or in a niche.
Stone, as a decorative detail, can be used to decorate the walls in certain places on top of the panels.
It is recommended not to experiment with a combination of stone and 3D panels. You can add volume to the hallway using just one thing, but a mixture of them will reduce the space and will look too intrusive.
Panels can be used not only as the main finishing material or one of the main ones, but also simply as a decoration element. If the walls are decorated with wallpaper or paint, you can place, say, a bamboo sheet on one of them to create a Japanese style.
Don’t be afraid to try something new when decorating your hallway, but don’t forget about the boundaries dictated by your sense of taste and style.
Preparing for work
Having decided to decorate your hallway with MDF panels yourself, you should worry in advance about stocking up on the required amount of materials. You should calculate the surface area that you are going to cover with MDF in order to calculate the number of panels required for the job.
In this case, the decisive factor when calculating the number of panels will be the width of the area to be covered with panels.
Calculation of the required number of panels should be made taking into account their width. The most common standard width is 15 cm, but panels are available in 19 or 24 cm widths.
To calculate the required amount of MDF per wall, you need to divide the width of the wall by the width of the type of panels you have chosen. Based on this, you will determine the amount of MDF that you should stock up on before starting work. Please note that panels should be purchased with a small margin in case of an error or unexpected defect. In addition to the panels, you will also need special moldings.
Before covering the walls with panels, pre-treat the surfaces in the hallway with special disinfectant compounds. This will allow you to avoid the appearance of mold or mildew in problem areas of the wall in the future.
Important: preliminary preparation of walls for MDF cladding does not require puttying and plastering of the walls or cleaning them of old paint. You just need to remove the old baseboards from the floor.
Which ones are better to choose?
Before you go to choose panels for the corridor, you need to take into account several nuances. These will include the surface of the walls (flat or uneven), the need to install additional heat and sound insulation, the area of the hallway, the height of the ceiling, the general style of the living space, even the number of residents.
If the walls are uneven, it is better to use tile or slatted panels fastened to the sheathing.
Leaf varieties are suitable for smooth surfaces. When choosing, also proceed from the need to retain heat and isolate the room from sounds from the outside. Consider materials suitable for these purposes: MDF, cork, bamboo. If additional insulation is not required, the choice of materials can be expanded.
In a narrow corridor it is advisable not to use a frame. But if there is such a need, try not to choose voluminous models, especially darker shades. This way you will turn the room into a narrow room where it will be impossible to turn around. The best choice would be sheets of light colors. There may be an unobtrusive ornament.
If the hallway area allows, you don’t have to skimp on all sorts of decorative elements, which can be stone trim or 3D panels. To visually raise the ceiling, cover the walls with slatted panels vertically.
To expand the space, use the same variety, but positioned horizontally. Do not deviate from the general style of the apartment or house.
For classics, wood materials, MDF, and cork in discreet natural colors are suitable. Various carved elements and moldings will highlight the classic design. Wooden panels are also suitable for creating a country style. For the loft style, stone finishing is best suited. Moreover, it should not look elegant and expensive. The surfaces need to be given the appearance of brick walls of an older building. Plastic, if you choose the right color, will fit into a minimalist, modern or high-tech interior.
When selecting panels, consider whether you need moisture-resistant materials. If there are not many residents, dirt accumulates in the corridor in small quantities, then perhaps moisture resistance will not be a priority when choosing panels.
Laying insulation - process features
It is not at all necessary to install insulation - but many people do this so as not to miss the opportunity
Usually, when decorating a hallway room, it is important to use additional insulation in the process. Penofol A and polyethylene foam are perfect for this role. Such materials are good because they not only retain heat well, but also insulate noise.
When the installation of the metal frame is completed, penofol is glued to the surface. This material must be glued on the side where there is no foil. The sealant is distributed in thin strips over the polyethylene foam - it is important that there is a step of 10-15 cm between the strips. They are glued end-to-end - the edges of the layers should be connected.
Now you definitely have an idea of how MDF panels are used to decorate a hallway. There is no doubt about this option - it will suit you perfectly.
If MDF is of high quality, it has the following advantages:
- Certain moisture resistance (not suitable for bathrooms, of course);
- Durability and decorativeness;
- Installation work is simple;
- The material is durable.
Another very important characteristic of MDF panels is that they are very easy to machine (milling, sanding, fastening, drilling, gluing). All this work can be done using the same materials and tools that are used for wood.
If you have the necessary tools at hand, you will be able to cut out any patterns into the panel; it is also possible to decorate with decorative cuttings: many people do this today.
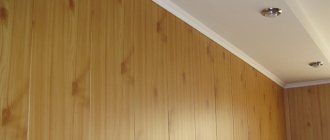
The finishing was quite successful - MDF looks great on the walls in the hallway
Since MDF is a completely flat material, the panels can be laminated and painted without any problems. Caring for the surface is easy - you just need to wipe it from time to time with a slightly damp cloth (and make sure that there are no abrasive substances in the cleaning agent). The cost of MDF panels is also an undoubted advantage of this material.
If the film peels off slightly on top of the panel, you need to go over it with sandpaper (choose fine-grained). The problem will definitely be fixed.
Such materials, which cost moderately, are advantageous to use for wall cladding - in a wide variety of hallways, rooms and corridors. If it turns out that some panel is damaged, you can always replace it with a new one - there will be no difficulties.
A good owner can try himself as an experimenter: you can, for example, combine a variety of materials. For example, on top you place wallpaper of some light shade, on the bottom – panels that imitate wood. Something interesting will definitely come out - there is no doubt about it. The main thing here is to believe in yourself!
The wall covering in the hallway should not only be beautiful, but also practical. In order for the decoration of the walls in the hallway to be of high quality and tasteful, you should look at the photos with options, choose a material that is easy to care for, wear-resistant and does not stain. It is advisable to choose a wall color that is not very dark, because there is no natural light. It is better to select materials that can be cleaned at any time. In addition, it is unacceptable to use delicate materials that will be wiped off by shoulders or bags. Soon they will lose their presentable appearance.
Interesting interior design ideas
When creating a design, we focus not only on the aesthetic appearance, but also on the possibilities of the room. Time and again we have to return to the unevenness of the walls, especially if we are talking about an apartment in a panel house. To mask imperfections, we use various elements that are in harmony with each other: stone, vinyl wallpaper, slatted and tile panels.
If the lighting in the hallway is dim, use light shades of panels so as not to reduce the space.
In the hallway of a large private house, owners can afford to use large drawings and patterns on surfaces, since the visual reduction in area will remain almost unnoticed.
An interesting solution would be to decorate the upper half of the wall with wallpaper or paint and cover the lower part with panels arranged vertically.
Decorating the walls with light panels and the floor with dark ones will help to visually expand the space.
The 3D panels look interesting. They can be combined with mirror polystyrene. Since such material increases volume, it is better to use it in a small room. Diffused lighting is suitable.
The imagination can draw a limitless number of options. The choice of one of them depends on your financial capabilities and taste preferences. Remember that combinations are always interesting. They enliven the interior, moving away from monotony and boring monotony.
Photo examples
You can see examples of hallway design in the photo below. Small hallway in a Khrushchev-era building decorated with MDF panels Finishing a hallway with plastic panels in a panel house Spacious hallway trimmed with MDF panels
3D panels on the wall in the hallwayOriginal wall panels for finishing the corridor
Each type of panel is an excellent option for finishing a hallway or corridor. All of them are not only visually attractive, but also practical. Thanks to the large selection of shades, it is not difficult to choose the right option. To do this, you should take into account the humidity in the apartment, personal preferences and, of course, financial capabilities.
Combination with other materials
You can cover all the walls with panels, or you can cover only part of them. Most often they cover the lower part, and the upper part is decorated with wallpaper, plaster and other materials. This combination will be a great idea for those who have children or animals. They often damage wall coverings, and panels are more durable.
You can divide the room into functional zones using various finishing materials. Panels are often used to decorate the space near the door. Panels made of stone or its imitation are perfect; they go well with plaster.
Most often, panels are combined with wallpaper. This is due to the fact that they are widely used for wall decoration. Moreover, wallpapers come in a wide range of colors and design options. They are distinguished by ease of gluing, beauty and practicality.
Plaster is an equally popular option. It goes well with slabs and, thanks to its unusual texture, makes the interior more interesting. It is a strong and durable material that does not fade or lose its original appearance. Moreover, if you are tired or unsatisfied with the shade, you can paint the plaster.
If the walls are smooth and have no other flaws, then they can be painted. The paint has many shades, so it is easy to combine with other finishing materials. It looks a little boring, so it is better to use panels with an unusual and bright design. However, on the modern market you can find unusual shiny paint, decorate the wall with a print or other decorative elements.
Finishing instructions
The simplest and most necessary advice for everyone is to create a plan for finishing the corridor on a piece of paper, write down all the dimensions, parameters of the room and the amount of material.
If you have clearly decided that the finishing should be done exclusively using MDF, then it is worth learning how to install it correctly. Here are some nuances:
- Preparing the walls. It is worth thoroughly cleaning the surface, plastering large holes and irregularities. The panel is capable of hiding only minor defects. If the hallway is made with beveled corners, then you immediately need to align them and make them even.
- Insulation. Before installing the strips themselves, it is worth insulating the room. This will better soundproof the corridor and make it warmer. You can use any of the existing types of insulation for the selected material. Even thick fiberglass is allowed.
- Frame. When the insulation layer lies flat and smooth, you can begin to create the grating. It must be made of wooden planks about 3-4 centimeters wide. The distance between the parts of the future lattice should be about 30-40 centimeters. The lower and upper planks are installed immediately, then the side and internal ones. Do not forget to use a level to ensure that the angles in this sheathing are at right angles. The quality of the frame will directly determine how the finished wall will look.
- Installing the first strip. This moment is of particular importance because as soon as you start the first one, so it will go. The first element must be 100% vertical, below the level. Otherwise, you will have to cut subsequent strips on both sides, which will become more and more askew. The first MDF board is installed using special fasteners, which one side fits inside the strip, and the other is attached to the frame with nails or self-tapping screws.
- Laying out the remaining parts. Next, each strip of MDF will fit into the grooves of the previous one. If you do not want the wall to bend over time, you can also use special fasteners for screwing it to the frame. Use regular wood screws to maintain strength conditions.
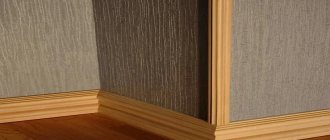
- Edge processing. If in the corridor only the walls will be treated with panels, and the ceiling will be different, then the upper and lower parts of the installed MDF wall can be covered with a special corner. It covers all the cut edges of the planks and creates a very stylish look.
We reviewed the main stages of finishing a corridor using MDF panels. It is clear that there are no great difficulties in such a matter, but there are still small nuances. Consider this:
- The corner for the edge of the planks should match the color of the main motif of the material. Pick up both the first and second - right in the store at the same time.
- If the front door and entrance opening are made of MDF panels, and the walls are planned to be made using the same, then it is better to differentiate the color scheme. It is advisable to choose a “wood” color for the doors, and any other color for the walls and ceiling.
- Remember that a small space is often reserved for the corridor and hallway, so it is better to paint the walls in light pastel colors. Using black, gray, brown is not inappropriate, especially since MDF is very easy to clean.
- When comparing the material with plastic, remember that MDF is much stronger and more resistant to damage. The panels are about 0.5-1.5 centimeters thick and are environmentally friendly.
- It is convenient to use MDF panels only for a certain part of the room. For example, the lower half of the corridor is made of such material, and the upper half is covered with wallpaper. Often the bottom is decorated with decorative stone, and the top is decorated with panels.
- Be careful when choosing and purchasing material. In the store you should pay attention to the edges and grooves. They may be damaged during transportation and will create a less impressive and impeccable appearance for the walls.
- It’s better to get a screwdriver for decorating walls with panels. They will have to do a lot of things - attach insulation, build a frame, screw in fasteners.
In conclusion, I would like to wish patience to every newcomer in such an important matter. Although this is not very difficult, everything will have to be calculated very well. Calculate exactly how much material you have and how best to cut it. Good luck!
Beautiful examples
Traditionally, wall panels are used to finish the lower part of the room. This makes the design more noble and cozy. Snow-white vertical models are ideal for a Provence-style corridor.
For a classic interior design, an excellent solution would be to use white models with moldings. And the use of wallpaper with pale patterns will create the effect of using textiles.
Bamboo panels with black lines look bright and stylish. They fit perfectly into a modern style interior.
Options with imitation brickwork always look interesting and stylish. Light gray models are well suited for an interior in a minimalist style, made in gray tones.
For an interior dominated by white tones, white 3D panels would be an excellent solution.
Dark panels made of natural wood are a good option for finishing a design in a classic style.
The slatted vertical models look original. They go well with unusual blue panels.
The walls, completely finished in a glossy version with imitation of natural wood, look beautiful.
To see how a laminate wall in the hallway will look, see below.
Fastening panels - stages
There are different ways to attach panels to the base: frameless, framed
Novice craftsmen may experience various difficulties when attaching panels to the walls in the hallway. For some, this process may even seem difficult. To keep problems to a minimum, you must be aware of what sequence should be followed in the stages of work.
The procedure here will be something like this:
- First you need to measure the room where the repair is supposed to be done;
- You must calculate how many sheets will be required for repair;
- The finishing corners also need to be counted - they are needed to form the angle. At any angle, the joints can be both external and internal;
- It is customary to use special disinfectant compounds to treat those areas where fungus and mold may appear in the future - this happens often.
Now it’s time to start forming the frame - it is to it that the boards will be attached. Wooden slats are usually used here (the size is chosen 4 by 2 cm).
- The slats are fixed to the wall - plastic filler will help you with this; self-tapping screws and dowel-nails are also often used;
- The panels for the walls in the hallway have already been selected, so when the sheathing is being done, the craftsman must make sure that the structure is level. A building level will always help you with this. The sheets are attached to a wooden base using thin, small nails. Staples are also suitable - they are called clamps.
Materials needed for installation work
Various auxiliary elements will help in fastening the panels
Now let’s look at those materials and elements without which it will not be possible to carry out installation work.
- You cannot do without the finishing corners (they consist of two strips); there is a gap of 2 mm between them. The product is usually coated with a film of the same shade as the MDF panels themselves. This film holds two strips together;
- The corner can be easily bent both outward and inward - and all this is thanks to this design. Especially, these devices are convenient to use when you have less than ideal corners in the hallway;
- You will need wooden slats to prepare the frame for the cladding. The ideal option is when the width of the slats is 4 cm and its thickness is 2 cm.
It is not recommended to select slats with a large cross-section - the panels themselves are light. Also, you can always find wooden slats without any problems in any hardware store.
- To fix these slats on the wall surface, you will need self-tapping screws that are suitable for working with wood (a length of 80 mm is sufficient). Plastic dowels can also be used
- It’s also better to stock up on clamps - using these elements, MDF panels can be attached to the frame without any problems. You can find the clamps in the same department where the panels themselves are located (sometimes they even come in one set - but this does not happen in all cases);
- Liquid nails are an excellent solution for gluing corners. Buy this glue if you don’t already have it;
- In general, special attention should be paid to glue. There is no need to use some random composition here - you need a substance that has certain characteristics.
Namely, what the glue should be:
High-quality adhesive composition - a guarantee of high-quality fasteners
- The glue must retain its plasticity even after hardening. It’s just that MDF panels are usually made from pressed cardboard, so they are very sensitive to temperature and humidity in the room. You need an adhesive that can easily cope with such temperature changes. This property is usually described in great detail on the packaging.
- Further, the adhesive that is chosen for MDF panels should help in their installation even where the walls are not perfectly smooth. Simply put, the adhesive composition must have such a texture that it can be applied in a thick or thin layer to the surface without any problems. Thick glue is what you need
- All these requirements are ideally met by the liquid nails already mentioned above, which today are often chosen for such work - when decorating a hallway with MDF panels.
If you decide that MDF panels are ideal for cladding the hallway, pay attention to the following: this finishing material is not moisture resistant. So, if your room has high humidity levels, the panels will absorb moisture over time and may become warped. For such a room it is better to choose another finishing material, fortunately, the choice today is rich.
Technology of applying MDF panels to the wall
MDF fastening completed
If you have a concrete, wooden or brick surface in your room, it is not at all necessary to remove the previous coating from it (if it is wallpaper, paint, plaster). Moreover, you don’t even need to plaster or putty the walls in the hallway before you start attaching the MDF panels.
This point is an important advantage of wood fiber products. However, you still have to remove the old skirting boards: it’s impossible without this.
What to do next? It all looks like this:
- The master must find the place on the wall that sticks out the most. It is from here that the installation begins;
- Since the sheathing will be located horizontally over the entire area, and its maximum pitch will be 400 mm, it is customary to place MDF plates vertically;
- If the permissible value is exceeded by the step distance, the pattern may be distorted - we must not forget about this;
- In a situation where they begin to install planks from a corner, it is recommended to ensure that the last part is installed in one piece;
- It is better to check all the calculations first again - attach the purchased panels to the wall and see for yourself: where the material will fit without problems in its entirety, and where it is impossible to do without building up the slatted base;
- The hallway is decorated with panels so that in the corner there is a spike of the panel, the installation of which is carried out. Experienced craftsmen advise cutting it off completely at the very first element;
- Then, a gluer-holder is installed in the groove - five or six pieces are placed along the entire length;
- Each glue holder is attached to a wooden beam - a screwdriver will help you here.
For drywall, it is customary to fix the opposite end with self-tapping screws. However, before fastening with self-tapping screws, it is worth making a hole in the plank - a drill designed for working on metal will help with this. Ideal diameter: 8-10 mm. In this case, the hat will definitely not be visible.
The frame mounting option is universal: you can at the same time insulate the hallway
- It is customary to fasten the next plank so that its tenon fits into the groove of the previous one - then each subsequent panel is assembled in a similar way. There will be all connections at the joints, the edges on the sides and top are fixed using corners - they are attached using liquid nails;
- Sometimes it is customary to lay boards diagonally, and in certain cases - horizontally. It is extremely important that the wooden base is perpendicular to the new coating;
- If there are deep depressions, cracks or holes, you can always put bars or wedges in them;
- The joints at the bottom are usually hidden behind a simple plinth - it can be fixed with nails or glued to a sealant;
- The corner joint is made under the ceiling;
- On the wall, the bottom rail is fixed at a certain height from the level of your floor - so that in the future it can be used to attach the baseboard. As a rule, this rail is placed directly on the floor - and it works.
Watch a detailed video about how, when decorating a hallway with MDF panels, the panels are attached to the wall surface:
Possible mounting options
MDF panels are fastened in different ways - there are several options
Let's talk about what options for attaching MDF panels to the surface exist today. If there are no serious errors on your concrete surface, it is absolutely clean and smooth, there is a layer of plaster (which is still strong), putty (which does not peel off), then you can glue the panels directly to the sealant-adhesive.
This work is done like this:
- The glue is distributed in dots or zigzags throughout the board;
- Then it is pressed to the surface for a few seconds;
- Then they take it away from the wall for a moment and apply it again: this time it’s forever;
- All excess adhesive must be removed with a spatula or knife.
Fastening the panel to a frame made of wooden slats
A frame made of metal would also be an excellent basis for such work. For these purposes, UD profiles and hangers are often used.
This technology will be preferable if you plan to:
- Lay insulation;
- Do you want to hide many different structures that have volume;
- If the concrete or brick base has serious deviations;
- In such a situation, you can even abandon metal slats in favor of beams. This design will be more stable and stronger;
- If you need to install an electrical outlet or switch somewhere, use an electric drill to make a hole of the required diameter;
- The mounting box (socket box) is selected in the same way as when working with sheets of drywall.
Kinds
Panel manufacturers do not skimp on creating a variety of products in shape, color, texture, size, and so on. There are three main types of wall panels:
- tiled. They are produced in the form of squares of different sizes, colors and texture options. They resemble standard ceramic tiles in shape and combine well with other finishing materials. They are fastened using a tongue-and-groove system. You can use tiles to decorate the entire room or just part of it, for example, a panel room. Using tile panels you can hide uneven walls and give the room a neat look;
- rack and pinion They have a rectangular shape, reminiscent of lining, although, unlike it, they are made not only from wood, but also from other natural and artificial materials. The tongue and groove fastening system is also used for installation. Walls can be sheathed with these panels vertically, horizontally and in the so-called “herringbone” pattern. The slats are suitable for small rooms, as they will not visually reduce the space. The standard length of the elements is usually 6 m and the width is about 40 cm;
- leafy. They are solid, homogeneous sheets of large sizes (from 1.2 m to 2.45 m). They are usually made from fiberboard and MDF, which are decorated to imitate various natural materials (stone, wood, cork) or with a pattern. Therefore, suitable panels can be easily matched to the interior of any style. Installation is most often carried out on flat walls using a special glue, although you can find options for attaching to lathing. The joints between the sheets are hidden by moldings, which can also act as a decorative element.
Whatever type of panels you choose, it is recommended to use non-combustible materials in order to ensure maximum safety for the room. Such varieties are practical, durable, easy to care for, and in fire hazardous situations they prevent the fire from spreading.
Step-by-step instructions for attaching MDF panels to walls
If you have pre-treated the walls and stocked up on all the materials in the required quantity, taking into account the corners, moldings and other related parts, you can begin work on lining the hallway with MDF.
We form a frame from slats, fixing them on the wall with self-tapping screws, dowel nails or liquid nails. Using a building level, we make sure that the sheathing on the wall is level.
MDF sheets are attached to the slats with clamps (special staples) or small nails.
Important: work on installing the frame should begin from the most convex section of the wall, and then level the entire structure at the same level with this section.
The lathing along the hallway walls should be done horizontally with a pitch between slats of 400 mm. Failure to maintain equal intervals in the future, when installing panels, can lead to distortion of the pattern.
- MDF panels are attached to the sheathing in a vertical position.
- Installation of panels usually starts from the corner. In this case, it is better to completely cut off the mounting spike, which should be located in the corner, from the panel.
- Five or six gluers are installed in the groove of the panel at equal distances, which are then attached to the wooden battens of the sheathing using a screwdriver.
- The opposite end of the panel is fixed to the slats with self-tapping screws into pre-drilled holes 8-10 mm in diameter so that the head is “recessed” on the surface of the MDF.
- Each subsequent MDF plank is inserted with a tenon into the groove of the plank already fixed to the wall.
- All joints, side and top edges are fixed with corners using liquid nails.
- The lower joints are covered with a floor plinth, reinforced in any available way.
A hallway made of MDF panels, equipped with your own hands, is quite within the capabilities of any owner who is ready for creativity and experiments with various materials.
Combined wall decoration in the hallway
Today the corridor is divided into two zones: entrance and lobby. In this case, it is logical to use several finishing options or certain combinations. For example, cover the space near the front door of an apartment with panels, and decorate the rest of the area with wallpaper or paint the wall. You can use stone, and equip the vestibule with slatted panels, and so on. It is possible to combine the material with frescoes on one of the walls. Mirror inserts or the use of moldings at the junction of materials look good.
What you need to prepare for self-assembly of MDF
Installation of MDF panels in the hallway is quite possible for anyone who knows how to use the simplest tools and devices.
You will need:
- Jigsaw. You can also use a hacksaw, but you can cut the MDF panel more accurately with a jigsaw - the cut is perfectly even and smooth.
- Electric drill. It is needed if the panels are fastened not with liquid nails, but with a frame.
Materials that may be needed during installation:
- Final corners having the same film coating as the panels;
- Wooden slats for the frame under MDF panels with a section of 4x2 cm;
- Wood screws about 80mm long, plastic dowels for attaching the slatted frame to the wall surface;
- Clamps – fasteners for fixing MDF panels on a wooden frame;
- Liquid nails for gluing corners, as well as for attaching panels to the wall.
Hallway wall panels: surface preparation
Before you begin to attach the finishing material, the hallway walls must be prepared. The first important step will be the removal of old material, wallpaper and plaster. The next step will be to level all uneven wall surfaces; this should only be done if not lining or laminate is used.
An important detail needs to be taken into account. If the hallway is small, then it is better to refuse frame installation, as this will significantly reduce the size of the corridor.
If the choice fell on finishing with wallpaper, stone or decorative plaster, then make sure in advance that all the walls are perfectly smooth. After the work has been done, we sheathe the walls of the hallway.
Mounting to the wall: instructions
There is no need to process or prepare the surface before installation, as is the case with other facing materials. You can leave old wallpaper and other surface finishing materials. This is another advantage of MDF panels: you bought it and finished the wall. No prep work. The only thing you need to know is how the cladding itself is done.
To do everything correctly, you need to find a checkpoint. To do this, you need to determine the place that sticks out the most. This is the control point. This is where the repairs need to start. Parts are attached to it level. The slats are fastened horizontally, the maximum distance is 25 centimeters. If you increase the distance, the structure will be fragile because the panels are located vertically.
vote
Article rating
Natural wood panels
In the manufacture of such panels, hardwood and wood with natural wood veneer are used. The main materials are: alder, cedar, oak, ash, pine, beech and maple.
After the panels are made, they are impregnated with special compounds to make the material resistant to moisture and fire.
- The veneer panel includes several layers. The main layer is made of pine, the cheapest material. Then a two or three-layer veneer is glued to it, on top of which the final one (made of valuable wood) is glued.
- The layers are bonded to each other through hot pressing.
- Finally, the panel is thoroughly polished and then covered with varnish, paint or wax.
The most expensive panels are made exclusively from valuable wood, with further polishing.
Link to article
Finishing with MDF panels is becoming today one of the simplest and fastest ways to turn the walls of a room into a beautiful and smooth surface. For the hallway, corridor, storage room and even the kitchen, this material will be a good solution. In fact, sometimes you don’t want to bother with “wet” repair processes or you need quick and effective repairs over a large area, then MDF panels easily solve these problems. Their design is becoming more diverse and allows you to create attractive interiors in a modern apartment, and the ease of installation is incomparable with other types of decoration. In this article we will give you some tips on covering hallway walls with MDF panels.
LET'S PREPARE THE TOOLS
To work with panels, you need to prepare a plumb line or laser level, a screwdriver, a fine-tooth hacksaw or jigsaw, a tape measure, a pencil and a metal square.
TWO INSTALLATION METHODS
There are two ways to mount MDF panels on walls: using glue or using a frame. Gluing allows you to save space in tight spaces, and the good thing about the frame method is that you can hide various utility lines in the cavities of the structure. You can also add that such panels can only be glued to smooth walls. And the frame method allows us to disguise any flaws on the wall that we do not want to perfect in the traditional way.
INSTALLING THE METAL FRAME
For the frame, you can use antiseptic wooden beams or galvanized profiles, which are used in plasterboard structures. But if for installation of drywall we install the supporting profile vertically, then for MDF panels the profile on the wall must be in a horizontal position. First you need to install a guide profile along the entire perimeter of the walls, near the floor and ceiling. We install horizontal profiles in increments of 500 mm, fixing them with U-shaped brackets to the wall. The quality of the entire work will depend on the geometric accuracy of the frame. When installing the frame, make sure that the lowest horizontal profile is pressed with its side to the floor. This will provide you with reliable fastening of the skirting boards in the future.
WE FIX THE PANELS WITH CLIPS
MDF panels can be attached to a metal profile using special clips, which, in turn, are attached to the frame with galvanized self-tapping screws with a flat press washer.
When buying a package with clamps, pay attention to the size - it is selected taking into account the thickness of the MDF panel, usually it is a clamp with a clearance of 2 mm. Pay attention to the package, the nails in the package are used on a wooden frame, and if you have a metal profile, then the screws are purchased separately.
We make fastenings in increments of approximately 500 mm. There is a groove and tenon on the sides of each MDF panel. We insert the protruding tenon tightly into the groove of the previous panel, and insert a metal clamp into the groove of the panel being fixed. Before attaching the clamp to the profile, press it tightly to the surface and check that the panel fits tightly into the groove so that there is no gap. The next panel will cover the clamp with a protruding ridge. This results in a hidden fastening.
With the use of clamps, we get a completely dismountable structure - the panels will again be ready for re-installation even if completely dismantled.
WE MOUNT PANELS WITH GLUE
Installing MDF panels on walls using glue is much faster, since there is no need to build a frame. But walls for adhesive installation must first be prepared. They must be fairly smooth and free of loose layers of paint and plaster. For better adhesion to the glue, the walls should be primed with an acrylate primer. As with wallpapering, you need to use a plumb line to determine the vertical line along which the first panel will be installed. And to prevent further misalignment, the first panel must be additionally secured with self-tapping screws in places where the traces will be covered by the plinth and decorative trim. In the future, you will still have to occasionally check the verticality of the installation. But first, let's figure out what kind of glue we need for the job.