A furniture jig is a device that can significantly simplify and speed up the process of production and assembly of furniture structures. This device, which can be manufactured in various designs, makes it possible for even novice craftsmen to make holes in elements of furniture structures with high quality and precision.
Drilling through the jig ensures precise placement of mounting holes
Template characteristics
Installing furniture hinges is an important step in assembling cabinets. A special insert template is used for this process. This element is made from different materials. You can purchase a ready-made part in a store or try to do everything yourself.
Work on installing facades is simplified by templates for furniture hinges. The finished element has many advantages. These include convenience, since there is a sketch for marking. Among the advantages of using a template are the strength of the structure, ease of use, and compactness of the product.
Description
A furniture jig is a special template tool that is often used by specialists in small and large enterprises to mark drilling points on products and, in some cases, also ensures that the drill fits straight into the material. Depending on the needs of the master, conductors can be either factory-made or self-made. Most often they take the form of a metal template with sleeves for the hole and marking the distance between them. The main advantage of using a furniture jig is that specialists spend less time taking measurements and making markings for drilling.
Using it, you can quickly mark the necessary points on the product blanks, and then make their high-quality connection using different fastening methods. The scope of its application is quite wide, but most often it is used for quick insertion of standard furniture hinges. The device may vary in appearance and markings on the template depending on its intended purpose and operating conditions. For example, a jig for furniture hinges in the production of doors will differ significantly in appearance from a jig that is used to fasten massive furniture doors.
Features of drawing up a drawing
You can make a template yourself if you have a drawing of the future design. To develop a sketch, you need to know what elements the template consists of.
Template structural details:
- Base. There are holes for drilling on it. This part of the furniture hinge installation template is key.
- Holder. The functions of an element include a limitation. The part is fixed to the door leaf, thereby eliminating shifts and deformations.
- Connecting parts. These elements help to adjust the template to specific door hinge sizes. The number of connecting elements depends on the complexity of the structure and the functions assigned to it. The primitive template has only 3 such details.
You can determine the amount of materials needed if you accurately determine the dimensions of the template. The design can be made more complex. You can add the installation of door locks to the functionality of the template.
Electrical accessories
Sawing and processing parts of furniture is a more labor-intensive process that cannot be handled with manual tools. It is recommended to stock up on electric tools for this.
Use different ways to create tools.
You may need:
- An electric drill is the most versatile power tool. Choose a model with a speed controller that is fairly lightweight.
- An electric jigsaw allows you to make beautiful cutouts and accurately and quickly cut wood or plywood.
- A grinding machine - with it you can bring the surface to the desired smoothness, make it neat and even, and give it a finished look.
- A construction hair dryer will be needed if you need to glue edges to varnished chipboard.
Electrical appliances are quite expensive. If you are furnishing your apartment and no longer plan to make furniture, you can rent equipment to save money.
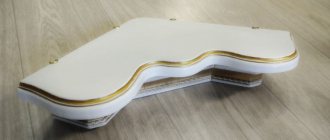
Furniture template for overhead hinges
The hinge template is designed to simplify the process of installing facades; it is often called a hinge jig. To use the sample, you do not need to have any special skills or knowledge. First you need to mark the location for the center of the fastener. Then the template is applied. Its nose should coincide with the applied mark.
Next you need to mark the hole for the strip. This can be done with a marker or a self-tapping screw. Then the template is applied so that its nose coincides with this mark. Next, the place for attaching the bowl is marked. Using a cutter, make a hole for the internal hinges. Self-tapping screws are used to secure the fittings.
Features of working with the template:
- The sample is made of durable materials, but it must be treated with care. For this reason, drilling through a template is prohibited. This may reduce the life of the product.
- When marking, be sure to step back 1.1-1.2 cm from the edge.
- Hinges from different manufacturers may have slight differences in size - the spacing between the centers of the screws. Then the template is used to determine the location for the cup. This hole is universal for all fasteners.
The number of hinges depends on the dimensions of the doors. The cutters are selected depending on the façade material. It is recommended to use reinforced self-tapping screws for fastening. During operation, the risk of damage to the fittings is reduced.
What is system 32 in the installation of furniture fasteners and accessories
In the production of cabinet furniture, they are increasingly moving away from standards, implementing some individually developed projects. However, there are certain design principles that remain unchanged. And at the international level.
Furniture system 32 is a general principle for standardizing the layout of furniture for further assembly. Its basis is a repeating step of 32 between the centers of the mounting holes with a distance of 37mm from the edge (taking into account the thickness of the edge).
System 32 is also followed by manufacturers of various furniture fittings and components. Thanks to this, the furniture maker does not have to think about and measure different distances in order to install guides for drawers of different types, handles of different sizes, lifting mechanisms, furniture hinges, etc. It is enough to remember a simple series of numbers (with time and growing experience in making furniture with your own hands, it is remembered like a multiplication table).
All this saves time and costs for the manufacturer in preparing furniture for assembly. System 32 also “subordinates” the settings of CNC machines, drilling and additive equipment.
Making your own template
Making a template for furniture hinges with your own hands follows a clear plan. It is important to follow the sequence of steps. If you follow all the rules, then no difficulties will arise in the process.
Stages of developing a template for loops:
- Selection and preparation of materials;
- Preparation of necessary tools;
- Development of template details;
- Final assembly of all elements.
Paper template for download
- To create a template yourself, you need to print a sample.
- According to its dimensions, make a blank from solid material, plastic or wood
- Attach the paper template to the workpiece
This is what you should get.
To create a workpiece you will need to take a drill, router, hammer, and jigsaw. You will also need tools for drawing markings. First you need to make a base. The optimal dimensions are 19x38 cm. A hole measuring 13.5x7 cm should be made in the center. The edges should be smooth. A router will help with this.
Bolts must be placed on the workpiece. It is important to maintain symmetry relative to the width of the base. The bolts must be buried in the structure so that they do not interfere with further manipulations. The hole is made wider than the connecting elements and additionally driven in using a hammer.
It is necessary to retreat 7 mm from the 13.5x7 cm holes and make small notches. Around an element with dimensions of 37.5x7 cm, notches are made on one side at a distance of 30 cm from each other.
A homemade template requires a holder measuring 2x5 cm and a length of 5.8 cm. You will need to install a limiter on one of the sides, which looks like a small block. This element will not allow the distance to shift when installing the facade.
Then all parts of the template are attached. Washers are installed under the bolts and nuts. This element increases the durability of the template. The manufacturing process does not require special skills or knowledge. It is enough to familiarize yourself in detail with the template development scheme.
Selection of materials for work
For the template, you can use plywood, chipboard or MDF. More durable structures are made of plexiglass and metal. You can take several materials for one template. So you can use chipboard for the base, and make the guides from a more durable material. It is easier to work with wood, as it is easier to process than glass and metal.
Required connecting elements:
- Bolts. You will need 6 pieces with a thickness of 6 mm and a length of 30 mm. To fix the connecting element, you need to have a 10 key.
- Nuts. Need 6 pieces. The main requirement for the element is convenient adjustment. Wing nuts are most often used.
- Washers. Their diameter should be 6 mm.
- Self-tapping screws. They are selected depending on the thickness of the remaining connecting parts.
Materials and tools
To manufacture a device, you must first decide on the tasks that it will perform. Accordingly, the necessary material is selected from which the furniture template will be made with your own hands. The most durable, reliable and “long-lasting” is considered to be a metal conductor. To create a furniture jig for drilling with your own hands, it is permissible to use wood, plywood, textolite, and plexiglass. This is due to lower labor costs and cheaper materials. All this is important, especially if you are going to make several different templates yourself.
To make a conductor, a piece of reinforcement, a block or a plate is suitable - something that can probably be found in any garage or home workshop. To make a simple marking device, you can take a regular school ruler - wooden, plastic or metal.
Of decisive importance in the manufacture of the jig is the accurate calculation of the location of the holes on the workpiece. You can take a ready-made diagram or make it yourself. The latter option is preferable, since the dimensions in the drawings must correspond to the tasks being solved.
Tools you will need:
- drill;
- grinder or jigsaw;
- a set of locksmith tools;
- clamps;
- vice.
When manufacturing a jig, you will need perfectly accurate drilling of guide holes and hardening of the finished device
Drawing of a homemade conductor for drilling holes for confirmations
Drilling holes
Installation is carried out with all the rules:
The depth of the hole for the furniture hinge should be about thirteen millimeters. If possible, the insertion of furniture hinges should not be deeper, otherwise the front side of the canvas may crack; The diameter of the hole depends strictly on the cup of the loop
Tools must be completely aligned with their axis to prevent damage to the surface; A sharpened cutter will help protect the blade from damage and chips; Do not rush while drilling, otherwise there is a risk of doing it sloppily; It is worth paying attention to the dimensions of the cups and their dimensions when installing furniture hinges;
Having drilled one hole, proceed to the next and so on until all the holes for laying the hinges are prepared.
What tools should I use for this?
The bowl must be secured to the facade, and the bar to the body of the bedside table. The furniture hinge must be inserted into the hole, which must be made in advance. The shoulder of the loop becomes a kind of bridge, now connecting both parts. To make holes for such loops, you need to prepare the following tools:
- screwdriver or drill;
- special drill-mill;
The diameter of the cutter for the hole for a furniture hinge is 35 millimeters or 25-26mm. It is selected depending on the size of the loop cups. To create holes for such hinges, you can also use a simple drill.
A multifunctional drill, with attachments that are easy to replace, is quite suitable for such work.
The middle spike must be installed in the center of the circle, outlined using a specially prepared caliber. Automatic calibration is used on the corresponding machines, but at home the master cannot do without a specialized electric tool.
During installation, hinges require a high level of care and precision. The chance to complete exactly the required niche is the most important advantage of the so-called Forstner drill. It can provide a stop that will prevent you from penetrating further than required. And the teeth of the drill do not allow it to deviate from the intended “course”. The end result is an almost perfect hole. And due to this, the cup fits into the recess quite tightly.
But the above-mentioned drill also has one significant drawback, which manifests itself when working with a solid piece of wood. This is low quality, which is to be expected if the instrument was not made in a factory. This is why you should choose tools exclusively from official companies. And, of course, don’t forget about warranty cards.
Depending on the type of panel you are working with, the cutter can get quite hot. Due to this, it can burn the edges and wood that is removed from the recess. That is why, when working with such a foundation, you should not forget about breaks in work. So that the drills have time to cool down at least a little. Working in three to four sets will be ideal.
Particular attention should be paid to breaks when working with MDF sheets. If the activity is carried out with chipboard sheets, parts made of strong alloys will be able to make recesses for hinges really quickly and without much stress
Fastening rules
Most often, no preparation is needed to connect parts made of wood using self-tapping screws - the screws can be screwed into the part without drilling a hole. For these purposes, use a Phillips screwdriver or screwdriver. You need to act smoothly and carefully, especially when working with oxidized screws (they are considered the most brittle).
The tool should be kept strictly in line with the screwing hardware. You should not try to screw the fastener into the knot - despite the fact that these are the densest areas, such fastening will be considered ineffective. If you plan to screw screws into high-density natural wood, it is recommended to pre-lubricate the hardware with laundry soap. It will act as a lubricant and ensure easier insertion of the fastener into the material.
It is worth considering that the screw should not go through the 2 structures being connected.
Before drilling, you need to apply markings, and then make a hole in the main part measuring 0.8 times the diameter of the screw. The depth of the hole must correspond to the screw-in base of the hardware. If the fasteners are thin, you can use an awl.
When drilling soft lumber, it is also possible to make holes by hand. To work with hard materials, drill a hole that matches the profile of the screw-in fastener. To make a recess you need a drill and a drill. It is best to use a countersink.
After the preparatory work, the screw is inserted into the hole. It must be strengthened in the material by twisting it clockwise with a screwdriver. In this case, the correct selection of hand tools is important. If you take a screwdriver that does not match the size, there is a high risk of damaging the slot on the head - in this case, it will be impossible to tighten the fastener. You can also fasten screws using electric or pneumatic screwdrivers. Their use makes work easier and speeds up the assembly process.
The final stage is installing stickers or plugs on the fastener heads. Such accessories are sold in a wide range of colors. Their main task is to camouflage fasteners. Thanks to the use of stickers, you can increase the aesthetics of finished furniture.
For more information on screws and self-tapping screws, see below.
Make your own wooden kitchen step by step
To make wooden furniture for the kitchen with your own hands, you first need to decide what kind of wood you will work with as the main material. The modern market offers more than 40 types of wood - hard and soft. Hardwoods include oak, beech, walnut, yew - their wood is more durable, but they are also more difficult to process, so they are ideal for making solid wood and slabs. Among the soft ones, you can choose pine, spruce, poplar - they have a smaller margin of safety, but they are easy to process and can be used to construct shelves, small cabinets and individual decorative elements. And, of course, the selected material must be of high quality, thoroughly dried and dense, without knots, cracks or layers. In a wooden house, a DIY kitchen made from the same type of wood as the house itself will look especially good.