Photo: repairstyling.com Street shoes scattered all over the floor mixed with indoor slippers is an eternal problem in most hallways. It's ugly, uncomfortable and unhygienic. You constantly have to stumble, worry about expensive shoes or that your pets will unexpectedly ruin your favorite boots. Is this a familiar problem? But solving it couldn’t be easier - they put shoe racks in the hallways specifically for this purpose. And we will tell you what they are!
Types and models of shoe racks
To choose a suitable shoe rack, you need to consider the size and layout of your hallway. These can be vertical or horizontal, closed or open structures. And they all have their advantages and disadvantages.
Open shelving
This is a stationary rack with several sections, which used to be called shoe boots. They are simple, practical, accessible and inexpensive, and the top tier can be used as a seat or instead of a shelf. Shoes are constantly ventilated and dry well, but at the same time dust can accumulate on them.
Photo: nikastroy.ru
Shoe stands
The stand differs from the rack in the absence of any stationary frame structure. These are guides or shelves, the distance between which depends on the type of shoes: low for summer boots, high for winter boots. Most often, stands are metal or plastic, with or without a seat, but they also gather dust and are constantly in sight.
Photo: domechti.ru
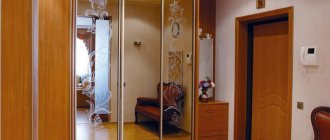
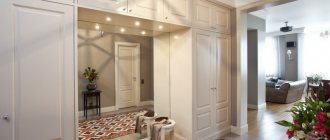
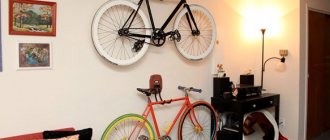
Built-in shoe racks
Like any built-in wardrobes, such shoe racks allow you to take advantage of the features of the room. For example, it can be mounted in a useless niche or thus hide wall defects. The design has only one drawback - it is completely stationary and cannot be moved.
Photo: etotdom.com
Closed cabinets
A shoe closet is a separate cabinet with doors in which shoes do not collect dust and are hidden in plain sight. They can be tall and narrow, classic or with vertical doors of different widths. The disadvantages are more impressive dimensions and the inability to immediately hide wet shoes.
Photo: bachhoaxanh.com
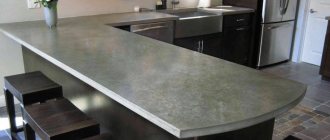
Nightstands and chests of drawers
Cabinets and chests of drawers usually differ in size from a closet, so they are suitable for cramped living rooms with low ceilings. Traditionally, chests of drawers are more spacious, and cabinets are smaller. Most often they are closed, but there are also open models.
Photo: oooblagodat.rf
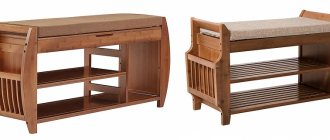
Combined shoe racks
This is the most practical option for individual layouts and interiors, although it will cost more. Such shoe racks combine different types of sections and shelves to store all shoes at once: seasonal, casual and home. Among the disadvantages, in addition to the price, there are also quite impressive dimensions.
Photo: manrule.ru
Master Class
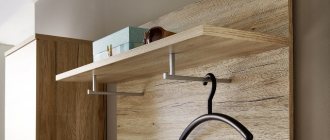
Below you will find instructions for making a shoe rack with your own hands from wood.
Preparation of the drawing
First of all, you need to decide on the dimensions and design. The tiered design depends on the number of people expected to use it. It is also worth considering how many shoes a person owns.
The width of the shoe shelf is selected based on the available free space in the hallway or the dimensions of the rest of the furniture. As for the design solution of the shoe rack, it is important that it matches the design style of the vestibule.
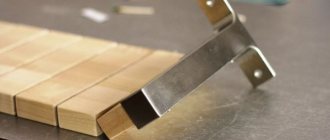
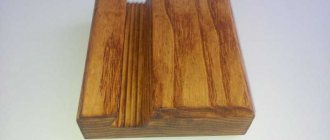
Preparation of material
The type of tree does not matter. The recommended thickness of the boards is 1.5 - 2 cm. After the issue with the material has been resolved, you need to use a saw or jigsaw to cut out the shelf parts in accordance with the prepared drawing. Then you need to carefully sand all the workpieces.
Painting elements
Before starting paint and varnish work, you should make sure that the planned artistic finishing is completed. The chosen color should be in harmony with the overall style of the corridor. Therefore, it is best to use the same paint as for the hanger. An alternative could be stain. Varnishing is also acceptable.
Preliminary preparation for installation
Before you start assembling the structure, you need to make all the necessary holes at the connection points of the parts.
Assembling the shelf
First, load-bearing elements are installed. Then the shelves of the first tier are installed. After they are aligned, they move on to assembling the last floor of the shoe rack. The finished product is placed in the planned corner of the hallway.
It is quite possible to make a shoe rack yourself at home. Moreover, it will not take much time and require a minimum amount of expenses.
Materials for making shoe racks
For the manufacture of shoe racks, all the same materials are used as for any other furniture. Solid wood is impressive and suitable for classic interiors, but it is expensive. Chipboard and MDF are simpler and more modern alternatives, common in the manufacture of cabinet furniture.
Plastic is relatively inexpensive and durable if you choose the right type. But it will fit only into modern styles, such as high-tech, and will not suit natural eco-interiors at all. Metal with an anti-corrosion coating is strong, durable and reliable, but it is better suited for open structures.
Photo: dizainexpert.ru
DIY crafts from old things (85 photos)
DIY shoe shelves: the best ideas
Thanks to the wide variety of ideas, everyone will be able to choose the most suitable option for themselves. In addition, it is not at all necessary to repeat it completely. Add your own details and experiment with decor.Dimensions of shoe racks for the hallway
The easiest way is to calculate all sizes individually for your interior. But for reference, you can take a few average parameters. For example, the height of shoe racks-benches is usually 50-55 cm, medium cabinet shelves are 60-120 cm, and high pencil cases can easily be equal to a wardrobe. The length of chests of drawers varies from 60 cm to 1.5 m for spacious hallways. The width on average varies from 40 to 70 cm, depending on which side and at what angle the shoes will be placed.
Photo: market.yandex.ru
How to make candlesticks with your own hands: 80 photo ideas
Detailing
Shoe cabinet parts
Details chipboard 16 mm, color: dark wenge:
- 1100*250 – roof/bottom, 2 pcs.
- 668*250 – sidewalls and internal stand, 3 pcs.
- 526*250 – internal horizontal shelves, 2 pcs.
Details chipboard 16 mm, color: light wenge:
- 311*518 – facades, 4 pcs.
Details chipboard 10 mm, color: light wenge:
- 510*140 – internal partitions for shoe boots – 4 pcs.
- 510*135 - internal partitions for shoe boots - 4 pcs.
- 510*85 - internal partitions for shoe boots - 4 pcs.
Fibreboard part 3 mm, color: white:
- 696*1096 – back wall – 1 pc.
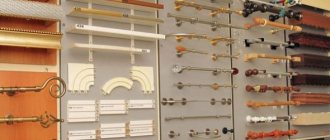
Accessories for shoe racks
- Shoes - 4 sets. These are plastic sandwiches for the sidewalls, each set contains two pieces, size: 192*287*85*16;
- Handles – 4 pcs;
- Thrust bearings – 6 pcs.;
- Self-tapping screws;
- Confirmations
- Double-sided tape (for mounting facades).
Necessary tool
- Screwdriver;
- Screwdriver, tape measure, square;
- Confirmation bat;
- Screw bit;
- Drill for confirmations;
- Awl.
How to make a shoe rack yourself?
It is not necessary to buy a ready-made shoe rack for the hallway, because you can make it yourself. Especially if you need atypical sizes or special content. It is enough to arm yourself with a standard set of tools - a tape measure, a level, a hammer, a drill, a drill bit and fasteners.
DIY shoe rack
First, you will need to purchase the necessary fasteners and ready-made parts: metal corners, handles, adjustable legs, drawer guides, shelf holders. Of all the materials, it is easiest to work with chipboard yourself - just take into account the thickness of the boards when making calculations.
Determine the appropriate dimensions, cut and process all edges and edges with sandpaper and special adhesive tape. Calculate where the hinges, guides, and fasteners will be located and mark it all on the boards before starting assembly. Start marking the holes from the bottom shelf, because it is solid and the main structure is attached to it.
For assembly, use self-tapping screws or confirmation screws and a drill of a suitable diameter. Step back from the edges so that the chipboard sheet does not crack during screeding. To fasten the shelves, use special metal holders that evenly distribute the load. And for all corner joints, use metal corners - they will provide rigidity and stability.
Photo: berkem.ru Photo: stroy-t74.ru Photo: berkem.ru Photo: syl.ru Photo: berkem.ru Photo: berkem.ru
DIY rotating shoe rack
Making a round rotating stand like in stores is not as difficult as it seems. You will only need chipboard or plywood and several blanks from them: round ones for shelves and rectangular ones for cross-supports.
Mark even circles with a special large compass or using regular thread. Sand all the cuts with a sander or sandpaper and glue the edges with a special tape using an iron or hot air. Assemble crosspieces from rectangular parts using self-tapping screws and use them to connect adjacent circles to each other.
For small-diameter shelves, one central cross is sufficient; for larger ones, it is better to have several on different sides. To make the structure rotate, attach a stand with a special mechanism at the bottom, which are sold in furniture stores.
Photo: delta-link.ru Photo: manrule.ru Photo: skachat-kartinki.ru
DIY shoe rack made of cardboard
For those who love hand-made things and experiments, there is an interesting idea - a shoe rack made of cardboard. But you will need thick, highly durable cardboard, such as shoebox cardboard. And along with it a furniture knife, a stapler with large staples, wide tape and wood glue or a gun. Lay out a sheet of cardboard on a flat base or on the floor and mark out rectangular sections about 30 cm high. Divide each rectangle into three parts and bend it into an equilateral triangle. Glue the edges of future boxes with tape and connect them together using wood glue into a single structure.
This shoe rack can be placed on the floor, attached to a wall or hung. This will interestingly complement Scandinavian interiors, boho, loft and eclectic styles. But keep in mind that the structure is not very stable and durable, and most importantly, it is sensitive to moisture.
Photo: mosnerudstroy.ru Photo: hammer-shop.ru
DIY shoe rack made of metal profile
The metal profile is great for open shelving and combines with glass shelves. This is an interesting solution for Scandinavian and modern interiors, high-tech and loft. In addition to the profile itself, you will need a screwdriver, an angle grinder, a level, a jigsaw and a glass cutter.
The main task is to take correct measurements and cut the metal profile into fragments of the required length. Then secure the main frame guides to the wall with self-tapping screws, remembering to monitor the level and verticals. After this, assemble the rest of the frame in the same way, and place shelves made of safety tempered glass on top.
Photo: livemaster.ru
Photo: steel-ideas.ru
Photo: smolenkaspb.ru
Photo: severdv.ru
Photo: manrule.ru
DIY shoe rack made from pallets
Furniture made from wooden boxes and pallets is in demand when decorating country houses, in rustic styles or in eco-interiors. It will take you a few hours at most to assemble the structure, but first you need to get a construction pallet of a suitable size.
After that, sand it with a machine or sandpaper, cover it with a moisture-resistant impregnation and paint. You just need to lean the pallet against the wall, and you can already insert shoes into it. But this option is only suitable for slippers, sneakers and similar things.
Using the same principle, you can assemble a structure from boxes. Divide the large ones into sections, and immediately connect the small ones together or attach them to the wall in a chaotic manner. Such modular designs, painted in bright contrasting colors, look interesting. In the tallest drawers you can screw several shelves onto special corner holders.
Photo: build-experts.ru Photo: dlobal.ru
Photo: dizainexpert.ru
Photo: alltopcollections.com
Bench-shelf for shoes
If desired, even old things can be transformed and given a second life. In this case, we suggest converting a simple bench into a more modern design for the hallway.
In the process you will need the following:
- bench with shelf;
- dye;
- brush;
- batting;
- foam;
- knife;
- furniture stapler;
- upholstery fabric;
- buttons (optional);
- hammer.
We paint the surface of the bench with black paint and leave it for several hours until completely dry.
We cut a piece of foam rubber based on the size of the bench. Please note that the size must match perfectly.
Place a fairly large piece of batting on the work surface. We place foam rubber on top and place a bench on it. We stretch the batting and fix it with a construction stapler.
This must be done especially carefully so that there are no unnecessary folds on the surface.
We place upholstery fabric on the work surface and a bench on top. At this stage, you should not rush to ensure that the main fabric is as smooth as possible, without creases and well stretched. We fix it with a stapler.
Corners look best when wrapped like an envelope. If desired, the bench-shelf can be decorated with black buttons.
The result is an original and functional bench-shelf.
Shoe rack for a small hallway
For a small and narrow hallway, tall, flat cabinets with vertically opening doors are best. If the room has low ceilings, pay attention to the same low wide cabinets from which you can make a bench. Use joint systems: combine shoe racks with cabinets, stands, shoe hooks.
Less space in a small hallway is taken up by solid shelves instead of separate drawers and cells. To maintain order, use compact liner dividers and organizers. Pay attention to tall, flat models in which boots and shoes are stored at an angle.
Photo: boommebel.ru
Shelf styles
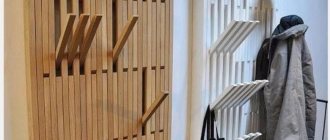
Like any other piece of furniture, the shelf must match the chosen interior style of the room. For high-tech and loft, simple models made of metal and pipes are suitable. This option will look especially colorful against the backdrop of the “branded” brickwork in the hallway. For a group of rustic styles headed by Provence, open-type wooden shoe racks are suitable. The surface of the product is covered with discreet paint and artificially aged. This option will look great in combination with wicker boxes-baskets, which are placed on the upper tiers. For country music, you can choose a model from boxes that are placed on top of each other, after which the entire structure is secured with glue. For minimalism, original options are used. For example, a product that can hardly be called a “shelf” in the truest sense of the word: a row of vertical poles on a stand. Each one is “put on” a boot. For classic styles, luxurious closed models with carved doors are used. They also go well with elegant banquettes on twisted legs with a storage system located under the seat.
Shoe rack in the hallway - photo ideas
These are not all the ways to organize convenient shoe storage. With a shoe rack, the hallway will always be clean and tidy. And we have collected ideas on how to fit it into the interior in this photo collection!
Photo: homeli.ru Photo: vsemebel40.rf Photo: krovlyakryshi.ru
Photo: dizainexpert.ru Photo: regionoperator.ru
Photo: vseblaga.ru
Photo: manrule.ru
Photo: vk.com Photo: manrule.ru Photo: dizainexpert.ru Photo: yuzno-sakhalinsk.price.ru Photo: glazovmebel.su
Photo: cahks.com Photo: matelpro.com Photo: dizainexpert.ru Photo: pinterest.ru Photo: kitchendecorium.ru Photo: vannadecor.ru Photo: hoff.ru
Photo: mnogodivanov.ru
Photo: links-stroy.ru
Photo: senso-rf.ru
Photo: womanadvice.ru Photo: ramenskoye.skidkagid.rf
Photo: orel.mebel-nastile.ru
Photo: centr-mebel.com Photo: dizainexpert.ru
Photo: theworldnews.net
Did you like the post? Subscribe to our channel in Yandex.Zen, it really helps us in our development!
Place for guest slippers
It is also better to store them near the front door. There are a lot of solutions here - from special holders and sections in the closet to fabric hanging trunks that can be hidden in the wardrobe compartment.