In the hallways there are two types of storage places for shoes: for those that are worn now and those that will be needed in other seasons. In the second case, space is allocated in closets and wardrobe compartments. Narrow shelves, drawers and baskets, various storage systems and organizers allow you to bring order and consistency. But for the first case, some kind of separate cabinet, chest of drawers or do-it-yourself shoe rack, made of the right size for the hallway, will come in handy. I selected photos and drew drawings and diagrams of the most successful models of narrow functional shoe holders and overshoes, which can be purchased ready-made or made independently.
Why you should make a shoe rack with your own hands for the hallway
The problem of placing shoes worn at a given time in the hallway can be solved in different ways. Typically, low cabinets with a soft seat are used for storing seasonal shoes and slippers - they are also called shoe boots.
They also design open shelving with shelves for shoes of shallow depth. If you place the shelves at an angle, you can make the rack narrower - after all, its depth is determined by the size of the shoes.
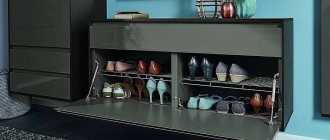
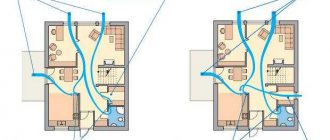
A slim shoe rack is perhaps the best option possible. In the reference book with a list of furniture and interior items, I defined “slim”. Essentially, this is a shoe rack with a rotating mechanism that you can make with your own hands.
Due to the fact that the shoes are in an almost vertical position, the depth of such a cabinet is very small - ideal for small and narrow hallways.
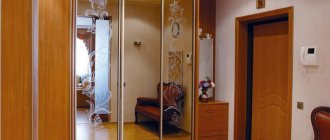
Since a shoe rack of this type is narrow and unstable, it must be attached to the wall. You can make it hanging, which will give the interior an additional zest and allow you to slide something under the body of the cabinet. Often a mirror is hung above a shoe rack, and its lid is used as a shelf for all sorts of small things, which is also very convenient. You can screw hooks, hangers for umbrellas and bags with your own hands to the side of the shoe rack - this will expand the functionality of the furniture and add comfort to the interior of the hallway.
The benefits of making your own shoe cabinet of the desired design are obvious:
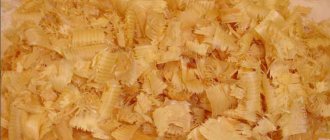
- In order to make a shoe rack with your own hands, you can use scrap materials and any leftovers.
- The design of a typical shoe cabinet is extremely simple, and the variety of drawings and photos allows you to choose the best option.
- Since the material consumption is low, as is the cost of the product, such projects are reluctant to be commissioned. You can immediately save yourself time and do it yourself.
Watch a video about making a shoe rack
I would like to draw your attention to the fact that mechanisms can be different, they can differ greatly in their sizes, and the dimensions mentioned in this video relate specifically to my case, but I think that anyone, based on the general principles of assembly, will be able to adjust this additive scheme to any size of their mechanism and a closet.
It is important to remember that this mechanism provides for an internal, rather than overhead, arrangement of the cabinet facade.
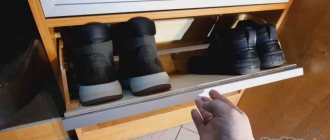
In my case, the place for installing the shoe rack mechanism was the lower part of the cabinet, which has an internal width of 600 mm, a height of 365 mm and a depth of 250 mm.
I’ll say right away that my version is made for slippers, but for boots, even size 41, the space of 365 mm in height is not enough, be sure to take into account the required height of the internal space when designing a shoe rack.
This cabinet will have facades made of aluminum frame profiles filled with MDF, therefore, in order not to attach the plastic sides of the shoe rack to the aluminum profile, it was decided to make a false facade from plywood, on which the cabinet facade will subsequently be attached.
This option will allow me to accurately install the facade after installing the drawer, eliminating all inaccuracies and deviations in the gaps, and they can easily exist, since this shoe rack mechanism does not imply adjustment at all.
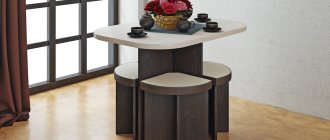
DIY shoe rack with seat, photos and drawings
The most comfortable sitting height is 350-500mm above floor level. The width of the seat must be at least 300mm. Most often, a compact shoe rack with a seat with your own hands has dimensions of 400x600x350mm. You can make the shoe cabinet longer and higher if the size of the hallway allows it.
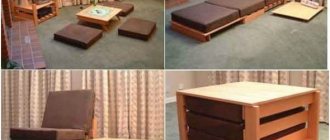
DIY shoe rack made from pipes, photos and drawings
Such a small and practical piece of furniture can be made from scrap materials - everything that is left over. For example, use pipe cuttings.
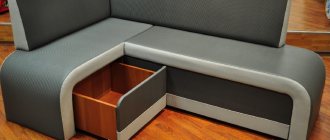
In this case, the shoe rack can be made in the form of a tall narrow cabinet for shoes or a shoe cabinet with a seat.
Pipes can also be used as supports for shelves. For example, in the implementation of a carousel shoe rack with a rotating base.
The rotating element is a conventional TV rotating mechanism with a square platform. To ensure stability of the cabinet, you can make the base larger; the height should not exceed the radius of the shelves without additional weighting the center of the structure.
Calculating the width of the shoe box drawer inserts
We take into account the gap between the side walls of the cabinet and the plastic sidewall of the drawer, taking into account the plastic bushings cut into the side walls of the cabinet, set 3 mm on each side, and also take into account the thickness of the plastic sides of the drawer themselves, for my sides the thickness is 5 mm.
It turns out that we subtract 2 bushings located in the cabinet walls, 3 mm each, and two plastic sides of the rotating device, 5 mm each, and we find that we need to subtract 16 mm from the internal width of the cabinet opening.
The thickness of the wooden elements inserted into the sides is calculated as 10 mm, but in the absence of such material, I will make my inserts from 8 mm plywood, which I plan to paint after assembling the box.
In my situation, with an internal cabinet width of 600 mm, the inserts turned out to be 584 mm long,
and the width of the façade made of the same plywood is 596 mm. Due to this, a gap of 2 mm remains between the facade and the walls of the cabinet.
The height of the facade depends on the height of space you need for shoes. You should take into account the lower sweeping zone and the size of the shoes that will be in the shoe rack.
As a standard option, for a mechanism with a lower part with a bevel, the manufacturers of these same mechanisms offer the following solution.
The front of the drawer at the bottom should protrude and be a couple of centimeters below the mechanism; then, below this front with a gap of 7 mm, a fixed narrow front is attached to prevent the drawer front from touching in the sweeping zone during opening.
The height of the facade can be anything within reason, again, I repeat, it depends on your shoes.
I don’t really like this idea, precisely because in the lower part there is a place for garbage to accumulate with difficult access to it.
For a mechanism that has a right angle at the bottom, it is not necessary to install a narrow fixed facade; such a mechanism with a facade can be installed close to the bottom of the bedside table.
Having made the inserts, I assemble the box and secure the plastic sides of the mechanism to the plywood parts with self-tapping screws.
After assembling the drawer, it is time to mark the space for the drawer mounting bushings in the side walls of the cabinet.
Taking into account the 20 mm thickness of the aluminum facade and the 8 mm thickness of the false plywood facade, as well as the distance of 25 mm from the front edge of the side to the center of the rotation axis, the distance from the edge to the center of the hole was 53 mm.
The distance from the bottom of the cabinet to the center of the hole must be calculated individually in each specific case, depending on the thickness of the facade and the version of the plastic side mechanism.
For example. In my case, since the plastic mechanism has a bevel at the bottom, and the shoe box drawer has a thick front and is located at the bottom of the cabinet, it was decided not to install a lower fixed front, but to leave a small gap between the bottom of the front and the bottom of the cabinet.
In my case, with a height of the aluminum facade of 350mm and a gap between the bottom of the facade and the bottom of the cabinet of 13mm, the height from the bottom of the cabinet to the center of the hole was 150mm
Thus, I solved the problem of free opening of the drawer and the possibility of easily removing debris that will inevitably end up at the bottom of the cabinet.
After marking the space for the bushings, I drill out the seats using a 20 mm Forstner drill.
I install bushings in the cabinet walls; to ensure the bushings fit securely, I use liquid nails.
Afterwards, I insert the shoe rack drawer into its place, and through the plastic sides I fix the drawer to the cabinet walls using mating sleeves.
Next, I install the bushings that fix the drawer in the open-closed position; for this, the markings can be done directly on site.
To secure the box in the closed state, you will need to install a lock.
Then, using double-sided adhesive tape, right in place, observing all the gaps, I glue the facade onto the plywood of the box, and then fix it with self-tapping screws.
All that remains is to install the handle and the internal partition of the shoe rack, after which you can use it.
That's all, just watch the video about the step-by-step assembly of a shoe rack on the Smart Bill channel.
Show more articles from the category - Workshop
DIY narrow shoe rack with inclined shelves, photos and drawings
The greater the slope of the shelves, the narrower the shoe rack itself can be made. But you will need to provide some kind of stopper that will prevent boots, sneakers and other items from sliding off the surface of the shelves due to the slope. The stopper can be made from a wooden or metal tube, or a narrow strip of chipboard or wood.
As inclined shelves, you can use special nets for wardrobes with a side.
I recommend that you familiarize yourself with the range of such components in various wardrobe systems and related accessories for sliding systems (such as Commander, Find, Aristo, etc.). There are a lot of storage systems for hallways and dressing rooms with fastening to the side and back walls, as well as the placement of shoes in a vertical position (sole top) on “peaks” and “petals”.
Assembling a shoe rack
First of all, we assemble the frame of the shoe rack, four main parts - two sidewalls, a roof and a bottom. The box itself can be assembled at:
- Confirmats - here you will see the stubs from them,
- Minifixes - the process of installing an eccentric coupler is described in more detail in the article Installing a furniture eccentric,
- Furniture metal corners.
It's up to you to decide what will be easiest for you. I would still recommend minifixes.
After we assemble the box, we can install the internal parts.
The easiest way to screw them to the sidewalls and bottom is with confirmations, and to the roof and between each other in the center - with metal corners.
The final work on the frame will be the installation of the fiberboard back wall. In principle, nothing complicated should arise here.
It should be remembered that when installing the back wall of fiberboard, you should always have a perfect square/rectangle with even diagonals
DIY shoe rack made of wood and scrap materials
Strictly speaking, chipboard is not the best option for storing wet shoes. It does not have the required moisture resistance and requires more careful use. Therefore, a shoe rack made of wood, metal, MDF, or furniture board seems a more attractive option for making it yourself.
In addition, wood, plywood and furniture panels provide more opportunities in the design of a shoe cabinet. Hollow and openwork-shaped sidewalls can be used as supports.
Or in a simpler version - using timber as supports.
In general, you can use any scraps and materials at hand to make a shoe cabinet with your own hands.
Necessary materials
The materials for making shoe racks can be:
- MDF board,
- Chipboard board,
- Plywood,
- Tree.
As for plywood, it is certainly one of the most durable materials for making furniture. However, it requires additional processing and painting.
MDF is also highly durable. Its dense structure facilitates the process of drilling and assembling the product. But, often, if you make a shoe rack entirely from MDF, the product turns out to be quite heavy and expensive. Therefore, only facades are usually made from MDF, and the entire body is assembled from chipboard.
When ordering cutting and lamination of MDF, you can additionally choose milling on the plate, that is, using special milling equipment, a relief pattern will be applied to the parts. It will add a special style to your shoe rack.
In this material we will look at the manufacture of overshoes from a chipboard slab with a thickness of 16 mm - for the frame, and 10 mm - for the internal partitions of the overshoes. This material is one of the most budget-friendly on the market.
Due to the fact that chipboards have a wide range of colors, you can choose the color you like most or choose a decor that best matches the rest of the furniture in your home.
Our design involves the use of two colors: dark wenge (for the roof, sides, internal pillar and bottom) and light wenge (for the facades).
Of course, it is much easier to order detailing from a specialized store or workshop, since chipping cannot be avoided when cutting parts yourself. You just need to go to a furniture shop with detailing, and they will also trim them for you.