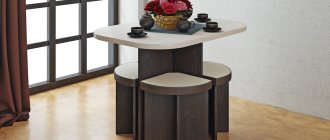
Laminated chipboard is one of the most popular materials used in the production of cabinet furniture. About 80% of furniture in the world is made from chipboard. Both economy class and premium class furniture are made from it. The high demand for furniture made from chipboard is caused by high consumer properties, pleasant appearance, as well as affordable cost. The variety of colors and textures allows you to make furniture for the interior in any style and color scheme. In addition, laminated chipboard goes well with other materials: MDF, fiberboard, wood, plastic, metal.
What is chipboard?
LDSP is a laminated chipboard made from coarse wood chips bonded with formaldehyde resins. The material is presented in sheet form, which is achieved through hot pressing. The basis of laminated chipboard is chipboard, which does not have a decorative coating. Rough chipboard is mainly used in the construction industry or in the manufacture of upholstered furniture.
Types of chipboard in furniture
Manufacturers label the structure of laminated chipboard differently, but usually like this:
- BS is office;
- SE – wood with surface pores;
- SM - smooth surface;
- MAT - matte smooth surface;
- PR – porous structure;
- PE – “orange peel”.
Regardless of the application method, such chipboard is called melamine-coated chipboard.
For production, the first two are most often used: BS and SE. PR is also popular, but is used less frequently; SM is used in the production of internal partitions. Other markings may occur.
Widely used for making furniture, filling coupe doors and other interior decoration elements.
Technology and production stages
The production of laminated particleboard includes several successive stages:
1. Wood processing and obtaining raw materials
The main component in the production of chipboard is wood chips. To obtain it, illiquid trunks are used, which at the initial stages are cleared of bark and sawed into pieces about 1 m wide. The prepared wood material is ground into wood chips using special equipment. Also, waste from wood processing enterprises is often used to obtain raw materials.
Raw materials for wood chips
Wood chips used in particle board base
2. Drying of raw materials
After the grinding stage, the wood enters the drying chamber, where vortex flows of hot air remove moisture from the wood chips.
Shredded wood in the dryer
3. Selection
The dried raw materials are transferred to a cycle plant. At this stage, wood particles are selected: chips of suitable size are sent to the next stage of production, and large particles are returned for re-grinding.
Sorting process for large wood elements
4. Mixing components
This stage of chipboard production involves mixing dried and selected wood chips with formaldehyde resin.
5. Creating a blank
From the mixer chamber, the resulting mixture of sawdust and formaldehyde resin flows onto a conveyor belt, where it is shaped into several layers using a cold press. Next, a chipboard blank is created: the mass is acted upon using a hot press, connecting all the layers.
Formation of particle boards
Finished boards without laminated coating
6. Lamination
The surface of the cut chipboards is leveled and sanded. Next, the sheet is placed on a forming press. To give the rough chipboard decorative properties, a special film is used. At the initial stage, it resembles ordinary paper. Next, the film is impregnated with melamine resin, after which it becomes hard and brittle. The next stage of lamination is pressing, during which the processed film is firmly connected to the surface of the chipboard.
The process of gluing melamine paper onto a rough sheet of chipboard
7. Cutting chipboard
After completing the pressing stage, the prepared slabs are cooled and dried. Next, the rough material is cut into sheets of standard sizes.
Chipboard sawing machine
Cutting laminated chipboard
How to assemble a cabinet from chipboard with your own hands
Even a beginner can assemble a simple cabinet; to do this, you need to follow the following steps sequentially.
Table 5. Instructions for assembling the cabinet
| Illustration | Description |
| Step 1 | First, you need to make a sketch of the future product in order to have a clear idea of the size and number of parts, fasteners and accessories. |
| Step 2 | The cutting of parts is ordered from a specialized company or in a furniture shop, whose specialists must be provided with a clear list of parts with dimensions and designation of the sides to be edged. Where laminate edges will be made, subtract 2 mm. For example, if the length of the part in the drawing is 1085 mm, in fact it is necessary to cut out a part with a width of 1083 mm. |
| Important! When calculating the distance of the walls on both sides of the box, take into account 13.5 mm on each side per rail. |
| Step 4 | It is recommended to make the top cover of the cabinet 3-5 cm wider than the base. This will allow you to install it so that from below it does not rest against the baseboard or sockets on the wall. |
| Step 5 | After the guide location line has been drawn and the element has been attached, using an awl, a mark is made at the locations of the holes where the self-tapping screw will be screwed in. |
| Step 6 | Guides for drawers are screwed to the side walls according to the markings. |
| Markings for confirmations are applied to the side walls. |
| Step 8 | The drilling point is marked using a sharp awl. |
| The hole is drilled so that the screw head is subsequently hidden under a decorative rivet. |
| Step 10 | To fix the top cover, wooden dowels with a diameter of 8 mm are used, holes for which are drilled using a metal drill, onto which contrasting electrical tape is wound, indicating the drilling depth (12 mm) with a plate thickness of 16 mm. |
| Step 11 | The distance from the edge is 8 mm. |
| Step 12 | The dowels are fixed with PVA glue. |
| Step 13 | To install the central partition, measure the length of the dowels installed in the lid array. |
| Step 14 | Drill holes for dowels to the required depth according to the markings. The drill must be kept strictly horizontal. |
| Step 15 | The dowels are lubricated with PVA glue and a partition is installed. |
| Step 16 | Connect the table top to the side walls. |
| A shelf is fixed to the confirmations. Using a clamp, fix the shelf and crossbar at a right angle. |
| Step 18 | According to the markings, fix the shelf with a confirmation to the partition in the center. |
| Using the method described above, another partition and shelf are installed. |
| The decorative edge should be located on the outside of the product. |
| Step 21 | At the next stage, partitions with guides and shelves are installed. |
| To protect the floor covering, felt pads with a self-adhesive backing are used. |
| When assembling the box, the distance from the edge under the confirmation is 8 mm. It is enough to retreat 30 mm from below and above. |
| Step 24 | The bottom of the LDVP box is fixed with furniture nails. |
| After the box is assembled, check its diagonals. |
| Guides are fixed to the ends of the box. |
| Step 27 | A handle is screwed to the front of the drawer. |
| Step 28 | Drill holes for screws. Fix the facade. The screw heads are masked with decorative rivets to match the furniture. |
History of origin
Chipboard was first used in the post-war period, when a huge amount of resources was required to restore destroyed buildings. The high cost of natural wood has prompted furniture manufacturers to look for alternative options. Numerous experiments in this area led to the invention of a material that consisted of almost 90% waste materials and waste from the wood processing industry.
Previously, wood shavings were burned along with other waste, but later found a new purpose. Over time, the production of chipboard has improved and today this material occupies a leading position in the furniture industry.
Chipboard classification
Despite the fact that the basis of all types of chipboard is, at first glance, a constant composition, this material has many classifications.
Based on the type of cladding, particle boards are classified into the following:
- rough chipboard – without decorative layer;
- laminated chipboard – covered on both sides with laminating film;
- veneered chipboard – covered on both sides with a thin layer of natural veneer;
- laminated chipboard – lined with paper-resin film.
Chipboard without a decorative coating has no aesthetic qualities, so it is used extremely rarely in the manufacture of cabinet furniture. This material is often used for wall cladding. Also, rough chipboards are used in the production of upholstered furniture as the base of the structure. Laminated chipboard has many options that differ in color, texture and texture. Such a rich variety is possible thanks to a wide range of laminating films.
Laminated particle boards
Veneered chipboard is an inexpensive analogue of furniture made from natural wood. Externally, products made from veneered chipboard resemble furniture made from natural wood. The material is distinguished by a wide variety of colors and types of wood. Veneered chipboard in furniture production is not used as often as laminated chipboard, although it has pleasant decorative qualities. Products made from chipboard covered with veneer are very aesthetic and have high consumer properties: environmental friendliness, pleasant appearance, wear resistance, practicality.
Veneered chipboard is produced by lining rough chipboard with a thin cut of wood - veneer. For these purposes, both coniferous and deciduous wood can be used. The production process includes several stages: cutting veneer, gluing it to DP and sanding. Glue with urea-formaldehyde or melamine-formaldehyde resins is applied to the surface of the rough chipboard and the veneer is glued. Next, the layers are fastened together using a press. The final stage consists of carefully polishing the finished material.
Laminated chipboard is used as a cheap analogue of laminated chipboard. It has pleasant external properties, but is significantly inferior in quality.
Laminated particle boards
The laminating process involves covering the chipboard surface with rolled material in the form of a paper-resin film. An adhesive composition is pre-applied to the surface of the chipboard, to which a hard decorative film is attached using a press. The laminating process takes place at a temperature of 120 -150 °C. The main difference between laminated chipboard and laminated chipboard is that in the first version the paper is simply glued to the surface, and when laminating, pressing occurs chemically and the decorative film becomes one with the chipboard.
Classification according to quality characteristics includes the following types of chipboard:
- 1 grade;
- 2nd grade;
- 3rd grade.
Grade 1 chipboards are of the highest quality. For the production of 1st grade slabs, exclusively selected sawdust, mainly of one wood species, is used. It is the slabs of this type that undergo further processing - lamination. They have an absolutely smooth surface, without flaws or chips.
Grade 2 particle boards may have small chips or scratches. Such slabs can also be decorated.
Grade 3 wood-based particle board material is used mainly in the construction industry. The slabs have very significant defects that do not allow them to be used in the manufacture of cabinet furniture. Grade 3 chipboard is not covered.
Based on the degree of resistance to external influences, the following types of chipboard can be distinguished:
- moisture resistant;
- fireproof.
Moisture-resistant chipboard is treated with paraffin emulsion. Also in its production specially processed wood shavings are used. Such manipulations prevent wood fibers from swelling under the influence of moisture.
Fireproof chipboard includes fire retardants that prevent the combustion process.
Cutting and edging laminated chipboard
When creating furniture, you can’t do without cutting the material. But in order for the product to turn out smooth, beautiful and without chips, certain experience and equipment are required. It is quite difficult to qualitatively cut a sheet of material at home due to its large size, but there are specialized stores and companies that cut laminated chipboard according to customer sizes.
Of course, it is difficult to cut a large sheet with a regular jigsaw, but using a machine is a completely different matter.
Cutting at home
It is possible to cut laminate flooring at home, but it is unlikely that you will be able to avoid chips, although it is possible to reduce their size and number. You can more or less efficiently cut laminated chipboard at home if:
- carry out cutting on a hard, flat surface (if you need to cut a large, solid sheet, you can adapt two tables of the same height for this);
- to avoid chipping, you need to stick masking or regular tape along the cut line;
- When cutting small parts, you can use a hacksaw with well-sharpened small teeth;
- when cutting with a jigsaw, you can scratch the cut line, going through the laminated layer;
- It is best to use files with fine teeth;
- when working with a jigsaw, you need to set the maximum speed and pendulum mode;
- The jigsaw must be pressed firmly against the surface of the sheet.
Small parts can also be cut with hand-held power tools.
These tips will help reduce the number of chips, but avoiding them completely and making a perfectly straight cut line will not be possible without special equipment that only specialized companies can afford.
Video: how to cut material without chipping
What is edging and why is it necessary?
Edging is the obligatory application of a protective strip made of various materials to the ends of parts. The edge performs several important functions:
- gives the material and the product itself a finished look;
- provides additional protection against moisture penetration into the middle of the part;
- prevents the release of formaldehyde and other resins contained in the binder component used in the production of laminated chipboards.
You can do the edging of chipboard with your own hands, or you can also order this operation from a specialized company that uses special edging machines for these purposes.
The edge can have different thicknesses and be made of different materials
For edging, paper (melamine) or PVC edges are used. At home, it is easier to work with a melamine strip that has an adhesive layer. The edge is applied to the end of the part, ironed with a hot iron or heated with an industrial hair dryer and rubbed in with a bar wrapped in felt or cloth. Carefully remove the protruding edges of the protective strip (so as not to accidentally cut off the laminated layer) using a shoe knife or the blunt side of the blade from a stationery cutter. After this, walk with a “zero” along the cut marks, also trying not to touch the laminating layer of the slab.
Sawing machine
Furniture companies mainly use PVC edges and manual finishing equipment (special milling cutters).
You can learn about the types of end edges from this video:
Programs for cutting laminated chipboards and online resources
After the furniture design has been developed, the dimensions of all the necessary elements have been calculated and detailed details have been drawn up, it is necessary to make a material cutting map. This is necessary for the optimal placement of all parts on the plate, facilitating the work of the sawyer and, most importantly, minimizing waste. If you order furniture from a company, then the designer knows perfectly well what to do and can easily cut laminated chipboard according to the customer’s size, but when everything is done at home yourself, you will need a special program.
This is what a cutting map made in Astra looks like
There are several popular programs for cutting sheet or roll materials - Basic-Furniture Maker, Astra, Cutting and others. All of these programs are paid, but you can also download “cracked” versions, although there is a big risk of getting a not very pleasant surprise on your computer, the elimination of which may cost more than the fee for purchasing licensed software. You should buy a license only if furniture production is a means of earning money for you, and for a single case you can do online cutting of chipboard on the Internet, since there are plenty of such resources.
Master-Basic makes cutting sheet materials easier and more accurate, reducing waste area
Now there are many specialized sites on the Internet where you can find drawings of any furniture with detailed detailing and a detailed description of the assembly process. There you can also find online calculators for cutting laminated chipboard.
By watching the video below you can get an idea of how a material cutting map is made:
Manifold
Modern production of laminated chipboard has reached such a high level that with its help real masterpieces are created in the furniture industry. A rich assortment of colors, textures and textures allows us to satisfy the wishes of even the most demanding consumers. The variety of laminated boards includes the following colors of laminated chipboard:
- plain smooth (black, blue, white, light blue);
- plain textured (aluminum, white textured platinum);
- wood (alder, wenge, milk oak, beech, cherry);
- imitation of rare wood species (chateau oak, Winchester oak);
- glossy decors;
- veneered decors;
- fantasy decors with drawings and patterns.
Color options
A wide palette of possible colors of laminated chipboard allows you to bring any design ideas to life. Furniture is available in cold, warm shades, light, dark colors. White, beige cabinets, tables, chests of drawers are optimal for small spaces. They make the room visually lighter and more spacious. Black, gray, brown products are recommended to be used in styles such as classic, modern, and empire.
It is important to immediately determine which color will suit the existing interior, because changing the cladding of finished furniture is extremely difficult. Chipboards do not have to be plain. They can repeat the texture of other materials or be decorated with different decorative elements. Especially in demand:
- surfaces with patterns and designs;
- slabs lined with oak, alder, pine and other trees;
- glossy coatings.
Advantages of MDF furniture, features of operation and care
After special treatment, chipboard can outwardly resemble rare wood species, for example, repeating the color of Winchester oak. It can be difficult for the average person to distinguish a budget cabinet from an expensive product.
Manufacturers
The modern market for the production of chipboards includes more than 200 companies. The most popular of them are Kronospan and Egger.
The Austrian company Kronospan produces more than 2.5 million square meters within a month. laminated chipboards, which are in demand all over the world. They are distinguished by the highest quality, which is achieved through strict adherence to all technological processes, from the selection of raw materials to the warehousing and storage of finished products. In addition, focusing on consumer interests, the company's designers manage to produce laminated boards with unique decors.
The Egger holding is positioned by the production of chipboards with elite decoration, which is presented in the form of standard paper lamination and veneering with natural wood. The company's product range also includes many original laminated chipboard options, which differ not only in their external design, but also in decent quality.
Advantages
Laminated chipboard is the most popular material used in the manufacture of furniture. This material is excellent for the production of hallways, cabinets, and furniture compositions for the living room.
1. Practicality. Laminated chipboard is an unpretentious material that is easy to care for. If you follow the basic rules of caring for laminated chipboard furniture and treat it with care, it can last for decades.
2. Ease of processing. Laminated chipboard is essentially a ready-made material that just needs to be cut into the necessary parts and covered with edge tape.
3. Affordable price. Unlike natural wood, laminated chipboard has a much lower price and, therefore, furniture made from chipboard is much cheaper. This makes it accessible to all segments of the population.
4. Resistance to mechanical damage. Laminated chipboard is a very hard material that is practically not susceptible to scratches and other mechanical damage. Its only drawback is the possibility of chips appearing along the edges of the product if it is treated carelessly.
5. Heat resistance. Products made using laminated chipboard can withstand high temperatures. Even kitchen units are made from laminated chipboard, which are exposed to higher temperatures than other furniture in the house.
6. Pleasant appearance. Cabinet furniture made from chipboard has an aesthetically pleasing and laconic design. It perfectly complements the interior, both in modern and classic style. A variety of colors and textures will allow you to choose exactly what suits your color scheme and style.
7. Not subject to rotting. Due to the content of formaldehyde resins, laminated chipboard is protected from the natural process of decay and does not require additional processing.
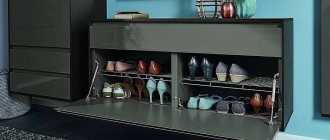
Selection of furniture fittings
In addition to fastening elements, there are other furniture fittings, without which the product will lose its decorative and functional qualities.
Table 4. Types of furniture fittings
| Name | Description |
| A necessary element that provides convenience when opening doors and drawers. Fixed with screws. Selected in accordance with the color scheme and style of the furniture facade. |
| For the stability of the structure, especially when the floor surface is not too flat, choose products with height adjustment. The material must be practical and durable, moisture-resistant and resistant to mechanical stress. The appearance is also selected according to the design style. |
| Silicone damper | An inconspicuous but important detail that ensures silent closing of the doors. Fixed from below and from above on the door or end of the cabinet. |
| Loops | An important element that ensures the opening of the sash. Equipped with a mechanism for adjusting the height and depth of the door. |
| Wheels | Used for comfortable operation of roll-out drawers and cabinets. |
| Stubs | Masking fasteners. Matched to match the body. |
| Shelf supports | Used for fixing additional shelves in wardrobes and racks. |
| Hooks | They are used inside wardrobes and on panels in hallways. |
| They may have different cross-sections and radii. Used in wardrobes. |
| Lock | Used for doors and drawers in cabinets and office shelving. |
Video – Furniture fittings
Flaws
1. The presence of formaldehyde resins. The composition that binds small wood shavings releases a certain amount of formaldehyde into the air, which is not entirely safe for health. Despite the insignificant amount emitted by laminated chipboard, some types of this material are not recommended for use in the manufacture of furniture for a children's room.
2. Impossibility of fine processing. Due to its hard and heterogeneous structure, laminated chipboard cannot be subjected to fine processing - milling. It is impossible to make curly and elegant parts from it.
3. Susceptibility to swelling. With the exception of moisture-resistant types of laminated chipboard, this material swells when exposed to moisture. However, the PVC edge on the end elements performs a protective function and prevents moisture from entering the material. Swelling occurs only with prolonged contact with water.
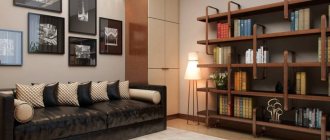
Chipboard in furniture: 50 photo ideas
PreviousOther Functional decorative element - chair covers
Next
OtherFurniture wax: types, application, how to use correctly.
Compatibility with other materials
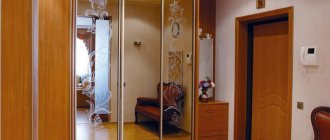
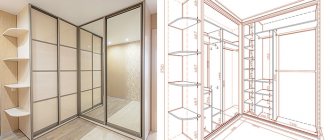
Laminated chipboard is a universal material used for the production of all types of furniture: cabinets, walls, hallways, kitchens. It has a pleasant appearance and laconicism, which allows it to be combined with completely different types of materials. Most often, laminated chipboard complements MDF, from which facades are made, and fiberboard, presented in the form of the back wall of the product.
In the production of cabinets, the most relevant additions are in the form of large mirror panels, emphasizing the elegance and beauty of modern furniture.
Often cabinets are supplemented with plastic panels with various designs applied through photo printing.
Laminated chipboard looks great in tandem with glass display cases, which can be presented in the form of transparent, frosted or shaded glass.
Tips for choosing laminated chipboard
When choosing laminated chipboard, special attention should be paid to appearance. The sheet must be smooth, without chips, cracks or scratches. The edges of the laminated board should not differ in thickness. This fact indicates that the slab was exposed to moisture. This material is unsuitable for making furniture: the swollen base makes it difficult to use fastening devices.
Pay attention to the cost of chipboard. If the cost is unreasonably low, ask why. At a promotional price, this is an illiquid product that is completely unsuitable in the furniture industry. In some cases, laminated chipboard with minor defects may be suitable, for example, in the construction industry, and then the low cost will allow you to win.
What is cheaper than MDF or chipboard and why?
MDF is one and a half to two times more expensive than chipboard, and is used for the premium and luxury segments. Economy segment products are always made from laminated chipboard. The final cost of the product may be influenced by the finishing material. The most budget-friendly ones are PVC film and sheet plastic; enamel is somewhat more expensive. The most expensive finish is natural veneer.