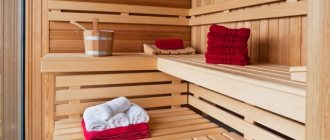
Furniture for a bathhouse differs from any other not only in its purpose, but also
in the materials used. A bathhouse needs a certain set of furniture, which should include a table, shelves, and wooden benches. When choosing pieces of furniture for a bath, its specific features, such as a high degree of humidity, should be taken into account. The heat and moisture inherent in a bathhouse impose special requirements on the choice of material for furniture:
- good humidity tolerance;
- the ability of furniture to withstand high temperatures;
- low heat conductivity;
- the material should not emit toxic compounds hazardous to health.
The most suitable materials for bath furniture
Based on the above requirements, the most suitable material for a bathhouse is wood.
- Conifers.
Pine and spruce are not suitable, since their wood is resinous, and the resin softens when the temperature rises and heats up. Hot resin can cause burns and also stain the body. There is an option when resins are removed from pine, but as a result of this process there is a significant increase in the cost of the wooden material. Independent de-resining is a long and rather difficult process, so it would be more correct to choose wooden furniture pieces made from deciduous trees for the bathhouse.
If you really want it and have the means, then the ideal furniture option for a bathhouse is a luxurious cedar interior. Cedar wood is not rich in resin, the texture is most suitable, but the cost is quite high. The advantages of bathhouse furniture made from Canadian cedar include the provision of a significant healing effect on the body through the release of essential oils from the wood as a result of its heating. Such oils perfectly disinfect, deodorize and have a beneficial effect on the skin and respiratory system.
Furniture made from Canadian cedar has a beautiful texture, high strength, a very pleasant aroma and has a beneficial effect on the human body.
- Hardwood.
With all the variety of deciduous species, preference as a material for furniture should be given to aspen and linden. These species have wood of a pleasant light shade, which can withstand changes in temperature and humidity well, without losing its original shape. In addition, linden has a pleasant smell and is easy to process due to its softness. Among the disadvantages of linden, there is susceptibility to infection by fungus and rot, to combat which chemical compounds are used, which are very undesirable in a steam room.
Linden furniture has a pleasant aroma, has a healing effect, is easy to process and does not heat up.
Aspen wood is also light at first, but after some time it begins to darken. Aspen was previously used to make the top of wells, as it is well preserved in high humidity and does not rot. The downside is that wood fibers wear out, leading to dents and abrasions. The cost of aspen lumber is very low.
Aspen furniture is easy to process and is highly moisture resistant
- Exotic breeds.
As an exotic material option, you can use abashi wood, which grows in Africa. Its color shade changes as the temperature around it rises: from milky or light yellow to dark brown. At the hottest temperatures in the steam room, this wood does not heat up above body temperature, so there will be no burn from it. The downside is that this material is not cheap.
Abasha furniture is ideal for a steam room, does not heat up and does not accumulate moisture
If we talk about wood species for other rooms, then for the washing room you need species that respond well to humidity, for the locker room and rest room - any.
Types of steam room shelf designs
Depends on the area and height of the room.
The standard placement of benches is along one or two walls, parallel, perpendicular to each other.
Stepped
They are of the stationary type. They are more common than other species.
The shelves are fixed to one wall where there is no window. A multi-tiered structure is created according to the principle of steps.
This arrangement is convenient because with each tier the degree of heating increases.
It is important to take into account that the distance from the ceiling to the top shelf must be at least 1.2 m. This distance will be comfortable for a person to sit or hover
In addition, the upper tier is attached above the line of the heating boiler or stove.
Folding
Another name is a compartment shelf. The principle of arrangement and operation is reminiscent of wall shelves on a train, which can be folded down when necessary.
Suitable for a steam room with a small area. The shelves are fixed on two opposite walls parallel to each other. The upper shelves fold down, the frame of which is formed from support legs with transverse crosspieces.
There is an option for fixing without racks, as if in a hanging position. Used for light weight loads. Requires competent calculations. Not suitable for DIY production.
To remove the pull-out bench, it is lifted towards the wall and lowered to its original position to open it.
Removable
They are also called collapsible, folding. This mobile design is convenient in steam rooms with a small area. Simplifies the process of drying the flooring.
The upper and lower benches are completely removable.
Corner (L-shaped)
For small steam rooms, corner benches are often installed.
They take up little space, but are not inferior in comfort to other types.
The upper and lower elements are adjacent to one partition along the longest wall, the middle ones along the short one, which is located nearby.
There can be 2-3 steps along each partition.
What items should a bath furniture set consist of?
You need to focus on individual tastes and financial capabilities, but there is a certain standard minimum.
- Shelves must be made in the steam room of the bath. They can have different shapes and sizes: single-stage or have several steps; located along the walls of the bathhouse or be in the shape of “G”, “P”. Wooden headrests and footrests are often placed in the steam room. Due to the fact that the place where they steam is small, it does not need to be cluttered with unnecessary objects, as they will serve as an obstacle to the movement of air. For convenience, you can add a small bench to place basins and ladles and attach hooks.
Shelves are the most important component of a bathhouse interior and making them yourself is absolutely simple and inexpensive.
Types and shapes of shelves for baths - The washing compartment of the bathhouse should be equipped with a shelf, and benches of various configurations and sizes can be made.
Details such as stools for tubs, buckets and other bath utensils would be useful here. Place a hanger away from possible splashes. Scheme and drawing of a bench for a wooden bath
Buy or make it yourself?
Bath equipment stores offer a huge selection of interior items. They are usually made from solid wood. If your financial capabilities allow you to purchase beautiful and expensive things, you can decide to buy.
But not every lover of a steam bath has such an opportunity. Then you can make simple, inexpensive and reliable furniture with your own hands. Detailed diagrams and instructions will be presented to everyone.
Making bath furniture yourself
Basic drawing of a table for a bathhouse: all dimensions can be changed and adjusted according to individual needs
You can make simple bath furniture with your own hands if you follow the tips. Self-production will allow you to realize all your wildest fantasies and optimally use the space of the bathhouse, maximally designed for comfortable relaxation, following your tastes and preferences.
Bath shelf drawing
First you need to decide on the design and construction. To do this, depending on the size of the bath room, a plan must be drawn up for the location of furniture inside, their sizes and shapes must be determined. It’s good if everything in the bathhouse is done in the same style and selected in accordance with the expected number of people.
Bath flooring installation diagram
When making furniture with your own hands, it is important to process the parts well: round the edges, sand the surfaces until they are absolutely smooth. To avoid burns from the metal heads of the screws, they are recessed 5 mm deep and covered with wood putty on top. No part of the bath furniture should be varnished.
Tools and accessories
After drawing up diagrams for assembling pieces of furniture, you should prepare working tools. You will need for production:
- Grinder machine;
- Screwdriver;
- Jointer;
- Plane;
- Jigsaw;
- Screwdrivers, rulers, square, pencil.
Before assembly, use a grinder to remove any uneven surfaces from the surface of all boards and bars and round the corners.
The wood must first be treated with a protective antiseptic composition. The use of varnishes is unacceptable.
Making a wooden bench
Bath bench assembly diagram
This part is necessary for use as a replacement for the lower part of the shelf, footrests, basins and buckets.
To make a bench with your own hands you need:
- cut the block into several 40 cm pieces (future supports);
- transverse posts 60 cm long are cut out from another block;
- nail the supports from below, and attach the base for the seat on top, formed from boards 1 m long;
- cover the base of the bench with wooden boards, leaving 1 cm gaps;
- coat the finished furniture with an antiseptic containing vegetable oils.
Drawing of a simple bathhouse bench to make yourself
How to make a stool from wood: ideas and an example of self-assembly
Everyone knows the expression: “simple as a stool.”
There is a fair amount of truth in it. This piece of furniture in its classic design is laconic and strict. It is difficult to do without a stool in the kitchen and workshop, in the garage and in the bathhouse. It is needed wherever cramped conditions do not allow for larger furniture to be placed. For a home craftsman, making such a thing is the best way to gain practical skills in carpentry.
The content of the article:
In this article we will introduce you to the varieties of wooden stools and tell you about the features of making them yourself. We hope that after this you will be able to confidently get to work and please your family with this useful piece of furniture.
Before you make a stool with your own hands, you should learn more about what carpentry masters in this area have come up with. First, let's study the sketch of a simple product and remember the names of the main parts. This will help us speak the same language using common terms.
So, a classic stool consists of a seat and four legs. The bars of the upper belt serve as a support for the seat and are called tsarg. The lower stiffening belt connecting the legs also consists of four bars called pro-legs. Through experience, the craftsmen established the optimal dimensions: height 50 cm, seat width 45 cm.
Next begins the endless field of folk art. By exploring it, you can find many interesting examples to follow.
Stools made of logs, saw cuts and branches
By abandoning the legs, the seat can be made from an ordinary log. By sawing it into several logs and equipping each with a soft pad, we will get an original set for a country holiday.
The disadvantage of this solution is obvious - heavy weight, which creates inconvenience when carrying.
Here's what you can do by combining wooden legs with a massive seat made from a rounded piece of log. This unusual stool claims to be a designer find.
There are no drawers or legs here. The rigidity of the structure is ensured by a massive seat, into which four legs are embedded at 1/3 of its height.
Anyone who is good with a chainsaw can create an original piece of furniture from a log. To do this, you need to make three neat side cuts in a thick block of wood to form the legs. Having made precise markings on the scraps of one trunk, you can cut them out into a set of two stools, nested one inside the other.
Continuing the “forest theme”, let’s see what can be built from the material lying under our feet. A beautiful product can be made from thick branches, freed from bark and polished. This design has one original detail - a drawer for household items located under the seat. The lid is assembled from planed boards mounted on wooden tenons and glue.
This piece of furniture will fit perfectly into a rustic interior style, which is characterized by massive wooden beams, stairs and tables. But it is unlikely to take root in an ordinary kitchen.
Cutting a log makes a ready-made seat for a stool. By cutting three legs from thick branches into it, we get a durable and attractive structure.
Hemp and forks of trunks can be used as bases for the manufacture of original products. Sanded and topped with thick log cuts, they fit perfectly into the interior of a log cabin.
Traditional simple stools
Timeless classics live not only in the facades of buildings. Time-tested solutions are also preserved in the designs of stools. Adding smooth lines to their appearance eliminates boring angularity.
In the photo below we see the classic version. Thanks to the rounded drawers and legs, it looks quite decent. The milled grooves on the legs also improve its appearance.
Simplicity has its own charm. Designers successfully play with this quality, creating deliberately rough, brutal products. Artificially aging furniture is not an easy task. The author had to work a lot on the product, the photo of which we see below.
The category of classic “stool design” includes designs with drawers under the seat. To do this, use wide side frames and hinged lids.
Sophistication and originality
Not everyone likes the hard seat and angular shape of the stool. For fans of aesthetics and comfort, craftsmen offer elegant products with curved legs and soft upholstery.
It is difficult for a beginner to make bent curly legs. Without compromising their beauty, they can be replaced with two pairs of crossed bars connected by a crossbar. But you shouldn’t give up soft foam upholstery.
Let's ask ourselves the question: what is needed to assemble a homemade wooden stool? Four thick boards for the seat, legs and crossbar. By decorating them with carvings, we get an exquisite and high-quality product. You can use it with pleasure at home, and on occasion, make it an exhibit of an exhibition of folk crafts.
When planning to make your first “masterpiece”, do not forget about using firing, stain and varnish for decoration. Even the simplest piece of furniture acquires a noble gloss after finishing with contrast tinting.
Varieties
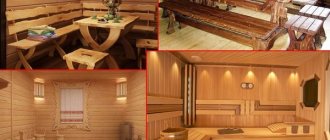
To decorate your steam room and dressing room colorfully and elegantly, you should pay attention to the types of furniture that are most often used for furnishing. The photo below shows the most popular models and accessories for bathing.
First you need to figure out what items must be present in the steam room. The first thing you need to buy is shelves. This is a special design designed for sitting. This is where people steam in a sauna under the influence of hot air. Requirements for shelves:
- Long length;
- Stable seat;
- The presence of several tiers.
Tiered furniture in a bathhouse is necessary so that the shelves can accommodate several people at once. At the same time, people should not interfere with each other. It is advisable to purchase shelves in 2 - 3 tiers. The width of the products is 60 cm, and the length is at least 180 cm.
Experienced sauna owners recommend also having footrests and headrests. The first ones are necessary to sit comfortably without disturbing other steamers. Headrests are needed to relieve stress on the neck. Benches are the second thing that is important to have in any sauna. They are also placed in the steam room, against the walls.
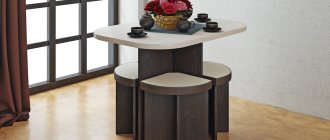
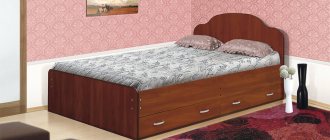
- Tables – there are a lot of options for choosing tables: figured, carved or classic square and round. The scope for imagination is limitless, everything depends on financial capabilities;
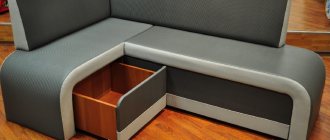
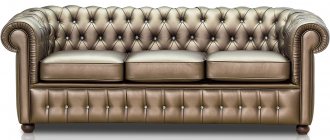
- Chairs or stools - upholstered furniture for a bathhouse is also important. For example, chairs may have a soft seat. The upholstery material should not deteriorate when exposed to moisture. Chairs can be decorated with antique carved backs, and stools can have figured legs;
- Wooden fonts are the place where a person plunges after a steam room. This easily replaces a swimming pool, because it is not always possible to equip one at a summer cottage. The average size for a font is 1.5 m in diameter. Several people can be here at once;
- Basins or tubs - it’s hard to imagine the procedure of being in a bathhouse without these items. Photos of basins and tubs are presented below - you can also make them yourself.
In addition to tables and chairs, furniture for the relaxation room in the bathhouse is selected at your discretion. These can be small storage areas for accessories and towels, cupboards for dishes, sofas and shelving.
Stools
Fonts
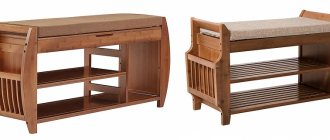
Colonial Rec Room Bench
If the appearance of the bench is not very good, you can change it and improve it. To do this, decide on the processing style and buy decorative materials. Go to visit your friends and take a photo of the benches in the bathhouse, and then choose a processing method. The colonial style allows you to make the bench noticeable and expensive. The work is performed in the following sequence. Brush the bench elements with a wire brush and apply a layer of white glaze to the surface of the wood. Wait until dry and re-brush the wood with a wire brush. The furniture will be bleached with grooved brush marks. Apply a layer of varnish to the surface; after drying, the furniture can be used.
shelves
Bath shelf - diagram
Shelves for a small steam room
Before making shelves for a bath, you need to take some measurements. The shelves should not cause inconvenience. Its device can be either single-tiered or three-tiered. It is believed that the heat is higher at the very top. The design resembles the shape of steps.
Once the required dimensions of the boards have been determined, you can begin to work:
- It is necessary to mount a frame of wooden posts. For this, a timber is taken.
- The racks are fastened together. You can even use metal screws here, because the body will not come into contact with this part of the shelf. The distance between the two posts should be about 50 cm.
- The frame must be attached to the walls of the bathhouse.
- Then the boards are attached to the frame. When installing them, you can no longer use metal. The distance between two adjacent boards should be about 1 cm. This is necessary so that the water can drain freely. In addition, this device allows the structure to dry faster.
PHOTO GALLERIES
Bath shelves with lighting (25 photos)
Here are the lighting options for the steam room with various ideas for lighting the shelves in the bath. We will also touch on lamps for the steam room here. As you can see in the photo, LED backlight kits are often used
Corner shelves L-shaped chambers in the bathhouse (24 photos)
Shelves that have corners in their design. Look at several options on how to do this and choose the one that suits you
The most unusual shelves for a bath 26 photos
This gallery contains photos of shelves that are difficult to make, but which look very nice, and, of course, will definitely surprise all visitors to your steam room with their unusual design.
Tips for caring for headrests
- After bath procedures, leaving the product in a heated steam room is not recommended. It is best to bring them in immediately before visiting the steam room. In this case, the headrest will not overheat, and the procedure will be comfortable.
- The accessory must be stored in a well-ventilated area.
- Headrests for a bath should be made from well-dried wood. Then the product will retain its original shape and last a long time.
- All metal fittings must be placed on the internal surfaces of the accessory or recessed deep into the wood.
- Every detail of the structure must be carefully polished.
- Do not use paints that release toxic substances when heated.
Handmade wooden headrests look very beautiful even without additional decoration. If desired, they can be carved or painted with enamel paint, which is not afraid of temperature changes.
Important conditions for creating an interior
When decorating the interior of a relaxation room in a bathhouse, several specific conditions and rules are observed. So, to create a beautiful design, they use finishing materials that do not contain metal parts and are moisture resistant.
This room is equipped with a good ventilation system.
Important! The dimensions of the rest room are determined by the dimensions of the bathhouse. The minimum area is considered to be 10 sq.
m.
Also, when creating a beautiful room design, perform the following actions:
- install hooks for drying several bathrobes and towels;
- construct storage areas for a variety of personal items;
- put a mirror.
This place is not cluttered with massive furniture or decor. This way the passage remains clear.
Zoning Features
The rest room usually has 3 zones:
- place for cooking;
- dining area;
- relaxation area.
Bath curtains create a feeling of security. Sometimes zoning of this place is carried out at the stage of construction of the bathhouse. Then they make a special partition wall.
The kitchen is separated from the dining area by a bar counter or a wide countertop. A fireplace is placed in the center of the room, which decorates the interior design.
Color spectrum
The rest room is decorated with light and pastel colors. These tones create a light and cozy atmosphere that relaxes guests.
Orange, light brown or yellow shades bring peace of mind and warmth to this zone. Furniture for such a place is selected according to the color of the cladding.
Variety of materials
When carrying out the interior decoration of this room, only high-quality building materials are used, which are moisture resistant and tolerate temperature changes well. When arranging the design of a relaxation room in a bathhouse, the following materials are used:
- decorative stones - artificial or natural;
- various types of tree species;
- fiberglass or non-woven wallpaper;
- majolica or ceramic granite tiles;
- decorative plaster;
- plastic.
When decorating walls, the following materials are used:
- lining made of oak, aspen, alder, pine or linden;
- various stones - cobblestone, marble, granite or sandstone;
- non-woven wallpaper;
- plasterboard moisture-resistant sheets.
When finishing a room ceiling, wooden panels and linden or cedar lining are used.
When installing floors, the following building materials are used:
- wooden boards 3.5 cm thick, the finished coating is covered with stain or colorless fixing varnish;
- ceramic granite.
After finishing, the recreation area becomes a stylish and comfortable place that gives guests homely warmth and comfort. This area is also a good place for winter holidays or a regular family vacation.
Selection of furniture
When choosing the right furniture for the rest room, perform the following steps:
- buy furniture that suits a certain design and fits well into the room interior;
- the table, chairs and other furniture items are placed as far as possible from the steam room, thus preserving the appearance of the room and increasing the life of the furniture;
- do not clutter up the resting place with various objects - make the space free;
- buy furniture made of durable, moisture-resistant material.
Comment! Wooden furniture is considered the best option when designing a relaxation room. After all, tables and chairs made of wood are covered with antibacterial impregnation.
More often furniture made of beech, oak, alder or larch is placed here.
Lighting in the bathhouse in the relaxation room
In order to create proper and pleasant lighting in the recreation area, perform the following actions:
- Small lamps are placed around the perimeter of the room, from which a lot of diffused light comes;
- install bright but unobtrusive light in the center of the room and dimmer light along the edges of the room; such lighting relaxes the bathhouse guests;
- Several spotlights are placed under the ceiling, which emphasize the youth style, this can be seen from the photo of the interior of the bathhouse and relaxation room.
There are also several narrow windows here, through which direct rays of the sun do not penetrate. This creates natural, pleasant lighting.
Decorating the relaxation room in the bathhouse with decor
Decoration of the rest room is carried out after completion of all other construction work. This completes the design of the room.
Various textiles are hung on the windows and walls, which make the room more comfortable and soft. Window curtains, sofa throws, soft pillows and tea towels create a feeling of home.
The walls are decorated with paintings or individual photographs, and open shelves are installed in the corners. Small souvenirs are placed on them: cups, figurines or vases.