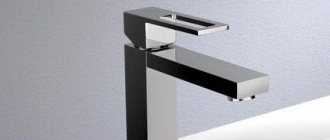
For many decades, sinks and washbasins have traditionally been equipped with two-valve taps. However, recently in kitchens and bathrooms you can increasingly see a more modern plumbing accessory - a single-lever mixer, attractive for its practicality and ease of use.
You will learn everything about choosing a lever mixing device from our article. We will talk about its design features and operational advantages. Do-it-yourself DIYers will find a guide on how to disassemble and repair a kitchen faucet of this type.
Design of single-lever models
A distinctive characteristic of this type of mixer can be considered a lever that simultaneously performs the functions of two heads at once. With its help, the temperature and pressure of the supplied jet are regulated.
In the first case, the tap handle moves to the right or left, in the second - up or down. Typically, these processes are combined, allowing the user to set the option that is most comfortable for him.
The design of single-lever accessories is extremely simple. Typically such a device consists of the following parts:
- body – can be made of different materials;
- spout - depending on the purpose of the tap, it can be low, high or medium;
- switch - a lever with which the temperature and flow strength are set;
- cartridge – for regulating the flow of water, which is an analogue of a faucet axle box.
In addition, single-valve devices also use service elements, such as gaskets. Often such accessories are also equipped with additional components that increase comfort of use. Among them are aerators that saturate the flowing stream with air, built-in dispensers for detergents and much more.
Single lever faucets can be made from a variety of materials. Chrome-plated models have become especially popular, but on the market you can also find accessories made of copper, brass or granite imitation
If the faucet is in the bathroom
The design of the faucet located in the bathroom usually has a complex shape compared to that used for the kitchen. In addition to the spout, there is also a shower head, so, in addition to the problems that we described above, difficulties arise with switching the flow of water from the tap to the water shower.
There are often cases when water begins to drip from the shower head. This happens due to wear of the rubber sealing ring, which is located in the upper part, so it will need to be replaced.
A faucet with a shower head is installed in the bathroom
To replace the seal, disassemble the watering can by unscrewing the nut and supply hose. This way you can see the same gasket. Before installing a new rubber band, this place must be cleaned, after which the washer and liner should be re-fixed.
It is much more difficult to deal with the problem if the bottom gasket wears out. This happens when the lever is constantly in the wrong position. Here you will have to disassemble all the small parts of the structure, so you may need the help of a professional.
Locking element options
In models with one lever, two types of units that regulate water flow can be used. Let's take a closer look at their device.
Ball lever
Such a unit is a ball made of stainless steel, in which special holes and fasteners are provided, with the help of which the sleeve with the ball located inside is attached to the structure.
When the lever is turned, the holes on the ball move, blocking or clearing the path for the movement of cold and hot water, thereby regulating the temperature and flow pressure.
Schematic representation of a single-lever valve with a ball functional unit, with detailed illumination of all fastening, safety and other service elements
Lever valves with a ball mechanism are highly resistant to hydraulic shocks.
However, such models have a number of disadvantages, which include:
- relative high cost;
- rapid accumulation of scale on the ball element;
- intensive wear of rubber gaskets.
- the difficulty of repair, which is why you often have to dismantle the old one and select a new mixer.
Due to the listed disadvantages, mixers of this design are used less and less in everyday life and in production. In contrast, ball valves, installed in front of plumbing fixtures on water supply pipes to control the water supply, have almost completely replaced valve models.
Disc crane models
Such accessories are favored by consumers and specialists. The operating mechanism of such mixers is ceramic disc cartridges, similar to ceramic disc mechanisms that are used in two-valve devices.
The disk mixer, a schematic representation of which is shown in the figure, is considered a more practical functional model, since it allows cartridge replacement
Externally, this element looks like a plastic cylinder, usually blue. However, hidden under the body are two plates made of snow-white, carefully polished ceramic. One of these disks can move depending on changes in the position of the lever.
In order for water to flow into the spout, the holes on the upper and lower parts must match. If this does not happen, the flow is blocked and does not enter the tap.
Disc models have a number of advantages:
- moderate cost;
- the ability to replace cartridge elements, which facilitates repairs;
- reluctance to form scale, which hardly accumulates on ceramic surfaces.
The weak point of such structures is their sensitivity to foreign inclusions in the water flow, as well as to sudden pressure surges in the water network.
The cartridge discs are made of well-polished ceramic, which ensures a good fit. The service life of mixers largely depends on the quality of these parts.
Check Valve Variations
The working element—the unit that regulates the water pressure—is of two types: ball and disk. The first type of design is made in the form of a stainless steel ball. It has holes, as well as fasteners through which the sleeve with the ball is attached.
When the lever is turned, the hole on the ball moves to the side. This clears the path for cold water and blocks it for hot water and vice versa. Thanks to the ball mechanism, the flow and temperature of the liquid are regulated.
Such mechanisms are perfectly adapted to hydraulic shocks. Although, these models have disadvantages:
- High price;
- Scale quickly accumulates on the ball mechanism;
- Fragility of rubber gaskets;
- Problematic repairs leading to replacement of the crane with new equipment.
Product Features
Single-lever mixer
A single-lever mixer is a device consisting of a faucet and a lever handle, with which the temperature and pressure of the water are regulated.
This mechanism performs three functions:
- mixing hot and cold water;
- pressure formation;
- power change.
The operating principle of the crane is simple:
- The water temperature changes when you turn the knob.
- The flow force is adjusted by turning the lever. The higher the position, the more powerful the jet.
The one-arm faucet for washbasin consists of several elements:
- rotary handle;
- tap covers;
- mixer spout and body;
- cartridge.
Water mixing occurs inside the device using a ceramic cartridge or a ball mechanism.
Troubleshooting the Bath/Shower Switch
A single-lever bathtub faucet has a switch that controls the flow of water to the bathtub and shower. Possible problems:
- water is supplied simultaneously to the bath and shower. The reason is the unsuitability of the spool gaskets.
- failure to return to the starting position of the switch button. The reason is wear of the switch rod spring.
Replacing the spool gasket rings involves some difficulties, and the main problem is that replacement gaskets are not available for sale. A spare set usually comes with the faucet. If the spare tire is lost, you can independently cut gaskets from dense (3-4 mm thick) rubber. Homemade gaskets can temporarily solve the problem, but they will not last long.
Repair of mixer with shower head
The switch design includes two gaskets - on top and bottom of the spool. If the cause of the leak lies only in the upper gasket, repairs can be made without disassembling the switch. It is enough to remove the decorative cap and carefully pull out the worn out rubber seal. Also carefully install the new gasket. If the problem persists, you will have to disassemble the spool switch and replace the lower rubber band.
The procedure for replacing the spool rubber seals:
- Check that the mixer lever is in the closed position.
- Disconnect the flexible hose of the shower screen.
- Remove the decorative cap, unscrew the screw fastening and remove the switch button.
- Carefully remove the spool from the mixer body.
- Notice the rubber seals by additionally lubricating them with sealing paste.
- Reassemble and install the switch in reverse order.
Replacing rubber seals
Tip. To ensure that the spool slides into place easily, moisten the new seals with water.
Replacing the switch spring
Failure of the button to return to the starting position can be corrected by replacing the stretched spring in the switch. Procedure:
- Remove the adapter as described above.
- Remove the rod with the wound spring.
- Remove the old spring.
- Using pliers, screw the new spring onto the rod. The spring should be made of galvanized steel, and slightly smaller in diameter than the previous one.
- Assemble and install the switch.
Switch spring
Types of faucets
Ball-type design
According to the internal structure, two options are distinguished: ball and ceramic.
Ball mechanism
Such taps are equipped with a round-shaped mixing chamber. It looks like a metal ball with three holes. Cold water flows into one of them, hot water into the second. The mixed jet comes out of the third hole. Temperature and power are adjusted by moving the ball.
Ceramic cartridge
Consists of three separate plates. At the bottom there are three holes for supplying cold and hot water and obtaining a mixed stream. Mixing occurs in the upper compartment of the cartridge.
Both models work and look the same, despite the differences in internals. The cartridge is reliably protected from limescale, the ball is resistant to impurities present in water.
Disassembly instructions
First of all, prepare the tools you will need to disassemble your single lever faucet.
You should have with you:
- Flathead screwdriver.
- Adjustable wrench.
- Spanners.
- Knife.
- Pliers.
This is interesting: Tropical shower for the bathroom
Next, your actions will be determined by the internal structure of the mixer. Please remember to turn off the water supply before starting work.
With ceramic cartridge
- Using a knife or screwdriver, remove the plug with the red and blue markings.
- Using a hexagon or screwdriver, unscrew the screw whose function is to hold the lever.
- Remove the lever from the body to reveal the top of the cartridge with the adjusting rod and clamp nut.
- Carefully unscrew the clamping nut, using either a wrench (for a faceted nut) or a screwdriver (for a round nut that has recesses and a shoulder) for this manipulation, depending on the type of nut.
- Remove the cartridge, noting its location inside the case.
Ball
The analysis of this single-lever mixer is carried out according to the following scheme:
- Remove the handle by loosening the screw that holds it in place.
- Using a screwdriver, press down on the ring (its notch) so that it turns counterclockwise, but not completely.
- Remove the dome using pliers without deforming the four-prong ring underneath.
- Unscrew the plastic ring from the dome to check the connection, its rotation and the degree of contamination.
- Remove the plastic shield part by cleaning the black part (seal). Sometimes the whole problem lies in the contamination of this part, so after cleaning the faucet is put back together.
- If cleaning does not help, remove the ball from the tap and inspect it. If you need to replace the ball, install a new part in the mixer, and then reassemble the entire structure in the reverse order.
See it clearly in the video below.
https://youtube.com/watch?v=K1K2Sw0428U
A mixer of this type quite often gets clogged at the tap spout point, which is manifested by reduced water pressure, but to fix this problem it is not necessary to completely disassemble the ball mixer. To clean the spout, first unscrew the nut in the faucet spout. Remove the mesh, and after washing and blowing, install it back, then return the nut to its place.
Advantages and disadvantages
Many homeowners pay attention to the single-lever mixer, because its design, repair, and installation are simple, but at the same time very effective and functional. These more modern devices differ from two-valve ones not only in their more aesthetic appearance. They are also very convenient to use; they allow you to more accurately and quickly adjust the water temperature and reduce its consumption. But they also have disadvantages:
- Demanding on water quality. Single-lever faucets, due to the nature of their design, are very sensitive to impurities contained in tap water. Due to its poor quality, they often become clogged and then stop working. Models with ceramic cartridges especially suffer from this problem.
- Low maintainability. It is almost impossible to repair a single-lever faucet with your own hands; you can only replace some of its parts, for example, seals or the entire cartridge.
Remember! To increase the service life of a single-lever mixer, you can improve the quality of tap water by installing a special filter, as well as perform timely preventive maintenance of the device.
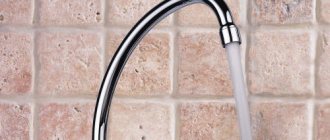
Repair of a single lever faucet with swivel spout
Faucets with a swivel spout are installed on sinks in the kitchen or bathroom. Periodically it starts leaking from under it. In this case, the locking mechanism is not to blame; it’s just that the gaskets have lost their elasticity or the lubricant has dried out.
Repair of a single-lever mixer with a movable spout
In this case, disassemble the mixer as described above, then remove it by pulling the spout up. Remove all old gaskets. If they are stuck, you can use a flathead screwdriver or even a knife blade. You have to remove them, but they are still replaceable. Use the removed gaskets to select new ones. It is advisable that they be made of silicone, not rubber. Silicone is more elastic, retains its properties longer, and tolerates contact with water better.
Lubricate the new gaskets with plumbing silicone grease and install them in place. Reinstall the spout. It must be pressed down well so that it rests against the union nut on the mixer body. Next is the assembly of the rest of the mechanism.
Problems during operation
Even high-quality plumbing fixtures fail over time. The service life of the faucet depends on the material from which it is made, the quality of the tap water and the intensity of use. The most common problems that arise when using single-lever models are:
- Cracks on the device body. They arise due to poor quality material and installation errors.
- Aerator clogged. The cause of this malfunction is the poor quality of tap water.
- Wear of rubber gaskets. Seals are consumables; they wear out over time due to the high intensity of use of the device.
Important! No matter how high the quality of the faucet, it needs preventive maintenance. Even if no problems arise during operation, you need to disassemble the device once every 2 years, clean it, and replace the gaskets. After all, even a small speck that gets under the seal can cause a leak.
Common problems with faucets
Faucets have quite a few points with seals, and a leak can appear in each of them. In addition, associated rubbing parts wear out, corrosion destroys threaded connections, etc. Due to poor water quality, entire components quickly fail. You can find out exactly the cause of a leak only after a thorough inspection of the condition of all parts. But there are a few common leaks.
Leak at the base of the faucet
Water on the floor under the faucet
This is a current problem that has several causes.
- Violations of the tightness of the siphon, pipe connection points, technological plug, etc. Violations have nothing to do with the mixer, they are simply eliminated; any beginner can do the work.
- Leaks at the points where flexible hoses are connected to the mixer body. It can be caused by three reasons: damage to the rubber seal, loosening of the fastening, or a violation of the tightness of the hose at the point where the threaded fitting is connected. For repairs, the mixer does not need to be removed; just unscrew the hoses and perform an accurate diagnosis.
Leaks may be caused by a leak in the hose.
Water sprays from the spout in all directions
Most often, such problems appear after the mesh on the nose is blocked. It has very small holes, which over time are completely closed by hard calcium deposits. The seals cannot withstand the increased pressure, and leaks appear under the threads. There is no need to disassemble the entire mixer; unscrew and clean only the mesh.
A clogged aerator causes water to splash
Cleaning the faucet aerator
Constantly leaks from under the lever or spout
The most complex problem can have many variations. To repair, you need to completely disassemble the mixer, determine the cause of the leak and fix it.
To fix the problem, you need to completely disassemble the mixer
As you can see, most problems with the mixer can be fixed without dismantling it and completely disassembling it. Take your time, carefully study the cause of the problems.
Important. When performing any repair work on water supply devices, do not forget to turn off the central tap. If you have more modern wiring and the ability to turn off individual rooms or household appliances, then block only them.
What is needed for repair
To carry out repair work, you will have to disassemble the faucet without removing it from the sink; sometimes you may need to repair the kitchen spout, which in one-handed models can be carried out without disassembly operations.
When dismantling the faucet, you have to remove the handle, unscrew the fixing nuts and hoses - this requires suitable tools, consumables and components.
Tools and supplies for plumbing repair work
Tools
To carry out repair work you will need the following tool:
- An adjustable wrench for unscrewing the nut from the mixing device body and dismantling flexible hoses.
- A socket or flat wrench for tightening and removing bolts on mounting studs.
- A Phillips screwdriver or hex wrench for removing the faucet handle.
Necessary materials
When removing the mixing body from the kitchen sink or removing underwater hoses, you often encounter difficulties associated with contamination of the dismantled parts with limescale or corrosion. Before carrying out work, it is better to treat their surface with household chemicals to remove rust and limescale - this will simplify the dismantling and further installation of the equipment.
The presence of gaskets in the underwater hoses and the mixing body eliminates the use of various types of additional seals in the form of synthetic and linen tape, rubber rings.
During repair work, it is often necessary to replace underwater hoses that have become unusable; for replacement, it is better to purchase types with stainless braiding and a union nut with fittings made of non-ferrous metals (copper, brass).
Internal structure of a single lever cartridge faucet
Blockage in pipes
In some cases, after cleaning the filter nozzle, low pressure is still observed. The cause of this problem is often a blockage in pipes or flexible lines that blocks the flow of water.
Most often, such a nuisance is typical for outdated water supply systems where metal pipes are installed. Clogging occurs because rust particles accumulate in the pipes over the years and form a blockage.
If the flexible hoses become clogged, they will need to be dismantled, then cleaned or purchased new ones.
If such a problem is detected, the first step is to shut off the tap water supply. In the case of flexible hoses, you will have to thoroughly clean them using a cable. However, this is only relevant when the blockage is minor.
Rust often accumulates in old pipes
The same should be done with water pipes in case of blockage. If contaminants are collected regularly, it is better to replace them. It is recommended to install modern plastic pipes, because they do not corrode.
Prices for special cleaning products
Special cleaning products
How to properly disassemble a disk mixer
If the plates in the faucet sleeve break, it is necessary to disassemble the mixer. To do this you will need the following tools : a screwdriver and a hex key.
Instructions:
- Using a screwdriver, you need to pull out the plugs. They are painted in two colors to indicate the direction of movement of the lever to regulate the water temperature.
- Using a hex wrench, unscrew the screw that connects the joystick and the adjustment rod.
- The handle is removed from the tap. The ceramic and then the clamping nut located on the top plate are unscrewed. If the clamping nut has small indentations, it must be carefully unscrewed so as not to damage the part. In other cases, the nut is unscrewed as usual. The ceramic one can be easily unscrewed by hand.
- The mixer disk is removed. The cartridge in the mixer needs to be replaced if it begins to leak or fails for other reasons.
- The new cartridge is installed in its original place. The nut holding the disk is tightened, then the lever is put on, the screw is mounted and finally the plugs are put on.
Tip: before buying a new cartridge for the mixer, you need to take with you the old disk that has already failed. The thing is that cartridges can have different hole diameters (3 or 4 cm) and clamps on the bottom plate of the cartridge. Therefore, there is a risk of purchasing a larger or smaller disk. Also, when choosing a new cartridge, you need to pay attention to the disk with a silicone gasket, since it is less susceptible to water.
Difficulties in purchasing and using a faucet
In order to minimize the danger when purchasing and further using a crane, you must choose only products from a reliable manufacturer. A well-known brand with a reputation in the market guarantees that the device will serve you for many years without breakdowns.
Most often, blocks for controlling the mixer are already available in plumbing - since they have a standard appearance, it is necessary to purchase a similar device, thanks to which it will be possible to immediately replace the block or use some of its parts. In the future, if there is a breakdown, it will be possible to assemble one serviceable one from two blocks.
A special anti-leak valve called “AquaStop”
Most often, water enters the device through flexible hoses, which wear out quickly. Therefore, to avoid flooding of the kitchen or bathroom, an AquaStop valve is installed at the outlet of the water pipes.
It should be borne in mind that such a valve is only effective if the hose is torn off the pipe under water pressure. In other situations, it will not help avoid flooding.
Prices for popular faucet models
Faucets
How to properly disassemble a ball mixer
This type of single lever faucet is as easy to disassemble as a cartridge faucet. It should be borne in mind that if a serious breakdown occurs, the entire mixer will have to be replaced. If the malfunctions in the operation of the faucet are insignificant (for example, when the faucet is turned on at full power, the flow of water is weak), you need to disassemble the faucet and repair it yourself. The cause of such a breakdown may be clogging of the faucet with abrasive substances.
Instructions:
- Remove the nut from the faucet spout.
- Pull out the mesh, rinsing it with water.
- Place the nut and screen back into the mixer.
If the tap leaks, it is necessary to replace the rubber seals with new ones. To do this you will need: a screwdriver and a hex key.
Instructions for replacing the rubber seal:
- The screw is unscrewed and the lever is removed.
- The connection is removed from the thread, then the screw is unscrewed with a screwdriver. Usually plaque collects on it, which needs to be removed with a cloth.
- The rubber seals are removed and replaced with new ones. The ball is also removed.
- After replacing the gaskets, the ball is installed in its place. The seals are secured with a plastic nut.
- The lever is installed and the screw is fixed. Finally, you need to check the operation of the mixer system by opening the tap. There should be no water leaks.
Prevention of breakdowns of a single-lever mixer
In order for joystick taps to serve for a long time, it is necessary:
Knowing the diagram and principle of operation of single-lever mixers, you can independently repair a failed joystick tap.
If it's leaking from under your shirt
In some cases, water may leak from under the faucet jacket. The main reason for this phenomenon is considered to be damage to the sealing gaskets, and liquid can leak both in the upper and lower parts in the area where the circular nut is located.
Water from under a gander's shirt
In this regard, when installing a single-lever mixer, you need to firmly tighten the circular nut. This part often gets unscrewed or loosened while the product is being transported, resulting in a small gap. Such a gap is quite enough for water leakage.
If the nut is tightened well, then the cause of the leak will be a faulty gasket . To eliminate the problem, unscrew the nut and remove the nylon washer (serves to create a working gap between adjacent rotating parts of the housing). Next, remove the faucet spout along with the jacket and carefully check the installation locations of the gaskets.
There should be no traces of corrosion, sinks, etc. The only solution to the problem in this case is to replace the gander from the old faucet; in the worst case, you will have to replace the mixer completely.
The second reason for water leakage from the jacket is considered to be wear of the sealing gaskets . Such parts are made in the form of a horseshoe, with their working part facing the water chamber. It is quite difficult to buy a new gasket for a faucet, but it is possible to repair a faucet.
Disassembling the mixer to eliminate leakage from under the jacket
To do this, several layers of fum tape are laid in the seats, which will increase the diameter of the seals and improve their tightness. Next, put on the gaskets, install nylon washers, and assemble the remaining parts of the mixer.
Before installing the tap in a permanent place, check its tightness. If the repair work is done correctly, the water does not flow, then the mixer can be fixed to the sink.
Troubleshooting a cartridge faucet
Cartridge models have a different design. Actions to repair them depend on the nature of the malfunction. If the tap does not close completely and constantly leaks, you need to change the cartridge. If the housing shell or tide is damaged, the mixer is completely dismantled and replaced with a new one.
Most often, such models quickly wear out the spout or control unit. If the latter breaks down, the reason is a manufacturing defect, long-term operation or clogging with large solid particles. In this case, plastic parts or the rod holding the faucet handle fail. The cause of the breakdown of the drainage is the clogged filter nozzles. Because of this, the flow of water is blocked and the increased internal pressure ruptures its shell.
Repair and replacement of cartridges
For cartridge models, replacing the rubber seals does not always solve the problem. Sometimes the cartridge itself needs to be replaced or repaired. You can also do this work yourself.
To replace the cartridge with a new one, disassemble the mixer and remove the worn part. If cracks are visible on the body, it cannot be repaired. The new part is installed so that it is in the guides. Then they try to turn the cartridge by hand. If it doesn't give in, it means it's in the right position. Then assemble the mixer in reverse order.
Important! To replace, select a cartridge that exactly matches the old one. Therefore, when buying a new part, be sure to take the worn one with you.
Sometimes you don't need to buy a new part. To eliminate the problem, you can repair the old cartridge if there are no cracks in its body. Repairs are carried out in the following sequence:
- To simplify the process of assembling the part, several marks are placed on its body.
- Press out the fasteners with a small screwdriver.
- Remove the bottom of the cartridge and remove the remaining elements.
- Find the cause of the problem. Usually some internal part is damaged.
- To restore its shape, adhesive compositions suitable for use in conditions of high temperature and humidity are used. They are applied to the previously degreased surface of the parts to be joined.
- Then the parts are combined, installing each in the desired position.
- The cartridge is assembled based on the previously marked marks.