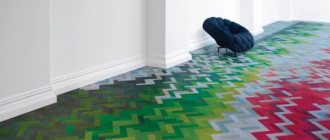
Parquet boards are considered one of the most beautiful and reliable building materials for installing flooring in an apartment or private house. Over time, such products lose their attractiveness under the influence of external aggressive factors. The decorative coating wears out, cracks and dents appear on the surface, and the floor begins to creak. From our article we will learn how to repair parquet boards.
Do-it-yourself parquet repair and restoration
For a long time, parquet has been considered one of the most expensive materials for floor finishing, since natural wood is used for its production. Properly laid parquet looks aesthetically pleasing and attractive, and its service life is significantly longer than that of other coatings. The question often arises: how to keep parquet in perfect condition? Parquet repairs will not have to be carried out frequently if you constantly take care of the coating and eliminate them when defects appear.
If the installation of parquet was done correctly, then this coating can last for many years.
Varnishing and polishing
Before you start varnishing the parquet, you need to wait two days for 80% of the dust to settle. On the morning of the third day, you need to wipe the wood with a very slightly dampened rag, and after 5-6 hours, start applying varnish.
The first layer is performed with a special priming varnish. Apply it with a roller and take it only from the bath, and not pour it onto the floor, so that stains of different saturation do not appear. At intervals of a day, another 2-3 layers of parquet varnish are applied; before each application, the surface is treated with a felt disc to remove adhering dust.
The notorious transparency, reminiscent of young amber, can only be achieved with a varnish layer of 0.4–0.6 mm
This is four to five layers of varnish, laid on top of each other as tightly as possible, this is the whole importance of intermediate polishing. The varnishing is completed with two layers of a two-component finishing varnish, absolutely transparent and highly resistant to abrasion.
published
PS And remember, just by changing your consumption, we are changing the world together! econet
Basic types of do-it-yourself parquet restoration
Before raising the issue of restoring parquet boards or parquet, you must first analyze the condition of the floor covering and, if specific problems are identified, make a decision on the need for repairs. To do this, you should think through the main stages of the work, approximately calculate the waste, so that during the repair process you do not encounter the problem of a lack of funds. Only after a preliminary assessment can work begin.
Before restoring the coating, it is necessary to assess its condition.
Depending on the degree of complexity of parquet repair and restoration, the work carried out can be divided into 3 types:
- Major renovation. It is carried out mainly after the expiration of the warranty period of the floor covering and in the event that the cost of restoring the parquet will be higher than the cost of a major replacement of the boards.
- Average renovation. It is planned when obvious defects have appeared on the floor that require elimination, for example, a change in the color of the surface, the appearance of stains, the mobility of some elements or squeaking when pressed. The work consists of replacing parquet or restoring individual tiles of the coating.
- Routine repair of parquet floors. This measure is more likely to be preventive; it allows you to postpone major repairs for a long time.
Note! Parquet is one of the most stable coatings. With proper operation and timely repairs and maintenance, it can last for several decades. Moreover, most of the restoration work can be performed locally.
Repairs of average complexity include general restoration of parquet or replacement of individual boards.
Repairing wet parquet flooring
Swelling of the planks after the parquet gets wet is the most unpleasant type of damage to the floor covering. This can happen as a result of burst pipes, when the floor is completely under water. Wood has the ability to absorb moisture well, after which it becomes deformed. The only way out of this situation can be a complete replacement of the entire coating.
If you do not dismantle wet parquet flooring, mold will immediately appear underneath it and they will have to be replaced in any case, but during this time the fungus can spread to the walls and an unpleasant odor will appear in the room, which will not be easy to get rid of. For the above reason, parquet elements must be dismantled. You need to clean the base from glue, dry it well, and then just start installing the final coating.
It will take a long time to dry the planks, and before laying a new parquet floor, you need to make sure the concrete base is dry. For this purpose, the concrete surface is covered with a thick polyethylene film and waited for 12-15 hours. After the allotted time, the waterproof material is inspected and if it is dry, then you can begin installing the parquet floor. The presence of even a small amount of condensation on the film indicates that the concrete layer must still dry out and it is too early to lay the decorative coating.
If a small area of the parquet surface gets wet, then not only these parquet floors will have to be lifted, but also the floor elements located around the emergency area. This is necessary to ensure that the rest of the coating is dry.
The main reasons why parquet floors lose their appearance
The need to repair and restore parquet will arise sooner or later in any case, and the main reason here is constant and long-term operation. After all, people not only walk on parquet flooring in house shoes, they also move furniture on it and damage the flooring with sharp heels or rough soles. Other causes of defects include:
- Constant excess humidity. Wood is distinguished by its ability to swell when wet, the same applies to wooden parquet blocks. If this is a basement floor and a special waterproofing layer is not laid under the parquet, then the coating will sooner or later swell and walking will be accompanied by squeaking.
- Excessively dry air. Constant high temperature in the room causes the wooden elements to dry out, which is likely to cause deformation and distortion of the base.
- Improper cleaning. Frequently carried out wet cleaning with a regular mop or steam cleaner leads to the accumulation and retention of liquid in the crevices, which can cause the wood to rot.
- No processing. If the purchased parquet has not been pre-treated with special agents that prevent the growth of fungus or wood pests, then such a floor will quickly become unusable, even with proper care.
Parquet flooring can deteriorate due to high humidity or excessive dryness in the room.
Among the main reasons why you will have to repair parquet boards is surface discoloration. This happens mainly due to the use of unsuitable detergents, excess moisture or the ingress of aggressive chemicals, such as ammonia. The main problems also include:
- Appearance of cracks. The main reason is considered to be dry air, which often occurs in winter with active use of heating devices. The preferred humidity in a room with parquet is 40-50%.
- Blistering of boards. It is formed due to the accumulation of water under the surface of the board or due to improper repair of the parquet after the room has been flooded.
- Lack of heat resistance. Associated with improper installation of insulation or poor processing of joints, and can also be caused by insufficient preparation of the base.
- Displacement of boards when walking. It occurs due to a violation of the screed technology, the absence of a soil layer or the formation of mold on the inside of the boards.
- Peeling of parquet from the base. The problem occurs when there are uneven surfaces on the floor, due to uneven application of the adhesive mixture, as well as when the dies are incorrectly attached to the wooden base.
- Gaps between boards. The main reason for the appearance is the use of too wet material.
- Glue protrusion. Occurs as a result of applying a very thick layer, improper laying of boards or due to incorrectly sized sheets.
- Scratches and dirt. This happens mainly when the floor covering is not used carefully.
The appearance of defects on the parquet may be the result of improper cleaning.
The most common problem that causes the need to replace parquet is subsidence of the floor, which occurs due to the destruction of the screed under heavy load.
How to avoid the appearance of small and deep defects on the floor covering?
Parquet and parquet boards are expensive flooring options. Therefore, it is advisable to minimize the risk of scratches, chips and other damage.
Basic recommendations for caring for wooden floor coverings:
- Try not to allow heavy objects with sharp edges to fall onto the floor.
- Don't wear high heels at home. Stiletto heels are especially dangerous for wooden surfaces. For indoor shoes, it is best to use soft slippers.
- Monitor the length of the claws of domestic cats and dogs. It is recommended to put special socks on their paws.
- Place silicone pads on furniture legs. It is recommended to place rugs under chairs and armchairs that move on wheels.
- For regular floor care, it is better to use specialized products recommended by parquet and parquet board manufacturers. It is necessary to periodically use mastics, varnishes and polishes.
Preparing the premises for the main types of repair and restoration of parquet flooring
Any repair or restoration of parquet in an apartment should begin with preparing the room. To do this, you need to remove all furniture and interior items from the room. If you replace the boards locally, you can repair the parquet without removing the furniture, but in any case it is better to cover it with film to protect it from dust settling. During a major replacement, you should completely vacate the room, because any type of repair will be accompanied by dusty work, especially if you need to adjust the boards to size using a jigsaw.
It is also better to immediately identify all damage; you can even outline them with chalk so that during the repair process you do not miss defective areas. After assessing the condition of the coating, you should make sure that you have some tools, especially if you will be restoring the parquet yourself. These include:
- surface grinder or parquet sander;
- angle grinding;
- cycle;
- sandpaper with varying degrees of abrasiveness;
- vacuum cleaner;
- chisel and plane;
- jigsaw;
- putty for wooden structures;
- finishing coating, which includes varnish, wax or oil.
After assessing the condition of the parquet and determining the type of restoration, you need to stock up on all the necessary tools.
We should not forget about personal protective equipment, because some types of work should be carried out with gloves, and when using a jigsaw, it is recommended to cover your eyes with safety glasses.
About the types of defects: the scale of the problem
You need to understand that the resistance of the coating to external influences, including mechanical damage, is affected by the type of wood used for its manufacture. The more expensive and stable the parquet, the less likely it is that dents will appear on it even after many years of active use.
It is obvious that parquet boards, compared to solid or piece parquet, are not so resistant to mechanical damage, so they are much more likely to be repaired. Causes of vulnerability:
- soft bottom layers;
- relatively thin facial layer;
- not the most stable varieties of trees at the base.
Engineered parquet boards are considered the most durable, resistant not only to dents, but also to moisture and temperature changes.
No matter how durable the coating is, it does not guarantee one hundred percent protection from various types of influences.
However, regardless of the type of wood, not a single type of parquet or parquet board is immune from damage over time. Dents and scratches are the most common problems encountered. Depending on their type, an effective method is chosen to solve the problem.
So, the most common type of dents are those formed as a result of contact of the floor with women's heels. Sharp and thin heels, often with iron heels, mercilessly damage wood, violating the integrity of the varnish or oil coating, leaving unaesthetic dents on the surface.
Heels can leave not only deep dents, but also large scratches.
Heel marks are an unpleasant phenomenon, but fixable. You can get rid of them by local repair if there are few marks and by scraping if the surface is disfigured by marks everywhere.
It is worth understanding that it is much easier to restore parquet boards with your own hands at home than in public premises with other scale problems. Small dents can be removed without using a sander.
Spot repair of old parquet: eliminating cracks and restoring loose boards
The cost of parquet repair will primarily depend on the extent of the damage. Often, local replacement of some elements will cost a little less than a major overhaul, because it will be necessary to fit new parts to those already installed. The duration of operation of the floor covering without additional measures is influenced by the quality of local work.
The most common reason for minor parquet repairs is the appearance of cracks due to loosening of the planks. This problem is relevant due to the fact that wood is a capricious material, which is characterized by swelling and shrinking. Therefore, preventing the occurrence of cracks is considered a rather difficult task, since it is not always possible to maintain constant humidity and temperature in the room.
On a note! When large gaps appear, the first thing you need to do is pull the planks together and place a piece of wood in the free space, which will be enough to close the gap. If there are a lot of cracks, it is better to completely lift the covering and lay it again. You need to be prepared for the fact that some of the planks will need to be replaced.
Local restoration of parquet will cost much less than major repairs.
It is recommended to take into account that if, when loosened, only a certain number of planks are replaced, there is no guarantee that over time the same defect will not occur in another part of the floor. Step-by-step instructions for repairing parquet with your own hands:
- Using a chisel, remove any loose dies. If the element does not come out well, you can try to split the part with a sharp end by inserting a chisel parallel to the fiber structure. After splitting, the element is taken out in parts.
- Remove the remaining adhesive mixture and clean the base on which the removed boards were located.
- If strong unevenness occurs, use putty.
- Remove the side edges from the dies requiring replacement and level the ends using a plane.
- Sometimes, in order to install several strips, the parts adjacent to them are also replaced.
In some cases, when replacing several elements, the picture is assembled separately and then placed in its entirety in the resulting space. At the same time, it is necessary that the details match perfectly with the rest of the parquet in pattern and color and fit into the overall picture. When replacing individual parquet boards, you can use special glue or bitumen mastic, which requires heating before use.
Parquet blocks that are loose are removed using a chisel.
After a certain section of parquet has been replaced, a weight should be placed on top. In this case, it is necessary to additionally capture small areas located next to the long-glued elements. If there are glue residues on the sides of the edges, they must be removed immediately, because after drying it will be impossible to remove the glue without leaving traces.
When the boards adhere tightly to the base and the glue is completely dry, restoration work will need to be carried out. To do this, you need to clean the treated area with sandpaper, then remove the dust and cover the new parquet with varnish, oil, mastic, or the same composition that was used to treat the entire surface.
Troubleshooting broken dies
Situations often occur when parquet flooring splits into several parts. This can happen for a number of reasons: as a result of improper installation or due to non-compliance with the rules for using parquet flooring.
The cracked plank is removed - pulled out using a chisel and hammer, being careful not to touch the adjacent dies. Next, the new parquet flooring is adjusted to the required dimensions and glued into the resulting empty space using an adhesive composition.
After the glue has dried, the restoration site is leveled, if necessary, with a plane, then it is treated with putty, thereby eliminating any remaining gaps. At the end of the work, the surface is sanded and coated with the same composition as the entire parquet floor.
It should be noted that it will not be easy to choose the right shade that is identical to the entire surface. Typically, one of the varieties of stain is used for this purpose. But still, the new varnish coating will be at least slightly different in tone, so it is necessary to bring the shades of the floor and planks closer to each other as much as possible
In conclusion, it should be noted that a beautiful parquet flooring requires special care, otherwise a worn and neglected surface will give the room an untidy and uncomfortable appearance.
How to get rid of squeaks and other problems that require restoration of old parquet
The problem of a creaking floor is familiar to many, because it is considered one of the most common; it arises due to the friction of the planks relative to each other under the influence of weight. In this case, you can try to repair the parquet yourself using any type of fastener. These can be screws, self-tapping screws or other options screwed flush with the coating. After screwing in the element, the installation site is hidden using putty of the desired color.
Another reason for unpleasant sounds is the separation of the floor covering from the base. Here, an important task is to return the boards to their original position.
In some cases, in order to eliminate the squeak, you will have to completely or partially remove the parquet.
To repair creaking parquet flooring you may need:
- self-tapping screws, with the help of which individual strips are tightened to the base;
- an adhesive mixture injected into the gap between the slats using a syringe or syringe with a thin plastic tip;
- Polyurethane foam, due to its strong swelling, is recommended for use least often.
The most expensive parquet repair will involve complete or partial dismantling of the planks, after which they are re-installed, and the most unsuitable parts are either adjusted or replaced with new ones.
The third reason for the friction of the boards against each other is considered to be a violation of the technique of laying the dies and an incorrectly calculated distance between them. In this case, local repairs of the parquet are not allowed, because in any case it will be necessary to completely remove all elements, as well as move the logs, after which the coating will be laid again.
On a note! If one joist moves during assembly, do not lift the entire parquet completely. It is necessary to disassemble the adjacent part of the covering, use a hammer to knock the joist into place, and then reinstall the parquet.
If some parquet tiles have peeled off, you can fix the problem using self-tapping screws and a screwdriver.
In addition to the reasons listed, creaking sounds can also be caused by the absence of an expansion joint, which should be located between the edge of the parquet and the wall. In order to properly make a seam, after laying it is necessary to cut off part of the covering to form a small gap, the optimal size of which is 1-1.5 cm. There are other reasons why it may be necessary to repair panel parquet or conventional plank covering.
The appearance of a difference between shields or individual elements. In this case, it is necessary to sort out a significant area, because the cause of the violation may be deformation of the base. If a step of small height has formed, you can try to raise the protruding planks, cut off part of the coating at the base, or sand it.
Darkening of the surface. The main reason why old parquet has to be restored is considered to be the contact of aggressive chemicals on the surface, which quickly penetrate deep into the wood. Another reason is the wrong type of tinting or other coating. In this case, the only option for parquet repair is scraping and sanding, after which varnish, tonic or an oil-wax mixture is applied.
Fighting the squeak
Creak is a faithful companion of parquet, whose performance characteristics have decreased over time. Various reasons can lead to the appearance of a squeak:
- parquet drying out due to low humidity levels in the room;
- physical damage to the parquet (broken tongue-and-groove joints, splitting of individual planks, etc.);
- peeling of parquet tiles from the base;
- displacement of the parquet base relative to the floor joists.
If the floor not only creaks, but bends significantly under your feet, the joists are most likely damaged or the fastenings of the parquet base are broken. In this situation, complex repairs cannot be avoided, which will affect both the rough and finished floors (and not just the parquet). If the appearance of a squeak is not associated with serious damage, and if the parquet has not yet peeled off from the base, then it makes sense to try to fix the problem using one of the methods described below.
Talcum powder
If the parquet creaks, it means that small gaps have already formed between its tiles. If there is no serious damage, then ordinary talc, spilled between the parquet strips, will help get rid of the unpleasant sound for a long time.
fishermen59 FORUMHOUSE user
If the parquet itself creaks, you can pour talc into the joints and walk on the floor so that the talc gets into the joints of the locks. Then remove excess talc.
Filling with polyurethane glue
If the parquet “plays”, creaks and shows other signs of delamination, the situation can be corrected by pumping a polyurethane composition for gluing wood between the dies and the base.
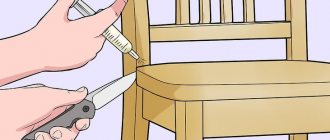
Armed with a drill and a drill bit (2 mm), a medical syringe, glue and masking tape, you can get to work:
- Apply masking tape to the damaged areas of the parquet (it will prevent the glue from spreading and prevent it from rising to the surface through the cracks in the parquet).
- Using a drill, we make several inclined holes in the parquet (the distance between adjacent holes is approximately 15 cm). Attention: only the parquet should be drilled (the base must remain intact).
- Pour adhesive into the space between the dies and the base.
- After an hour, remove the tape, and remove any traces of glue that have come to the surface with a cleaner designed to remove the glue used.
You cannot walk on the parquet until the glue has completely hardened. After the glue has set and its excess has been removed, the treated area should be pressed against the base with a weight. After the glue has completely hardened, all holes can be sealed with a wax marker of a suitable color.
Cammer FORUMHOUSE user
Try drilling diagonally with a thin drill bit. Then fill in the adhesive mixture using a syringe. The hole can be sealed with a wax whale (if you choose a dark brown shade, the hole will look like a natural knot). A couple more points: you need to choose either a liquid glue or one that can be diluted with a primer. After pouring the glue, you need to crush the loose dies with something heavy.
Pulling parquet with self-tapping screws
There are cases when the sources of squeaking are simultaneously cracks in the parquet, the gaps between the base of the parquet and the joists, as well as the joists themselves. And if full-scale floor repairs are planned only in the distant future, then temporary measures can be taken to eliminate the unpleasant sound.
Cummer
If everything creaks, then solving this problem is very difficult. In such cases, a temporary measure is taken: you can try to pull the parquet to the floor slab. Take a hammer drill, a long 8 mm drill, a dowel plug (8*60 mm) and a universal self-tapping screw (5*150 mm). Drill through (next to the joist, or even through it).
After this, the floor covering is attached to the slab with self-tapping screws, and the heads of the self-tapping screws are hidden from view using wax markers.
Eliminating squeaks with wax or paraffin
If creaking occurs when the parquet rubs against the base, then instead of glue, you can pump paraffin under the parquet. We learned about this technology from the experience of our users.
strekoza FORUMHOUSE user
My mother used a syringe to inject liquid paraffin into the creaking areas. The parquet has been in my mother's apartment for more than 40 years - without a creak. It was finished during my childhood.
Working with liquid paraffin, given its high temperature, will be quite problematic. Therefore, it is better to use liquid parquet wax instead, which will not only fill the free space between the base and the dies, but will also be partially absorbed into the structure of the wood.
What is the restoration of parquet after flooding?
Exposure to large amounts of water on parquet is considered one of the destructive factors, because wood is a natural material, and moisture almost instantly enters the pores and microcracks. As a result of flooding, the boards not only swell, but also lose their shape and their structure is disrupted. In addition, other problems arise:
If the parquet is flooded, you need to quickly remove the liquid and dry the coating, for example, with a hairdryer.
- blackening of the coating;
- development of fungus and mold;
- formation of cracks, differences or chips;
- warping and swelling;
- change in color of seams and joints.
To avoid having to carry out a major overhaul of the entire floor covering, you should try to remove and saturate all moisture as quickly as possible, using fans, heat guns or any other methods. In this case, the cost of repairing parquet after flooding will directly depend on the wet area, as well as on what kind of base was used to lay the covering.
If local swelling occurs, you can try to dry the area with a regular hairdryer, which will melt the mastic. The appearance of the smell of mastic indicates that you can try to return the parquet to its original place, after which you need to evenly distribute the load not only over the restored area, but also grab at least a meter on each side.
Note! In a situation where minor flooding has occurred, but the water has spread over the entire floor area, everything will depend on the speed of response. If you immediately begin to dry the surface and get rid of moisture, there is a high probability that swelling and re-laying of the floor will be avoided. If the floor was seriously flooded, major repairs cannot be avoided.
The consequence of the flood may be the appearance of mold and mildew, as well as a change in the color of the coating.
If, as a result of flooding and soaking, the planks have become detached from the base, you should immediately prepare to replace the covering with a new one. If individual dies that remain firmly attached to the surface are deformed, you can try to carry out restoration work.
When repairing parquet (consumer reviews contain such information), you can encounter situations where, after pouring, the parquet dries on its own in 3-7 days, takes on its previous appearance, and the planks take their original position. Therefore, you should not immediately begin major repairs. In any case, if you make a complete replacement, it is quite possible to wait a few days.
If the parquet boards have dried well, but still do not take their place or remain swollen, you will need to perform a complete overlap. After replacing the damaged area, the parquet is sanded using a sanding machine, after which the damaged area is sanded and re-varnished. You also need to take into account that even if a little more than 30% of the floor covering has been damaged, experts will still recommend performing a complete covering. In some cases, the cost of repairing parquet per m2 of damaged area may be higher than the cost of laying new parquet per square meter.
Mold control
Let's move on to a description of more labor-intensive procedures.
If moisture sometimes gets on the surface of the parquet, this is bad, but not critical. If water regularly seeps into the subfloor space, then large-scale pockets of mold that destroy the coating from the inside and appear on its surface will cause a lot of trouble for the owner of the house.
Fighting mold on parquet is a complex and time-consuming task, consisting of several stages:
- Complete dismantling of the finished and subfloor in areas where mold is detected.
- Identifying the cause of moisture accumulation under the parquet and eliminating it.
- Drying the screed (subfloor) and treating all elements with protective compounds.
- Installation of subfloor and installation of parquet.
The reasons that cause moisture accumulation under parquet flooring can be very diverse. This could be a fistula in the heating riser, due to which the entire floor slab or floor screed becomes saturated with moisture. Also, the cause of mold can be wet walls (more precisely, moisture that flows down damp walls under the floor). Be that as it may, you will have to approach mold removal with all responsibility.
Zalina7 FORUMHOUSE user
Mold must be dealt with radically, and not just wait for it to dry out. The mold must be eradicated, then everything must be washed well, dried, and only then sorted out. If possible, swollen dies should be replaced. There are a lot of means to combat mold. At worst, use copper sulfate or Domestos/Beliznoy.
Features of parquet repair without sanding
After laying parquet or parquet boards, scratches are inevitable, because the floor is constantly damaged by shoes, furniture legs, animal claws, as a result of children's games or when heavy objects fall onto the surface. In some cases, you can try to restore the parquet without sanding, using a retouching pencil or putty that matches the color of the main coating. If the area is small, you can do without sanding and using varnish.
If the defect is minor, you can use a special putty or pencil.
Damage and scratches from the boards are removed using cosmetic putty, which is applied using an ordinary thin spatula. Finding the right color is not difficult, because retail establishments offer a wide selection of materials.
On a note! The second name for parquet putty is restoration paste. If you can’t find the desired option on store shelves, you can try making the paste yourself.
To make decorative putty, you need to mix crushed sawdust and epoxy varnish in a ratio of 1:4. After this, the required amount of dye is added to the mixture. The finished paste is applied to the damaged area, which is then treated with fine sandpaper.
Sometimes, after restoring oak parquet, in order to create a complete picture, it will be necessary to imitate joints in some areas using an ordinary awl and a metal ruler. Work should be carried out when the restoration paste is partially dry; it should not be very hard, but it should not stretch. Step-by-step instructions for repairing parquet with your own hands:
Cosmetic putty is applied to the damaged area using a spatula.
- Using a ruler applied at the end, make a small indentation at the joint.
- Using an awl, apply the end false joints along the attached ruler.
The final stage of such a restoration is considered to be varnishing the parquet. It is appropriate to use any type of varnish here: alkyd, epoxy, acrylic or water-based. Before using the composition, it is recommended to study the application features specified in the instructions. You also need to take into account that to obtain a perfectly smooth surface you will need to apply at least 2-3 layers of varnish. After the varnish has completely dried, to obtain a better result, it is recommended to rub the surface with mastic, after which the restoration of the old parquet with your own hands without sanding is considered complete.
Options for removing scratches and streaks
The reason for the appearance of dark streaks and scratches on a parquet floor is usually walking on it in shoes with heels or rubber soles. Sometimes the parquet surface can be damaged when moving pieces of furniture. Covering the floor with a special polymer mastic will help save the parquet from dark stripes.
The problem with minor scratches can be solved by using a retouching pencil of a similar tone to that of the parquet floor.
Repair and restoration of parquet: sanding, sanding, how these types of work differ
Sanding is the process of leveling the surface of the floor covering by removing the worn layer from the parquet using a cutting tool. By grinding we mean almost the same process, only in this case the surface layer is removed by using an abrasive material.
Today, the processes are considered almost identical, which is due to the frequent use of machine scraping, which requires the use of an abrasive material. Parquet repair (grinding or sanding) is carried out using various equipment, the selection of which takes into account the following factors:
Using scraping, the top old and damaged layer of the coating is removed.
- Scale of work. Sanding and restoration of parquet are carried out if it is necessary to process a small area and are mainly carried out using hand tools. If you need to organize work over a large area, it is better to use a grinder.
- The original state of the parquet before renovation. If the coating is in a disrepair, repairing the floor yourself using hand tools will be quite time-consuming, but a sander will help to significantly reduce not only time, but also labor costs.
- Performer experience. Parquet repair (scraping) is often performed by people who do not have much experience working with sanding machines. Professional craftsmen rarely use hand tools during the repair process.
On a note! If you want to repair the old parquet flooring in your apartment faster with your own hands, you don’t have to immediately buy a sanding machine, because it is not only expensive, but also quite expensive to maintain. The best option in this case is to rent the device for the duration of the repair work.
For grinding, devices with abrasive materials are used.
When repairs can only be performed by specialists
In some cases, restoring a parquet floor will require the involvement of professionals with experience in this field and professional equipment.
When it is difficult to eliminate defects yourself:
- Severely worn flooring with deformed boards and cracks can be restored without replacing the entire floor.
- If, after flooding, the dies are swollen and deformed, they must be removed and dried. Severely deformed elements must be replaced. After laying the floor, the old boards need to be sanded and varnished.
- The parquet has darkened, its strength has decreased, fungal infections have appeared, the wood can be pierced with an awl to 5 mm. Such a covering will have to be re-laid and the subfloor completely dried.
Related article: DIY New Year's home decor outside (65 photos)
In other cases, you can perform the restoration yourself.
We check the condition of the board by pricking the dies at an angle of 45 degrees with a shoe awl. With a medium degree of pressure, the awl should pierce the surface of the oak board less than 5 mm; birch, walnut and ash - less than 7 mm.
If the tool goes deeper, then the floor element needs to be replaced.
What tool is used to restore and repair old parquet: sanding
The main tool for manual scraping is considered to be a scraper, the task of which is to scrape, rather than plan, a wooden covering. The device itself is a simple design and consists of a metal plate sharpened at an angle with a fixed handle.
Main technical characteristics of the device:
- Blade thickness. It is selected based on the height of the coating, taking into account the applied paint layer. A blade with a thickness of 0.7-0.8 mm is considered optimal; in this case, the size of the peeled layer should not exceed a few millimeters.
- Blade width. The wider the base, the larger the layer you can remove in one pass. Experts recommend purchasing a tool whose width does not exceed 45 mm; If the blade is wider, the scraper will be difficult to work with.
- Handle length and material. It is more convenient to control the pressure if the tool has a short handle. Recommended length – 45 mm. The material is chosen based on personal preferences, but still many note that when working with a wooden handle, the hand sweats less than after working with a plastic one.
Manual scraping of parquet is carried out using a special tool - a scraper.
Additionally, for ease of use, many product options are equipped with a pressure handle, which allows you to increase the pressure on the working tool. Separately, we should highlight the figured cycle used in the repair of block parquet to decorate the figured wooden plinth. The estimated cost of the device, depending on the characteristics, varies from 100 to 200 rubles. If a blade breaks during operation, it can be easily replaced by purchasing a new one. At the same time, the price of blades ranges from 30 to 50 rubles.
The main advantages of using cycles:
- low cost of the device;
- the ability to carry out repairs in hard-to-reach places;
- maintaining the appearance of the coating;
- absence of dust during operation.
It should be noted that when repairing artistic parquet, the use of cycles makes it easy to carry out actions, observing the correct direction of the wood fibers.
In addition to the advantages, there are also some disadvantages:
- time-consuming work;
- removing a fairly thick layer of coating;
- the need to exert a large amount of physical effort;
- working in an awkward position.
Work is done much faster and easier using a sanding machine.
Materials for restoration
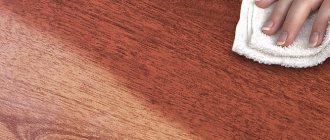
To protect the parquet floor from external influences, it is opened with special varnishes.
There are 4 types of parquet varnishes:
- Alkyd and uralkyd varnishes. They are inexpensive, do not emit toxins, dry very quickly, so you can be indoors within an hour after varnishing. However, such varnish will last no more than 10 years. Uralkyd varnishes are somewhat more durable, although they are more expensive. As a rule, they are used for short-term repairs followed by sanding and varnishing, as well as around the perimeter of the room.
- Based on epoxy resins. Such varnishes provide a durable and reliable coating for 30-40 years, although they are not cheap. As they cure, they release toxic volatile substances, so you should not start working without personal protective equipment (gloves, respirator, goggles). Windows should be open, but the door to adjacent rooms should be tightly closed. It will take about a week for the epoxy varnish to harden and gain density. Only after this can you be in the room.
- Acrylic varnish consists of a base and hardener, which are mixed immediately before application. This composition is practically non-toxic, but much more expensive than epoxy. With proper care, the service life of the coating will be 50 years or more.
- Water based. Rather, it is a finely dispersed suspension of some polymer, for example, PVA, in water. This varnish dries in a day, while it is non-toxic and inexpensive. Provides long-term protection to wood by penetrating deep into its structure. Mastic can be applied over the coating. The treated surface becomes less sensitive to minor mechanical damage. However, such varnishes somewhat change the color of the wood and quickly fade in direct sunlight.
How sanding is carried out: the cost of repairing old parquet
As for grinding, you can use a variety of abrasives. Sandpaper is considered the simplest. Of course, doing the work manually is quite long and difficult. To speed up the restoration, some people attach sandpaper to the base of the shoe, but this method is not widely used due to the fact that it is difficult to control the work of the legs and maintain the same pressure.
A more advanced repair option is the use of a drum-type sander. The device is mainly used for deep sanding, because coarse abrasive cannot leave behind a perfectly smooth wooden floor. In one pass, the machine removes 1.5-2 mm of coating. To prevent dust generated as a result of removing the coating from spreading throughout the room, the device is additionally equipped with a dust collector. The most popular model of parquet sanding machine is considered to be SO-206, the price of which varies from 56 to 70 thousand rubles.
During the process of both grinding and sanding, scratches may appear when large abrasive grains leave marks. This is especially noticeable on soft types of wood, such as pine. In this case, you can re-grind or cover the damaged areas with restoration paste. After completing all restoration work, you need to apply a protective varnish coating, which not only makes the parquet attractive, but also protects the surface from mechanical damage.
A drum sander is best suited for sanding parquet.
On a note! It is recommended to repeat floor polishing at least once a year. The more layers, the stronger the coating. All work on applying the varnish layer must be carried out in a respirator.
As for the price of restoring old parquet, it directly depends on the original condition of the coating. If the parquet is in satisfactory condition and you only need to go over it with a sander and also restore the varnish layer, then the cost will be about 850 rubles/m². When you want to make the floor covering perfect, you need to carry out a variety of work: sanding and sanding with a drum machine, re-sanding with a surface grinder, tinting and applying varnish. Such work will not cost less than 1250 rubles/m².
Parquet is an expensive floor covering that has long been admired. Even the cheapest parquet option will always look better and last longer than the most expensive laminate. In order not to have to carry out major repairs of parquet, it is recommended to carry out restoration and restoration work from time to time, which can extend the life of the material. Even a simple application of an additional layer of varnish will help refresh the parquet and restore its shine.
Removing old floors: secrets of successful renovation (read more)
How to repair worn coating
Any type of flooring is subject to wear and tear, which also applies to parquet flooring. It loses its respectable and impressive appearance, as a result of which the interior of the room does not look as aesthetically pleasing as before. In order for the coating to look luxurious again, it is necessary to take a number of measures to eliminate defects.
The following sequence of actions must be followed:
- The old parquet floor is scraped to remove worn varnish and a small layer of the upper part of the block along with any irregularities on the surface.
- Then the parquet is puttied and sanded.
- The prepared floor surface is covered with either mastic or varnish. In this case, the first layer dries for about a day and only then can you begin to apply it again. There should be at least two layers of varnish, and preferably three or four. Of no small importance for the result of the work is the correct choice of composition for the parquet coating and its consistency.
According to experts, two-component varnishes are considered the best. But they have a big drawback - it is a sharp and very unpleasant smell. For this reason, many property owners refuse them, preferring to apply water-based compounds, despite their fragility and the need to update the parquet surface every 3-5 years.
Getting rid of annoying creaking floorboards
Unfortunately, old parquet, which can be repaired for various reasons, often begins to creak and make completely unpleasant sounds. Many people think that it is impossible to get rid of squeaks, but this is not at all true - there is a way!
The most important task is to determine the cause of unpleasant sounds. This is often due to the fact that the craftsmen who laid the parquet violated the installation technology. Creaking can also be caused by installing parquet boards on bitumen mastic. Sometimes unpleasant squeaks can occur due to peeling of the coating from the screed - the layers come into contact with each other, which causes an irritating sound.
Blistering
The absence of temperature compensation gaps can cause a violation of the level of the entire parquet flooring. Externally, this manifests itself in the occurrence of the following defects: bulging of individual strips, the appearance of irregularities. One of the best ways to solve this problem is to dismantle the outer rows of dies.
If necessary, their end faces are ground down to the required size. As a result, a free space of up to 5 mm thick should form between the wall and the parquet flooring. It is filled with a flexible seal - foamed polyethylene or tubular rubber. Next, the dies are reinstalled.
This method will ensure the proper level of pressure on the parquet flooring elements. With the thermal expansion of wood, the linear expansion of the dimensions of the parquet will be compensated by the damper gasket.
Types of work
Before you restore parquet with your own hands, you need to master several simple manipulations. Let's talk about each of them in more detail.
There are ready-made putty pastes and mixtures on sale that can be used to fill cracks and crevices (for more details: “Which putty for parquet is best suited”). However, in some cases you can prepare such a mixture yourself. To do this, you will need remnants of the old parquet left in reserve. They need to be sawn into small sawdust and mixed with parquet varnish to a paste-like state, or with epoxy varnish in a ratio of 4:1. This grout is ideal if you want to accurately match the tone of the wood.
Imitation of joints
You can disguise the putty by simulating joints, which can be done using a ruler and an awl:
- First you need to wait a little until the putty hardens to the state of gelatin, that is, it will be plastic, but not sticky. Alkyd and uralkyd varnish hardens within a few minutes after application and quickly crystallizes.
- For straight joint lines, furrows are drawn with an awl under a ruler.
- Wavy lines are pressed with a metal ruler.
- If the putty has already hardened, then to create false joints it will have to be scratched with an awl.
Manual looping
To scrape small areas of parquet, you can use a hand scraper, which can be purchased at a specialty store. If desired, a hand scraper can be made from a plane blade.
Sanding with feet
You can sand small sections of parquet using two types of sandpaper glued to the soles of old shoes. For roughing, paper No. 40 is suitable, and for finishing – No. 80. Sanding with your feet is faster than by hand, and the processing is more delicate than, for example, with a whetstone.
Gaps in the coating
Throughout the year, parquet experiences changes in humidity, sometimes even significant ones.
It gets excessively moistened and then dries out, and as a result, gaps appear between the slats. It is impossible to completely eliminate this process, but it can be mitigated if in winter, when the relative air humidity in the apartment drops below 20%, you use a humidifier. Gaps in parquet flooring pose a potential danger to the floor. And it’s not just about the aesthetics and beauty of its appearance - dirt and debris will get into them, unnecessary moisture during wet cleaning, which will increase the cracks. Long-term absence of repairs and regular exposure to moisture will cause the planks to rot at the site of damage.
For the most part, in these cases, you can repair the parquet yourself.
- If the width of the gap is not very large (less than 3.5 mm) and is located somewhere in the middle of the floor, then it is cleaned with something sharp and thin, for example, thin wire or a knife, and putty with mastic or suitable putty. By the way, you can prepare the putty yourself from birch, beech or oak sawdust (you need to match it to the color) and wood glue.
- If the gap is large, more than 5 mm, then the putty is no longer an assistant - it spreads quickly and “will not stay in the gap.” But it’s still possible to cope. It is deepened, the edges are trimmed with a chisel, if necessary, and cleaned. An insert is cut out of suitable wood, coated with mastic or wood glue and driven into the gap.
- The cracks near communication pipes are sealed differently - using sealant. It is applied with a special syringe. Since this paste is based on acrylic resin, it should not be exposed to water until it dries completely. Excess paste is removed with a spatula. After waiting for complete drying, the surface to be repaired is carefully sanded with fine-grained sandpaper so as not to scratch the dies. Then they paint over it with a stain or paint matched to the color of the parquet using a special swab or brush. The repair work is completed by varnishing or treating with mastic.
Small voids near baseboards
The cracks that are located near the baseboards are probably the most unpleasant. They start by removing the baseboard. Between the wall and the outer board, there should usually be a spreading wedge inserted: if it gets loose, just strengthen it.
If instead of an expanding wedge you find foam, press the plank away from the wall and install a suitable wedge in the resulting space.
Wide holes
There is no point in filling a deformation of more than 5 mm; it will crack anyway. We will fight such deformations “by contradiction” - first we will deepen them. If the edges are uneven, they should be trimmed with a chisel and the resulting groove should be cleaned.
We cut out a plank from suitable wood, grease it with wood glue and hammer the insert between the planks.
We coat it with varnish, having first cleaned and sanded the repair. Gaps in parquet are formed mainly due to significant changes in humidity throughout the year. They can be prevented by maintaining relative humidity of about 20% in winter. For these purposes, in particular, an artificial air humidifier is used.
Necessary actions
To restore the color of parquet you need to do the following:
- First, remove the baseboard.
- Then the old varnish is removed using a grinding or scraping machine.
- Afterwards, the surface is thoroughly cleaned with a vacuum cleaner and checked for damage.
- If necessary, putty; if there are no defects, you can proceed to sanding with a grinder with a fine-grained blade to eliminate roughness and remove darkened areas.
- After finishing sanding, the surface must be thoroughly cleaned of dust again, only then can the first layer of varnish be applied (certainly along the fibers).
You can see the grinding process in the following video:
To change the color, stain is often used, which is also usually varnished.
Varnishing is done using a roller or brush. When the first layer dries, it is sanded with zero sandpaper and varnished again, and then sanded again.
Two-component varnishes are considered the best, but they have a significant drawback - a very persistent unpleasant odor, because they contain formaldehyde resin. If during renovation it is not possible to completely empty the room of its occupants, you need to use a water-based varnish. It hardens quickly and does not frighten you with its smell.
Getting rid of scratches
You can get rid of small scratches using a wax pencil.
The most common surface damage is scratches. How to restore parquet in this case? There are two options.
Elimination of minor scratches
Small, not very wide and deep scratches can be removed using a special wax pencil. If they are deep enough, you should use silicone putty or melted wax. The hardened surface is sanded with abrasive sandpaper and varnished.
Removing deep and wide scratches
Defective areas are completely cleared of varnish and the layer of damaged wood is removed. In the absence of experience, it is not always possible to achieve the desired result the first time. At the end of scraping, the room is thoroughly cleaned with a vacuum cleaner. Next comes primer, putty and varnish.
You can see how to putty in the following video:
Repairing chips and potholes
Parquet is made from hardwood, but even such wood is not able to survive a strong blow from an object with a higher density. As a result, bumps, potholes and chips appear.
Parquet restoration consists of the following:
- First, the surface is cleared of varnish and checked for damage.
- Then it’s the turn of looping. Unevenness and potholes are leveled by removing a thin layer of wood. If necessary, the procedure is repeated several times until strong changes disappear.
- Chips are leveled using putty. Small chips that remain after sanding are added to it so that the entire surface looks the same. The mixture is leveled with a wide spatula.
Putty is used to eliminate small cracks and chips
Important! Sanding allows you to “refresh” the parquet. Recommended frequency of the event: once every 6 years
When the putty dries, the parquet is sanded and varnished.
Getting rid of chewing gum and plasticine
Be that as it may, it is difficult to attribute them to the desired decor. If you try to remove the jewelry with a solvent, stains will remain. It's better to use ice. It is placed in a plastic bag and placed on the contaminated area. After 10-20 minutes, the chewing gum will separate from the surface on its own or will become very pliable and can be removed without problems.
How to remove wide holes in parquet
If the gap in the parquet is too wide and the situation cannot be corrected with putty, then experts recommend doing the opposite. This means that the hole needs to be expanded even further - we deepen it with a chisel or an awl, and smooth out the edges.
Then you need to take a pre-prepared wooden block, coat one side with wood glue, not forgetting to treat the sides of the insert, and “embed” it into the damaged floor covering. After this, the repair area is cleaned with fine sandpaper and covered with varnish or mastic.
Please note: wide cracks often appear on parquet flooring laid in a room with constant changes in air humidity levels. To prevent this situation, it is recommended to artificially humidify the air in winter.
Defect Elimination Technology
If you plan to repair the parquet yourself, you will need step-by-step instructions for each type of work. Let's look at ways to eliminate common flooring defects and breakdowns.
Mechanical damage
Cracks are filled with a special compound and rubbed with sandpaper.
During operation, careless handling causes scratches and gouges to form on the coating. The coating can get scratched even if you move a heavy chair without lifting it.
Types of mechanical damage and methods for eliminating them are discussed in the table:
Fill with colored putty. If the color is chosen accurately, the restored areas will be invisible.
The sequence for restoring deep scratches on parquet:
- We clean the coating from dust using a vacuum cleaner.
- Fill the crack or scratch with putty.
- After the putty has dried, sand it down with sandpaper.
- We remove all dust generated during the grouting process.
- Apply a thin layer of varnish to a clean, dry surface.
When black marks form, we wipe them with polymer mastic.
Wax putty is applied in molten form, and is preheated with a gas or battery-powered wax melter. To learn how to remove small scratches, watch this video:
You can independently prepare putty from two-component epoxy glue with the addition of sawdust until a homogeneous mass is obtained.
Timely restoration of the coating will help maintain the ideal appearance and integrity of the floor for many years.
Mechanical scraping
After sanding, the parquet is varnished again.
To make the parquet floor shine, it is rubbed with wax-based compounds, mastics, various oils, or varnished.
With careless handling, heavy foot traffic and cleaning using abrasive products, the coating can wear off and lose its shine and color. In case of significant tarnishing of the surface, sanding and sanding are carried out with further coating with a decorative layer.
In case of significant tarnishing of the surface, sanding and sanding are carried out with further coating with a decorative layer.
After rough sanding, go over the surface with fine sandpaper.
Sanding is the removal of the top layer of parquet using a special apparatus with sharp metal knives that remove the decorative coating and the top layer of wood.
Sequence of scraping:
- We remove the baseboards and remove dust with a vacuum cleaner.
- We dismantle all protruding fastening materials (screws, nails).
- We perform rough sanding, which includes removing uneven surfaces and old varnish. This procedure is performed using a surface grinder or drum machine.
- Use wood putty to seal joints, seams and irregularities.
- Sanding the parquet floor is done with sandpaper in the direction along the dies. The appearance of the surface will depend on the quality of this stage. We clean all the unevenness of the parquet and the protruding plaster mixture.
- Vacuum the floor surface.
- Apply varnish in 3 layers. Apply each subsequent layer after the previous one has dried. Apply the varnish with a roller or wide brush.
- We install skirting boards. To learn how to achieve high-quality sanding of a parquet floor, watch this video:
To remove the stickiness of the last layer of varnish, after it has completely dried, wipe it with a cloth slightly moistened with soapy water.
Manual scraping
Let's look at how to repair parquet using a manual scraper, which is a tool for restoring the top layer of parquet boards manually.
The device is a plane, the blade of which is bent with a hook. With its help you can restore small areas of the floor.
Manual restoration will take a lot of time, and the result will be worse than using professional equipment.
Imitation of joints
On the puttied surface, you need to create imitation joints between the dies.
To complete this work you will need a metal ruler and a shoe awl. The putty should set well, but still be soft. Many mixtures harden within a minute, so you need to make the joint quickly.
If the joint is smooth, apply a ruler and draw a line with an awl. A curved connection can be formed with the edge of a ruler. If the putty has hardened, you can scratch a line along it under the ruler.
Fighting the squeak
If one die creaks, it may have come off; you just need to put it in place and fix it.
If your entire floor is creaking, you first need to determine why this is happening.
Possible causes of parquet creaking:
How to eliminate creaking parquet flooring
The reason why an unpleasant squeak appears on a parquet floor is a violation of the coating laying technology. Also, according to experts, this defect occurs when hot dies are installed on bitumen mastic. A creaking sound is heard when the planks are peeled off from the base or as a result of insufficiently strong fastening of them together, since then friction occurs between the elements of the floor (read: “How to eliminate creaking parquet - proven methods”).
You can eliminate an unpleasant squeak without dismantling the entire coating using one of the methods described below:
- Use of anchors. They can be used in places where the loudest creaking sounds are heard. Parquet boards and concrete base are drilled through. The resulting hole must be of sufficient size and prepared for backfilling. Then an anchor is inserted, the head of which, after tightening, is hidden in the wood. As a result, the detached die is securely pressed against the base. After the installation of the parquet is completed, the recesses from the holes are puttied.
- Installation of a wooden pin resting on the base. In this case, the hole is drilled only in the parquet flooring. It can be from 15 to 30 millimeters in diameter, depending on the parameters of the die. Then a round pin is cut out of wood. Its size should be 1-2 millimeters smaller than the previously drilled hole, which is filled with thick glue. Then a pin is driven into it. The parquet is leveled relative to the entire covering using a level and the load is placed. When the glue dries, the excess piece of pin remaining above the surface of the die is cut off. The repair area is puttied and sanded.
- Filling the cavities that appear under the floor boards with an adhesive composition through holes drilled in the parquet flooring. To implement this option, it is necessary to reassemble the parquet - identifying places where creaking appeared. To do this you need to tap the boards. Then you need to drill holes and fill them with glue using a construction syringe. After filling the cavities, a load is placed on top of the newly fixed boards and is not removed until it is completely dry. Then you need to level all the holes with the floor surface with putty and sand it after it hardens.