Hardwood floors are durable and look beautiful. But sooner or later you will have to think about replacing them. If you are not ready to spend money on this, or do not want to face time-consuming repairs, use an alternative method. Painting parquet is a method that will take much less time and effort than dismantling and laying a new coating.
When to paint parquet
Although hardwood floors last a long time, they do not last forever. A clear sign that it is time to renew the flooring will be wear and tear on the flooring. If it has worn down, nicks have formed on the boards, and the varnish has worn off, then repairs are necessary. Not everyone knows whether the parquet can be painted or whether it will have to be completely replaced. In fact, there is nothing complicated about it. You can carry out all the repair work yourself, and it will cost less than completely replacing the materials with new ones. A painted board will look renewed and will last for several more years or decades.
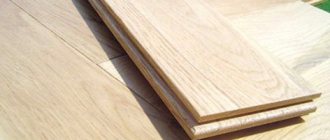
Old parquet
Tools
You will need a grinding machine or a scraper, either manual or automatic. The second option is very expensive, so to renovate an apartment or private house it is better to rent it. Vibratory sanders, which are used for manual processing, are much cheaper than automatic equipment. However, they cannot provide a good degree of smoothness. A hand scraper can be useful for sanding floors in corners of a room and around large furniture.
A drum or belt grinding machine significantly increases the speed of restoration work. Professionals note that such equipment is best used for the restoration of large surfaces. The belt parquet sanding machine, equipped with a drum, is available in two versions: with a single-phase or three-phase drive. Models in most cases are equipped with a dust collector. A drawback is noted in the form of uneven grinding, so it is recommended to use it only for rough sanding.
Other tools needed include:
- Corner machines of the “boot” type are suitable for processing hard-to-reach places in the room: in corners, under heating devices, around massive furniture or along the baseboard. Modern models are equipped with garbage bags.
- A construction vacuum cleaner is used mainly for industrial purposes; it is not advisable to buy it for home use. It is better to rent or use a broom and a regular household vacuum cleaner.
- Attachments for sanding machine.
- Grinder, drill.
- Screwdriver.
- Nails, screws.
Parquet work
We carry out a full range of parquet works including installation, repair and restoration of parquet. Our initial goal is always to achieve the maximum result. We work only according to strict technology rules. We constantly monitor the development of the parquet industry, new products, the latest technologies so that the execution of parquet work meets modern requirements. Our suppliers of materials and equipment are time-tested companies that guarantee reliability. We choose the materials used that are as environmentally friendly as possible. Parquet work is carried out by qualified craftsmen - professionals in their field.
Professional skills, experience, proper organization of work allow us to offer our clients high results.
Severe cases
In three cases, independent restoration of parquet will require significant expenditures of money, time and labor:
- Heavily worn, unkempt and trampled parquet with visible hollows and wavy cracks in the tiles. In this case, most often you can do without replacing the parquet flooring, but it is best to entrust the restoration of the parquet to professionals: it will cost less.
- The floor is swollen after heavy flooding over the entire area; the dies (parquet flooring) have come off the base. This floor needs to be re-laid. After drying in a stack, old parquet flooring can be used, but the whole complex of sanding and varnishing work is also necessary.
- The dies are darkened, the wood is loose, and when pressed lightly, the awl goes 5 mm or more into the wood. The parquet floors are rotten and moldy. Required with drying the room and preparing the base floor.
In other cases, restoring parquet with your own hands is quite possible. If parquet work is timed to coincide with the renovation of the premises, it is carried out last. Let us first consider what materials and technological operations are required for this.
Paint the parquet white
Light parquet or parquet boards never cease to be a fashionable, environmentally friendly, modern and sought-after trend. Corresponds to Nordic minimalism, now a popular Scandinavian style. It is known that white color has a positive effect on a person’s physical condition, stimulates the functioning of the visual organs and the endocrine system, and cleanses your body of unnecessary waste and toxins.
Painting parquet white or gray is white tinting or bleaching parquet, which is noticeably different from regular parquet tinting. This matter requires an individual approach, special skill and skill.
How can you paint parquet?
To quickly and easily restore parquet boards, you can use the standard method:
- apply a layer of stain to highlight the beautiful wood structure;
- then apply a layer of varnish to the surface.
However, this method is not suitable if the parquet board is very worn.
To perform high-quality painting of the floor covering, it is important to choose the appropriate materials correctly:
- You can paint parquet floors only if it is water-soluble and designed specifically for floors.
- To preserve the natural grain of the wood, you need to choose a paint that is not very dense; it will help you quickly and easily refresh the shade.
- It is worth paying attention to the type of wood (for example, to paint pine, you need to select paint designed for soft wood).
Recommendations
The result of how successfully the decorative surface of the old parquet was restored depends entirely on the quality of the surface preparation. Failure to use the scraping procedure significantly complicates leveling the surface of the parquet floor. Owners often sand the entire surface with hand sanders, hoping to restore the parquet's flatness in this way without sanding.
In fact, this approach only makes the situation worse. If the tiles were laid in accordance with the technology, then literally a few points on the parquet floor need to be sanded and restored. To find them, you can use a flashlight and pre-varnish, which, however, will have to be subsequently washed off or cleaned off before applying the main coat of varnish.
Varnish coating
The final operation is covering the parquet after sanding. By this time, the flooring must be thoroughly vacuumed.
Procedure:
To give the required shade, stain is applied to the dies. After it dries, the surface is leveled with a primer in 2-3 layers and wait until it dries (average time - a day). If necessary, the boards are again treated with fine-grained sandpaper and cleaned with a vacuum cleaner.
- Marmoleum - installation basics and rules for laying natural linoleum (70 photos)
Cork flooring - features of coating application and installation rules (100 photos)
Floor reinforcement - installation of metal mesh and its strengthening (105 photos)
Start varnishing. Approximate consumption of parquet varnish is 1 l/10 sq.m. For application use a sheep wool roller.
The more varnish, the more stable the coating; the optimal number is 2-3 layers. Each layer is cleaned with a fine abrasive cloth before applying the next. Instead of varnish, you can use oil. Both materials should be at room temperature at the time of application.
In many cases, sanding will bring the old floor back to life. Despite the labor-intensive and painstaking process, timely sanding will increase the service life of such an expensive coating as parquet.
paints and varnishes
- Let's look at how parquet restoration is carried out and what materials are used for this. Quite often you can come across a technology where a layer of stain is applied to a wooden base to highlight the structure of the wood, after which the surface is varnished. If the parquet is old and worn out, then this technology is not suitable, since there is no point in highlighting the worn layers of wood. The most suitable option is to improve the appearance of old parquet using paint or tinting.
- The paint for parquet can be of any shade, which guarantees a complete match of the color of the floor in relation to the overall interior. When choosing paint for parquet, colors play a very important role, although the application technology is no different from the method of application to a regular plank floor.
- To cover parquet, acrylic or latex water-soluble enamels with increased abrasion resistance are used. Various tints are used to correct the shade. First, a special tint is applied, and then everything is covered with two or more layers of varnish. The choice of necessary paints and varnishes is quite large. The main thing is to follow the application technology, then the painted parquet will last for many years.
- Before applying paint and varnish, it is possible to use a primer to preserve the wood texture. And only at the end of all operations the finishing varnish is applied to the floor. To achieve the desired result, you may need 2 or even 3 layers of finishing varnish.
White wood stain
This substance is recommended for gentle lightening of floors. Unfortunately, it does not create a protective layer on the surface and requires additional application of varnish on top. This stain is applied with a brush or cotton cloth. After about 4 hours, the floor should be lightly sanded with sandpaper, then cleaned of dust and applied varnish. After the first layer of varnish has dried, you can apply a second one.
Lags
Repairing logs is the most difficult. The difficulty lies in determining the position of the joists under the floor; to do this, you will have to dismantle a section of the floor along the wall. The repair consists of installing anchors. To do this, you need to drill a through hole that will go through the parquet, base, joist, and go 3-4 centimeters deep into the concrete floor slab.
An anchor is installed in the hole, which tightly presses the joist to the concrete slab and prevents the parquet from creaking. Such repairs are quite expensive, the cost of one anchor is 30-50 rubles, and several hundred of them may be required. And the process is very labor intensive; it is better to entrust this matter to professionals.
Why do Germans use a spatula?
The Germans claim that by using a spatula you will saturate the wood deeper. This is actually a controversial issue. If your parquet is old or poorly puttied, then you use a spatula to force the material into the gap. At the same time, we understand that the material itself does not dry well, and may not even dry at all. Yes, according to the technology you need to apply the material, wait 15 minutes, then apply again and wipe off if necessary. But our experienced expert practitioner does not advise doing this for a simple reason: the longer the oil is on the surface of the wood, the more it is absorbed into the cracks. And no deeper saturation occurs during these 15 minutes: it’s just that the oil will then take longer to come out of the cracks. If the white pigment is applied normally, then it has already entered the pores, and in an additional 15 minutes the wood will no longer accept any more pigment; it will immediately take exactly as much as it needs. Thus, the longer the material is on the wood, the more difficult it will be to wipe it off, the greater the chances of spoiling the coating, the more material will go into the joints and there will be an evaporation effect: the excess material will still come to the surface and evaporate. The longer you wait, the more problems you will have.
Types of defects and their elimination
Highlight:
- Dips of individual planks in parquet. It is necessary to remove the damaged plate, clean out the resulting depression and place a new plate in it, fixing it with glue.
- Poorly fixed parquet plates should be fixed either with nails or with glue. Deepen the cap into the wood no less than 2 mm. If the planks were attached in a hidden way, then it is more advisable to use glue.
- Creaking of wooden floors occurs due to drying and aging of wood. In this case, creaking floorboards are strengthened at the corners with thin nails. Another method can be used: a wooden pin coated with glue is driven between the parquet plates.
- Deep cracks, if there are few of them, can be filled with thin wooden plates coated with glue on all sides. After drying the material, the top is trimmed flush with the floor surface with a plane.
- It is not advisable to putty large multiple cracks and holes separately. It's better to replace it completely.
How to paint parquet flooring with your own hands?
At the initial stage of work, it is necessary to properly prepare the base for laying the paint layer. To do this, it is necessary to remove the remnants of the old coating (paint, varnish or primer) until we reach the level of clean wood. Here you cannot do without scraping, special surface treatment with a grinding machine. You can rent this equipment from specialized companies that carry out repair work.
At the preparatory stage it is necessary:
- Clean the base from small debris and dust using a construction vacuum cleaner;
- Use sandpaper to clean areas of the floor covering adjacent to walls or utility lines, that is, those places where the passage of a sanding machine is difficult.
- Conduct a visual inspection of the floor, replace damaged or loose planks.
When sanding parquet, it is necessary to ensure good ventilation in the room. Work is carried out in safety glasses, headphones and a respirator. Some types of equipment have a dust collector in their design, which reduces the amount of dust released into the room. Parquet sanding work is carried out in the following order:
- We put coarse sandpaper on the working part of the device. The operator moves diagonally across the room, making an overlap between passes within 5 centimeters.
- The second pass is carried out with medium-grit sandpaper. We process the plane in a direction perpendicular to the first layer.
- At the final stage, sand the surface using fine-grained sandpaper. In hard-to-reach places, we sand the floor by hand.
You cannot apply paint over varnish; the old protective coating must be removed without fail. If it is not possible to rent a grinding machine, then the work is carried out manually using a special tool, a cycle with removable skins.
Surface treatment occurs in the same order, first with coarse sandpaper, then medium and fine. The flooring is considered well cleaned if the parquet has lightened and become smooth. Clean wood should appear on the surface of the coating.
Note! When preparing the base manually, a lot of dust is generated; the work takes much longer than when grinding mechanically. Despite this, this method allows you to save money.
After finishing sanding the floor covering, it is necessary to remove all accumulated debris; use a vacuum cleaner for this. Next, inspect the surface for cracks and chips. We cover the defects with putty, let the solution dry, clean the surface and begin applying varnish or paint.
Parquet painting
Many property owners are interested in the question of whether it is possible to repaint the parquet in a different color. Yes, this is possible, because during the preparation process the top protective layer will be removed until the wood texture appears. To paint the flooring, short-haired rollers with long handles are used, as well as paint brushes for working in hard-to-reach places.
The process of painting parquet is carried out according to the following algorithm:
- We carry out a visual inspection of the floor, the surface must be smooth and clean;
- we use odorless paint, otherwise it is necessary to ensure good ventilation of the room;
- dilute the composition according to the manufacturer’s instructions;
- we begin to apply paint from the far corner of the room from the windows to the doors;
- Immediately remove drops of dye that appear on the surface with a rag;
- When treating the surface with a protective layer of varnish, the solution is applied in two layers with an interval of two days for drying.
Important! The drying time for various compositions of paints and varnishes is indicated on the manufacturer’s packaging. Complete hardening of the solution occurs 8-12 hours after application, but you can walk on the parquet only after 14 hours.
Particular attention must be paid to the care of the floor covering. If the parquet is varnished, then special cleaning agents must be used for cleaning. It is not advisable to walk on such a floor in shoes; special pads are placed under the legs of the furniture.
Viewed times: 4,119
Author of the article
Flooring specialist with 10 years of experience. Oleg has something to share with our readers
Applying paint
After completing the preparatory stage, you can paint the old parquet with a pre-selected enamel. To do this you will need to choose the right tools. You can use a regular brush. However, this will take a lot of time. Therefore, it is most often recommended to buy a roller or sprayer. You should not use products made from foam rubber, as they leave marks and do not paint uneven surfaces very well. Even after drying, it will be noticeable that the paint applied unevenly. To paint the floor, it is better to purchase a roller made of wool or mohair (with a long handle). If liquid paint is used for repair work, a special sprayer can be used. In addition, it is suitable for those cases when you need to process a large area, and doing it manually is difficult. Before painting the parquet, you must once again make sure that there is no dust or other visible contaminants left on the boards. The further process consists of the following steps:
- Make sure there is access to fresh air in the room. Vapors most often have a negative effect on the human body.
- To avoid damaging your clothes, use a special suit. Also wear a respirator to protect your respiratory tract.
- The composition must be applied from the far corner of the room, gradually moving towards the exit.
- Make sure that the paint does not pool and form uneven spots. Wipe them immediately with a dry cloth and reapply the enamel, as it dries quickly. For the same reason, you need to immediately erase marks if you accidentally hit walls or any objects.
- If additional varnish is applied, the floor will need to be covered in several layers. Each subsequent one is placed across the previous one. At least 2 days should pass between application of layers.
Pay attention to: How to carefully paint plexiglass at home: painting techniques and decorating methods
Water-soluble enamels dry on average 10 – 12 hours. It is necessary to wait this period before starting to apply a new layer (if more than one layer will be applied). To ensure that no traces remain on the painted floor, it is recommended to install furniture no earlier than 1 - 2 weeks after the repair. But you can walk on the boards the next day.
Applying paint
Do-it-yourself parquet painting sequence of work
Painting hardwood floors is not difficult, however, if you are going to paint hardwood floors yourself, you will have to spend a little more time and effort than painting a regular wood floor. Since this process requires a certain sequence and additional preparatory work. If you think you can do the job yourself, here is a short tutorial on how to paint parquet flooring.
Start by choosing paint. There are a huge number of colors, but you need to choose the one that will harmonize with your furniture and will bring a new, appropriate addition to the interior. But in any case, you need to paint the floor with paint that is a shade darker than the previous color of the parquet. This will allow you to paint it better. Of course, parquet flooring can be painted any color, even white. But such coloring can be even more difficult.
This is how you can paint old parquet while maintaining the structure of the wood.
Also decide whether you want to completely paint the parquet floor or simply refresh it with a thin layer through which the structure of the wood will be visible. After all, some types of parquet have a wonderful, beautiful natural pattern, and the floor will lose its zest after dense painting. There are also types of paints that are able to penetrate the structure of wood, preserving its natural beauty.
But if your goal is not only to change the color of the floor, but also to improve its condition, then, of course, it is better to paint over the wood completely. It is also worth remembering that some tree species have good absorption, and some do not absorb paint at all. Therefore, keep in mind that this property of the wood will affect the final staining result.
DIY parquet painting
Creak, local restoration
Unpleasant creaking of the floor underfoot occurs for the following reasons:
- loose bars;
- sagging wedges between the floor covering and the wall;
- voids have formed under the parquet.
First, you should check the wedges under the baseboards. They may become dry and, therefore, do not hold the parquet. Take out each element and replace it with a new one. Rotate the baseboard in place and observe the flooring for a week. If the floor continues to creak, the origin of the sound is somewhere else. Parquet is mounted on plywood or screed. Over time, the foundation is subject to destruction and failures form. This is where the creaking begins. We need to find the parquet flooring from under which the sound is heard. Drill a hole and use a syringe to inject special glue or cement. When working with the latter, remember that it hardens quickly, so do everything quickly and extremely carefully so as not to stain the adjacent planks. The operation ends when the mixture stops flowing in and comes out, after which a press must be placed in this place. After 48 hours, remove it and fill the filled hole. If the creaking sounds spread over a large area, the entire flooring will need to be redone.
General information
But it is very expensive to completely replace the flooring. It is made of wood, which makes it possible to subject it to repeated processing. In this article we will consider the option of partial restoration of parquet flooring at home, depending on the defect that appears. There are 2 types of partial repair of such flooring:
- Correction of individual dies.
- Surface.
The second includes the following types: eliminating cracks, chips and gouges, restoring or changing the shades of the board. One of the restoration methods is to renew the old parquet without sanding, and we will also consider this.
( 2 ratings, average 4.5 out of 5 )
Stages of restoring worn-out areas
1. First, we need to thoroughly clean the problem areas. Usually the varnish in these places is no longer there and the visible texture of the wood has already been worn down beyond recognition. This can be done using a manual sanding machine.
2. For this you can use sandpaper No. 40 -60. We thoroughly clean the areas of abrasions. As a result of this work, “bald patches” (islands of bare wood) form on the surface. I must say right away that the grinding process is quite dirty. 3. The easiest way to protect the room from dust is to cover the sanding area with a piece of polyethylene. You can also cover the edges of the oilcloth with old rags. The entire structure should resemble a canopy over the work area of the grinding machine.
4. After turning off the device, you need to give time for the dust to settle. Just close the edge of your makeshift hut and leave everything for a while. And then carefully collect the settled dust with a vacuum cleaner and a damp cloth. 5. The next step is very important for this work. Before varnishing cleaned surfaces, it is necessary to prevent darkening of the wood texture. To do this, you can use wood impregnation. All our actions must first be carried out in places less noticeable to the eye. Since the materials used can produce an undesirable effect on the texture of the wood (it can darken or, on the contrary, become lighter) and even under a layer of varnish these color changes will be visible. After making sure that the color of the wood remains unchanged, you can continue working on visible places.
6. First coat the cleaned areas with varnish. Sometimes it takes several coats to ensure the surface is even and there is no uneven depression left. And only when you have restored the clearings can you varnish the entire surface. 7. I repeat once again that this repair is cosmetic and we do not remove all the old varnish. Therefore, before starting work, it is necessary to check the compatibility of the old and new varnishes. Or it’s easier to say, apply the old one to an inconspicuous area of the floor and let it dry. If everything went well (the varnish has dried and the old one has not peeled off), feel free to start working. I recommend “Alpina” gloss parquet varnish for this type of work.
It dries perfectly, fits perfectly on the surface, shines, has virtually no odor and is very durable.
In addition, it is quite cheap and sold in small containers, which is important for cosmetic repairs. The advantage of this restoration method is minimal physical effort and material costs. So you can update and revive the old parquet at any time, without waiting for a global renovation and without covering scratches and bald spots with rugs and chairs
Article rating /
Give your rating!
How to care for varnished parquet
Now let's look at a few tips for caring for parquet boards:
- The indoor temperature should be at least 12 degrees.
- Try not to carry out wet cleaning.
- Use special compounds and a vacuum cleaner with a soft brush to clean the parquet surface from dust.
- Small debris (such as sand) can cause scratches on the floor surface.
- Forget about walking on hardwood floors in street shoes. Don't even dare walk on it in heels!
Preparing the premises
Remove all the furniture you can from the room. If possible, remove the baseboards - this will prevent scratches or varnish stains from appearing on them. Remove the curtains and cover all valuable items with film to protect from dust. If there are nails on the floor, then bury them deeper so that they do not interfere with you later.
Auxiliary Tools
During the work you will need the following auxiliary items:
- work gloves - preferably several pieces;
- shoe covers - will be needed when applying any materials to the floor;
- caps - when applying materials to the floor, they will prevent hair from falling.