Who among us doesn’t like to watch TV series or movies while cooking something in the kitchen or eating? The phone is not a laptop; it will lie flat on the table. It is, to put it mildly, uncomfortable to look at something like that. You can buy a special stand to secure your phone in a vertical position, or you can make it yourself from scrap materials. For example, these could be ordinary office clips.
Paper clip stand
The stand can be easily made from a paper clip. All you have to do is bend it correctly. This won't be difficult because the paperclip can be easily shaped and is strong enough to break under the weight of the phone.
Paper clip stand
How to make a phone holder? One of the simplest homemade coasters consists of a paper clip. You can use this phone stand on your desk.
Now we will talk about creating a more advanced design. However, to create it you will again need office supplies - paper clips.
Step 1. Find the clamps You need to take 1 or 2 medium-sized clamps. You can choose any color you like.
Step 2: Bend Bend one end of the clamp so that it becomes a J-shape.
Using one clamp, one of its ends is grasped. You need to bend it into a J shape. This will keep the phone in place. You can use the gap between two tables or a desk drawer. Insert one end of the clip between the tables and then bend it to form a J shape.
There is also an option to insert the end when closing the desk drawer. You need to close the drawer until the clip forms a J-shape.
Step 3. Paste one into the other. Now you need to insert the first clamp (J-end) inside the second clamp.
The first J-end clamp must be inside the second clamp. Both clamps should be parallel to the table. One end of the first clamp should be able to hold the phone while its J-shaped end should be parallel to the table.
You can also add a USB dongle at the top of the end of the first clip. This will provide a larger area for the back of the phone. Everything worked out!
Tools
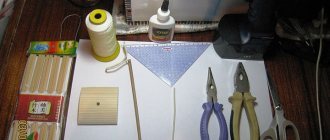
To make the simplest version you will need the following:
- pliers;
- Super glue;
- paper clips (2 pcs.);
- plastic card or something else of similar size.
We have listed only the minimum that is required to manufacture the device. To create a presentable appearance, beautiful fabric, non-slip materials, rhinestones, leather, etc. are used. In addition, craftsmen sometimes use special clips or elastic bands to additionally secure the smartphone.
Dinosaur stand
If you have a plastic toy lying around (in this example there will be a dinosaur), then you can also make a stand out of it. Please note that it should be returned to its original condition.
Step 1. Find the dinosaur. A favorite toy is selected. You need to make sure that it stands firmly and securely. You should also look at its tail to see if it is long enough to rest on the surface, since it is through this that the stand will be held.
Step 2. Cut. Using a utility knife, the dinosaur is cut in half. It is better to use a toy that is hollow inside.
Step 3. Seal the space. The dinosaur's tail must be caulked. You should use your fingers to make sure that the inside is caulked.
Note!
- Do-it-yourself easel - types of designs, choice of materials for creation + step-by-step instructions and simple diagrams for beginners
- DIY wedding glasses: a detailed master class for DIY decoration, selection of decorative elements and materials (photo + video)
- Do-it-yourself busy board: we make interesting educational boards for boys and girls from different materials
Step 4. Insert the suction cup. While the caulk is still wet, you need to insert the suction cup. The phone is applied to ensure that the suction cup is at the correct angle. Remove excess putty using a small brush.
Step 5. Seal the legs. This is important to ensure that the dinosaur's tail stays in place when used as a stand.
It is worth noting that the caulk inside the dinosaur tail takes several days to dry (about 4 to 5 days). But having a phone stand with a dinosaur is original, interesting, and inexpensive. So for the sake of this, you can be patient.
Types of devices
Accessories have different configurations, they are divided into:
- Tabletop models. The stand allows you to conveniently place things on your desktop and maintain order.
- Hanging. They are used to recharge devices and free up space in the workspace.
By following simple rules, you will be able to create a stand for long-term use that will fully meet your current needs and look attractive.
Stick stand
If the reader likes to make vlogs through his phone, then this project recording stand is what he needs. A very simple project on how to make a smartphone stand out of chopsticks.
Step 1. Glue the chopsticks together. Chopsticks are glued into the desired shape using wood glue. You can start with a U-shape. You will need 13 chopsticks. 6 sticks on each side, 12 in total. Then the last stick is cut into small pieces. It requires gluing them on the bottom of two glued 6-piece chopsticks. You need to make sure that the phone can slide into the U-shaped stand.
Note!
- DIY photo album - step-by-step instructions for creating a photo album
- DIY lampshade - a detailed description of how to make different types of lampshades
The most interesting DIY home crafts: a selection of the best interior crafts
Step 2. Stick as a bolt. Using another chopstick as a bolt, you need to secure the U-shaped phone stand. This U-shaped stand is ideal for many recording needs. But you can always think about other projects and find what best suits your needs.
Other ideas
What else can you make a phone stand from, available tools:
- Sunglasses. Fold the arms and secure your smartphone in them. The glasses should be large so that the smartphone does not overweight and the structure does not fall.
- Use non-slip car mats. Place them under the phone, and use any sufficiently large object as a stand: a box, a glass, etc.
- Take 6-8 household clothespins. They should be smooth, large, and made of strong material. You'll also need a pencil. Clamp the pencil with clothespins, leaving a small distance in the center equal to approximately half the length of the device. Now place the clothespins with the pencil on the table, with the inner clothespins facing up. They will serve as a phone stand. The remaining clothespins hold the structure in place.
- Build a phone stand from a regular sheet of thick paper (for printing) and a stapler.
- The smartphone can be secured to any handy object using a stretchy elastic band.
- Take an unnecessary case and glue it with double tape (only tightly) to a box or other item. Just insert your phone into the design when you are going to watch something.
If you often use your smartphone to watch videos, then buy a special stand. Or just look for a new convenient case with a lid so you don't have to worry.
Suction cup stand
Step 1. Take the suction cup. With the suction cup you choose, you can start creating your own design on it. The design is limitless - whatever you want can be done. Using different colors of nail polish, the suction cup can be painted.
Step 2. Hole. Now you need to make a vertical hole in the top of the suction cup.
You can use something metallic or sharp. For example, heat a needle over a candle. When it is still hot, you need to immediately poke it into the center of the suction cup, starting from the right side. Repeat this until the top of the suction cup on the left side is pierced.
Step 3. Insert the ring. Once the hole is large enough, the key fob ring is inserted into it. Do this until everything goes through.
Great, now your DIY phone holder is ready! You can use this device both as a smartphone stand and as a holder. Quite convenient combination of 2 functions in one element.
Paper technology
If the stand can be made from stationery clips, then you can also try from paper. For this you will need:
- thick sheet of paper;
- ruler (minimum 20 cm);
- scissors;
- pen;
- optional paints and varnish (water-based).
Creating an interesting stand for a smartphone will take no more than 20 minutes; origami techniques will be used to make it. The result will be such an unusual thing.
The first step will be to mark on the sheet with a pencil or pen - whatever is at hand, a square shape of 20*20 cm. This is the size of the stand for standard smartphones. Next, cut along the contour and get:
You can use either a regular thick sheet of paper or a cover from a notebook, notepad, colored cardboard, etc. The format is suitable A4.
Next, the sheet is first folded horizontally in half, then vertically. The folds should be pressed down well so that they can be used in the future. Having finished with this, we unfold the sheet with clearly defined outlines of horizontal and vertical lines.
For ease of use, let’s mark where our left side is and where our right side is. We take the left edge and wrap it until it rests in the middle of the sheet.
We do the same with the right edge. As a result, we get a sheet that looks like this:
The next step is to create triangles from what we have so far. To do this, one of the corners, upper right or lower right, it doesn’t matter which one you start with, you need to turn it towards the middle, you get a diagonal line. Here we will need a ruler, since the paper in several layers becomes quite dense, it is convenient to smooth and align the fold line with a ruler.
As a result, the paper will look like this:
We do everything in the same order with the left side. The top of the left side is folded towards the center, then the bottom of the left side. After all the folds are put in order, we get:
We bend the new formed corners inward - diagonally:
Now, using the accordion principle, the entire structure must be clamped, we begin to do this on the right side:
Now let’s take the left corner and use the same principle to fold the corners diagonally inward.
It turns out a kind of boat:
We take this boat and turn it over, put it on the table:
Next, we press hard on the middle of the structure and, thanks to pre-prepared trajectories, it bends:
So you get a ready-made stand for a smartphone that you made with your own hands.
With its help, you can not only simply store your phone so that it is visible and in a safe place, but also watch videos by setting it in the following position:
Continuing the experiment, you can then paint the stand any color or even decorate it with a pattern. If using watercolor paint, it is best to paint in several layers and allow sufficient time to dry. On top of this, it is best to coat it with a water-based varnish for durability.
Stand from a hanger
If you have an unnecessary clothes hanger (which is made of thin metal or wire), you can also use it to create a stand for your smartphone with your own hands. The hanger's durable wire will contribute to the stand's strength and durability.
Step 1: Cut the wire. First you need to cut the wire from 35 to 45 cm long. Then bend it in half, but do not bend it.
Step 2. Make two 90 degree turns. Mark the center. Then you need to measure about 6.5 cm in any direction from the center. Bend two corners 90 degrees in one direction. Now you have a three-way wire with an open end.
Step 3. Bend each side 90 degrees perpendicular. Measure 1.3 cm on each side of the triangle. Bend the wires 90 degrees perpendicular to the previous bends.
Step 4. Bend each segment 45 degrees in the opposite direction. Fold again to 2 cm, approximately 45 degrees in the same direction on both sides.
Step 5. Bend each segment 90 degrees in the opposite direction. Raise the checkmark halfway and bend it approximately 90 degrees. This will hold the gadget in place.
A do-it-yourself smartphone stand made from a hanger will hold the device in both portrait and landscape mode.
In a similar way, but with different dimensions and a thicker section of metal, you can make a stand for your tablet yourself.
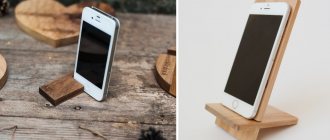
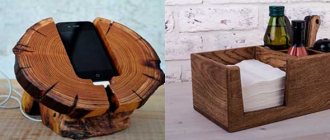
Wooden stand
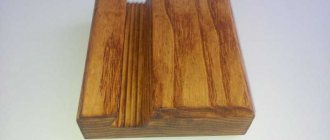
First of all, for a wooden phone stand, you need to choose two bars so that they contrast with each other in color. Then you should make sure that they are the same height and their edges are square.
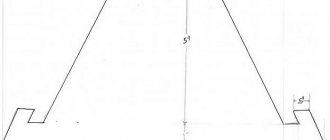
Dimensions of the wooden stand. The sizes are selected in accordance with the parameters of the gadget. If necessary, you can find a project diagram on the Internet.
Making a wooden stand. A band saw is used to cut a thin strip of a larger piece of wood. Then the 3 parts are glued together. In this picture you can see the final dimensions of the main face.
Then another piece of wood is taken, which must be cut, giving it an acute angle (about 55 degrees).
Now you should glue it to the main structure.
You also need to cut a small piece of wood that will hold the smartphone. It is also glued to the body. Your DIY wooden phone stand is ready! The final stage. After sanding, the smartphone stand should be varnished.
The office is in use
Representatives of office professions know very well that there is more than enough office supplies in the workplace. Moreover, you can find everything from pencils and pens to office clips. So I came up with an idea that is easy to implement and will definitely be useful. Why not make a stand out of office clips? They look like this, and if anyone didn’t notice them before, now everyone will definitely pay attention:
There are colored ones, small, large, as you can imagine, so you won’t have to complain about a monotonous black stand; by choosing colored clips, you will unknowingly improve your mood by looking at the bright and warm colors:
For the first variation you will need only two large clamps.
Pay attention to the size of your smartphone; you may need smaller or larger clamps.
Tape them together using a piece of paper or cardboard, or any other flat thing, and the stand is ready!
Related article: Filet knitting: free crochet jewelry patterns for beginners with photos and videos
If you want to watch something on your smartphone and charge it at the same time, then you will need four of the same clamps, they are fastened together as shown in the figure, and the charger is placed in the middle, this way the smartphone is held tightly and is in a comfortable position for charging.
Using clamps, you can come up with various options for fastening them together to create stands and holders; here you can only rely on your imagination. It’s quite convenient that all these structures can be quickly disassembled; when you get tired of it or need its elements, in a matter of seconds it will seem that there was no stand at all.
