Purchased furniture for a child’s room, especially made from natural materials, can be quite expensive. In a store or online, you don’t always find exactly the option you like. You can create a children's high chair and table from wood yourself. The work will not be difficult if you prepare all the necessary parts and tools, use your ingenuity and imagination. The reward for the work is a unique product, as comfortable as possible for the baby and practical in home life.
You can create a children's high chair and table from wood yourself.
The benefits of making a high chair with your own hands
A DIY chair will cost much less, and one made according to your own sketch will meet the intended parameters and the required degree of comfort for the baby.
The reward for the work is a unique product, as comfortable as possible for the baby and practical in home life.
All natural wood parts can be purchased in specialized departments of construction stores. They will select boards and bars of the required sizes for you.
A DIY chair will cost much less.
A child's high chair, created with one's own hands, is high-quality furniture for a child. In the process of work, you take into account the dimensions of the seat and backrest, which are as comfortable as possible for a growing baby, and check the strength of the structure directly at home.
All natural wood parts can be purchased in specialized departments of construction stores.
A wooden chair you create with your own hands can be decorated to your liking, rather than being satisfied with a ready-made solution for purchased furniture.
They will select boards and bars of the required sizes for you.
Fresh ideas for children's furniture in the gallery
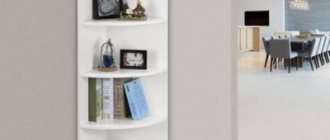
Such an interior item as a soft dining corner has earned popularity due to its functionality, attractive appearance and the ability to optimize the use of space. This is especially important for small rooms. However, even in spacious kitchens, a corner will not be out of place - it will perfectly perform zoning of space. Read more on our website.
Kitchen Area
Required materials and tools
To create a chair you will need various materials. Individual parts will be made from them. First of all, these are wooden blocks and boards from which the frame, seat and back are assembled. Instead of natural solid wood, you can use chipboard or plywood, but these materials are not durable. For fastenings, take sufficient self-tapping screws. You will need medium-hard sandpaper.
A child's high chair, created with one's own hands, is high-quality furniture for a child.
Dimensions of bars (length):
- support legs – up to 20 cm;
- seat frame connecting strips – up to 20 cm;
- backrest lintels – up to 20 cm.
A wooden chair made by yourself can be decorated to your liking.
During the manufacturing process, the thickest bars with a cross-section of 5x5 cm are used for the legs. For the planks, parts are taken with a diameter half the size of the supporting ones.
For the planks, take parts with a diameter half the size of the supporting ones.
The parameters of the seat board (height and width) should also not exceed 20 cm. The back part may be slightly higher, but preferably no more than 30 cm.
We recommend avoiding plastic products for two reasons:
- they are less durable;
- The environmental friendliness of such products has not been 100% proven.
The parameters of the seat board (height and width) should also not exceed 20 cm.
To make a chair with your own hands, you need the right tools:
- screwdriver;
- screwdriver;
- jigsaw;
- wood hacksaw.
The dorsal part may be slightly higher, but preferably no more than 30 cm.
The assembled chair will “require” original decor. In addition to the carved option, you can use paint or other materials to apply a design or appliqué. To accurately apply the image you will need a stencil.
The assembled chair will “require” original decor.
Deciding on design and construction
For a wooden product, you can come up with any option. A highchair is usually made with straight supports and the following forms of the back structure:
- solid square or rectangular;
- wide truncated cone;
- straight through (with jumper bar).
To accurately apply the image you will need a stencil.
For the chosen design solution, the parts are processed in accordance with it.
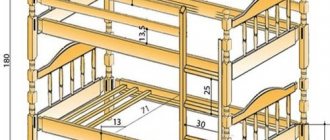
Creating a product with your own hands requires careful preparation. You must first make a sketch of the project. Visually draw a diagram of the connections of all parts separately with calculations of sections and lengths. Following the sketches, you will recreate the model in reality with exact parameters. A chair that has all the right dimensions will fit the baby and will not create any inconvenience.
For a wooden product, you can come up with any option.
Certain models are created with the expectation that the child will sit at a common table with other family members. In this case, high legs are chosen for the product, which are not attached exactly vertically in relation to the seat and floor, but more widely. The lower part of such a chair will look like a truncated cone, connected for stability by wooden blocks around the perimeter. The top part will be approximately 30-35 cm below the table level.
A children's high chair is usually made with straight supports and the following forms of the back structure
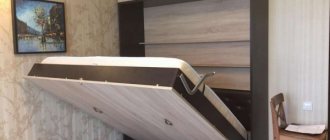
If you have certain skills, you can assemble a folding product. Such items can be easily removed if necessary into storage areas.
For the chosen design solution, the parts are processed in accordance with it.
conclusions
Making a table will not take much time and effort. Follow the recommendations of specialists, take into account the features of the product. Select the material - it is best to choose wood.
A homemade product will become a source of pride, in no way inferior to a purchased table.
Manufacturing process: step-by-step instructions
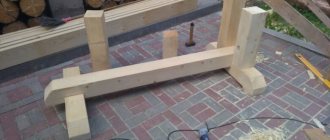
After preparing a drawing with exact parameters, we begin to assemble a simple children's high chair.
- Calculate the length of the legs exactly according to the diagram, saw off the excess with a hacksaw.
- Cut out the jumper bars to size that will secure the frame in the seat area.
- Connect them to the supporting structure. Add furniture glue for reinforcement.
- Attach the pre-sized back and seat using self-tapping screws.
- All wood parts must be cleaned with sandpaper to avoid roughness and burrs.
A chair that has all the right dimensions will fit the baby and will not create any inconvenience.
If the parts are disproportionate, “adjust” them according to the design diagram using a hacksaw. To make the chair you created with your own hands comfortable, ask your baby to sit on it, ask how comfortable he is.
If all dimensions were determined correctly, the child will love the new furniture. To ensure the parts are smooth, sand the surface again.
Certain models are created with the expectation that the child will sit at a common table with other family members.
To varnish the product, use only safe compounds - a special coating for children's furniture, environmentally friendly and having the appropriate certificate.
The top part will be approximately 30-35 cm below the table level.
After finishing the exterior with varnish, let the chair dry thoroughly for a day or two. Then you can begin decorative finishing, if any is planned. If it involves carving, then varnishing is done after finishing the artistic treatment and sanding the parts.
Decorating a chair
Use a jigsaw for carving. You can make a decoration in the form of a flower, cutting it out in the center of the back, or any geometric shape. First, mark the area of the future decoration with a pencil so that the carving is even. Parts such as legs and back can be carved. The corners of the seat can be rounded using a jigsaw and sandpaper.
During the manufacturing process, the thickest bars with a cross section of 5x5 cm are used for the legs.
The top can also be made not strictly rectangular, but a truncated cone, rounded, compound. In the latter option, you will need additional bars and cross bars - one or two. They are secured using special holes at the junction with the dorsal frame. This is a rather labor-intensive process, but if you wish, you can choose this option.
For fastenings, take sufficient self-tapping screws.
All steps for processing parts must be performed before the chair is assembled - this way the work process will be faster, more convenient and neater.
If you have certain skills, you can assemble a folding product.
To make a home-made piece of children's furniture look more interesting, you can apply a design to the back and seat. To do this you need to use safe paints. The color scheme should be bright and cheerful. Simple ornaments, floral patterns, and imitation of children's toys, such as cars, look great on wooden furniture.
Instead of natural solid wood, you can use chipboard or plywood, but these materials are not durable.
Due to the fact that the size of the product is small, a large pattern will become a kind of accent that attracts the child’s attention - he will like to sit on such a beautiful chair, play games or have breakfast.
You can use appliqués for decoration – there are plenty of adhesive bright films on sale.
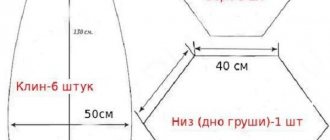
The image will turn out smooth if you use a stencil pre-cut from paper or thick plastic.
You can use appliqués for decoration – there are plenty of adhesive bright films on sale. Whether the image will be monochromatic or multi-colored depends on your imagination.
First of all, these are wooden blocks and boards from which the frame, seat and back are assembled.
It is not recommended to use bulky (protruding) parts, both small and large, in finishing the seat or back of a children's chair. Firstly, it is inconvenient for the child, and secondly, they quickly fall off with frequent use of the product.
To create a chair you will need various materials.
What decor can be used for a homemade children's high chair?
You can use any safe materials as decoration for a homemade chair
The chairs are varnished and painted to match the interior color. You can add decor with applique or decoupage .
The fabric finish looks good , it gives comfort and makes the chair even more convenient to use.