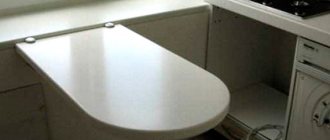
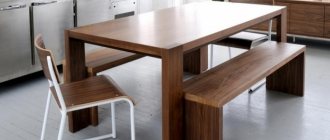
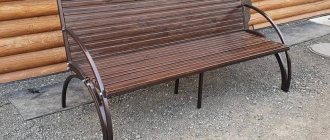
Most owners of modern housing note a common problem - lack of free space. In an effort to place all things as compactly as possible, you have to resort to all sorts of tricks. One way to free up space without sacrificing comfort is to make a transforming table with your own hands using a ready-made lifting mechanism. Multifunctional furniture, which has very modest dimensions when folded, can be seamlessly integrated into a wide variety of interiors thanks to a large number of design options. Making a transforming table at home is not difficult; you only need basic craftsmanship skills and correctly cut the components of the structure.
What is needed for assembly
In order to assemble a coffee-dining table, you need to prepare everything for this work. Initially, obtain all the necessary parts and tools. This will help you not to be distracted during the assembly process, but to completely immerse yourself in the work and do everything quickly and efficiently.
Assembling the table is a simple procedure.
For such work you will need:
- a Phillips screwdriver or a screwdriver with all the necessary attachments;
- furniture hammer (other models may be too powerful and large and break the part due to awkward movement);
- a set of necessary fasteners (as a rule, they come as a complete set along with the purchased parts for assembling a transformer coffee table.
Use professional tools to assemble furniture.
The modern furniture market offers many different models, but most manufacturers offer disassembled tables that are assembled according to a standard design.
Frame
First you should start working on the body of the product. After which subsequent parts can be safely attached to the base. The details of the legs of the future table are prepared and all the elements are connected one by one.
Table legs can be made of metal.
The output should be four corner legs. The leg itself consists of two elements, which are attached to each other using screws provided for this purpose. They can also be called eccentrics.
Prepare all the parts to assemble the table.
The elements of the body side frames are connected using exactly the same principle. After completing this stage, a person receives four legs and a square or rectangular base body (it all depends on the model of the purchased table).
The table top is easily attached to the table legs.
Once these elements are ready, they need to be connected to each other. The legs are screwed to the body according to the instructions and at the end we get a part of the table to which the transformer mechanism can already be attached. It will perform the conversion functions.
The mechanism of the transforming table may be different.
Note! If you look closely at the details of the legs and drawers, you can see that in addition to the holes for connecting each element of the leg and drawer with each other, there are other “holes”. They are entrusted with another function: installation of the lift, as well as the tie of the entire structure, ensuring maximum tightness of the connection and possible loosening in the future as the product is used in its different variations. After the assembly of these elements is completed, you need to make sure that the special holes match each other.
The tabletop can be of any shape.
Then you can proceed to the plastic thrust bearings; they must be pressed to the bottom of the legs. Special shock absorbers are installed on the upper part of these elements. They will perform the function of softening the impact of the tabletop during its transformation.
Mechanism
The next step will be the assembly and installation of the lifting mechanism.
The table can be laid out depending on the number of guests.
To put it into working condition, you need to:
- connect the spring with one side to a special hole inside the lifting mechanism;
- there is a groove on the opposite side, the spring is attached to it with the other side using a special pin;
- screwing the lifting mechanism to the drawers (initially you need to connect it with long elements, and then with short ones).
The folding mechanism will have to be purchased separately.
Additional Information! The legs, which are assigned the function of holding the inset tabletop, are located above those intended for the underframe.
Tabletop and underframes
After all the above work has been completed, you can safely proceed to the next stage - mounting and fastening the tabletop and underframe. This stage goes as follows. Using specially designated screws and using a screwdriver or screwdriver, the lower flap of the tabletop-book, as well as the underframe, is secured.
The tabletop is most often wooden.
These parts are screwed to special holder platforms. Then you should start installing shock absorbers on the outside of the underframe. With their help, when folding a full-fledged product into a magazine version, the tabletop will not receive serious impacts, which will contribute to:
- eliminating strong pops during transformations;
- preventing scratches, cracks, chips and other damage to the tabletop surface.
Table legs can be designer.
Then you need to fold the legs of the lift into a special box. It does this simply, just move from outside to inside, after which the legs will be in the right place. This will not affect the aesthetic appearance of the product in any way, because the lower part of the tabletop successfully masks everything.
Carefully assemble the table.
Then the second part is installed on top. When doing such work, it is necessary to ensure that the end holes that are intended for hidden hinges. The center-to-center distance between them should be approximately 14 millimeters. You need to insert the hinges into these holes and secure them as carefully as possible with screws.
Dining option or unfolded table.
This is interesting: Advantages of a window-sill table in the kitchen, tips for installing it
Varieties of mechanisms and designs
The first thing you should think about before you start designing a bench table is how many people should fit on it. Depending on the number, you need to choose one of the design options.
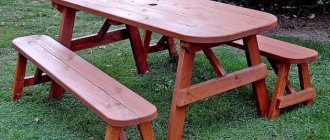
Table + benches. The most popular model. One bench, when disassembled, turns into two with a table in the center. Up to 6 people can comfortably sit here. The only downside that can be noted is that the appearance when folded is not very aesthetic. Constructor. This bench is also designed for a company of up to 6 people, and if you don’t take it apart, for two. The project includes a tabletop. Slightly inferior in capacity to the first option. Flower. It looks a bit like a construction set, but if assembled it will look like a bud - hence the name
An important advantage is the ability to adjust the backrest of the seats, but the downside is that there are recesses on the seats, which makes them less comfortable compared to other models. Additional design options. In fact, there are many varieties and designs of such benches. You can make a corner structure if you have empty space in the corner
The design with a coffee table is ideal for those who like to work outdoors, and the polygon table is suitable for a large group of 8 people.
You can make a corner structure if you have empty space in the corner. The design with a coffee table is ideal for those who like to work outdoors, and the polygon table is suitable for a large group of 8 people.
Instagram @daria.lozhnikova
Instagram @daria.lozhnikova
Instagram @daria.lozhnikova
Necessary tools for work
To work you will need to collect a lot of tools. Among them:
- hammer;
- screwdriver;
- Bulgarian;
- machine for grinding work;
- screwdriver;
- hacksaw;
- Bulgarian;
- electric drill;
- paint brush and some others.
To make a transforming table with your own hands, you will need a fairly large set of tools. A jigsaw is used to process the sheets. To level the surface, you will need a sanding machine. You will also need a compass, tape measure and other measuring instruments to check the quality of the assembly.
Preparing to create a bench-table
Selecting the optimal material for manufacturing
How to make a transforming table-bench with your own hands: drawings and design options
Such an element of furniture as a transforming bench can be purchased at any hardware store, but you must agree that it is much more pleasant to accommodate guests and relax comfortably on a product of your own making, because it is not only a beautiful design, but also a source of pride for you. However, before you start working directly, you must definitely decide on the material from which the bench will be made.
As a rule, wooden materials are used to construct a high-quality bench. Moreover, in addition to natural wood, plywood or PVC can be used. Undoubtedly, the first option will be more expensive, but, as a result, it will serve you not for 3-4 years, but for about 35-40 years. In addition, wood has a number of advantages.
Advantages:
- Environmentally friendly material;
- Safety;
- Long service life.
An important note to pay attention to when using wood: before use, be sure to coat the bench with an antifungal agent and also paint it with varnish. This will be an excellent prevention of rot.
Convenient option
Wood is a safe material
Environmentally friendly material - natural wood
Project drawing
In order for the design to be of high quality and convenient, it is recommended to make a drawing. If for some reason you do not have the opportunity to do it, then a ready-made circuit would be an excellent solution. When drawing up a drawing or selecting it from the Internet, 4 conditions must be observed:
- The image of the final structure should be firmly fixed in your head. You can't miss it during construction.
- The dimensions of the future transforming bench must correspond to the area where the structure will ultimately be located.
- It is recommended to compare the entire progress of work with the drawing, so it must be clear and of high quality (in the case of printing a photograph from the Internet).
- At the very beginning, you should calculate and record the dimensions of the moving parts, which will subsequently be firmly fixed to each other.
Below is one of the drawing options on which further work will take place:
Classic version of the drawing
Tools and materials
To create a transforming bench we will need the following tools:
- Hacksaw;
- Roulette;
- Sandpaper;
- Chisel;
- Drill;
- Bolts with nuts.
The materials we will use during construction are listed below:
- Wooden beams;
- Edged boards;
How to assemble all the components correctly
The service life is affected not only by the quality of the materials from which the product parts are made, but also by the accuracy and correctness of the installation procedure.
Follow the instructions when assembling the table.
Strict adherence to all conditions and order of work, the use of the correct fasteners will help create a high-quality piece of furniture that will serve for a long time and to the delight of its owners.
Circuits and components
An important factor in assembling the transformer table is strict adherence to the resulting diagram. She clearly explains with visual examples what part should be attached and how it should be attached with visual examples of what it should look like upon completion of each stage of work.
It is easier to assemble furniture using the drawing.
The second important detail is the components. Before starting, you need to check and recalculate the number of all parts and compare them with the quantity specified in the diagram for the product. The absence of even a small element may cast doubt on the possibility of assembling the structure and its full functioning.
Table assembly instructions
Each transformer table has its own characteristics, transformation mechanism and number of elements.
Follow the advice of experts when assembling the table.
However, there is something that unites the instructions of each model, namely:
- maintaining the correct sequence of work;
- careful execution of each operation;
- careful fastening of all parts.
The process of transforming a table from a coffee table into a table for receiving guests.
Zhuranalny
To assemble a transforming coffee table, you will need assembly instructions, as well as a complete set of all parts and elements. After which each part is connected in the correct sequence.
The coffee table transforms into a dining table.
The output is a finished piece of furniture.
Lunch
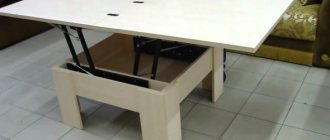
Thanks to this type of furniture, such as transformers, in two seconds a compact coffee table can turn into a dining table for several people; a special mechanism allows you to reveal two parts of a large tabletop hidden in the base, and also make the product much taller.
In small apartments, the presence of transformable furniture is important.
The assembled table will serve its owners for a long time. In order to avoid problems with it after a while, it is necessary to tighten the connecting elements and clean the surface at certain intervals (about once a year). For this, either a regular rag or a special polish can be used.
Advantages and disadvantages of the mechanism
This piece of furniture, equipped with a lifting structure, has its pros and cons. Among the advantages are:
- versatility, allowing you to use the transformer “for all occasions”: from daily family dinners and entertaining guests to doing school homework;
- ability to adjust size and height;
- wide choice of materials;
- different styles;
- reliability and safety of operation.
There are three main types of transformable tables: coffee table, dining table, book table.
Important positive aspects are affordability and compactness.
Among the disadvantages, if it can be considered such, experts and home craftsmen cite the possibility of breakdown, when the mechanism for the transformer table may fail. However, on the one hand, nothing lasts forever, and on the other, the more carefully and carefully the furniture is handled, the longer it will last.
When folded, the table takes up very little space, and when unfolded it allows you to seat a group of friends.
Choice of modification
Among the variety of models of multifunctional furniture, tables are in particular demand. They are presented in various modifications and forms. According to their purpose they are divided into:
- For magazine work. With the help of a special tabletop and a smooth transformation mechanism, an ordinary table can easily be turned into a work desk, reminiscent of a school desk. The fastening system is designed for several different positions, allowing you to take the desired height. The furniture is equipped with convenient drawers for storing books and stationery.
- Dinner-magazine. This is the most common option, indispensable for small spaces that do not have a separate dining room. It stays folded most of the time and takes up little space. But when guests come, it can be easily expanded to create a full-fledged dining table that can accommodate up to ten people.
- Storage table. Compact design that hides storage space for household items from prying eyes. Consists of a table top and several drawers underneath. Once assembled, access to them is blocked. It opens if you rotate the tabletop around its axis.
- Picnic table. Has many modifications. This is the most common item that is most often made by hand. The tabletop can be rotary, round or rectangular. It is attached to frames that make it easy to move the structure into the desired position.
Making transformable tables with your own hands is not at all difficult. Without any skills, you can start with a picnic product. It has the simplest assembly scheme; any material will do. And after practicing, you can proceed to more complex furnishings. At the same time, choose a design that you really like, and not the one presented in the store.
Step-by-step making of a desk with your own hands, examples of decor
Coffee table Dining table Storage table
For a picnic
What types of folding tables are there?
Taking into account the fact that there are many options for folding models, it is worth first of all deciding on the specific purpose of the item. If it is stationary, then it is better to make the structure more weighty, and for moving it is worth choosing a model that is light in weight and dimensions.
There should only be protection provided against the fact that it will be pressed into the ground.
- The design mechanisms and the way the table will unfold will determine how complex the work itself will be.
- If we take into account that all models have both a table top and legs, then you can consider an option in which the legs are then screwed to the folding table top.
- For this purpose, a screw thread is provided on the inside, and the leg has a pin on top.
The table can be made of various plastics, plywood or chipboard. It is quite acceptable to use aluminum sheets for these purposes.
The chosen shape, in the form of an oval, circle, square or rectangle, can add originality to the design. What makes the product unique is not the solid surface, but the one made up of individual strips.
Manufacturing instructions
To make a transformable folding table from wood you will need:
- make a drawing;
- prepare details;
- choose a mechanism for the table;
- perform assembly.
Features of making your own manicure table with a hood
The instructions for all parts indicate universal sizes. Individual assembly diagrams for transformer tables may contain other numbers. Calculations vary depending on the design of the product and its dimensions.
Drawing up a drawing
You can make drawings and diagrams for making a transformer table yourself by drawing a sketch on paper with all sizes marked. The sizes can be selected individually, or you can use universal options:
- When assembled, 90 by 75 by 51 cm (length, width, height).
- Unassembled 90, 150, 51 cm.
Calculations must be accurate; every wrong millimeter can lead to the failure of the entire product. Therefore, it is much more convenient and easier to make moss using a special computer program. In it you can not only draw a layout of the future table, but also calculate the materials and create a cutting map. It is quite easy to learn. In a couple of days you can draw a high-quality drawing and avoid possible mistakes.
Preparing parts
To make a real transformer with your own hands instead of a regular table, you will need the following parts:
- Chipboard 2.2 cm thick, size 90 by 60 cm, two pieces for the tabletop.
- One sheet measuring 72 x 35 cm as an auxiliary panel.
- Four furniture corners.
- Four bars 51 cm high for supports.
- Transformation mechanism.
- Accessories: screws, bolts, nuts, washers, hinges.
To assemble the product you will need a screwdriver, hammer, jigsaw or electric saw.
Assembly
Assembly is an important stage in the manufacture of a transformer table using a lifting mechanism with your own hands. When all the drawings, tools and materials are prepared, you can proceed:
- Carefully and carefully cut out all the planned details. The ease of unfolding the product will depend on the accuracy of the cut.
- Using an eccentric tie, connect the legs together. This will further strengthen the finished furniture and add stability to it.
- Make markings to secure the transformation mechanism.
- Drill through holes and attach fastening parts to them.
- Next, secure the tabletop to the holder platform using the corners; it is better to start fixing it from the smaller panel.
After this, all that remains is to fold and unfold the structure several times to make sure that the assembly is done efficiently and all parts are securely fastened.
Assembly diagram Assemble the legs Strengthen the frame with legs Install the transformation mechanism
Attach fastening parts to them Secure the tabletop
Ready product
Handmade folding structure
The country model is always universal, due to the fact that it can decorate the kitchen, be moved to the garden, or can be placed in the room.
To make a wooden table you will need:
- A pair of chipboard sheets, the dimensions of which should be approximately thirty by sixty-five centimeters. The thickness should be at least two centimeters;
- Boards - fifteen pieces - 550 by 50 by 20 millimeters;
- Self-tapping elements forty-five millimeters in length;
- Bolts with washer and nut. Ten pieces is enough.
If the assembly is carried out using photographs, then everything is visible on them, and in this case a drawing is not required. This is a pretty convenient way.
Step-by-step execution technology:
- First, the boards must be cut to size;
- Then thorough sanding is carried out;
- The parts are bolted together according to the markings according to the diagram;
- The table is assembled from prepared structural parts.
Labor costs
The time spent on assembling the transforming table was reflected in tabular form.
| № | Work stage | Number of hours |
| 1 | Assembling the tabletop | 4 |
| 2 | Assembling sidewalls with legs | 2 |
| 3 | Stain and varnish coating | 2 |
| 4 | Installing piano hinges | 1 |
| Total | 9 |
This is pure time spent only on performing individual operations. Taking into account technological breaks and rest, I assembled the table in 2 days.
A table of this design, when assembled, can serve as a convenient surface on which newspapers and magazines will be placed. The table is suitable for serving breakfast or dinner. When folded, the structure occupies a minimum of usable space. If necessary, the transformer can be “turned” into a fairly spacious dining table.
Folding furniture is attractive for use in the country, in summer pavilions and on picnics. The table easily fits in the trunk of a car.
Smart furniture
Innovative interior design models, made in different styles, are considered not only a successful addition to the decor. Folding furniture simplifies life, contributing to a radical transformation of space.
An integral part of the interior of small-sized apartments has become a console coffee table that transforms into a dining table for 12 people.
Rotary racks equipped with front and rear functionality deserve special attention. They work on the principle of a fairy-tale hut on chicken legs, and are considered an ideal element of space zoning.
As a rule, such rotating cabinets are equipped with a TV on the front side, protected from the rear by shelves or a built-in mirrored dressing table. The base of the rotating modules is a chest of drawers, which hides in the depths a retractable table on wheels, inside of which a bed can be hidden.
The modified transformable desk bed, in addition to the sleeping area, includes a home office area and is located on only two squares of usable area of the apartment. To extend the bed, the tabletop is moved up and tilted to the side, forming the head of the bed.
Where to start?
The transforming table from “Much Furniture” should be assembled in stages, starting with the legs. The drawings show in detail how the parts are twisted. It is worth noting that assembly must be carried out according to technology, otherwise the furniture will not be able to serve you for the required period. In general, the tables are assembled according to the following plan:
- Legs.
- Table top lifting mechanism.
- Table frame.
- Additional shelves and drawers (if available).
Knowing how to assemble a transforming table from “A Lot of Furniture” using a video, you will cope with this task in a few hours. To simplify the process, you can use a screwdriver and a ruler with a pencil to make marks. It may not be very convenient to do this alone; the help of a friend will not be superfluous, at least to hold some elements of the table.
Decorating Tips
The transformable bench can be covered with stain and then with water-repellent varnish, which is used to paint yacht decks. The varnish dries in about 36 hours. But still, it is not recommended to keep a bench coated with varnish outside in the rain and snow.
If you still plan to install it in a permanent place on your garden plot, you can paint the structure with waterproof paint, which will dry for about a day. Once every few years, the paint must be renewed so that the wooden elements do not begin to rot, become moldy, and various parasites do not infest them.
If the design is done correctly and you take care of it, it will serve you for at least 20–25 years. Very often craftsmen replace wood with metal, which does not look as beautiful and aesthetically pleasing, but the service life increases significantly.
We paint all the elements of the bench with stain
How to make a transforming coffee table
To make a good transforming coffee table, just follow a simple algorithm. First you need to select a folding mechanism. After this, a project is created and materials are prepared. Tabletop elements are adjusted to size. Next, the frame and supports are installed. The countertops are installed as a finishing touch.
One of the options for making a transforming coffee table.
It is better to use ready-made drawings or draw them yourself using special computer programs. This will greatly simplify the task of assembling the final structure, and will also help calculate the amount of materials to create the finished product.
Drawing and dimensions for a transforming coffee table.
It is enough to connect the purchased strips with bolts. Assembling the frame will also not be a problem. To assemble all the parts smoothly, it is better to make markings with a pencil in advance.
Transformable coffee tables save space and are quite practical.
Table-rack (transformable)
Table-rack (transformable). Wall-mounted folding table-rack. Can be used in any room as a table or shelving unit. The table base is attached to the wall using six anchors. Four tabletops (shelves) are fixedly fixed on four guides. By turning the guides up 90 degrees, the table can be transformed into a rack with four shelves. The tabletops are made of chipboard. Guide material St.3, rectangular pipe 40x20x2 mm, with subsequent painting. To facilitate lowering and raising the table, two gas lifts of 8 kg each (gas lift) are mounted on both sides. The table can be folded and remain on the wall, thus not taking up much space.
Technical characteristics of the table: - size of one tabletop, HxWxD, mm 16x800x300 - overall dimensions of the assembled tabletop (4 pcs), WxD, mm 800x1200 - overall dimensions of the table, HxWxL, mm 318x870x1202 - gas lift, load, kg 8 - gas lift, quantity , pcs 2 - weight of the table itself, kg 15.4 - total weight, kg 23.6 - wall mounting, anchors, pcs 6
Technical characteristics of the rack: - size of one shelf (4 pcs), HxWxD, mm 16x800x300 - overall dimensions of the rack, HxWxD, mm 1218x870x300
Composition: 3D table-rack assembly (SB), 3D subassemblies, all 3D parts separately
Source
Manufacturing process
From the prepared laminated chipboard we cut out two parts of the tabletop: one stationary, the other lifting.
Additionally, we cut out the base panel. It will be mounted on the wall, and, in fact, the entire structure will be supported on it. Its dimensions are approximately 20 x 30 cm, but can be larger. It all depends on the size of the table.
We will also need a retractable panel that is attached to the main one and supports the lifting tabletop in the open state. It can be cut in the form of a right triangle from a single piece of chipboard, or it can be assembled from individual slats.
We connect the stationary and lifting parts of the tabletop to each other using a piano hinge. It should look like a book.
Using butterfly loops, we install a triangle-support with an acute downward angle on the mounting base. When folded, the triangle should be parallel to the base, and when unfolded, it should be perpendicular.
We apply the wall panel to its location, level it and securely fasten it.
Using special hooks, we hang the main part of the shelf-tabletop simply on the wall directly above the base.
Ready. To fold the table, simply turn the triangle support to the side and lower the movable part of the tabletop.
Types of transforming tables
This type of apartment accessory is available in many types, depending on the table transformation device:
Application of automatic device
There are 1-2 additional surfaces that are located under the tabletop. At the moment the main part begins to move, additional elements also begin to move. This type of table has several layout variations, and it may include gas lift and springs “considered the most reliable variation.”
Rotary table
A very interesting view. During unfolding, the additional and main elements do not become one. Special metal guides are used to build such a table.
Using inserts
The most popular type of tables. The design features a tabletop that diverges during transformation. Additional tabletop elements can be placed on the sides or in the center.
Double decomposition
This model consists of two surfaces that fold on top of each other. To decompose, you just need to remove the top part.
Making a dining table
Creating a transforming dining table is practically no different from the option described above. You can use other, more durable materials. The assembly sequence is the same.
It is better to use more durable materials for the dining table.
A transforming table is a convenient device that allows you to save extra square meters in a small apartment. This furniture will fit perfectly into the kitchen or living room. With this table you can easily accommodate a large number of guests.
Convenience and practicality in one product - a transformable table-rack
Many people's apartments or houses do not have a large amount of usable space that allows them to place all the necessary pieces of furniture in the household. That is why, in such cases, property owners try to purchase products that would combine several useful functions at once, occupying minimal space in the premises.
One of these pieces of furniture is a transformable table-rack, which has recently enjoyed significant popularity among buyers.
Recommendations for selection
Choosing a kitchen is a very important and pressing issue for the housewife. Everything should be convenient and functional. In the case of a small kitchen, the situation is complicated by space. It is important that the kitchen does not look cluttered. In this case, tips on choosing a folding headset will come in handy.
- To save space, you can use built-in household appliances. If the housewife cooks often, then she should take a good stove of the right size. If cooking occurs infrequently or in small quantities, then it makes sense to pay attention to hobs with two burners.
- If the kitchen has a clear place for a dining area, then it is better to choose a folding table. If the meal is planned somewhere in the middle of the kitchen, then you should choose a table-book or a folding transformer.
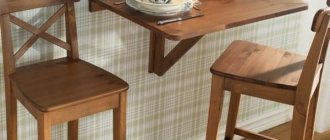
- You can completely abandon the usual table. An excellent alternative is a built-in countertop and two stools in the kitchen unit. This can be done when purchasing custom-made furniture.
A modular sofa with a sleeping place is the best solution for a small kitchen-living room. During the daytime, you can move the modules apart and use them as chairs.
Wooden garden table with benches
For those who want to make a set of garden furniture along with seats, a monolithic table design is suitable. Benches can be combined with both straight legs and X-shaped ones. In both cases, the dimensions of the table with benches will not allow it to be moved around the site frequently. For ease of movement, the structure is made collapsible. By dismantling the benches and legs, all components will take up little space and can be carried by one person. It is easier to place a folding table for winter storage in a barn or garage.
Seats
The benches are made from boards 30-40 mm thick. When knocking down a seat made of bars, gaps of at least 5 mm are left between them. The width of the bench should be from 30 to 45 cm. Along the perimeter of the seat, round the edges of the bars with a plane, grinding machine or manual milling machine. The radius of curvature is at least 10 mm. Soft bench seats can be made from plywood or MDF. Foam rubber is placed on top of them and covered with leatherette.
Tabletop
The dining surface is assembled from boards, bars or moisture-resistant pressed material (plywood, MDF, OSB). The tabletop is mounted on a frame or mounted on supports. If a monolithic structure is made from solid wood, the surface is leveled with a plane and sanded with sandpaper. Then they are thoroughly impregnated with antiseptics, painted or varnished.
Table installation
After assembling large units, they are connected into a single whole. Supports are installed if the table is on viscous soil: wide supports made of wood, stone or metal are placed under the legs. The connections are made collapsible for ease of movement and storage. To do this, the components of the transforming table are fastened with threaded rods, after drilling a hole. Before tightening, place washers under the nuts. The latter will prevent the wood from “crushing” during assembly.
For your information! Threaded connections must be lubricated with automotive oils or lithol for free screwing of the nuts.
DIY folding picnic table. Step by step photos
Before you start assembling a folding table, you should remember that half the success lies in using quality materials . The timber and board must have as few knots as possible, and cracks and delamination of the wood are not allowed. In addition to lumber, you will need fasteners, hinges, and means to protect lumber from exposure to the atmosphere.
Materials needed to make a table
To make a folding table, you need to have on hand:
- timber measuring 45×45 mm – 8 pcs. 730 mm long – for making legs;
- slats 45×20 mm: 2 x 550 mm and 2 x 950 mm – for assembling the upper frame of the table, as well as 2 x 350 mm – for the folding part;
- plywood slats 40x27 mm for supports - 3 x 450 mm;
- 18 mm plywood with dimensions: - 985x585 - sheet for the tabletop; - 2 sheets 985x530 for folding parts; - 1 sheet 885x481 mm for the shelf;
- rail 440×40 mm as a cross member;
- 2 slats 450x40 mm for side support elements;
- 4 loops 60×34 mm for fastening table covers;
- 4 loops 80x41 mm for folding legs;
- screws made of galvanized or stainless steel;
- metal dowels for mounting shelves.
When cutting workpieces, try to ensure that the corners of all parts and their ends have right angles . To do this, use a carpenter's square, and if it is missing, you can use the angle of factory-cut sheet material.
DIY folding table drawings. Photo
Assembly instructions
Before you begin assembling the folding table with your own hands, you need to prepare the timber parts for installation. To do this, a groove up to 20 mm wide and deep to the middle of the workpiece (22.5 mm) is cut out on each frame part. The same distance is measured from the edge to the groove - 30-40 mm.
Step-by-step photo of how to make a folding picnic table
After all the grooves have been cut, holes to connect the parts together, as well as attach the legs.
To avoid distortion of the frame when making a folding table with your own hands, cross-shaped cuts , into which the corners of the frame will fit during installation. This process can be examined in more detail in the presented figures.
Properly prepared parts are the key to high-quality assembly, so it is advisable to use high-quality equipment - a good circular saw, drill, set of chisels and other carpentry tools.
Assemble the upper frame of the underframe (the common name for the tabletop frame). To do this, the slats are assembled into a groove and fixed with furniture confirmations (screws for a hex key);
Support legs are installed on the assembled frame , combining the sawn parts with the frame slats.
At the corners of the plywood shelf, cutouts are made for supports . metal dowels are installed at a distance of 220 mm from the edge of the legs .
Retractable support elements are assembled. To do this, the remaining bars are connected in pairs with slats installed in grooves, fixing the connection points with confirmations.
Having sanded and primed the tabletop and other parts, they begin to paint the footrest, slats and tabletop.
Install the shelf spacer. The side lintels are attached to the tabletop frame. The support rails are attached to the shelf, for which holes are drilled in it. Remember that this work requires special care, since even small displacements can affect the geometry of the table.
A jumper is mounted to the table frame, after which three additional spacers are attached.
Extendable hinged legs are attached to external struts.
The main and folding parts of the tabletop are screwed to the hinges.
The table cover is installed on the frame , after which the middle part is fixed to the frame with self-tapping screws.
A table assembled in accordance with our instructions will have sufficient strength and reliability. The main thing is to carry out the work step by step, in the presented sequence. Processing and painting must be carried out before assembly. Otherwise, it will not be possible to carefully paint individual parts and the finished product will not look elegant and impressive enough.
How to choose the right table transformation mechanism
When choosing, you need to pay attention to the table transformation mechanism and give preference to the product in accordance with the functional features of the structure. They use:
- synchronous or asynchronous sliding of the tabletop;
- manual or automatic lifting of the central insert;
- sliding or rotating type of opening, used in the “book” variety;
- drawer tables use mechanisms for sliding the cover of external or internal fastening;
- in tsargless ones, direct fastening to the tabletop is most often used.
- a folding insert is used from two parts connected by cylindrical hinges and secured using a special turning device.
When folded, it is a neat piece of furniture; when unfolded, it is an excellent table for a large company.
There are other types of devices, the features of which can be found directly when choosing and purchasing a transformer.
A table like this will decorate any apartment, the price won’t put a big dent in your wallet, and its practicality will delight you for many years.
Tasks
The furniture industry of domestic and imported origin deals with the problem of spaciousness, producing original kitchens with retractable and sliding structures, which are called transformable kitchen furniture. The essence of such furniture comes down to the fact that not all household items are used constantly. Some of them can be folded compactly and unfolded when the need arises for their use. Through the use of transformers, several problems are solved:
- space is saved;
- ergonomics improves;
- a certain design style is created;
- a beautiful view and comfort are formed.
We bring to your attention some options for transformable furniture in photo 1. We will be glad if they help you update the interior of your small kitchen.
What is the convenience of such a bench?
- Saving space on the site. In a small garden, a full-fledged recreation area (table + benches) takes up an prohibitively large amount of space and often interferes with convenient passage through the territory. When folded, the transforming bench is compact and unfolds only for the period of feasting, like a book-table in the living room.
- Constantly being outside. The owners of such a bench do not have to take the kitchen table out into the yard for every reception. The garden bench is treated with specialized anti-rotting agents and can stand under a tree throughout the warm season.
- Aesthetics. If you wish, you can create a bench that best matches the exterior of your home. For example, a massive wooden bench would be appropriate near a log house; next to a house covered with siding, a bench with a metal frame looks good; A modern country house should have a loft bench.
A transforming bench with a metal frame looks great against the background of a wooden gazebo
One of the main advantages of this design is the ability to make it yourself on a moderate budget. After all, you won’t need store-bought mechanisms, as when creating home furniture.
To the dacha
Most often, picnics, hearty lunches, and barbecues are organized at the dacha, so the transforming table will be an indispensable assistant for those who like to eat well.
The furniture can be arranged both for a large feast and for modest evening tea parties, for example.
Three options for semicircular tables
The first option is one of the simplest. A semicircular table with a swivel support can be installed on the loggia
or in a home workshop.
The dimensions of the table can be changed at your own discretion - it depends on what you need it for. It all depends on personal preferences and needs.
Materials needed to make a balcony table
can be seen in the table below.
Step-by-step work process:
If desired, you can make a “Christmas tree” on the surface. To do this, you will need to saw wooden planks, and then glue them to the tabletop (as when laying parquet).
There is an even simpler version of a semicircular table. You can make it from an old wooden reel for an electrical cable. This idea was shared by the author of the YouTube channel DIY Woodworking Projects.
The tools that will be required for the job can be seen in the table below.
The master uses one of the sides of a wooden reel as a basis. The sidewall needs to be cut in half into two parts, which need to be glued together - this way we increase the thickness of the tabletop.
If there are cracks and nail holes in the boards, they need to be covered with putty. Then the surface needs to be sanded.
We make a shelf from boards. We attach the tabletop to this shelf using a pair of furniture hinges.
To make the edge of the tabletop look more or less neat, you can cover it with veneer or nail a thin wooden lamella onto decorative nails.
After this, all that remains is to make a bracket from boards or wooden blocks, and you can begin installation.
To make a table for a child, it is advisable to decorate it in an interesting way. For example, all children love bright colors - you can focus on this. There is nothing complicated here.
The material used is whatever is at hand - furniture board, chipboard, MDF, plywood.
To decorate the surface of the tabletop we will need ice cream sticks. But you can also saw such blanks from wooden slats. We paint the upper part of the sticks in different colors.
How to position?
The main task of such furniture is to save space, so you need to arrange all the items as thoughtfully as possible. Examples of the location of a transforming kitchen:
- it is convenient to install the multifunctional structure along the wall: the space in front of it should be sufficient to use all modules;
- an island with everything you need for cooking can be placed either against the wall or in the middle of the room;
- the stall looks best when it is not standing close to the wall, but closer to the middle of the room; it should be possible to walk around the structure from any side;
- if the structure unfolds only in one direction, then choose a place so that the unfolded parts do not interfere with entry and exit from the kitchen;
- Transformers in the form of a cabinet will allow you to divide the kitchen space into working and dining areas.
When using a folding dining group, you should immediately choose a corner in which it is easy to hide the folded structure.
Tables for picnics
Such designs are light and elegant. They are small in size and easy to fold when folded.
Chipboard sheets, the thickness of which can be one or one and a half centimeters no more, will be used for production. An aluminum pipe is used for the legs. The supports from an unusable folding bed will be quite useful for this. Only they will need to be raised to a certain height by extending them with a pipe.
The tools for work will be:
- Electric jigsaw;
- Hacksaw for working with wood;
- Drill;
- Screwdriver with a set of screwdrivers;
- For cutting aluminum - scissors.
A suitable drawing can be found on the appropriate website and used with the necessary adjustments. The usual dimensions for a table top are seventy by eighty centimeters, and the total height is up to fifty centimeters.
Folding table-shelf
Transformable home furniture is unique in that one product can combine several functions at once.
A striking example of this is the shelf table. By default, this is the most ordinary shelf, which, if necessary, can be transformed into a table. A very practical solution.
You can make a shelf table from furniture board or plywood.
At the end, all that remains is to sand the assembled shelf table and paint it with wood paint (or you can paint it with stain and varnish it).
There is another, no less interesting option. There is not just one shelf, but several, and the tabletop itself is larger.
The frame of the structure is made of metal (which means it is reliable and durable). It can be assembled from construction corners or professional pipes.
The tabletop consists of several parts and is made of boards (plywood can be used).
When unfolded, the table rests on two metal legs made from a profile pipe.
The number of shelves may vary (in this case, four shelves). They can be used to store various small things.
But it is very convenient to place flower pots on them (so as not to clutter the window sills). When the time comes to water the flowers, the shelf transforms into a table with a slight movement of the hand.
You can use furniture gas lifts as folding mechanisms - two pieces will be enough for the entire structure (they are installed on the sides).
Folding table for garage
The idea of this table belongs to the author of the YouTube channel Celal Ünal.
At the last stage, all that remains is to sand the surface and coat it with wood varnish (or paint).
Unfortunately, the author did not provide any drawings, but by and large they are not needed - everything can be done “by eye”.
Folding table for work or study
Small folding tables are great for work and study purposes. You can make them from any materials that you find in your home.
For example, you can make a wall-mounted table large enough to only fit a laptop.
Or you can make a table-desk with enough space for the child to study homework or do other important things.
How to make a simple table:
