Typically, searching for information on how to install hinges on a cabinet involves three situations. You have decided to either make the furniture yourself, or save on professional assembly when purchasing, say, a kitchen set. Or you want to replace old hinges that have failed. In the first case, you will also need to learn how to correctly calculate the required number of canopies for the facade and make markings and drilling for their installation. And also read how to choose furniture hinges. In the latter - to correct errors due to which the furniture hinges on the cabinet for some reason failed. Also, restore the sidewalls, if the fasteners are torn out, prepare the chipboard for re-installation. Let's first consider the general algorithm of how to install furniture hinges on a cabinet correctly with step-by-step instructions. And then - special cases.
How many furniture hinges should I install on one façade?
There are generally accepted standards for installing four-hinge furniture hinges. Thanks to them, you can easily replace one canopy with another, and also choose any manufacturer based on price, quality and additional equipment.
When choosing how many furniture hinges to install on one door, they are guided by three criteria: the height of the facade, its width and weight. Moreover, the height is decisive in determining the amount of fittings.
Leading manufacturers of furniture components conduct a lot of tests and develop more accurate standards for their own products. For example, recommendations for choosing the number of hinges for installation on one façade from Blum are shown in the catalog as follows.
- It is not recommended to design the cabinet façade wider than 600mm. The number of hinges for installing the door on the frame depends on the weight and height.
- To ensure maximum stability and stability when opening and closing, it is recommended that the awnings be installed as far apart as possible.
- To facilitate marking, the following standard is used: the outer hinges are installed at a distance of 100 mm from the edge of the body and 98 mm from the edge of the facade itself (with 2 mm gaps between the facades).
- The approximate distance between cabinet hinges is 500mm. So, on a cabinet with a height of more than 1000 mm, there is a reason to secure the door with three hinges.
Selecting a model for production
Conductors of industrial production can be highly specialized and universal. Templates of the first type are used to perform certain operations on typical parts. Universal devices are suitable for working with different materials and objects of various configurations.
Based on design features and functionality, conductors are divided into the following types:
- overhead - when used, they are applied to the surface in the desired area, fixed with clamps or held by hand. Used for drilling holes in flat parts;
- rotary - the working part moves in both vertical and horizontal planes. Used when working with elements of complex geometric shapes and to create holes, the axis of which must be located at an angle;
- tipping - used to create holes in perpendicular planes.
A marking jig is used to mark the locations for drilling holes. It is much thinner and lighter.
The conductor device can be specially created for a certain type of fastener: dowels, confirmations, screws, corners. There are devices to simplify the process of installing fittings.
According to the type of fixation, furniture jigs can be sliding or fixed. The former can be moved freely over the surface if necessary, while the latter are rigidly fixed in the right place. The presence of an adjustment mechanism will help to combine the device with different types of workpieces.
For large furniture manufacturers, the availability of a variety of additional accessories plays a decisive role, since they significantly reduce time costs. In this case, the cost of the tools does not matter much. A completely different approach to purchasing the necessary equipment from those who have a small furniture production facility or from independent craftsmen who produce certain types of furniture. In this case, making furniture templates with your own hands turns out to be much cheaper and more practical. The choice of the necessary options and the complexity of the device are determined not only by production needs, but also by the skill and experience of furniture manufacturers.
Overhead
Turning
Universal
How to install furniture hinges, templates, marking diagrams on an overhead, internal or corner cabinet
To install the hinges on the cabinet and adjust them correctly, you need to have a general understanding of the mechanism of operation and the position of the adjusting screws. The most complex design has four-hinged furniture hinges with a built-in closer and CLIP TOP (Blum) snap mechanisms.
- A strike plate with holes for fastening to the sidewall.
- Shoulder.
- Bowl.
- Three latches.
- Safety pin.
- Clip mechanism.
- Screw for adjusting the installed front in depth.
- Eccentric for adjusting the height of the façade (on the strike plate).
- Width adjustment screw.
- Holder.
- Spring closing mechanism.
- External hinge.
- Internal hinge.
- Mounting screws.
- Deactivation.
- Blumotion door closer.
Regardless of the number of components, the presence of a built-in or overhead closer, absolutely all four-hinge furniture hinges are correctly installed in the same way.
- A counter plate (1) is screwed to the body from the inside.
- A part of the hinge with a bowl is put on the installation hole and secured with screws (11)
- Using the adjusting screws (7), (8) and (9), the façade is pressed stronger/weaker against the body, higher/lower vertically and left/right horizontally.
When installing, it is convenient to use special furniture templates (conductors) - they make marking for installing hinges on the cabinet much easier.
But they are needed only, for the most part, for production. In domestic conditions, when installing or replacing hinges on cabinets and cabinets is rarely required, you can apply the markings manually, using a square and a tape measure.
The installation pattern for the strike plate and bowl hinge will be slightly different for the overhead, corner and internal hinges. Also, different insertion diameters are required for hinges with bowls with a diameter of 35mm and 26mm.
Diagram of how to install overhead hinges on a cabinet
There is a general diagram of how to install overhead hinges on a cabinet with a bowl diameter of 35mm. It’s more convenient to imagine it using the example of a kitchen cabinet 700mm high and 400mm wide with a front of 696x396mm, respectively.
To properly install the canopy on the facade, you need to make holes for the hinge bowl with a diameter of 35mm with a distance from the edge of 22-22.5mm. The bowl is attached with screws - you can also make preliminary markings for them, at a distance of 48mm from each other.
A counter plate is installed on the inside of the sidewall, at a depth of 37 mm along the fastening screws from the edge, coaxially with the location of the hinges on the facade.
Installation diagram of internal hinges on the cabinet
Inset or internal hinges are installed on the cabinet in exactly the same way. The only caveat is that the counter plate on the side of the cabinet is recessed to the thickness of the facade.
That is, with a standard fastening, 37 mm is measured from the edge, and with an internal loop - (37 + 16) = 53 mm. If the façade is thicker, 18-22mm, then the distance for installing the hinge strike plate on the cabinet increases accordingly.
Installation diagram for corner hinges and mini hinges with a 26mm bowl, distinctive features
As a rule, corner hinges can be installed on a cabinet in the same way as regular overhead hinges, according to the same scheme.
Four-hinged transformable hinges and carousel hinges with a 35mm bowl are installed in the same way, unless the manufacturer provides other sizes in the instructions. But sometimes an additive of 37mm can increase to 42-45mm with beveled ends of the sidewalls and other non-standard cases, so be careful.
Installing a 26mm furniture hinge on a cabinet is done in the same way, but with different dimensions for marking on the facade. For the sidewall, the additive remains the same.
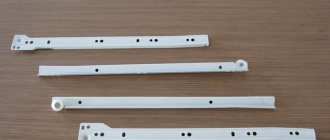
Making your own template
Let's look step by step at how to make the simplest template presented in the article in the first picture. To make a template for hinges and locks with your own hands, you need:
- select and prepare materials for future construction;
- prepare the required tools;
- manufacture components;
- perform final assembly.
Materials required for the manufacture of the structure
You can make templates for inserting hinges from any available materials. The most commonly used:
- Chipboard or plywood;
- MDF;
- plexiglass;
- metal cuts.
If desired, all of these materials can be assembled together in various ways, for example, the base can be made of wood board, the guide elements made of plexiglass, and so on.
Templates made from wood are easier and faster to make than from glass, plastic or metal, since this material is easy to process.
To assemble the structure you will need:
- M6*30 bolts in the amount of 6 pieces (bolt diameter is 6 mm and its length is 30 mm. To fix it, you will need a 10 mm wrench);
How to Determine the Required Bolt Sizes
- wing nuts also M6 - 6 pieces. Instead of wing nuts, you can use other types of nuts, the main thing is that they are easy to adjust;
Nut used when assembling the template
- flat washers with an internal diameter of 6 mm.
Size for choosing washers
- wood screws. Self-tapping screws must be selected based on the thickness of the parts being connected.
Tools for making a template
In addition to the components, it is necessary to prepare working tools, which include:
- a drill equipped with a set of drills of different diameters;
- jigsaw or other cutting tool;
- milling machine;
- clamp or other holder;
- tools for marking: ruler, pencil, tape measure, metal square;
- hammer.
Step-by-step algorithm on how to install hinges on a cabinet with your own hands
In order to install hinges on the cabinet with your own hands, you will need a drill with a Forstner drill of the required diameter (26mm or 35mm, depending on the size of the bowl), a screwdriver, a screwdriver, an awl, a pencil, a square and a tape measure.
| Decide on the number of hinges and their installation location, mark the distances for subsequent installation of the hinge itself and the strike plate. To speed up the process and measure accuracy, use a ready-made or homemade template. |
| Using a drill and a Forstner bit, drill a hole for the furniture hinge bowl. Be careful not to pierce the facade with the tip of the drill; this is a fairly common mistake among inexperienced furniture makers. |
| According to the marking diagram, a counterplate is screwed to the side of the cabinet at a distance of 37 mm for an overlay facade or (37+X) mm for an internal one, where X is the thickness of the facade. |
| The hinge bowl is fixed using fastening screws to the cabinet door. Then, holding the façade suspended, the hinge arm is placed on the striker plate and secured with installation screws. A 1-2mm gap must be left between the end of the case and the cabinet door to allow for further adjustment. |
The hinge design allows you to adjust the façade installed on the hinges in three planes: vertically, horizontally and in depth.
If the cabinet has double doors, install both doors first, and only then proceed with adjustments. The same goes for kitchen cabinets in a row. The doors need to be adjusted simultaneously on all cabinets and cabinets in the kitchen in order to achieve a single plane in height and depth with uniform gaps.
Template drawing
Before you make a template for the hinges, you need to think about the drawing of the future design.
You can develop a drawing of a template for inserting loops yourself. To do this, you will need to know what elements this device consists of. The design of the device includes:
- the base of the template on which there is a hole for drilling niches for hinges. The base is the main part of the device;
- template holder, which simultaneously acts as a kind of limiter. The holder is attached to the door leaf so that no shifting or deformation occurs during operation;
- connecting elements that also help adapt the design to the dimensions of the door hinges that need to be installed. The number of additional strips depends on the complexity of the template and the functions performed by the device. For the simplest design, 3 parts are enough.
The main components of a simple template
It is recommended to indicate the estimated dimensions of the template on the drawing, which will help determine the amount of materials required.
Ready-made drawings can be found on our website (“Drawings of template elements”), which describe in detail not only the manufacturing process of the device, but also how to use it for inserting locks and hinges.
If desired, the design of the device can be complicated, for example, with a template for inserting door locks or a template for installing furniture hinges.
The nuances of installing furniture hinges on a glass cabinet door
Similar to chipboard furniture hinges with a 26mm bowl, special furniture hinges for glass doors are installed. Using the adjusting screws, you can align the facades in the “left-right” position up to 5mm, “top-bottom” up to 2mm and “closer-further” from the frame up to 2.5mm.
| A plastic bowl with a seal is inserted into the pre-drilled hole, and the hinge arm is snapped into it. |
| The strike plate is installed to the desired depth with an internal glass facade and to a depth of 37mm with an overhead hinge for a cabinet. |
| Next, to install the hinge on the glass cabinet door, you need to thread it through the striker plate and secure it with adjusting screws. |
The canopy adjustment for the glass door is made in the same way as for all four-hinge hinges. After alignment, a special plug (metal or plastic) is placed on the outside of the bowl mechanism.
Since glass with drilling is quite fragile, it is recommended to install additional dampers (closers) to soften the impact of the door on the body. You can implement a push-opening system by installing a magnetic pusher with applied metal handles on the top or bottom edge of the glass door.
How to replace furniture hinges on an old cabinet
When replacing furniture hinges, it is advisable to replace the installation screws with thicker ones (for example, take 4x16 or 3.5x16 versus 3x16). This will ensure the strength of the fastening in the same holes.
If you need to replace furniture hinges on an old cabinet because they were torn out from the sides or the facade itself, it is necessary to carry out preliminary restoration work. You can read more about this in the article on how to repair a cabinet with your own hands.
Jig for drilling holes for furniture handles
Manufacturing process. The author selects a suitable piece of plywood and cuts it to the required size. An important point: the length of the board should be exactly 100 mm longer on each side. The reason for this precision is that the author intends to align the template with the bottom edge of the door leaf in order to be able to accurately mark the holes and drill them. Ideally, this device should work for both right- and left-handed sashes.
So, he trims off the excess material from the edge to the length specified above. The resulting scrap will also be used in the template.
Now it's time to test the jig on a real door. Fixes it tightly with a clamp and drills holes. Then he screws the handle on. Everything is perfect, both the indentations on the sides and the exact vertical.
Great job. When drilling holes in the door itself, the author recommends placing a small plank on the back side to thereby prevent chipping.
This drill bit is slightly larger than the diameter of the bolts themselves, so they will sit relatively loosely in the holes. Ideally, the fasteners should fit as tightly as possible.
Thanks to the author for a simple but useful device for assembling furniture! Good mood, good luck, and interesting ideas to everyone!
The author's video can be found here.
Source
How to Install a Piano and Card Hinge on a Cabinet Door
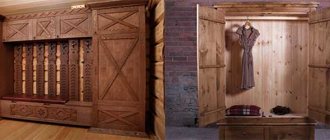
In modern cabinet furniture, cabinets and cabinets, four-hinge hinges are mainly used. Piano and card hinges are installed on the cabinet door in cases where it is necessary to emphasize the style, the “antique” design.
Due to the fact that card and piano hinges do not allow adjustment, it is important to adhere to the utmost precision and accuracy when marking attachment points. It is also necessary to first level the cabinet body horizontally, without blockages or distortions.
The easiest way to install a piano hinge on a cabinet door is with an assistant. First you need to decide on the design of a piano or card hinge - depending on what type of opening is needed and what decorative effect you want to achieve.
The card or piano hinge area can be screwed both to the end of the body and facade, and to the inside of the door and sidewall.
The installation principle itself is extremely simple and clear. It is recommended to first pre-fix the piano loop in 2-3 places, fixing the position. And then screw the screws into the remaining holes. Excess piano hinge can be carefully cut off with a hacksaw.
If other hanging options are used to equip the furniture (mortise, mezzanine, pin hinges), rely on the recommendations of the attached instructions.