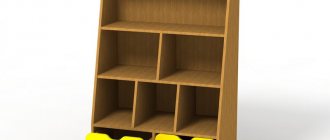
Simple and convenient profile rack
If you need a storage system for a garage or other room, you can buy a ready-made kit or do it yourself. The first option is simpler, but involves considerable costs.
For everyone who wants to figure out how to make a shelving unit from a profile with their own hands, we offer a detailed description of the process of manufacturing a reliable structure that will cost you very little.
What does the list of preparatory work consist of?
Stopping short, calculate the amount of consumables, including mounting parts and fasteners, consider the location and shape of the future rack, decide on the level of operational loads so that the future rack has at least one and a half safety factor.
A mobile rack is more complex and material-intensive. Stationary structures are attached to the walls, which has a positive effect on increasing their load capacity and reducing material consumption.
When choosing the latter option, you should take into account the complexity of possible dismantling and installation in another location.
About the strength of plasterboard shelves and their structures
When making a shelf, rack or stand for household appliances from plasterboard yourself, it is worth determining the load to which the entire structure will be subjected. Both the service life and the safety of operation of the product depend on this.
GKL slabs are thin (0.6-2.4 cm) and fragile. A metal profile frame helps them withstand the load. Designing structures should begin by taking into account the expected weight of the items that are planned to be placed on the rack:
- if a plasterboard shelf will have a decorative function, then the frame is made lightweight in order to save materials and your own time;
- for stands for equipment, you need to assemble reinforced structures, and for long shelves, make additional vertical posts and double the number of horizontal guides;
- a rack for books or household supplies in the pantry is made using wooden blocks for the frame, because thin metal profiles sag when luggage weighs heavily, and the thickest gypsum board is chosen for shelves.
To make a plasterboard shelf in a room with high humidity, use moisture-resistant plasterboard. It is also undesirable to load the racks too much, since the gypsum filler becomes more plastic when exposed to moisture.
Advantages of metal profile structures
Racks made of metal profiles have a number of advantages that can be used both at home and in the office, shops, and warehouses.
- Simplicity and accessibility of installation/dismantling. To assemble a metal collapsible rack, the participation of specialists is not required. The work can be performed by any person who has minimal skills in handling carpentry tools.
- Metal profile structures can withstand significant weight. The shelf is assembled without an additional strip in the middle (stiffening ribs) with a maximum load of 60 kg. One stiffening rib will be needed at 90 kg, and a shelf with two additional parts at the base will support a weight of 120 kg.
- Low cost. Moreover, this applies both to the metal profile itself and to work with it.
- Long service life. Metal, especially after special treatment, is one of the most durable materials. The main danger is contact with water. But the use of galvanization or special polymer dyes can solve this problem.
- Aesthetic appearance. The shape and size of the structure are selected taking into account the needs and characteristics of a particular room.
Shelves can be made:
- free-standing;
- mobile;
- wall
The latter, in turn, can be rows of shelves on four vertical supports or racks, which, using hanging brackets, are attached only to two vertical supports attached to the wall.
How to make a rack with your own hands
When choosing a model from a profile, measure the height of the wall and mark the location of the future shelving. For self-assembly, buy a ready-made profile cut into pieces. The set of materials comes with instructions that will help you easily assemble the bookcase.
For wooden models, draw the parameters yourself.
Example of a wooden shelving plan
The profile parts are fastened with bolts or welding. Marking the shelves. For shelving made from profiles, plastic or metal shelves are purchased. They are also bolted to the racks, and the fastening is supplemented with metal corners. For mobility of the rack, rollers are welded to the legs.
To make the structure resistant to heavy weight, it is supplemented with cross-shaped struts.
Required materials and tools
For work you will need:
- bolts, nuts, welding with electrodes;
- Welding may be required if the rack is made of metal;
- grinder for cutting racks;
- drawings, a set of brushes or a foam sponge;
- galvanizing or paint;
- set of profiles, shelves, rollers.
For wooden models or models with plastic shelves:
- screwdriver, nails;
- water-repellent paints;
- level, screws;
- strips for ends, legs and supports;
- plywood for shelves;
- hacksaw.
Assembly diagram
They take into account that the height of the shelf should be 15-20 cm less than the height of the wall. Calculate the maximum weight for the structure, and only then purchase the necessary materials for the work.
The standard height of the shelves is 50 cm, width up to 80 cm. Wider shelves are either attached to the bottom of the structure or made into a wide version. The thickness of the shelf should not exceed 5 cm.
The assembly diagram is made independently according to the drawings
First, the main frame is assembled. At the time of assembly, it is necessary to secure the shelf brackets to the profile after the shelf frame is assembled. The racks are fastened either with bolts or welding. Bolts and plugs are used for shelving in the room.
First, assemble the main frame. Fasten the profile to the wall with self-tapping screws.
The shelves are inserted into the frame and the bracket is tightened. Cross-shaped struts are welded on the sides. It is necessary to control the level and curvature of the rack. The finished structure is coated with galvanization, primer, and paint.
A profile rack is a multifunctional piece of furniture that can be placed in any corner of the room and set a certain functionality. In the living room, decorated with prints and filled with books, it fits comfortably into the decor. You can assemble it with your own hands, giving the structure the desired look. Because the material is easily accessible and no professional skills are required.
How to build a rack
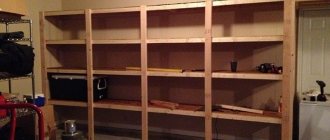
This garage will soon have a new shelving unit.
Now let's figure out how to make a rack from a metal profile with your own hands. For simplicity, we will divide the process into two parts - preparation and the work itself. First, you need to stock up on the necessary materials and tools, and only then can you begin assembling the rack.
Materials and tools
The rack is assembled from the following materials:
| Illustration | Description |
| Metal profile for shelving. Standard galvanized elements made of metal with a thickness of at least 0.5 mm are used. Dimensions are selected based on the loads to which the structure will be subjected. |
| Fasteners To assemble the structure, it is best to use self-tapping screws with a press washer, as in the photo on the left. They press well to the metal surface.
|
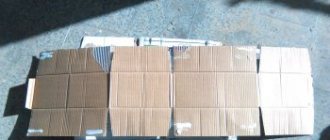
| Material for shelves. There may be several options:
|
The tool you need is the following:
| Illustration | Description |
| Tape measure and pencil. In the process of work, you need to take a lot of measurements, so you can’t do without a tape measure. Instead of a pencil, you can use a felt-tip pen. |
| Metal shears are necessary for cutting the profile. Any option will do, the main thing is that you feel comfortable working. |
| A screwdriver will make the job easier | A screwdriver is necessary for tightening screws. With its help, assembly will proceed quickly and efficiently. Manually tightening dozens of self-tapping screws is not a pleasant task. |
| A hacksaw is convenient for cutting wood | Wood saw. With its help you can easily cut boards, plywood or other materials for shelves. If you have a jigsaw or circular saw, then the work can be done with a power tool. |
Build process
If you have everything you need at hand, then assembling a shelving unit from a metal profile with your own hands will not be difficult.
The process looks like this:
| Illustration | Description of the stage |
| First, make a drawing. There is no need for perfect accuracy and precision. You must clearly understand what a rack of plasterboard profiles will look like, what its height, width and depth will be. Also decide in advance on the height of the shelves and location. |
| Elements are marked. The racks are cut to the height you need, and the shelving beam profiles are cut to the width of the shelves. It is very important to do everything exactly so that you get the parts of the same size. Otherwise, the rack will turn out distorted.
|
| The profile is easy to cut with scissors | Elements are cut according to marks. The process is done like this:
|
| Cuts are made on the transverse elements. This is necessary for subsequent fastening of the elements. The depth of the cut should be equal to the width of the profile to which the crossbar will be attached. If there are bends inward on the inside of the profile, then they also need to be cut off. |
| The cuts are bent at right angles | Two crossbars are inserted into each other, and their ends are bent at an angle of 90 degrees. The photo shows a fully prepared element; there should be two such blanks for each shelf - on the outside and on the inside. |
| The racks are being assembled. To do this, take two vertical supports, between which crossbars are placed at the height you require. To work you need a flat surface, you can do everything on the floor. It is important to set everything level so that the connections are at right angles. |
| Elements are fastened with self-tapping screws | The racks are assembled. To do this, 1-2 self-tapping screws are screwed into each joint. Fasteners are made from both sides and from the inside, this ensures the best strength.
|
| Strength can be checked in this way | The remaining elements are assembled in the same way. If everything is done correctly, and you used a rigid profile, then the racks will easily support the weight of an adult, as you can see from the photo. |
| This is what the base of the rack looks like | The rack section is assembled. To make the structure smooth, you need to do everything like this:
|
| It is better to assemble the rack on its side | All connections are tightened with self-tapping screws. It is easier and more convenient to attach the shelf supports by placing the rack on its side. When all the screws on one side are tightened, turn it over and continue working. The design is lightweight, and two people can easily turn it over. |
| In wide racks it is better to add a support in the middle | We mark the installation location of the additional support. It is placed on the lower support of the shelf and is needed when the shelves are large and if the structure will be subject to high loads. You need to mark the middle, then determine the height of the leg that needs to be cut.
|
| The support is carefully secured. Two self-tapping screws are screwed into each connection. Check the vertical position of the support when attaching it. |
| Shelf material is cut to size | Lastly, measurements are taken and elements for the shelves are cut out. They can simply be laid on supports, as shown in the photo. Or you can make cuts in the corners so that the elements rest on the side crossbars, so the structure will be much stronger.
|
The rack can be used for any purpose
The finished structure is installed where it will be located. If the floor is uneven, you need to place pieces of plywood or boards under the supports to level the structure.
For safety, some craftsmen additionally attach the rack to the wall using dowels. This prevents the rack from tipping over even under high loads.
Advice! If the walls are made of foam or cinder blocks, special anchor bolts will be required.
Braces increase frame rigidity
Braces can be added to the rear to provide additional rigidity. They prevent the racks from warping and ensure ideal rack geometry, even if there is a lot of weight on it.
Drawings and dimensions
First of all, it is worth mentioning the collapsible frame options. Such models are very mobile. Their parts are connected with bolts. The storage can be easily moved to the desired location. But there are also non-demountable frame racks.
To join their parts use:
- welded joints;
- self-tapping screws;
- nails (this is determined by dimensions and material).
When large in size, such assemblies are virtually stationary. It is not only impossible to take them out through a door or window, but even to disassemble them. It will only be possible to break it, so dismantling is fraught with many difficulties.
As for the console versions, such racks do not have sidewalls. But it provides for attaching the shelves to the solid rear wall.
As for folding models, they are closer to a stepladder. The dimensions are relatively small, and you can’t count on decent capacity. However, the mobility is even higher than that of the collapsible versions, and this largely compensates for the low capacity.
As for the shape, rectangular and triangular types of shelving are optimal for both the pantry and other rooms. A rectangle is generally a classic shape. You just need to choose whether to install square legs or extend the supports to support the entire structure at once
When drawing up a diagram, you should pay attention not only to the geometry, but also to the dimensions of the storage unit itself.
The height is mainly limited to 2 m. In this case, even most people of average height, without stepladders or stools, can reach the top shelf. As for the depth, it is entirely determined by the size of the objects laid out.
Hanging or protruding things are not very good, but a huge half-empty space is unlikely to be a rational choice. To store books, magazines, and flowers, you need shelves 0.3 m wide and 1 m long.
For garages and sheds, for garden tools, for wallpaper and for illuminated seedlings, it is recommended to use shelves 0.4-0.5 m wide. They can also be used to stack:
- tires;
- canisters;
- spare parts for cars and garden equipment;
- metalworking, carpentry and entrenching tools;
- fasteners;
- various clothes.
Particular attention should be paid to the shelving in the bathhouse. All of them must be mounted not only on the floor, but also on the wall, because otherwise it is impossible to ensure reliability
It is unlikely that anyone will like falling from a shelf to the floor. All such products must be made of wood and carefully polished.
This is what a rack cabinet looks like with a height of 1716 mm, a rear wall width of 1038 mm and a single section width of 324 mm. But this is a homemade budget class shelving unit. The depth of the shelves reaches 500 mm. Their length is 1550 mm. For work, plywood with a thickness of 1.5 cm and pipes measuring 2.5x2.5x0.2 cm are used.
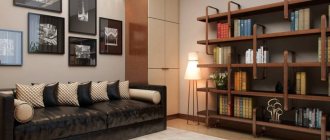
Plasterboard shelving in the interior of an apartment
When creating the interior of your own apartment, installing a variety of shelving is an excellent way not only to create a unique design, but also to significantly increase the functionality of the living space, since with their help you can solve a number of important problems at once, such as:
- zoning of the premises, this is especially true for small apartments or modern studio apartments;
An example of zoning a room with a plasterboard partition with shelving - obtaining additional space both for storing things and household supplies, and for arranging audio equipment and a TV;
- the opportunity to inexpensively decorate rooms through a non-standard shape, organizing lighting, implementing color schemes and arranging decorative elements on shelving.
Drywall is an ideal means for constructing shelving, since its properties and processing technologies make it possible to create a functional interior in an apartment with your own hands at minimal cost. With it you can create:
- figured and arched designs of partitions with shelves;
- convenient built-in niches made of plasterboard;
- functional wall cabinets made of plasterboard.
Construction of a wall cabinet made of plasterboard
The use of various combinations of materials provides additional opportunities for implementing your own design projects when planning a living space. The plasterboard base of the structure in combination with built-in spotlights or a glass shelf surface can not only organize space in the living room, but also give the room’s interior an elegant style.
Types of shelves
According to the method of arrangement, shelves can be built-in or wall-mounted. Niches give the room an organic feel, merging with it. They can be located against the wall or perpendicular to it, dividing the room into zones. mobile, can be located anywhere and can be attached in different ways:
- made of plasterboard are attached to 2 adjacent sides and perfectly replace ready-made shelving.
- With one-sided fastening, they can be located anywhere and are attached as needed in the household.
Plasterboard shelves built into counters and tables are also gaining popularity: we see photos of these in fashion magazines and in modern fashionable interiors. Few people know that making the same ones at home will not be difficult.
Shelves made of plasterboard can be suspended from the ceiling when the structure is attached to hanging profiles and there is no installation to the wall.
Finished structures look very interesting when illuminated: a “floating” effect appears and the space visually expands.
Types of cabinets made from plasterboard profiles
In small rooms, shelving made from plasterboard is excellent for dividing space into zones, thereby creating more comfortable living conditions.
A plasterboard rack is a prefabricated structure that is easy to assemble with your own hands. Indoors, a closet can replace the most bulky pieces of furniture.
The functional purpose of plasterboard cabinets is very diverse. There are several types of these necessary and useful structures.
Types of plasterboard shelving and profiles:
- Free standing. They are not attached to the walls, but are freely placed in any part of the room, acting as interior partitions or screens, they zone the room. They are a through lattice structure, in the cells of which decorative interior elements are placed.
- Wall-mounted. This type consists of shelves or niches adjacent to one of the walls of the room at the back. They are the most stable and durable structures; you can safely place home electronics on them: audio systems, TVs, computers, and books.
- Closed. This type replaces cabinets and bedside tables. In everyday life, they are mostly used in the kitchen, as containers where you can store food or as bar counters.
The basis of this design is a frame made of metal profiles, which is sheathed with plasterboard and decorated.
Models and designs
When choosing shelving for your garage, take into account the area of the room and the space allocated for it. So, some designs may be too bulky for the parameters of your garage or, on the contrary, not spacious enough. Before choosing a model, immediately think about what will be stored on them, because different types of storage systems perform their individual functions and withstand different loads
Before choosing a model, immediately think about what will be stored on them, because different types of storage systems perform their individual functions and withstand different loads.
The following shelving models are available:
- stationary;
- collapsible;
- mobile;
- island;
- rotating;
- modular;
- mounted
Stationary shelving is stable due to the fact that the pressure of the weight of the loaded shelves falls on the floor. The structure is made of vertical beams and horizontal bars on which the shelves are attached, and has a rigid connection, which ensures safety. Involves installation on a wall in a permanent place without the ability to move. They are easy to use, stable and durable.
Metal racks are the strongest and can withstand a lot of weight, while wooden racks are suitable for light items and are easy to make yourself. Installation of such a storage system does not require special tools or skills.
More common are prefabricated metal garage racks, which can also be purchased at any market and assembled yourself without much effort. Unlike stationary ones, they are made of perforated metal profiles, and the shelves can be fixed at any height depending on needs. Such racks are more convenient and spacious and allow you to store both a set of spare wheels and large cargo. They can be equipped with drawers that can additionally store necessary things.
Mobile racks are made mainly of metal structures. They are equipped with small wheels that allow you to freely move tools around the garage. It will be possible to easily transfer tool boxes to the workbench and continue working.
Although the movable design is mobile and makes it easier to work with necessary items, its load capacity is much less than that of other racks. This rack is sold disassembled and can be assembled in the garage like a construction set without much effort or skill. Withstand load – no more than 100 kg.
The metal island rack is a stable system of several shelves that can be changed in height. This design is designed for lighter objects and is clearly balanced to prevent possible collapse of shelves and blockage due to gravity. There are central racks that can be approached from all sides, and corner racks that are installed in the corner of the room. The load withstand is no more than 50 kg.
The rotating rack is designed for storing and storing small piece items, bolts, nails, hooks, keys and other small things that are easily lost and difficult to find in drawers. Every little detail will be visible. Such designs are convenient, do not take up much space (it would be rational to install them on a workbench) and will free up space for more massive parts. Withstand load – no more than 50 kg.
Modular shelving is a multifunctional product consisting of individual block elements that can be connected to each other, like a construction set, into a convenient storage system. You can make exactly what you need, and if there is a need for additional space, you can attach more sections and shelves to the existing rack. Withstand load – up to 150 kg.
Hanging shelves can’t exactly be called racks, but such a convenient and versatile design can be used in garages. They will fit everything unnecessary, things that are not particularly useful in work, small parts, light objects. Wall-mounted systems are practical and affordable; making such shelves will not be difficult from any available materials, and ceiling-mounted ones, if attached using special fasteners under the ceiling at a level that does not touch the roof of the car or your head, will completely hide everything from prying eyes extra items. The load should not be large, because hanging shelves can hold much less weight than stationary racks. Withstand load – no more than 100 kg.
Layout and ideas
In the garage you need not only a rack, but also a workbench and a stand for hand tools - all kinds of keys and other small things, of which there are a lot and it is difficult to come up with a specific convenient storage place.
The workbench can be made in the center of the rack. This is convenient - everything you need will be at hand, you won’t have to constantly go to the shelves.
Garage shelving with workbench is convenient
The workbench can be part of the system, or you can make two separate modules, between which you can install the required table. If you don’t like this arrangement, you can change the configuration - at least put it at an angle.
Advantages and disadvantages of metal shelving
The advantages of metal structures include:
- Reliability and durability. The shelves can support significant weight without damage.
- Easy to care for.
- Wear resistance. Even with intensive use, metal pipe racks retain their characteristics and appearance unchanged.
- Full compliance with fire safety requirements.
- Storage of items made of any material.
- The metal frame is resistant to moisture and temperature changes.
Disadvantages include:
- It is more difficult to make a rack from a metal profile than from wood;
- the price of metal structures is higher.
Making a rack from a profile with your own hands
A profile rack is a successful solution to many problems associated with the arrangement of simple storage systems, as well as the ergonomic distribution of space in a room.
Strong and lightweight metal cabinets are replacing wooden structures that are susceptible to destruction.
The production of metal racks is carried out in a certain sequence.
Step-by-step production:
- First, we create a drawing; it can even be applied to the surface of the wall, for clarity. The proposed model consists of racks with a height of 120 cm, a shelf width of 20 cm and a length of 200 cm. The distance between the vertical racks is 75 cm. This design will produce 4 shelves of different heights.
- Next, use a hacksaw or grinder to cut off the blanks. From the profile pipe we make 3 sections 120 cm long and another 12 sections 20 cm long.
- After this, we cut 15 sections from the steel strip, each 7.5 cm long. All sections must be thoroughly cleaned.
- The next step is to weld the brackets and drill holes in the mounts.
- It's time to tackle the shelves. We take the boards and cut them into lengths of 200 cm. The boards need to be processed using a sanding machine or sandpaper. We paint and varnish them.
- Then we clean the surface of the metal structure with a grinder and a cord brush, prime it and paint it in two layers with metal paint.
- All that remains is to attach the vertical posts to the wall. We set them according to the level and mark the fastening points. Using anchors, we attach the racks to the walls.
Racks made from profile pipes can withstand heavy loads, do not burn or rot. They can be disassembled and moved to another location. These characteristics make metal structures popular and in demand.
A standard metal rack is a collapsible structure consisting of support posts and shelves. The racks are made of high quality wear-resistant metal.
The finished rack can be equipped with additional hooks, hanging baskets, as well as inclined shelves on which certain types of goods can be placed.
Metal structures are in great demand and popularity due to their good characteristics.
Advantages of metal cabinets:
- Practicality;
- Durability;
- Excellent resistance to mechanical stress;
- Fire safety;
- Versatility;
- Compactness;
- Appearance.
The production of modern metal shelving significantly reduces the cost of these products. This makes it profitable for consumers to purchase ready-made shelving.
You can make them yourself, but if you decide to purchase ready-made metal shelving, be sure to pay attention to the metal from which they are made. This metal must have good anti-corrosion properties
The stability and attractive appearance of the structure will also be important during its operation.
Types of shelving
All types are used in household use.
They are distinguished by the volume of the structure and the material of manufacture. Purchase durable and long-lasting options made of wood or metal. Sometimes they make the shelves themselves. First, select the type of model.
Modular
Modular options are used in warehouse facilities, in industry, and replace sales counters in super and hypermarkets. Often found in archives and libraries.
The design is based on a perforated profile, with solid shelves. Metal parts are purchased as a set, they are cut into pieces, and they are bolted together during assembly. For a long service life, they are galvanized. Shelves are mainly made of metal, wood, chipboard, plastic.
The intershelf distance must be adjusted during assembly; later it will be difficult to move the bracket to a new level.
Modular
Made of aluminum
The aluminum-based shelf is characterized by its light weight. The structure can be moved using the existing rollers with a mechanical plug. Not subject to corrosion, compact for large and small spaces.
Used as shelves for products in supermarkets. The disadvantage of using it is that it cannot withstand a lot of weight, the structure is deformed.
Aluminum
From a profile pipe
The advantage of the profile pipe option is high strength, the disadvantage is that the inter-shelf space cannot be changed. They are used to equip garages and workshops. During installation, they are secured with additional bolts to increase stability and balance. For independent construction you will need welding and a grinder.
For use in rooms with high humidity, the shelf is coated with paint or galvanization.
From a professional pipe
Wooden
The construction is strong, but not reliable. You can independently design a rack of any level and configuration. For installation, wooden blocks with a section of 5 by 5 cm are used.
The intershelf space is adjusted during assembly; it cannot be changed after installation. Shelves are either made independently from wood or plastic, or purchased ready-made material. The service life of a wooden shelf is 5-7 years.
Wood
Structures made from profiles for plasterboard
The material for the shelving is cheap, high quality, the plasterboard construction is durable and light. To ensure resistance to heavy weight, diagonal spacers are installed between the shelves.
Galvanized steel is not subject to corrosion and will last a long time.
Stages of making a rack yourself
First of all, you will need to choose the location of the future product, determine the desired size, perform calculations and a drawing.
All important data is recorded only on paper, then the rack will turn out correct and there will be no unexpected discrepancies during the installation process. Well, then you can start creating a metal frame.
Stage No. 1. Create a drawing
On sheet A4 you should draw a sketch of the future rack indicating all the desired dimensions that were determined during the calculations:
- Optimal width 2000 mm
- Nowadays, designs with wide shelves are quite common, making it much more convenient to install containers.
- At the same time, it’s a good idea to make different distances between the tiers. There is more at the bottom and less at the top, so the mass will be distributed more evenly throughout the metal frame.
- It will be convenient to place heavier objects on the lower shelves and lighter ones on top.
Stage No. 2. Choosing a fastening method
We choose a reliable fastening method.
Mounting options:
In a hardware store you can purchase special chrome-plated pipes for structures, their standard diameter is 22 mm. And at the same time, devices for assembling metal structures
It is important that all parts are matched to the diameter of the structural pipes. The welded fastening method is quite strong, but also labor-intensive. It is possible to assemble a frame from various profile pipes using a welding machine, but this work is more difficult, dusty and noisy. The racks are bulky and heavy, but reliable. Thick metal often needs to be drilled for numerous fastenings, which can also cause some inconvenience and waste of time
Thick metal needs to be drilled frequently for numerous fasteners, which can also cause some inconvenience and waste of time.
Stage No. 3. Assembling a metal structure
We assemble the rack.
When the drawing is completed, calculations are made, and materials and assembly method are selected, then installation work can begin:
Taking into account the recorded dimensions, the necessary parts for the rack are cut from a profile or prefabricated pipe. Next, the frame is assembled
It is important to remember that the rack must be attached to a wall or floor. A metal wall rack adjacent to the wall is attached to slats
The metal wall rack is attached to the wall and is attached to slats.
- If you are planning an additional box, then it is better to use sheets such as OSV and chipboard for it.
- The use of gypsum plasterboard is undesirable for the rear wall and side ceilings. If you plan the drawing correctly, it is not necessary to attach the sheets to a metal frame.
You can plan everything so that they can be placed in the nests that formed the corners.
Stage No. 4. Final processing
If the rack is black metal, but you want to somehow enhance it, then painting is the most suitable option.
Small instructions:
- It would be a good idea to varnish or cover all existing wooden elements, if any, with a paint composition.
- And in general, there are many different shelving structures with very complex structural features.
- It is not necessary to create a skilled frame yourself if the structural model is very complex.
You can purchase a ready-made metal rack in a specialized store. The product, as a rule, is sold disassembled and is quite simple to assemble (see How to assemble a rack from a profile). In conclusion, we recommend that you watch the video in this article and become more familiar with the nuances of the assembly.
Various shelving options and their drawings
There are many options for shelving made from profile pipes. When choosing the optimal design, you should consider for what purpose it will be used. To store tools in the garage, it is best to build a structure measuring 50*200 cm with four shelves. In this case, the distance between the shelves should be 45 cm. To store preserved food, it is better to make more shelves. The size of the rack can be left the same, and the shelves can be made at a distance of 30 cm. The size of the structure for the warehouse will depend on the specifics of the product.
Standard rack layout
The most popular rack sizes are:
- 50*180 cm with four shelves;
- 60*200 cm with three shelves;
- combined designs 50*180 cm with a high shelf at the bottom and three 35 cm shelves for small items at the top.
If there will always be different items on the rack, you can make a universal design where you can adjust the height of the shelves. To do this, you need to make several holes on the main racks for attaching shelves. This will allow you to remove or add shelves, or change the distance between them, if necessary.
In some cases, it is advisable to make a long rack. But in this case, you should not do it on the entire wall. It is recommended to leave small gaps on the sides to make installation easier. The depth depends on the items that will be stored on it. But you shouldn’t make the shelves too deep, otherwise it may be inconvenient to get items out. Deep shelving is convenient if the structure is located in the middle of a garage or workshop, and there is access from two sides.
The height of the structure depends on the height of the ceilings, as well as the purpose of the structure. If items are primarily stored on it, then you can make the shelves higher. In this case, you can get items from the top shelf using a ladder. But if this is a rack with tools for work, then there should be constant and convenient access to it.
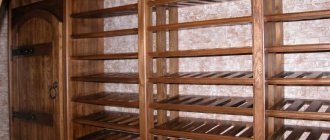
Wood shelving production process
Racks are produced in the form of separate sections that must be mounted on the walls of the cellar. This rack can be made quite quickly and easily. You choose the width of the product yourself, based on the volume of the cans that will stand there.
When installing and producing shelves, remember that there must be access to the wall part. This is done in order to dry it out in the summer. To produce vertical shelf supports, bars are used, the cross-section of which is 100x100 millimeters. Based on the height of the basement, determine how tall the shelving should be. Initially, horizontal transverse frames are produced. On the racks you need to mark at what height the shelves will be located. The thickness of your board should be about 40-50 millimeters. It is worth sawing off bars from it, the width of which will be from 6 centimeters. The length must correspond to the dimensions of the shelves. The grooves must be cut in the racks so that they are identical to the dimensions of the bars. As a result, the structure is assembled and secured. Then you need to put shelves on the timber frame. Previously, before the production process of the rack, it must be treated with an antiseptic.
Selection of racks for shelves
High-quality material is the key to a long service life
Wooden shelves in the basement are a very common occurrence; many cellar owners prefer to use edged boards as a material.
Watch this video on YouTube
- When making racks with their own hands, craftsmen pre-treat the material with an antiseptic and paint the surfaces. And after all the preparatory stages have been completed, the installation of the shelving assembly begins, followed by attaching the shelves to them.
- Very convenient to use are racks made from a metal corner, which, after processing, are assembled indoors. Assembling the frame is not a difficult task and does not require special skills.
If shelves are fixed to wooden frames using self-tapping screws, which strengthen the structure of the racks due to additional fastening of the shelves to the beams, then metal corners are a very stable and durable structure.
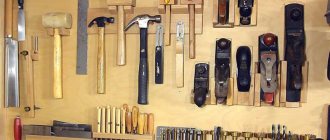
A tool that will help in the manufacture of shelves and racks
Schematic drawing of a wooden rack
Depending on the choice of material that will be used in the manufacture of shelves and racks, the list may have significant differences:
- Wood requires one set of tools, metal another, although there are no serious differences for attaching shelves to the shelving frame.
- The boards that are used as material for shelves on racks, of course, do not always correspond to the type in which they will be installed. The surface, if it is not treated, must be brought to the required smoothness using a plane or grinding machine.
- Cutting boards and timber is done using a regular hacksaw, but you can use small woodworking machines that can also perform wood cutting and planing.
- For installation you will need screws, bolts and nails.
To make shelves from plywood you need a minimum amount of tools:
- Nice hacksaw.
- Brush for surface treatment.
- Sandpaper for finishing edges.
- Construction tape for marking.
- The same applies to fiberboard, chipboard, laminated boards.
To make shelves from flat slate or metal you need to have:
- An angle grinder, popularly known as an angle grinder.
- Marking tape with a metal core or regular chalk.
- If the shelves will be additionally attached to a corner or wood, you will need a drill of the required size and an electric drill.
Features of assembling metal shelving
Metal racks can be welded or assembled with bolts. There are usually no problems with welding. If a corner is used, the joints can be overlapped - a difference of 3-5 mm when laying shelves is unnoticeable. If you wish, you can cut out the excess in one of the shelves and butt weld, but trimming takes a lot of time, and you still won’t see much of a difference.
How to cut corners for a smooth connection
When assembling a frame for a bolted shelving, the order is as follows: first, assemble the squares of the sidewalls and shelves separately, then screw them together. It is advisable to have at least two bolts for each connection - for greater rigidity (less play).
If you assemble garage racks from a profile pipe with your own hands, the procedure is different. First, the sidewalls are assembled, and short crossbars are attached to them. You get two rectangles with crossbars. Then they are connected by crossbars.
Methods for bolting profile pipes
See the photo for how to make connections. In one case, welding is still needed - weld the heel pad, in another you can do without it - cut out the "ears", bend them and cling to them.
There is another way - special crab systems. These are metal plates with recesses molded to fit the profile. Pipes are placed into the grooves, then the two plates are bolted together.
Crab systems for profile pipes
Such a connection is unlikely to withstand very heavy loads, but there is an undeniable advantage - you don’t have to drill a bunch of holes in the metal. In a profiled pipe this is certainly easier than in a thick-walled corner, but it still takes a lot of time and effort.
By the way, the bolts used are M8 or M6, so large holes are required for them. It is easier to first drill with a thin drill, then expand to the desired size with a thick one. But even with this order, you will need a significant number of drills. To make them overheat less and break less often, place a jar of water nearby and periodically lower the drill into it.
Tools and materials
The product can be based on one of the many materials on the market. Each of them has a set of positive aspects and disadvantages. To make a choice, you need to understand what influences and environmental conditions the product will be exposed to.
Aluminum profile. Making a rack from an aluminum profile has more advantages for home use. This is due to the lightness of this material, which allows, if necessary, to easily move the finished section.
Shelves can be easily made from wood and reinforced with reinforcement. Creating metal shelves at home is not a very practical idea. Metal sheets are a costly solution, which ideally needs to be equipped with an additional stiffening rib, since they are very thin. Otherwise, with a high degree of probability, such shelves will quickly bend and become unusable.
Another option would be to buy ready-made parts in a store. Such shelves will cost more than a homemade design, but, as a rule, they have a powder coating, which is less susceptible to scratches and chips in use.
To carry out the work there is a need for additional equipment. From the general inventory you will need:
- brush;
- dye;
- corner for precise marking;
- level;
- roulette;
- pencil or marker.
During assembly and subsequent installation, depending on the material, different tools may be required:
when assembling from a perforated angle, you only need a set of fasteners, nuts, bolts and a wrench or pliers;
Sheathing metal structures with plasterboard. Useful tips
- Be sure to reinforce the drywall joints with sickle and seal them with a special putty. There is a special putty mixture on sale for sealing joints. It dries quickly and makes the joint strong, protecting it from cracking. Neither “Start” nor “Finish” are suitable for these purposes.
- The joint itself must be made in the form of a groove, which will be filled with putty. To do this, before installing drywall, the end parts of the adjacent sheets must be cut at an angle of 45 degrees . To do this, you can use a special drywall plane or knife.
- The shelf is covered with plasterboard on all sides - bottom, top and end. Therefore, all possible visual errors during the assembly of the substructure will be hidden. Just remember this.
- To obtain straight lines and for mechanical protection on protruding corners, be sure to glue a protective perforated corner . Use putty as glue. For rounded corners, use a special “arched” corner. It bends easily in one direction thanks to special cuts.
Advantages and disadvantages of metal shelving
The advantages of metal structures include:
- Reliability and durability. The shelves can support significant weight without damage.
- Easy to care for.
- Wear resistance. Even with intensive use, metal pipe racks retain their characteristics and appearance unchanged.
- Full compliance with fire safety requirements.
- Storage of items made of any material.
- The metal frame is resistant to moisture and temperature changes.
Disadvantages include:
- It is more difficult to make a rack from a metal profile than from wood;
- the price of metal structures is higher.
Covering the frame with plasterboard
After completely assembling the cabinet frame, you can begin covering it with plasterboard. Sheathing of the frame should be done from the outside and inside. However, if the cabinet is small, then it is quite possible to get by with cladding from the outside. It should be remembered that the larger the cabinet, the greater the load will be placed on its internal shelves and walls. Therefore, it can be covered with 2 layers of gypsum board.
Fastening plasterboard sheets to profiles is carried out similarly to the installation of gypsum boards when cladding walls and ceilings:
Scheme of fastening gypsum boards with screws.
- The gypsum boards should be secured to the profiles with 25 mm metal screws.
- The fastening step should be no more than 20 cm.
- First, the plasterboard element is fixed around the perimeter of the frame, and then to its remaining parts.
- The screws must be tightened correctly: the depth of their indentation should be no more than 1 mm, otherwise the cardboard may be damaged. To do this, you can install a special limiter on the screwdriver. If the screw is still screwed in deeply, then it must be unscrewed and screwed in again at a distance of 5 mm from this point. The old hole will be filled with putty later. In Fig. Figure 1 shows a diagram of fastening gypsum boards with screws.
- The sheets should be joined together with a certain distance - 2-3 mm. This will make it easier to process the seam when leveling it.
We make and assemble a metal frame with our own hands
When all the necessary materials and tools are ready, we begin to manufacture the structure. We follow the following algorithm:
- We use a marker to mark the pipes from which the blanks will be made.
- Using a hacksaw or grinder, we cut the racks, transverse and longitudinal crossbars.
- We make the sidewall from blanks. To do this, we first mark the location of the jumpers on the rack, connect them with clamps or weld them.
- We attach the second rack to the welded jumpers.
- We process the welds with a file or grinder.
- We lay the first side frame on the workbench and assemble the second from the blanks, securing the parts with clamps.
- All parts are connected by welding.
- We assemble the second side frame with a bolted connection, without fixing it with clamps, so that clamps can be installed.
- We weld the longitudinal jumpers to the sidewall using a joining angle.
- We process the seams with a file or grinder.
- We weld the second side panel to the jumpers.
- We weld metal plates-legs to the ends.
- To secure the shelves, we will make embedded parts from metal plates. Each mortgage five cm long must have two holes for self-tapping screws.
- We weld the plates in increments of 30 cm.
- We install the finished rack vertically, check for strength and stability by shaking it to the sides with our hands.
If the rack is prefabricated, we weld the sheets and begin painting with special metal paint. If you need a collapsible structure, the frame is ready, we prime it, paint it and make shelves. Usually in this type of rack they are made of wood about 1.5 cm thick. We install them on a metal base using corners after the paint has dried.
Accessories
Let's look at the main parts for the shelving that may also be needed.
Band
Strips are made in lengths: 1.0; 2.0; 2.5 m.
The main dimensions of the strip are given in Table No. 1.
Note. Hereinafter, the term “Main sizes” refers to the most popular standard sizes. During installation, if necessary, you can use strips and profiles with other parameters specified in the technical specifications TU 36-1434-82.
Table No. 1
| Band/Dimensions | H | l | l1 | l2 | L | b | S | Weight, kg |
| K 107 P2.0 UT1.5 | 40 | 36 | 50 | 14 | 2000 | 9 | 2, 0 | 1, 35 |
| K 107 P2, 5 U3 | 40 | 36 | 50 | 14 | 2500 | 9 | 3, 0 | 2, 0 |
| K 106 U2 | 40 | 36 | 50 | — | — | 9 | 4 | 2, 14 |
| K 107 U2 | 40 | 36 | 50 | — | — | 9 | 3 | 1, 61 |
Z-profile
The main channel dimensions are given in Table No. 3.
Table No. 3
| Z-profile/Dimensions | A | H | b | l2 | b | S | Weight, kg |
| K 238 U2 | 30 | 40 | 30 | 8 | 9 | 2,5 | 2,87 |
| K 241 U2 | 40 | 32 | 32 | 8 | 9 | 2 | 2,65 |
| To 241 cUT1.5 | 40 | 32 | 32 | 8 | 9 | 2 | 2, 65 |
Corner
The main dimensions of the corner are given in table No. 4.
Table No. 4
| Angle/Dimensions | A | H | I | b | S | Weight, kg |
| To 237 cUT1.5 | 50 | 36 | 50 | 36 | 3, 10 | 2, 87 |
| To 242 cUT1.5 | 40 | 32 | 32 | 9 | 2 | 2, 65 |
| K 237 U2 | 60 | 40 | 60 | 45 | 4 | 3, 77 |