Some new residents cannot choose furniture that suits their taste, and some cannot afford to purchase the piece they like for financial reasons. In this case, many either resort to ordering furniture or try to make it themselves. Moreover, the simpler the construction and the more unpretentious the design, the more individuals there are who are ready to roll up their sleeves and begin mastering independent furniture production immediately after moving in or after completing a major renovation.
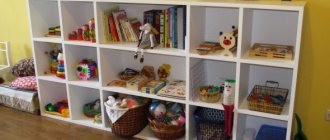
Quite simple furniture structures include shelves and racks, the manufacture of which does not require professional carpentry skills, and various panels can be used as materials, ranging from simple boards or veneered and laminated chipboards and plasterboard sheets.
Types and purposes of racks
We can roll up our sleeves and get to work, but in the process the question will arise, what exactly are we collecting? In order to avoid getting into such awkward situations, you need to decide in advance about the purpose of the assembled structure. It’s one thing if the rack will zone a large room and small souvenir products will be placed on it. It’s a completely different matter if you need a structure for storing kitchen utensils and equipment. Its shape will depend on the purpose of the rack. Profiles of different thicknesses, different drywall can be used, and the step of fastening the parts will be different.
Rack shelves can have a variety of shapes
If the structure must withstand heavy loads, then a more durable gypsum board (18 mm thick) can be used, as well as a thicker profile. If the loads are minimal, then a regular 12.5 mm thick gypsum board paired with standard guides will be sufficient. Despite all this, assembling a rack from a profile for plasterboard with your own hands is quite simple.
If the rack has many curved shapes, then for its covering it is best to use more flexible plasterboard with a thickness of 6 to 9.5 mm.
Profile types
But which profile should you choose? There are several types of it in stores for these purposes, which differ in appearance, size, as well as in the properties and conditions in which it needs to be used:
- Wall profile, used for glass shelves, made of anodized aluminum. It is possible to lay wires and install lighting; it will look very good with glass shelves. The permissible load on this profile is 15-20 kilograms, so the rack is suitable not only for books and small items, but even for household appliances
- A galvanized profile, which is intended specifically for drywall, but it is also used with glass and even with decorative stone tiles. There are two types of galvanized profiles - steel and aluminum. For greater strength and protection against deformation, you need to choose steel. This will allow you to build not only ordinary shelves on the wall, but also partitions with through niches
What you will need when working
Even before you begin the work process, you will need to stock up on the necessary materials.
- Profiles for assembling the frame.
- Dowels 6x40mm for fastening the frame.
- Self-tapping screws for metal, 15 mm long. They are needed to fix the guides together.
- Drywall for covering the frame.
- Self-tapping screws 6x25mm or 6x35mm for fastening gypsum boards.
For high-quality work with all these materials, special tools and devices are needed. You may need:
- a hammer drill for drilling holes and attaching dowels (you can use a drill and a hammer);
- a screwdriver for self-tapping screws (in extreme cases, a curved screwdriver will do);
- grinder for cutting profiles (metal scissors will work as an alternative);
- laser level for marking (water level and plumb line are an economy option);
- cutter for fixing profiles together (an alternative is to use bugs - small screws for metal).
From the list above it is clear that before making a shelving unit from plasterboard, you can stock up on both a more expensive and a cheaper set of tools. In the first case, the work will go faster and easier, but in the second case you will be able to save on expensive tools.
You will also need tools and materials for finishing. These are spatulas, putty, reinforcing mesh, corner, primer and roller. But that's a completely different story.
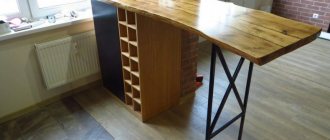
The principle of creating working structures from plasterboard
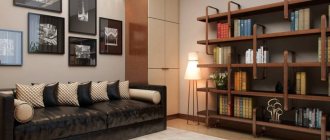
Since computers and other gadgets began to replace traditional printed books, wall shelves, which were once in almost every home, have somewhat lost their relevance. On the other hand, wall and partition racks are gaining popularity, on the shelves of which you can store not only multi-volume collected works of great classics, but also any other items - even household appliances.
They differ in material and configuration, and can be made of metal (see Prefabricated metal shelving: choosing the right one) or wood, or plastic. But it’s not always possible to find an option on sale that will fit into the interior and suit the price. Using plasterboard as a structural material will allow you to make a rack of the desired size and shape, as well as show all your creative abilities when finishing it.
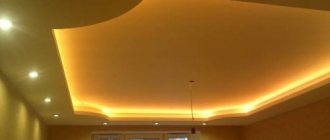
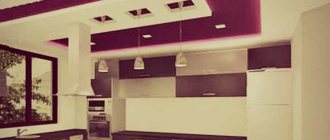
Decorative plasterboard wall with niche and shelving
Note! With the help of a plasterboard shelving, you can not only decorate the interior, but also disguise any protruding load-bearing or technical structure in it - be it a ventilation duct or a chimney from a fireplace, a crossbar or a support column that disrupts the harmony of the space of the room.
Just don’t take on the job without prior preparation. It is necessary to think over the configuration of the rack in advance, make a sketch, not forgetting about beautiful proportions and symmetry, and transfer the parameters to the wall. We hope that our instructions will help you cope with this difficult task. And first, let's discuss what might be needed for such work.
Material, fasteners, tools
If you can use traditional wall plasterboard (GKL) to construct zoning partitions, then to make a rack that will carry certain weight loads, it is better to take GVL with a standard size of 2500 * 1200 * 10 mm, or small-format sheets with a length of 1500 mm.
- Due to internal reinforcement with cellulose fiber, gypsum fiber sheets differ significantly from plasterboard in strength, so they are even used for flooring. This material has excellent frost resistance, so it can be used to make shelving not only in a house or apartment, but also in an unheated room such as a basement (see Shelving for a cellar: recommendations for assembling structures), a barn or a garage.
GVL – structural material for shelving
- The price of gypsum fiber sheets is slightly higher than drywall, but believe me, it’s worth it. In GVL you can hammer in nails and screw in screws without using dowels. And since the material does not crumble during processing, it is produced with the most common tools used for wood. The only special tool you will need to finish the edges after cutting is a roughing plane.
- The self-tapping screws used to attach sheets to the frame must be specially designed for gypsum fiber boards, and this is where their differences lie. This fastener has a sharp tip and a two-start (high and low) thread, which prevents self-extrusion of the fastener from the sheet, and also ensures the strength of its connection to the profile or beam.
Self-tapping screw for GVL
- The head of such a screw is cone-shaped, with a Phillips slot for a screwdriver and a screwdriver, as well as serrations for using a countersink. Unlike fastenings made on sheets with a cardboard shell, when fastening gypsum fiber boards, the heads of the self-tapping screws are fully recessed into the material, but without excessive force. To fix the sheets to each other, screws 19 mm long are needed, and for mounting on a frame - 30 or 45 mm long.
- By the way, about the frame: it can be made either from wooden blocks with a cross-section of 40*40 mm, or from an aluminum profile. But since we will be making not just a partition, but a structure with a large number of transverse connections, it is still more convenient to give preference to the second option.
Assembly options and sketches
A drawing or sketch of the future structure will greatly simplify its assembly. If you can see on paper what a plasterboard rack will look like and have all the dimensions, then the work process will be much simpler. This is especially true for complex structures with many shelves, niches and shaped elements. If there is a classic rack made of plasterboard in the form of racks and even shelves between them, then you can do without a sketch.
Another important point is the assembly option. The fact is that the rack can be assembled in the middle of the room, and it needs to be sheathed on all sides, or it can be assembled close to the wall. In the second option, the structure can be assembled simultaneously with a plasterboard wall, or it can be mounted separately against the wall. How to make a shelving unit from a plasterboard profile with your own hands is up to you. If the rack is made at the same time as the wall, then it is made in the form of niches.
We will consider the option of assembling the rack close to the finished wall. Having an idea of how the job can be done in the simplest case, you will easily understand how to assemble a rack in other conditions.
Preparing to assemble the frame
The most reliable frame is the one that is attached to the maximum number of surfaces. You can assemble various frames that will not be attached to the walls in the room or to the ceiling, but the more fastenings, the more reliable the structure.
You can buy several different profiles, some to use as guides, others as racks, and others as jumpers. But don’t worry so much, because the entire structure can be assembled from a regular three-meter 50/40 guide profile. It is reliable enough to cope with the tasks assigned to it. And for a beginner, the fewer different materials, the easier it is to work.
Before starting to assemble the frame, you can make markings on the floor and ceiling. This will significantly speed up and simplify the work.
The height of the rack when assembling the frame does not play any role. As for the depth, it should not exceed 50 cm, otherwise additional supports will be required. The width is a little more complicated, because it all depends on the weight of the things for which you make a plasterboard rack with your own hands.
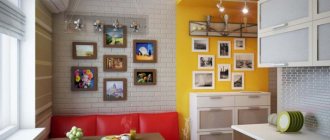
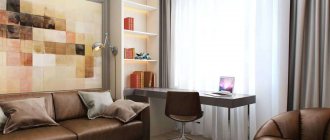
Beautiful examples in the interior
Owners of studio apartments need to solve the problem of division into zones. However, it is impossible to install bulky walls or partitions made of brick and other materials. An accessible way out of this situation would be to use a wardrobe, a simple closet or a shelving unit as a functional partition. By placing such furniture in the place you need in your studio, you can easily divide the space without the special costs and hassle associated with major renovations.
It’s a fairly common phenomenon that partition cabinets turn one large room into two: a kitchen and a dining room. In such a partition you can even make an opening for passing plates, cups and cutlery. This makeshift window is sometimes equipped with a door to close this hole and isolate the dining room. On the kitchen side, this design accommodates household appliances: a microwave, a dishwasher, sometimes even a refrigerator and shelves for kitchen utensils. And the other side, where the dining room is arranged, may include a small bar, a TV and many open and closed shelves for beautiful dishes.
A walk-through wardrobe looks ideal in a one-room apartment. With this improvised partition you can divide the room into zones. There must be an interior sliding door in the center of the closet. In this case, one of the parts will turn out without a window; it will be suitable for decorating a bedroom. The part with the window is equipped as a living room or office.
Here you can install a TV or other necessary equipment directly in the cabinet design. The interior decoration of the partition on each side is carried out separately, taking into account the design of each resulting part of the room. The most functional version of such a partition is a double-sided wardrobe. The model is equipped with an abundance of drawers and shelves for clothes. In small apartments, it is possible to use a partition model with a folding bed or folding table.
There are partition cabinets with a small height that do not reach the ceiling. Given its considerable width, in a room with high ceilings, even a sleeping area with a staircase can be arranged on its upper surface. This can save you money on buying a bed.
A double-sided shelving partition can turn a room into a bedroom and living room, delimiting these zones. Such a partition contains shelves, drawers, as well as a folding bed or table. This solution provides the opportunity to easily transform the room.
The arrangement of a partition cabinet between the living room and the kitchen makes it possible to use the living room as a dining room if you build in a window for passing plates. This option comes with a bar counter and a retractable table as part of the design. On the living room side you need to allocate a special shelf for the TV, and on the kitchen side - shelves for dishes and utensils.
In this video you will find even more ideas for zoning a room using cabinet partitions.
Assembling the frame - step-by-step instructions
The side walls of the rack may not be flush with the wall of the room.
First of all, the side walls are assembled. If the rack is planned to be wide, then you also need to create internal partition walls. The extreme wall is created as follows.
- The profile is mounted on the ceiling with the back facing up so that the groove faces down. 2-3 dowels will be enough.
- Parallel to the top rail, another profile is attached to the floor with dowels.
- One more profile is inserted along the edges of the guides on the floor and ceiling.
- The result is a rectangle (all sides are assembled with their backs facing out), the corners of which are fastened together with metal screws or a cutter.
- Jumpers are inserted into the vertical posts parallel to the floor and secured with self-tapping screws or using a cutter. They mark a place for future shelves. The jumpers are inserted with the gap down.
Using the method described above, a second wall of the rack is created, as well as as many partitions as required by the design feature.