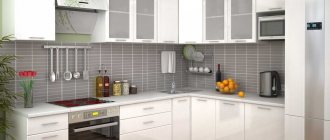
A DIY bar counter for the kitchen made of plasterboard will make the room stylish and modern. Making it yourself is suitable for those who have already installed a headset and want to supplement it. After installation of the structure, the finishing is selected based on the interior. You can tile the counter, paint it, or use self-adhesive materials.
In this article we will analyze in detail the nuances of bar counters and the features of their manufacture.
Advantages and disadvantages of a bar counter
Pros:
- Firstly, space zoning. The counter visually and not only divides the room into two parts - the work area where food is prepared, and the eating area. Or, if you are the owner of a studio apartment or have a kitchen adjacent to the dining room, the bar will serve as an excellent dividing line between rooms.
- Secondly, the bar counter can be used as a table. Also, having equipped it with all kinds of cabinets, you can hide the necessary kitchen utensils, food, etc. in it, which will significantly save space.
- Thirdly, making a bar counter yourself is not difficult even for a beginner. The main thing is to know how.
- Fourthly, bar counters are unique. It’s unlikely that many of your friends and acquaintances can boast of such a decoration for their kitchen.
It has only one drawback - such a kitchen set takes up a lot of space and is not suitable for apartments with small kitchens.
Types of bar counters
Depending on the design, the following types of racks are distinguished:
- Wall Rack: As a rule, it finds wide application in kitchens with medium square footage. It is distinguished by the small width of the tabletop and its location, where one side is tightly placed against the wall, and the other side has a free approach.
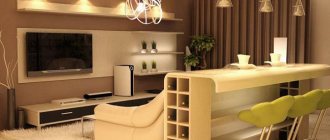
- Continuing the kitchen furniture: the counter is placed perpendicular to the work surface. Widely used in studio apartments.
- Partition: The height of this bar counter is much higher than the previous ones and special bar stools are purchased for it. It does not come into contact with any kitchen unit and serves as a separation between rooms.
- Island counter: It is placed in the middle of a large, spacious kitchen. A niche is made in advance for a microwave, oven or drawers for storing cutlery and so on.
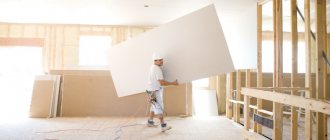
Sheathing the stand with plasterboard
The sheets are marked with a pencil and cut into individual elements in accordance with the drawing. After that, each of them is screwed to the finished slatted sheathing. It is better to place the attachment points in short increments of about 20 cm.
The evenly fixed sheet will have to be “passed” again with a screwdriver in order to recess the heads of the hardware a millimeter into the cardboard.
After covering the frame of the bar counter on all sides, the joints between the gypsum boards are glued with sickle tape. The outer and inner corners can be strengthened with additional plastic pads - but this is optional. All recesses at the attachment points are covered with thick putty. As soon as it hardens, the unevenness is removed with sandpaper, after which the drywall can be primed and proceed to facing work.
Types of structures
Before you start choosing materials, you should think in advance about what kind of design you want to see in your kitchen. The bar counter consists of two elements - the base and the tabletop, the size and shape of which can vary depending on the financial capabilities of the owner and the size of the room itself.
Based on this, the following types of structures are distinguished:
- Monoblock: The shape of the base resembles a square or rectangle, while the tabletop itself can be of any shape and size. Individual cabinets can be built into the base.
- Pipe stand: Very popular in small spaces. On one side, a metal pole runs through the stand from the ceiling to the floor, acting as a support, while on the other side two legs are attached to it.
- Multi-tiered: The tabletop is divided into several levels. This division is very convenient, because depending on how this or that idea is implemented, the levels of such a rack can serve both for storing food and dishes, and as a table for preparing food and the counter itself;
- Support point: This design is a tabletop, which on one side rests against a table or wall, and on the other side one leg is attached to it.
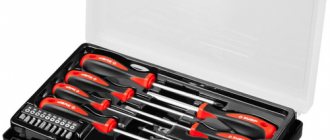
Tool preparation
When constructing plasterboard structures, as a rule, one set of tools is always used. It includes everything needed from cutting the profile to finishing the finished structure.
Namely:
- Pencil, tape measure;
- Metal scissors;
- Drywall knife (for shaped cutting - jigsaw);
- Impact drill or hammer drill;
- Screwdriver;
- Construction level, plumb line;
- Milling cutter;
- Wide and narrow spatulas.
Depending on the variation of the design itself and the chosen finishing material, the spectrum may change. It’s better to prepare everything you need in advance so that in the midst of work you don’t have to look for an item you suddenly need.
How to make a bar counter with your own hands
As mentioned earlier, even a beginner can make a bar counter in the kitchen if only he devotes enough time to study this issue.
The work of making a rack is divided into several stages:
- Execution of the drawing taking into account actual dimensions;
- Material selection;
- Purchase of materials and processing;
- Installation of the structure.
The bar counter can be made of wood, plasterboard, stone or brick. Some designers advise choosing the same material for the tabletop and base so as not to disturb the harmony, however, on the Internet you can find a lot of examples and combinations of two different ones.
Depending on what material you will be working with, special tools are selected, however, there is a standard set of tools that you cannot do without:
- Level;
- Screwdriver Set;
- Screws;
- Hammer;
- Screwdriver;
- Paints;
- Brushes and rollers.
To work with wood, you may additionally need screws, baseboards and varnish, and for stone - cement.
Working with different materials has its own characteristics, which significantly affects the work process.
For a plasterboard bar counter, first of all, a metal frame is made.
- The tougher it gets, the better. The walls of the frame are connected by transverse profiles.
- The structure itself is attached to the floor using dowels.
- After testing for strength, drywall is attached directly to it.
- The cracks and gaps are sealed with sealant, after which the stand is painted.
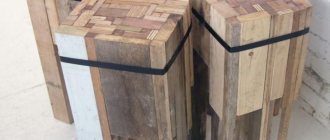
To make a bar counter out of wood, follow the same pattern as when working with drywall.
- The only difference is that the frame is made of wood from individual bars.
- First, markings are made on the floor in those places where the structure will be attached, then they proceed directly to the fastening.
- After this, the frame is sheathed with wood.
- The tabletop must be perfectly sanded, treated with special materials that serve as anti-flammability agents, and then varnished.
What will you need for work?
First of all, you need to purchase materials and prepare tools. But first, it’s worth drawing up a sketch of the future design with all the dimensions, so as not to add too much or forget about important details.
Almost any type of drywall can be used to create a bar counter. Although for a better result, we advise you to understand its varieties and properties:
- Thick gypsum plasterboard wall sheets (12.5 mm) are used to create smooth and durable surfaces that can be covered even with heavy ceramic tiles.
- If you plan to make a radial base for the rack, purchase thinner plasterboard (9.5 mm) - it is easier to bend to get spectacular rounded walls, but it is also quite reliable.
- The bar counter, which will be located next to the work area (for example, with an island arrangement of furniture) can be made of moisture- or even fire-resistant plasterboard. In such a kitchen you will feel completely safe.
In addition to gypsum boards, for work you will need metal profiles (guides, racks, corners) or simply even wooden slats, plus beams to create reliable support for the tabletop.
From hardware there will be enough screws and bolts. But if you plan to upgrade the bar counter with a structure made of chrome pipes, you will have to look for additional holders and tees to connect them. Choose a tabletop to your taste - it will decorate the counter and the entire kitchen, and can also play the role of an additional work surface. Therefore, be guided by considerations of aesthetics and practicality. Possible options:
- Solid wood, coated with protective impregnations and durable varnish, will perfectly complement the interior of a kitchen in a classic or country style.
- Laminated chipboard or MDF is a budget, but no less effective option with an imitation of the pattern of granite, marble or the same wood. It is better to order such a countertop from specialists who will not only cut the slab to your dimensions, but will also be able to properly close the edges.
- Composite - artificial stone can take any shape, which will allow the bar counter to fit most harmoniously into the kitchen decor and make it truly practical and comfortable. This tabletop must be ordered individually.
- Tempered glass is an expensive but effective way to complement the modern design of a room. It is better if the surface is corrugated. Otherwise, you will have to constantly monitor the cleanliness of the countertop, removing stains and fingerprints.
Select facing materials for the bar counter taking into account the main decoration of the kitchen. They work well with drywall: paintable plaster, wallpaper, PVC panels and tiles. For decoration, you may also need ceiling moldings, plastic baseboards or any other decorative strips.
Tools and auxiliary materials:
- To work with plasterboard you will need a sharp knife, as well as a drill or screwdriver. You may need a needle roller if you want to make a semi-circular base for the post.
- For cutting and assembling perforated profiles - metal scissors and a hole cutter.
- For finishing work - serpyanka (reinforced tape), putty and spatulas themselves of different widths, emery cloth or a special grater to smooth the top layer of plaster.
A pencil, ruler and level are a must-have set, without which you shouldn’t even start working.
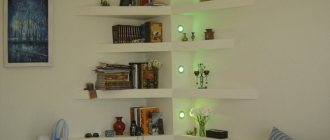
Lighting and accessories
Well-thought-out lighting can also become a kind of accessory, placing the necessary accents and creating a special atmosphere.
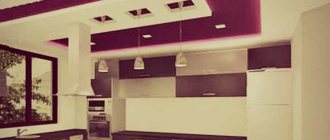
- Alternatively, several chandeliers can be installed under the ceiling above the bar counter, which looks very stylish from the outside.
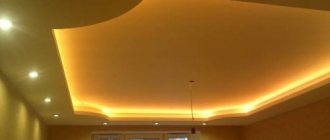
- In addition, you can specially make a suspended ceiling into which to mount several light bulbs.
- You can play with their color and lighting power. A dimer is perfect for this, as it allows you to change the light intensity.
Standard accessories for a bar counter include coasters with dishes, multi-tiered fruit stands, baskets with sweets and cookies, and so on.
Your imagination shouldn’t be limited to this list; don’t be afraid to experiment and come up with something of your own.
Step-by-step instruction
- At the first stage, the dimensions are determined - parameters of height, length and width that are convenient for the owners.
- Then they create a frame from the profile. It is important to consider their location for maximum rigidity, for example, install the corners from a solid profile. To do this, two walls are cut, and the rest is bent in a straight line. Reinforce with self-tapping screws or a cutter.
- After creating the perimeter of the walls, they are fixed to the floor. Between them, at a certain distance, a transverse profile is installed for rigidity. The profiles are connected perpendicularly with crabs.
- If the project includes lighting, wiring must be done in the frame in advance. According to TB, the cable must be insulated and removed from metal parts.
- Sheathing with plasterboard is possible if the stability of the frame is beyond doubt. Pieces of drywall are cut to the size of the frame and screwed into the profile using a screwdriver and self-tapping screws with short pitches. The caps are slightly recessed to disguise them with putty.
- The joints are sealed, the ends are sanded with a float. The holes for the screws are covered with putty, dried, cleaned with sanding paper and primed.
- It is convenient to paint with a roller or brush (in hard-to-reach areas).
- If necessary, install a plinth, and in places where there is a loose fit, treat the seams with sealant.
- Lighting for the bar counter plays a special role. Typically, halogen or LED lamps are used, placed in a beam installed above the tabletop, but lighting can also be provided using a chandelier on the ceiling. It is convenient to equip the lamps with a dimmer, which allows you to adjust the lighting intensity.
- If there are no outlets or a distribution box nearby, you can install an extension cord with a filter.
Bar counter for every taste