Despite modern design solutions, over the years the rack is a universal option for storing things. But it’s not even about convenience or comfort. The aesthetic component also plays an important role here, because good shelving fits perfectly into almost any interior. You don’t have to spend money on buying such furniture, since you can make a wooden shelving unit with your own hands, without any carpentry skills.
DIY wooden rack
What you need to create the perfect shelving
- Decide what you will store there. If these are heavy things, then a rack reinforced with a cross or a back wall is more suitable for you, but not a structure with ropes.
- Be sure to measure the place where the shelving will stand. This advice may seem obvious to you, but it will allow you to use the space as efficiently as possible. Mark the dimensions with masking tape directly on the wall to get an idea of what size shelving you need.
- Make a drawing or at least a quick pencil sketch if you don't fully understand the design. This way you will better understand the structure of parts and connections. It's easier to redraw than to redo the entire rack.
- Stock up on tools . Think about what you can borrow from friends or rent.
- Cut boards and other materials directly at a hardware store if you don't have a circular saw. Many large sites provide this service. It is impossible to make a long cut perfectly evenly with a hacksaw.
- When choosing a workplace, keep in mind that power tools make a lot of noise . Make sure that angry neighbors don't start banging on the wall.
- Cover things that should not get dirty with a covering film. After all, the dust from sanding wood will settle in an even layer on all surfaces in the room.
- Use a vacuum cleaner to reduce mess when drilling holes in wood and walls.
- Do not forget to use protective equipment when working: a respirator, safety glasses and gloves.
- Call an assistant . It's convenient to have someone hold the shelving wall while you screw it on. If you still want to work alone, get a couple of clamps.
- Attach the shelving unit to the wall with anchor bolts if you have an uneven floor or have small children or pets at home. Details are below, in the instructions for the rack on ropes.
Please remember that the following are just examples of work. You can change sizes and materials. Please note that the load must match the design. Check with the store to see if the size and type of material you choose is suitable for the weight of the items you will be storing there.
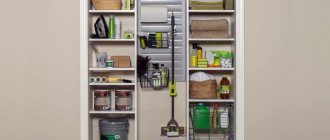
What to consider when planning a storage system in the utility room
As we have already said, it is important to think about what exactly you want to keep in the closet and relate it to the area. If it is small, then it is better to equip spacious mezzanines, and put drawers or baskets below for items that you use less often than others. This option is not suitable for building materials.
When calculating the depth of the shelves, do not get carried away. Remember that you need to leave free space between them so that it is convenient for you to enter, take something, turn around, and take out large objects. It is advisable that the passage occupies at least 70 cm. In a room with a high ceiling and an upper tier directly below it, provide space for a stepladder or ladder.
Measure the longest containers that you plan to put away for storage, and make several compartments just for them.
A few more tips for arranging storage shelving in an apartment
- Straight shelves without intermediate supports are only suitable for small closets with a distance of no more than 2 m from wall to wall. Otherwise, the board will sag.
- The width of the ledges increases from top to bottom; the heaviest things need to be removed downwards. This is due to safety and convenience.
- Use the rule: the larger the load, the thicker the material (this applies to wood, plywood), the more fastenings and the smaller the gap between the support posts.
- The optimal mezzanine width for cans with blanks is 30 cm or more.
- It is preferable to fix light equipment against the wall; massive structures are stable due to their weight.
- Take care of separate lighting for the pantry, do it before starting other work.
- Before installing storage systems, the utility room must be prepared: thoroughly cleaned, if possible, level the walls, re-paste them, paint or tile them.
- If necessary, cover the walls with antiseptic impregnations to protect against mold.
- If the room will be open, paint its walls in bright colors that match the surrounding interior.
Taking into account all the tips and features of your room, draw a sketch of the future closet indicating the design parameters and start creating it.
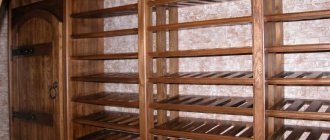
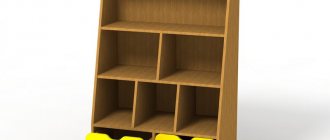
How to make a classic shelving unit with solid walls
Classic shelving is reinforced with a solid frame on the outside, and sometimes also with a back wall. This design will withstand heavy loads, such as full shelves of books.
What do you need
- Plywood sheet 2×125×250 cm;
- plywood sheet 0.6×125×250 cm;
- three slats 2.5x5x250 cm;
- one rail 2.5×8×250 cm;
- a circular saw;
- pencil;
- long ruler and tape measure;
- jig for drilling ends (if any);
- drill with a diameter of 3 mm;
- clamps;
- drill;
- hammer or nail gun;
- confirmations and nails;
- 220 P grit sandpaper;
- paint and brush, wallpaper and glue (optional).
How to do
Unfold the plywood sheets and battens onto the following elements.
Frame:
- two side walls 2×30×180 cm;
- five shelves 2x30x70 cm;
- top of the rack 2×30×75 cm;
- back wall 0.6×75×180 cm;
- bottom plug 2.5×8×70 cm.
Facial finishing:
- two vertical slats 2.5×5×170 cm;
- two horizontal slats 2.5x5x75 cm.
Let us remind you: if you do not have a circular saw, you can cut the elements to the desired size at a hardware store.
Frame: The Home Depot / YouTube
Mark under the shelves on the side walls. Using a pencil and ruler, place marks at a distance of 8, 36, 72, 108, 144 cm from the bottom edge.
Frame: The Home Depot / YouTube
To install shelves, prepare holes for fasteners. If you don't want the screws to be visible, use a jig and drill holes in the shelves at a sharp angle. If there is no jig, drill through the outer side walls of the rack at right angles along the marking lines from the previous step. In both cases, step back 5 cm from the edges.
Frame: The Home Depot / YouTube
Assemble the outer frame with nails and reinforce the joints with confirmats. Place the shelves along the marking lines and screw the euroscrews into the pre-prepared holes.
Frame: The Home Depot / YouTube
At a distance of 10 cm from the front surface, attach the bottom plug in the same way as you attached the shelves.
Frame: The Home Depot / YouTube
Nail the trim pieces around the perimeter of the frame. To do this, use a nail gun or a regular hammer.
Frame: The Home Depot / YouTube
Sand the surfaces and paint if desired.
Frame: The Home Depot / YouTube
Attach the back wall with nails.
Frame: The Home Depot / YouTube
If you haven't painted the back wall, you can, for example, stick wallpaper on it.
Frame: The Home Depot / YouTube
What other options are there?
Such a rack can be of any shape, for example triangular:
Or stylized as antique:
A classic shelving can be made from one material, as in this master class, where it is made from MDF sheets:
Step by step diagram
After preparing the drawing, you can start creating a bookcase with your own hands.
The first step is to apply markings from the project to the prepared material and cut it into the required number of parts. It’s better to double-check all the calculations and marks you’ve set so as not to get upset again because of damaged material and loss of time.
Frame
The base is usually made of a board, the thickness of which is at least 3 cm. At the bottom, longitudinal boards must be nailed using nails and a hammer, and transverse boards between them. This way the wooden structure will become much stronger and more reliable.
Next, the back wall is made. To do this, take plywood (you can use construction cardboard). In the drawing, the length and height of the rack have already been determined, so you just need to cut the element according to the given parameters.
The corners of the wall must be straight (90°), otherwise the structure will be skewed.
There is no need to make the element yourself if you buy ready-made material of the required size in the store.
Execution of sidewalls. To save money, they are often not included in the design, and ordinary beams are used instead. But still, let's consider this stage. To make the sidewalls, you need, again, to cut the required height and length from plywood or beams according to the drawing. Then, on their inside, mark the places for future shelves and cut the grooves. It makes sense to strengthen corners, holders or trimmings of beams in these places, since this will be more difficult to do later. Now you can install the side walls by tightening them with self-tapping screws. To make it easier to secure the second side, you should turn the structure on its side. At the same stage, the back wall is fixed (if it is included in the design). It saves the frame of the rack from distortion during further use.
Installing boxes and shelves
When the frame is completely ready, you can begin cutting and strengthening the shelves. According to the standard model, the dimensions of the shelves are equal to the parameters of the base.
If the corners were already screwed in during the manufacture of the frame, then all that remains is to screw the shelves to the sides using self-tapping screws. Or make 8-12 mm holes for screws - and use them.
Finishing
At the final stage, all that remains is to process the structure. Surface treatment is an important point that should not be forgotten. It will help maintain the durability of the furniture and prevent the wooden shelving from rotting. It is easy to carry out the processing yourself without any help. For this, various methods are used: sanding with further painting, coating with drying oil, wax or varnish, pasting with paper, and so on.
Oil, alkyd or acrylic paints are usually used to paint wood. Each part should be painted with two layers of paint and one layer of varnish. In addition, staining (on water, oil, alcohol and wax bases) or potassium permanganate is used for processing.
As additional ideas, the rack can be decorated with appliqués, stickers, drawings and many other things. For convenience, you can attach wheels (just turn the rack over and screw them using a screwdriver and screws). And some, after carefully processing the wood, even decide to glaze the open shelves. In this matter, everyone should be guided by their own taste and capabilities.
Advice! Even after high-quality and detailed processing, it would not be the best option to place the shelving in a place with high humidity or in front of a window on the south side. Such prolonged exposure will negatively affect the condition of the material.
The homemade shelving described in the article will not only become a practical and attractive part of the interior, but will also be the best experience for beginners in this business. If everything worked out, then the next step is to move on to more complex models.
How to make a rope rack with your own hands
These stylish shelving units are easy to make: just attach the shelves to ropes and hang the structure. The only problem is that they are not very stable: if you touch them carelessly, things can fall down. To avoid this, place the shelving away from aisles or additionally attach the bottom shelf to the wall.
What do you need
- Four boards 90 cm long;
- 8 meters of thick rope;
- drill;
- drill for the thickness of the rope;
- ruler;
- pencil;
- 220 P grit sandpaper;
- wood paint and brush (optional);
- knife;
- two thin sisal or jute ropes;
- perforator;
- a drill whose diameter coincides with the expanding part of the anchor bolt;
- two anchor bolts with a hook;
- wrench or pliers.
How to do
Soak thick rope in hot water to straighten it.
Shot: Living to DIY with Rachel Metz / YouTube
Drill four holes in the corners of each board - the rope will pass through them.
Shot: Living to DIY with Rachel Metz / YouTube
Sand the boards with sandpaper.
Shot: Living to DIY with Rachel Metz / YouTube
If desired, paint future shelves.
Shot: Living to DIY with Rachel Metz / YouTube
Lay the thick rope straight and let it dry. Cut into two equal parts. Fold each one in half to make a loop. Secure the loops using thin sisal or jute rope.
Shot: Living to DIY with Rachel Metz / YouTube
Measure equal distances on thick ropes and secure the shelves with knots.
Shot: Living to DIY with Rachel Metz / Youtube
Attach anchor hooks to the ceiling. To do this, drill a place for fastening with a hammer drill. Important: the depth of the hole must match the length of the spacer part of the anchor hook, and the diameter of the drill must match the diameter of the anchor. Hammer the anchor into the hole and tighten the spacer nut. Hang the shelving unit.
Shot: Living to DIY with Rachel Metz / YouTube
What other options are there?
It is not necessary to attach the rack to the ceiling. In this master class they suggest hanging ropes on the wall:
You can diversify the appearance of the rack, for example, by threading ropes through the holes in the shelves crosswise:
Briefly about the main thing
Racks are in great demand both in apartments and in private houses. They are simple, do not take up much space, and due to the absence of walls they seem weightless.
Before assembling the structure yourself, you need to choose the size, shape, type and material. Racks are made of wood or metal (sometimes both materials are used); polypropylene pipes and plywood can also be used.
First of all, it is important to make a sketch and dimensions. Any rack consists of a frame and shelves.
The frame consists of sides, the shape of which resembles a staircase. Shelves are nailed to their crossbars. For greater stability, additional vertical supports are attached at equal distances along the shelves.
How to make a rack from pipes with your own hands
In this master class, the shelves are “strung” not on ropes, but on pipes. This rack is assembled like a construction set and can withstand heavy loads.
What do you need
- Four furniture panels - they will become shelves. Choose the size at your discretion;
- sandpaper grit 220 R (grit);
- drill;
- drill with a diameter of 24 mm;
- 12 pipes with a diameter of ½ inch, 30 cm long;
- eight flanges for ¹⁄₂ inch pipe;
- four ¹⁄₂ inch diameter extended spools;
- 12 x ¹⁄₂ inch pipe connectors;
- spray paint for pipes and wood varnish and brush (optional);
- 12 self-tapping screws 16 mm long.
How to do
Sand the surface of the furniture panels with sandpaper.
Shot: Around Home DIY / YouTube
Using a drill, drill holes in the corners of the furniture panels. Let us remind you that a vacuum cleaner will help you litter less.
Shot: Around Home DIY / YouTube
Paint shelves and pipes if desired.
Shot: Around Home DIY / YouTube
Assemble four rack legs from pipes, flanges and connectors.
Shot: Around Home DIY / YouTube
Assemble the rack: all shelves, except the top one, will rest on pipe connectors.
Shot: Around Home DIY / YouTube
The top one will be attached to self-tapping screws - screw it through the flanges. If you painted pipes, tint the fasteners with the same composition.
Shot: Around Home DIY / YouTube
Before using the shelving, allow paint, if any, to dry completely.
Shot: Around Home DIY / YouTube
What other options are there?
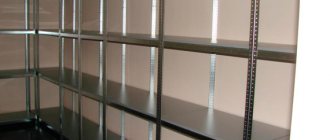
Industrial Style Open Shelving Wall Mounted:
Reliable wall-to-wall shelving:
Preparation
Before installing storage systems, the pantry must be repaired: clean the space, carry out dry and wet cleaning, remove old wallpaper and flooring. If necessary, the walls of the storage room or attic are leveled and also put in order: painted or pasted over.
It is recommended to use a primer that contains antifungal impregnations.
Laminate, parquet or linoleum is laid on the floor. It is also worth equipping the pantry with ventilation and lighting, which will greatly facilitate the use of the room.
How to make a shelving unit with corner slats
This rack is suitable for a wide variety of places and uses: its dimensions can be easily changed, and the reinforcement of the structure with a cross makes it stable and allows you to store a lot of heavy things in it.
What do you need
- 12 boards 2×5×250 cm for horizontal rack posts;
- circular saw (if available);
- ruler and tape measure;
- pencil;
- confirmations or wood screws;
- drill or screwdriver;
- two boards 2.5 × 10 × 300 cm for the cross;
- six boards 2.5x25x180 cm for shelves;
- 220 P grit sandpaper;
- wood varnish and brush (optional).
How to do
Cut eight narrow boards into 20 equal pieces.
Frame: MonsonSchoolhouse / YouTube
From these parts and four boards 250 cm long, assemble two identical “stairs”. The distance between the horizontal bars will determine the height of the shelves.
Frame: MonsonSchoolhouse / YouTube
Fasten the elements of the side posts to each other - use confirmations or self-tapping screws.
Frame: MonsonSchoolhouse / YouTube
Using self-tapping screws or confirmations, attach two boards crosswise to the side posts. Sand the surface of the wood, and if desired, paint along with the shelves.
Frame: MonsonSchoolhouse / YouTube
Place the frame in place in the room. Install the shelves on the side rails of the “ladders.” There is no need to attach them.
Frame: MonsonSchoolhouse / YouTube
What other options are there?
This type of design is also suitable for smaller racks:
And in this master class they tell you how to make a strong shelving for a workshop or pantry:
Necessary materials
When deciding how to make shelves in a pantry, you need to decide on the material from which the structure will be made. There are several options.
- The budget option allows you to make shelves from the material included in the furniture. If you have an old wall or an unnecessary chest of drawers, then you can disassemble them and get a fairly durable and, at the same time, free canvas for making boards.
This will be enough to ensure that the pantry has good and reliable shelves on which you can store anything.
- The second option involves purchasing material for shelves in the pantry. The choice must correspond to the list of intended items for storage, their dimensions, and weight.
It is advisable to make a rack directly in the pantry, since if it is large, then it will be difficult for you to bring it inside.
If it is expected that the racks will be loaded with conservation, then a solid board about 30 mm wide will be the best choice.
Any boards will do - the main thing is that they are of sufficient length and can withstand the expected load.
In addition to wooden materials, you can choose others, the main thing is durability and the possibility of self-assembly. In addition to the shelves, you should stock up on the fasteners on which the shelves will be installed, and the consumables necessary for the work.
In order to make wooden shelving for a pantry, you will not need a lot of materials and serious tools.
How to make a shelf in the form of a ladder
An A-shape rack is ideal if you need a small storage space. You can make such a design even if you have no experience at all - the assembly process is intuitive.
What do you need
- Two slats 2×5×300 cm;
- pencil;
- ruler and tape measure;
- circular saw or hacksaw (if available);
- screws or nails;
- drill, screwdriver or hammer;
- two furniture hinges;
- six boards 2×30×50 cm;
- 220 P grit sandpaper;
- wood varnish and brush (optional).
How to do
Vertical racks are made of slats. Measure a distance on them slightly longer than the height of the rack you need and saw off. Make the crossbars in the same way: they should be the same, and their length will determine the width of the shelves.
Frame: Modern Builds / Youtube
Mark the locations for the crossbars on the vertical posts. Their number will determine the number of shelves in the rack.
Frame: Modern Builds / Youtube
Assemble two identical “stairs” using screws or nails.
Frame: Modern Builds / Youtube
Attach the “ladders” to each other using loops.
Frame: Modern Builds / Youtube
Place the shelving frame at the desired angle and measure the width of the future shelves.
Frame: Modern Builds / Youtube
Place the shelves in place and attach them to the frame with screws or nails.
Frame: Modern Builds / Youtube
Finish your shelving unit with wood varnish if you want it to last longer.
Frame: Modern Builds / Youtube
Wait for the varnish to dry.
Frame: Modern Builds / Youtube
What are the options
Rack in the form of a ladder, which is attached to the wall:
A stronger option, suitable for storing books:
And here is a multifunctional shelving unit with a mirror on one side:
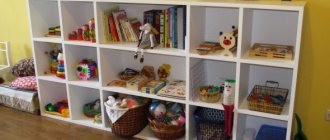
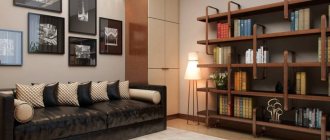
Interesting bookshelves
Who said shelves are boring? A bookshelf a la wood, your children will definitely be delighted with this one. A shelf in the shape of a Christmas tree can be decorated all year round; in addition, it can be easily transported to another place. Let's look at how to make such a bookshelf with your own hands and at the same time bring joy to small household members.
It can be made from plywood. Having an approximate diagram at hand, creating your own drawings will not be difficult. The diagram in the figure is a good starting point. It can be modified when preparing drawings of individual elements in accordance with the dimensions of the desired result.
Operating procedure:
- After the diagrams of the product elements are ready, transfer them to the material and cut out the parts with a jigsaw or fine-toothed saw.
- Connect the finished elements using glue and nails of a suitable size.
- You will need very small nails and work with them carefully so as not to damage the fragile material.
- Before assembling the parts, treat the plywood with a special antiseptic solution. This way you can extend the life of a wooden product.
- Also be sure to sand all cuts. This will protect you and your children from splinters and abrasions.
- If desired, parts can be painted before assembly. To achieve the final resemblance to the forest beauty, use green paint.
A Christmas tree isn't the only thing your bookend can look like. Designs in the form of honeycombs look very unusual.
To create such beauty you need to have minimal skills and knowledge, a standard set of tools and materials, and of course desire.
It’s very easy to make a diagram of such a shelf yourself. All wooden elements must have the same length and end cuts at an angle of 30º. You just need to carefully consider the number of cells and their location.
It is advisable to immediately assemble the entire structure and only then secure it perfectly to the wall.
Operating procedure:
- Cut out the required number of wooden elements.
- Sand the cuts thoroughly with sandpaper or a sander.
- Treat with a protective agent.
- Secure the structure with glue and screws, bolts or metal brackets.
- Paint or stain it, it will give the wood a more expensive look. Coat the product with varnish.
- After drying, place it in the intended place.
- For a small apartment and a small number of books, you can make a cozy hanging shelf, although it will also fit well in the kitchen. Even a novice carpenter can make such bookshelves.
- You will only need suitable material (wooden boards, furniture panels or plywood), as well as ropes to secure the structure.
Operating procedure:
- Make the required number of shelves according to your dimensions.
- Drill holes for the rope.
- Process the workpieces using a grinder or sandpaper.
- Cover with stain, paint, varnish (to your taste).
- All that remains is to secure the structure with a rope. To do this, strong knots are tied or pegs are inserted.
- Such a shelf should be attached to the wall using metal carabiners and hooks.
Advice! When creating a shelf for a nursery, do not forget to ask your child to take part in decorating the product. This way you will not only please him, but also make him feel important and that his advice is valuable to you.
How to make a modular rack with your own hands
This design is easy to change: if you run out of space, you can always increase the number of cells or reassemble them to get a rack of a different shape.
What do you need
- Four squares of plywood 30x30 cm;
- pencil;
- drill;
- drill 3 mm;
- eight screws.
The amount of materials is calculated per cell.
How to do
Take four squares of plywood. Mark where the parts will be attached perpendicular to each other.
Frame: BuildersSA / YouTube
Drill holes for self-tapping screws in the corners of each square. You can place an unnecessary piece of wood under the workpiece so as not to damage the table.
Frame: BuildersSA / YouTube
Fasten the elements to each other at right angles using self-tapping screws.
Frame: BuildersSA / YouTube
Make the number of cells you need, changing the length of the walls if desired. Arrange them in any order and additionally fasten them together with self-tapping screws.
Frame: BuildersSA / YouTube
Diagonal option
This type of wine placement is practiced everywhere. Any person can do it. To do this, it is enough to have some kind of wooden box or knock it down yourself.
When making it yourself you need:
- Cut four identical pieces of wood that are equal in width to the height of the bottle (or slightly less). Ideally, when assembling them, you should get a square.
- Measure the diagonals and cut 2 more pieces according to the resulting dimensions. These are the main elements.
- In the middle of each of them (up to half) a groove is cut with a width equal to the thickness of the wood.
- Insert elements into each other. You should get a design that resembles the letter “X” or a cross. It is placed in a square and secured with self-tapping screws. The bottles are placed in the resulting compartments.