A tool shelf is an important thing in a household. With its help, you can easily correctly arrange tools and organize the space of a garage, balcony or storage room, turning the room into a universal workshop. This review will look at the main types of shelves, and also give ideas on how to make a tool shelf with your own hands.
Material selection
Before you start designing a shelf, it is advisable to approximately think about its size, taking into account the dimensions and the number of tools.
As an advertisement: High-quality and durable balcony repairs can be ordered on this website: https://viploggias.ru/remont-balkonov/
Then you should answer the question: what can you use to make a shelf for a tool? It is important to remember the advantages of each material: wood is easy to process, it is cheaper than metal, the service life of wooden structures is quite long, but when the temperature changes or the humidity in the room increases, wooden products quickly deteriorate.
Metal shelves can withstand heavy loads, you can comfortably place any equipment on them, and such a product can last for many years thanks to the reliability of the material.
As for the variety of types, we can roughly divide the shelves into hanging, wall-mounted or shelving cabinets. This review will look at all three types, as well as provide recommendations for assembling and using each of them.
Rack on wheels
A small shelving unit on wheels is more suitable for those who do not have the ability to mount the storage system to the wall or who need a mobile version of the device. This product has a certain discreet elegance that is typical of simple loft-style models.
To make the shelving strong and inexpensive, we will use pine wood. There are no difficulties in working with this material, and it is also quite strong and durable.
Prepare everything you need
- 15 2x6 (5x15 cm) pine boards, 8 feet (243.8 cm) long;
- 4 2x4 (5x10 cm) pine boards, 8 feet (243.8 cm) long;
- 10 pieces 1x2 (2.5x5 cm) 6 feet (182.8 cm) long;
- 2 boards 1x2 (2.5x5 cm) 8 feet (243.8 cm) long;
- 1 pine board 2x2 (5x5 cm);
- 2-8 foot (60.9-243.8 cm) boards;
- dowels;
- 4 metal rods 67.25 inches (170.8);
- 4 metal corner brackets;
- 4 metal furniture wheels ranging in size from 4 inches (10 cm) to 6 (15.2 cm);
- 2 inch (5 cm) screws;
- sandpaper;
- wood glue,
- putty;
- primer;
- paint or varnish for finishing.
In addition, you will need to use a pocket hole tool, drill, level, tape measure, square, pencil, circular saw, grinder.
You can familiarize yourself with the dimensions of the rack and the location of components by looking at the figure below.
Cut out the details of the rack according to the list:
- 15 shelf blanks 2x6 (5x15.2 cm) 64.75″ (164.5 cm) long;
- 10 long shelf end pieces 1x2 (2.5x5 cm) 66.25″ (168.3 cm) long;
- 10 side shelf pieces 1x2 (2.5x5 cm) 16.5″ (41.9 cm) long;
- 10 side rail blanks 2x2 (5x5 cm) 11″ (27.9 cm) long;
- 4 parts – side vertical posts 2x4 (5x10 cm) 75.5″ (191.8 cm) long;
- 4 steel rods, 67.25″ (170.8 cm) long.
Work order
Start creating a shelving unit by assembling five identical shelves. Each shelf will consist of 7 parts.
- Prepare pocket holes in 2x6 (5x15.2 cm) strips 64.75″ (164.5 cm) long, indicated in red in the picture. Assemble three planks together using screws and wood glue, applying it to the joints.
When strengthening the joints of structural parts with wood glue, excess glue protruding in the seams should be immediately wiped off with a rag or a wet sponge. This way the finished product will turn out neat, and the absorbed glue will not interfere with evenly covering the wood with a protective or finishing agent.
- Next, install 1x2 (2.5x5 cm) strips 16.5″ (41.9 cm) long on the short sides of the future shelves. They are highlighted in blue in the figure. Use screws and glue.
- Similarly, attach long 1x2 (2.5x5 cm) end strips to the shelves, 66.25″ (168.3 cm) long, highlighted with yellow shading.
- Assemble the side posts of the shelving unit. To do this, use 2x4 (5x10 cm) strips 75.5″ (191.8 cm) long, indicated in green in the picture. First, refer to the schematic diagram and mark the attachment points for the crossbars.
- Prepare pocket holes at the ends of short 2x2 (5x5cm) strips that are 11″ (27.9cm) long. Make connections in the designated areas using screws and glue.
- Choose the location of the metal limiting rod that is convenient for you, prepare through holes for it corresponding to its diameter on one (rear) vertical strip of each of the two “stairs”. Be careful not to drill too close to the edge of the plank, otherwise the wood may crumble.
- Assemble the shelving unit, starting with the bottom and top shelves. Then attach the middle ones one by one. Use screws and glue.
- Place the steel rods in place. Secure their position with suitable nuts.
- Fill the recesses where the screws are attached with putty. Leave the rack until the composition is completely dry.
- Using sandpaper or a sander, remove any remaining special product and, if any, large imperfections on the surface of the wood. The rack should not have perfectly smooth surfaces, but given that the structure will be movable, it should be safe to use.
- After removing the dust, apply a protective compound (for example, stain) to the wood. Leave to dry.
- If you want, you can coat the rack with wood varnish. This finishing treatment is not necessary, but it will protect the wood from aggressive external influences (moisture, temperature changes, etc.). Leave for a while so that the varnish can dry.
- Install metal corner caps on the upper and lower corners of the product using a drill and screws.
- Place the shelving carefully. Screw four metal wheels to the bottom (in the corners) with screws.
Our guide allowed you to assemble with your own hands not just a rack on which to conveniently store tools, but a universal, functional piece of furniture. If desired and some amendments are made, it can serve in an office, living room, kitchen, etc.
Hanging shelves
Hanging shelves are highly mobile: they can be easily moved from one place to another if the situation requires it.
The second advantage of this type is ease of assembly. Almost anyone can make such a shelf with their own hands. On the other hand, such shelves are quite unstable; they sway at the slightest touch.
How to store fasteners, drills and screwdriver bits in the workshop
Hardware and various small things are an eternal headache in the workshop.
They get lost all the time. “They hide” when they are needed most and, in general, you want to sort them out once and for all. Outlet: Use to store bolts, nuts, screws, self-tapping screws, washers, etc. - transparent containers - jars and “baskets” cut from 5-liter plastic water bottles.
Cans can be screwed through the lids to the ceiling or to the bottom of the workbench.
Do not use glass jars - they are easy to break.
Drill bits and bits can be conveniently stored using magnets, such as those taken from old speakers.
Now the small change is always at hand and will not get lost among the older “brothers”.
Shelving cabinet
The shelving cabinet is perfect for a small room. The cabinet is placed along one of the walls, forming an area for tools. The shelving cabinet can be built in the form of one long shelf, or have several shorter ones.
The second advantage of a shelving cabinet is the stability of the structure, thanks to which larger and heavier tools can be stored on it.
Of course, the rack does not have the mobility of a suspended shelf, so its location needs to be thought out more carefully.
What are they made from?
As already mentioned, garage shelving is made of wood and metal. Wooden ones are lighter in weight, it is easier to work with wood, but they do not withstand such heavy loads. Metal ones are heavier (many times heavier), but you can lay an elephant on them.
There is also the issue of price. Rolled metal is not cheap at all these days. If you buy everything at the market or in a store, one rack (including consumables) will cost you almost the same amount as a finished one. The only real way to save money is to buy metal at a metal warehouse in whole lengths (there are 6 m and 12 m), and then cut it into pieces of the required length. The cutting can be done directly at the base; you will have to pay additionally for the services, but the amounts are quite small. In this case, you will be able to reduce costs by about 20-30%.
One of the layout options
Lumber costs less than metal. But don’t think that the costs will be small: you will have to buy graded wood without knots, and this is the “elite” or “premium” class with a corresponding price tag. So it won't be very cheap.
Made of wood
Operating conditions in the garage are far from the best - high humidity, frost, alternating freezing/freezing, and sometimes heat. Not very good for wood. Therefore, all material must be treated with antibacterial and protective compounds before work. Use wood products for exterior use, as conditions in an unheated garage are more similar. You can choose a product that simultaneously tints the surface being treated and your product does not need to be painted. After processing, the materials are dried and only then work begins.
How to connect bars
When connecting parts of a wooden rack, you can use standard methods for carpenters - quarter-foot or half-foot. If this is difficult for you, you can also butt nail and use metal angles and/or overlay plates to reinforce the joints.
Another point: it is better to connect with nails, not with screws. The result is more stable and fewer connections become loose. If you choose the option with reinforcement with plates, they can be mounted with self-tapping screws.
Wooden garage rack
Now in terms of size: for racks they usually use 50*50 mm timber, for crossbars you can use the same timber or a little thinner - 50*30 mm. Flooring is made from:
- boards with a thickness of at least 21 mm;
- moisture-resistant plywood with a thickness of 10 mm;
- laminated chipboard;
- OSB.
The cheapest are boards and plywood. Laminated chipboard is much more expensive, but it does not need to be painted, which is a good plus. In order not to spend a lot, you can take the first and last sheets in a pack at the bases - they are scratched and are much cheaper.
Wooden shelving for the garage - drawing with dimensions
Another point: chipboard shelves have an open side cut. If it is not treated, as humidity increases, the chips will swell and the shelf will begin to warp. To prevent this from happening, coat the edges with silicone. With this treatment, nothing will happen to the chipboard.
Metal
If you decide to make metal shelving for the garage, the choice of materials is wider - there are two options for rolled metal, plus standard solutions for warehouses (perforated corners). You can also use metal parts intended for other purposes - for example, steel cable racks or cable channels that are used in communications are suitable.
Cable channels and shelves - convenient and not very expensive
So, what is the frame of a metal garage shelving made from:
- From a metal corner with a metal thickness of 3-4 mm. The width of the corner shelf is 25-45 cm, depending on the planned loads. Durable, but metal-intensive material, weighs a lot, and is expensive.
- Profile pipe (rectangular in cross-section). With less metal consumption (less wall thickness), compared to a metal corner, it has better elasticity characteristics (more difficult to bend), and is more resistant to torsion. Approximate dimensions for racks are 50*50 mm or 40*40 mm, for crossbars 50*25 mm or 40*25 mm, respectively.
- The racks are made from corrugated pipe, and the crossbars are made from angle iron. The thickness of the metal is 2-3 mm, the width of the shelf is 25 mm or more. Unfold the corner so that the laid flooring looks like it is in a “nest”.
Take a closer look at how the corners are located.
The flooring on the shelves is made from the same materials as for a wooden rack (board, plywood, OSB, chipboard), only sometimes non-standard options are added, which are used sharply with a wooden frame due to the high mass - sheet metal.
The board remains optimal for most regions - a reliable, not very expensive material. You need to take wood, without knots (with a minimum of knots) with a thickness of 21 mm. Treat with antiseptics, then paint.
The advantage of metal shelves is high reliability with a small thickness, the disadvantages are price, weight and “loudness”. They also need to be painted, but first clean them of rust, then go over them with a rust converter and primer, then paint them, preferably in two layers. Also, by the way, the metal frame must be processed. Then the rack in the garage will not rust.
The process of designing hanging organizers
Hanging shelves are called organizers or shield shelves; you don’t need to have any special skills to make them. Usually they store small tools, so a lightweight material, such as plywood, is suitable as a base.
Then you need to apply a mesh in places where shelves or pockets will be made in the future. In addition to them, you can use various hooks and loops for additional fastening.
Now that we know how to make a hanging tool holder, let's move on to constructing wall shelves.
Top best ideas for storing tools
Since instruments can be long and short, large and small, and different in shape, the methods of storing them also differ. There are several methods for systematizing tools. Below are the most convenient and popular ones that you can do with your own hands directly on the wall.
Vertical storage systems such as racks
One of the types of vertical storage of tools is a system in the form of racks. The most necessary tools that can be placed within easy reach should be placed on the racks. Items that are needed less frequently are removed to distant racks on the upper or lower shelves. Metal garage shelves - IF systems - are perfect for this.
According to the types of installation, racks can be:
- stationary and collapsible;
- rotating or movable;
- hinged, retractable.
But even with a large selection of options, the proposals will not always satisfy the necessary needs of the garage owner. Therefore, it is recommended to combine store-bought shelving with homemade holders and shelves, or design a complete wall-mounted storage system yourself.
Vertical homemade wooden racks with slots for storing wrenches and screwdrivers are very convenient. They can easily accommodate adapter bushings for attaching tools with a conical shank of different sizes or pliers.
A vertical rack in the form of a mobile stand is an excellent choice for storing handy tools. It is recommended to make it from wood or plywood. Separate groups of tools are placed on hooks, magnets or shelves. Special perforated panels are often used for vertical storage systems.
Magnetic tape
Magnetic tape is simple and easy to use. Magnetic strips are taken to secure the tool and mounted on a wall storage system. You can attach a variety of tools to the tape: from small metal wrenches and screwdrivers to large objects.
The process of designing wall shelves
Wall shelves are a universal design that can always be used in a workshop, workshop or apartment. There are two ways to assemble such a shelf: the easiest way is to attach a metal profile to the wall, then make the required number of partitions and shelves.
Note!
FIFA 22 (PS4)Why do you need interior dolls?
- How to choose shoes that don't go out of fashion?
You can go the other way: assemble the shelf by attaching corners to the wall, and then laying boards on them.
The simplest rack
In a workshop or garage there is always a need for a simple, inexpensive shelving unit. You can freely place large tools and materials on it, and place small ones in separate containers.
Let us immediately note that the wooden structure will be attached directly to the wall. Therefore, if you cannot screw screws into the wall, you will have to choose another, free-standing, shelving model.
In this project the depth of the shelves is 16 inches (40.6 cm). Sometimes the shelving area is limited by other items, an opening door, etc. Therefore, there is an optimal depth of the shelves - 40-60 cm. They do not clutter the room and provide enough storage space. Even an inexperienced person can assemble such a structure, but you will need a little help to hold the long parts, clear step-by-step instructions, materials and tools.
What to cook
To implement a traditional storage system, you will need pine boards with a section of 2x4 inches (almost 5x10 cm) and pieces of plywood. They will change the appearance of the room and make it comfortable.
Stock up on the tools necessary for work:
- roulette,
- level,
- pencil,
- device for pocket holes,
- screwdriver,
- self-tapping screws.
Prepare yourself or order cutting of wooden blanks from a workshop:
- 6 x 8 ft (243.8 cm) pine plank shelf end/face strips.
- 3 leg strips, the length of which is equal to the height of the top shelf (optional).
- 9 x 12" (30.5 cm) shelf support strips.
- Pieces of plywood for shelves are 16 inches (40.6 cm) wide by 4 feet (121.9 cm) long.
Description of work
- Make markings on the wall at the height of the shelves. Check their correctness using a level.
- Using long screws, firmly attach 8-foot-long strips to the wall at the levels where the shelving shelves will be.
We recommend that you determine the height of the shelves yourself. Their placement depends on what you plan to store on them, as well as how convenient it will be to use the rack.
- Now we will tell you a clever solution on how to make the shelves even. Take the remaining 3 long planks (8 feet each), line them up exactly with the ones already attached to the wall, and lightly nail them to them. Use 2 nails or short screws per board to secure them in place just slightly.
- Now take the boards that will serve as legs for the rack. Two are installed on the sides, one in the middle. Attach them with screws only to the top strips. Use 2-3 screws for each connection.
Attention! This rack is not designed to store items that are too heavy. If you need a stronger one, please note that the optimal distance between the supports should not exceed 70 cm.
- Remove additional fixing fasteners from the slats. You have received an almost perfect front part of the rack.
- Using a special tool, prepare pocket holes on all 9 planks (12 inches each).
- Attach them perpendicular to the horizontal slats on the wall - along the edges of the slats, about 10-12 inches apart, and exactly in the middle (it is desirable that the position of the middle slats coincides with the middle vertical support).
- Now you can install the already made façade fragment of the rack. We mount it with long screws, screwing them securely into the supporting cross bars using pocket holes.
- All that remains is to cover the shelves with cut pieces of plywood. Attach them securely to the frame.
The design is ready! It is neatly made and does not need finishing. If you choose to paint or varnish your shelving, this will significantly extend its lifespan.
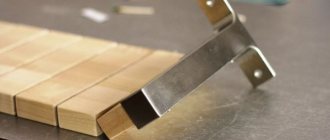
How to make a screw clamp
To attach a pipe bender to a workbench, as well as to perform other work, you will need various clamps. The price of a large number of products of different sizes is quite high. Therefore, if you wish, you can make such designs yourself.
To make a screw clamp you will need:
- Profile metal sheet, approximately 10 millimeters thick.
- Metal rod with M10 thread at one end.
- Several M10 nuts.
The manufacturing procedure includes:
- A bracket is marked on a sheet of metal. To do this, you can use a finished product or prepare a template yourself, at your own discretion, taking into account the requirements of operating conditions and the required dimensions.
- The workpiece is cut out. In this case, it is better to use an acetylene torch or gas cutter.
- The edges are cleaned with an angle grinder and the burrs are removed.
- On the smaller side of the bracket, several M10 nuts or a hexagonal rod up to 50 millimeters long with an M10 thread along the entire length in the center of the part are welded.
- An M10 thread of the required length is cut on a round rod with a diameter of 10 millimeters.
- All elements are given a protective coating with oil or nitro paint to protect against corrosion.
A homemade garage tool may also have a more complex manufacturing process, which requires special equipment and skills.
Purchased products and handmade ones
Ready-made options are very easy to assemble
Assembling ready-made options is very simple - the kit always includes instructions for assembling metal shelving. You just need to understand the sequence of actions and repeat everything that is written in the text and shown in the diagrams.
Homemade rack fully meets your needs
Another thing is whether the store rack will meet your needs?
After all, it does not take into account the specifics of the work to which you devote your free time. The second important difference is that purchased options are standard sizes, while self-production will allow you to use free space more efficiently, plus it will take into account the dimensions of stored items.
You determine the dimensions of the racks yourself, based on your needs.
Zoning space is an important point when organizing storage in the garage
Lighting of the working surface of the workbench can be not only wall or ceiling, but also natural if you place the table near the window.
A workshop area with a workbench and tools can be compactly placed next to large, spacious cabinets that are suitable for storing power tools.
And this is a special shelf for storing garage keys, screwdrivers and other small tools, designed for installation in a closet. Agree, storing them this way is much more convenient than digging through a drawer every time trying to find a wrench of the right size.
Look, even in a small garage for one car you can equip a full-fledged workplace if you hang tools and keys on the wall.
Well, if you allocate a separate room for this, you will become the owner of a full-fledged workshop.
GarageTek storage system accessories work wonders for your garage space. In just one corner there are two working areas at once - a workshop area and an area for gardeners.
General design issues
Rack with shelves
First of all, you should forget about the first ideas that come to mind - creating the simplest hanging shelves, with a load or area that can accommodate all the property currently contained in the garage. Firstly, this is not rational from the point of view of their manufacture, and secondly, over time, the volume of things stored in the garage increases, so new and new designs will have to be made.
Therefore, it is immediately necessary to plan the design of the shelves in such a way that it is:
- universal
- expandable
- as easily movable as possible
That is, it is advisable not to make each shelf separately, but to make an entire rack consisting of several shelves as a single structure.
Rack with cabinet
The next important question is what the design of the rack will be - collapsible or not. Typically, non-removable structures are more durable and can withstand heavy loads, however, their disadvantages include difficulties in expansion, dismantling and transportation.
Collapsible structures are less stable , their rigidity is far from that of non-collapsible ones. Often, for additional stability, such structures have to be attached to walls. However, they have two special advantages - easy expandability and mobility. In addition, thanks to their modularity, shelving can be made in a variety of sizes.
In this case, the choice depends solely on the desires of each person.
What is needed for production
In order to make a tool rack with your own hands, you need to acquire materials and tools. The most important thing is the presence of pine boards 50x100 mm, as well as plywood. The following tools are also needed:
- Roulette.
- Pencil.
- Level.
- Screwdriver, screwdriver.
- Self-tapping screws for wood.
As for the boards, you will need to prepare the following blanks:
- Planks for the ends and front bases of the shelves are made of pine. A total of six such strips, each 243.8 cm long, will be required.
- Planks for making legs - three pieces. The length of these slats should be the same as the height of the topmost shelf.
- Planks for making supports in the amount of 9 pieces. The length of each plank should be 30.5 cm.
- Plywood 40.6x121.9 cm for making shelves.
Having all these materials, you can start making a tool rack in the garage with your own hands.
Workshop ventilation
Cross-ventilation is best, so place your workbench between a door and a window if possible.
If the work is dusty or you will be using solvents or other volatile substances, cross-ventilation with air flowing from your back is preferable. This, together with an appropriate mask/respirator, will provide reasonable protection from airborne substances and particles.
Consider artificial ventilation using fans if adequate air circulation in the room is not possible. In cold climates, where windows and doors are kept closed and the room is heated, circulate air throughout the room using a fan air circulation system, preferably with a filter that is easy to clean. Adhesives and paints can produce fumes, so cross-ventilation is helpful in dispersing these fumes and also helps the adhesives and paints dry.