/Household appliances/Built-in/
It is impossible to imagine a kitchen without a stove and oven. Today, the stationary oven is being replaced by a modern built-in oven. The built-in type of equipment requires proper installation and connection according to all the rules. It’s worth starting by determining where to place it.
See also: How to choose an oven in 9 steps
Preparatory stage for installing the oven
The classic option is to install an oven under the hob.
But today, many users are moving away from this, choosing another solution for themselves, installing a built-in oven above the work surface. This makes it more convenient to monitor the preparation, put in and take out dishes, and it’s also more difficult for kids to reach the equipment.
If you are also wondering how to install an oven in a set, then before purchasing it is worth preparing a niche.
Since the dimensions of the niche must correspond to the oven.
Even if there are minor flaws, the equipment may fail or work incorrectly. Please note that the walls of the niche are positioned strictly perpendicular to the bottom and ceiling. There should be no distortions.
We recommend leaving between the niche and the oven:
- Bottom 9 cm.
- Top 5 cm.
- Side 4 cm.
This distance is quite enough for good ventilation.
Now let's talk about how to prepare the installation site. First, read the technical documentation.
Please note that it is better to place the oven next to furniture that can withstand high temperatures nearby (about 50 degrees).
Do not place the device next to anything that can easily catch fire - curtains, oil, towels, etc. And also with a refrigerator. An electric oven should be installed close to an outlet, but located higher than 10 cm from the floor.
Installation options:
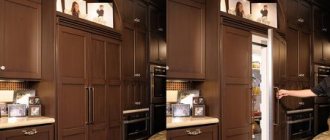
- Under the work surface in the cabinet. If you have a separate oven, then it is not necessary to have a hob above it. This placement will save space on the countertop.
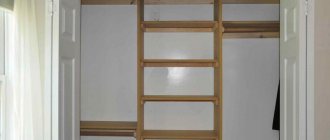
- In a high cabinet. This option is suitable if the kitchen is large, plus it will be easier to monitor food preparation and care for equipment.
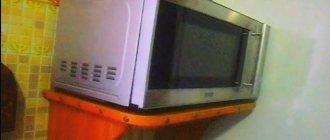
- In a tall cabinet. As a rule, he stands at the very edge and also holds other devices, a microwave, for example. Suitable for regular sized kitchens.
- On the work island. An option for spacious dining rooms, as well as if you cook quite rarely.
- In the corner. If you have removed the sink, the main thing is that the oven doors open easily.
In the kitchen unit where the oven will be installed, holes are made in the back for the cable and hose through which the gas flows. Afterwards the cabinet is returned to its place and the installation itself begins.
Types of oven
Ovens are distinguished according to several classifications:
- type of accommodation;
- management method;
- source of energy.
Depending on the type of placement, there are free-standing and built-in ovens. Some options are placed anywhere, but next to the power source. For those being installed, special furniture sections are provided. Based on the control method, a distinction is made between autonomous and dependent ovens. The second subtype only works in conjunction with the hob, and adjustments are made through one interface. Autonomous ones have become increasingly common in recent years. The third classification option is by energy source. The devices are divided into gas and electric models. The former remain in demand due to the prevalence of the energy carrier, but cannot heat the chamber evenly. Electric ovens are the most popular at the moment. Users select a certain temperature, and the device, in turn, maintains it with high accuracy and at a stable level.
Installation procedure for a gas oven
If the gas oven has a common power supply with the hob, then they are installed together under each other. And if you have an independent oven, you can choose any place, as long as there is a gas tap nearby.
During installation, it is important not to confuse the steps, use good materials and not ignore the instructions. And then make sure the connection is tight. When installing a built-in oven yourself, use a tee for a gas pipe to which the hob is already connected.
But you can’t do that! You may receive a fine. The cabinet and panel must be connected separately, each with its own pipe.
In this case, pipe routing can only be done by service specialists.
To connect to the common line, use a flexible hose or metal tube. The hose must be undamaged and no longer than 1.5 m. Also, during installation, make sure that the hose hangs freely.
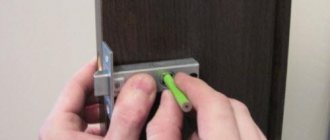
Installing a gas oven step by step:
- Check if all the parts are there and if they are damaged.
- Connect one end of the hose to the gas pipeline. Use a dielectric insert.
- Connect the other end of the hose to the equipment using a nut. To seal the connection, use a gasket with grease.
- Check the tightness with a soap solution. Apply it to the joint, open the gas and see if there are any bubbles. If they are not there, you did everything right.
- If the oven has electric ignition, then you need to connect it to the network. In this case, the line for this must be independent.
- Then fix the device in the niche using fasteners.
- And check its operation, turn it on according to the instructions.
Important!!! After you have installed the gas oven yourself, it must be checked by a gas service worker. We do not recommend using the equipment before this.
Tips and tricks for choosing an oven
The leader in consumer preference is electric models. The latter provide more options regarding temperature conditions and cooking methods. When choosing, you can use standard criteria: ease of use, efficiency, safety, appearance, compatibility with the environment and environmental friendliness. Gas ovens have a significant drawback: you often have to check the condition of the dishes from below, as they dry out from one-sided exposure. As for the dependent/autonomous division, the size of the room is important in this regard. Dependent ones are in a sense more universal, but autonomous ones are suitable if there is a separate hob, and an additional one will be superfluous due to the lack of another hood. In terms of the built-in/free-standing parameter, none of the options has a clear advantage. The first type is better for design, and the second can be represented by compact options.
Regardless of the type of device, you need to pay attention to the presence of a smart interface, a built-in microwave, and automatic cleaning capabilities. The buyer should be interested in the presence of Let's Taste and StreamFunction. Operating savings depend on energy efficiency.
Installation procedure for an electric oven
Installing an electric oven yourself is easier than installing a gas oven, but there are still a few things you need to know.
Important!!! If the appliance is 45 cm wide, it cannot be placed under the hob.
The equipment is mounted under the working surface or above it in a prepared niche. In this case, you need to leave free space between the oven and the cabinet, otherwise this may disrupt the operation of the appliance. And then they fix the oven to the walls of the niche.
The biggest challenge when installing a built-in electric oven is connecting it to the mains. You will need a two or three phase connection. If there is a voltage of 220 V, the first option is suitable.
Sometimes you have to make another line, since ovens are powerful and waste a lot of energy.
The cross-section of the wire must match the power of the device. For example, if the oven has a steam generator, then this is no less than 4 square meters. mm.
For your own safety, we recommend grounding. In an apartment, this can be done on a common panel.
And in your home you can use a socket, but the plug comes with a grounding plate. And the outlet itself should be 10 cm or higher from the floor.
The distance between it and the device should be such that there is still a length of the cord left. The plug should not come out of the socket with difficulty.
In addition, it is recommended to install a residual current device on the line, but it is better if this is done by an experienced technician. The device will protect the wiring from overheating and short circuiting.
And in general, to ensure that the built-in electric oven works properly after installation, choose wires with a large cross-section, a circuit breaker and a safety shutdown.
DIY installation
Self-installation is possible if you have knowledge and experience working with electrical circuits. They are almost always mounted in the lower tier, but autonomous products without a hob are installed in different places, provided that the gaps are maintained. Manufacturers take into account the complexity of this moment and provide cameras at a distance of 5 cm from the back and sides, and 10 cm from the bottom. Special furniture sections, in turn, have 10-centimeter legs. During the installation process, they first check the capabilities of the installation site, the serviceability of parts, connections, and communication points. Set up a system of electrical wires and make grounding. Sometimes you have to look for sockets with special parameters. Installation of the device proceeds after preparing the working tools and the installation site. The device is fixed only with factory fastenings.
Checking electrical wiring and connection
Without checking the quality of the wiring, further actions are prohibited. The first step is to find out the resistance level. Next, check the cross-section of the electrical wires, because it must correspond to the power of the oven. Next, the quality of the cores is determined. Typical system needs result in the presence of a grounding structure. Then they look at the circuit breaker, which reacts to failures and overloads. The current level for operation of this element is selected, depending on the declared power of the device. The built-in device is connected using a thick copper wire. In general, it is recommended to make an additional branch. New sockets of a non-standard configuration may be needed. The relevant information is indicated in the technical passport. The more powerful the oven model, the more likely it is that a special connector will be required. Screw terminal blocks should be used to connect the wires.
Installing and fixing the oven
For installation into the set you will need a painting knife, a fork, insulation, a drill and a Phillips screwdriver. As for the installation location, for stand-alone devices without a hob, an option with a second tier is possible, but it is better to place the device in the bottom row. Install equipment only in a level space that has been verified by the building level. The connection has a clear algorithm. They start by replacing the aluminum cable with a copper cable with three wires. Replacement is carried out from the device to the shield itself. For a device consuming 3-3.5 kW, you need a wire with a cross-section of 2.5 mm² and a 25 ampere circuit breaker. If the energy consumption is higher, then a core with a cut area of 4 mm² and a 40 ampere circuit breaker. The wires are connected to a 3-phase outlet. For houses with double cable, the shield is grounded. If the oven has a two-pin connector on the back, then the grounding on it is a separate screw - you can work with a simple wrench.
How to install correctly in an artificial stone countertop?
Installation of the oven and hob into a countertop made of artificial stone is carried out according to the algorithm described above. However, in this case, one requirement must be met: the distance between the device and the material must exceed 6.5 millimeters. This gap is filled with materials (thermal tape, foil tape, sealant) that act as a thermostat.
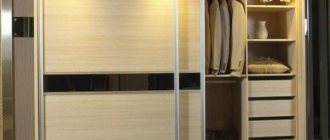
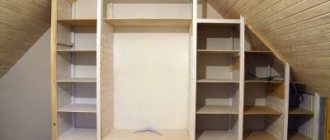
Kitchen layout options
Options for placing an oven of classic size 600x600
Placing compact and narrow ovens
Options for installing a wide oven