Housewives sometimes have a question about how to make eyelets for curtains manually, when the original option is not very pleasing or they need to come up with a decent fastening for new curtains. There is more than one way to do this, depending on what materials and skills are available. Therefore, everyone chooses for themselves the level of complexity, decoration style and detailed calculations.
Tulles are often attached using loops; curtains are placed on the cornice less often using this method.
Advantages of thread loops
If you have basic sewing skills, yarn loops are a quick, easy way to hang curtains, drapes, or regular tulle.
It is only necessary to calculate the load and density of the materials.
Advantages
- Practicality. Some variations of thread fastening involve simple replacement or restoration of the element.
- Safety. If the yarn is selected correctly for the main fabric, then the likelihood of breakage is very low. Even if there are small children and animals in the house.
- Aesthetics. It always looks stylish and beautiful, especially if the fabric fastening has a “character” that consists in emphasizing either addition or secrecy.
- Versatility. If after the move it turns out that the cornices have a different structure, or the original ones do not fulfill their function, then this variation of fasteners can still help out the owners.
Also a big plus is the simplicity of the method - you can do it with your hands and a couple of sewing tools and get very elegant results.
Description of loop execution
For strong fastening, the air loop method is suitable.
First, the yarn is secured to the fabric with a regular knot. Next, using a hook, we knit a regular single crochet. Having tied a chain of the required length, the second end is secured to the fabric. Once secured, cut off the free end of the thread. This will be one loop from the first method.
In the second method, you first knit a single crochet along the length required for one loop. Then the last loop is fastened to the first. The resulting ring is one loop. Next, we knit a single crochet for the distance required for the gap between the two loops. Next is a single crochet for a new loop. We fasten it into a ring of the same size as the first loop. And we repeat this until we knit a chain of the required length.
After finishing knitting, sew the chain to the upper edge of the curtain using hidden stitches.
General recommendations
The process of creating curtain or tulle fastenings in itself is not difficult to perform; you just need to gain some skill. But there are also nuances that come only with experience - calculation. This is determining the length of the curtain, the distance of the bottom cut from the floor, the need to process the edges and methods, sequence. It should be taken into account that if there is an additional folded seam at the top, the length of the product will be shortened and may look untidy with too much margin.
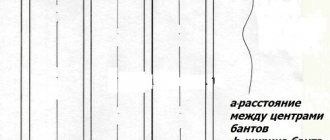
If you want more folds and then make a beautiful drapery, then the distance between the loops can be slightly increased.
A more even canvas on the window opening is made by sewing a large number of identical loops. It is difficult to give specific numbers; one must still take into account the total length of the material, its heaviness and tendency to form folds.
Sometimes, if the fabric is thin but difficult to drape, you can increase the distance to 20 cm to “force” it to take the desired shape.
If we talk about the length of the loops themselves, how to choose them, then here it is worth starting from: the length of the material and the highest point of grip of the loops. In other words, the length should be selected individually, taking into account whether there are restrictions on distance from the floor; if you need to raise it, then the loops are shorter, but in order for the curtains to be visually longer, the loops will be calculated differently.
If the loops are not intended for decoration, then they try to place them in inconspicuous places.
Important: the distance by which the fabric needs to be raised or lowered is not equal to the length that the housewife will add or shorten, so it is better to play it safe and “try on” the product for its future location before sewing.
What threads to use
Depending on what material the curtain is made of, threads are selected. For classic white tulle, it is better to choose a white thread.
If the fabric is multi-colored, iridescent, or has a pattern of a specific color, it should be chosen based on how the finished product will look most natural and whether it will not attract too much attention to itself, since the loops are the first thing It is a method of fastening, not an additional decoration option.
In addition, for making loops it is better to choose strong threads, perhaps even knitting yarn.
It is stronger, denser, and better suited for heavy materials. In addition, if the curtain is long, it usually weighs more than one that only reaches the window sill, so for long curtains it is better to choose this yarn. If the tulle is short, thin and transparent, you can limit yourself to thinner threads, but it is still advisable to fold them in two when working. It should be remembered that very thin threads still run the risk of breaking under the constant load of the fabric, and too often spaced loops will not look very aesthetically pleasing.
Conclusion
Curtains made of any material need fastening that will favorably emphasize the advantages of the fabric and highlight features: sophistication, sophistication or playfulness, as well as rigor and restraint.
As a result, you will receive reliable fasteners for curtains that will last a long time and will not spoil their appearance.
Self-made curtain loops can contribute to this in the best possible way, since the craftswoman herself chooses what to emphasize and what not to highlight. Only for this it is necessary to calculate all the nuances, plan correctly and implement it into reality without defects and errors, so that the result brings pleasure for as long as possible.
Required tools and materials
To make this fastening method, you don’t even need a sewing raspberry - it’s enough to have basic sewing skills.
To make loops, in addition to the selected yarn, you will definitely need a crochet hook, already prepared material and scissors. You will need a lot of yarn, and the hook is selected depending on the thickness of the thread.
The thicker the thread, the larger the hook is needed, at the same time, if the thread is thin, you should not use a thick hook - it will be inconvenient to work with, and the finished loops will look unaesthetic and stretched.
Convenient loops on curtains: master class
How to sew curtains with hinges with your own hands
Before you begin the process itself, you need to prepare everything you need.
In order to sew curtains with hinges with your own hands, you will need:
- Fabric for curtains;
- Sewing machine;
- Threads;
- Additional materials, patterns, accessories.
Before you start sewing curtains with hinges with your own hands, you need to accurately measure the dimensions, the width of the curtains according to the window openings and the length of the curtains. To do this, you need to take into account the width of the window, add gaps on the left and right sides if the curtain is solid, or gaps on both sides on both panels if the curtain consists of two panels. If the curtains are planned to have waves, you need to calculate their number according to the width of the window and add the depth of each wave to the resulting width. The width of the future curtain is ready, the length of the product is determined by the window or the floor, taking into account the loops.
Next, you need to decide on the loops, or rather on the material from which they will be made: fabric, braid or thread.
Then you need to calculate the number of loops that will hold the curtain on the curtain rod and first place them on the curtain, marking these places with soap or a pencil. Then we start sewing the loops. Fabric loops are the most common model. To do this, you will need braid and strips of fabric of a width that harmoniously matches the curtain, its color, pattern, etc. A strip of fabric is folded inward on both sides, a braid is applied to the middle and stitched in the middle along the entire length of the strip. The resulting piece of fabric is connected at the ends to the bottom and applied to the curtain, placing the curtain on top of the resulting loop. The curtain is stitched, capturing the loop. Such loops are the most convenient to use; they hold the curtain well, fit comfortably on curtain rods and baguettes, and wash well.
How to sew loops on curtains using a pattern
To sew loops on curtains with your own hands, you need to choose a material for the loops. It can be the same fabric that the curtains are made from, but you can use a different material to create contrast. You need to make a loop pattern on the fabric using soap or chalk. The optimal size for loops is 20 cm wide and 15 cm long. Next, we cut out the resulting blank from the fabric; it will be rectangular pieces of fabric.
Rectangular flaps must be folded in half, right side inward and stitched along the edge along the entire length. After this, the loops are turned right side out and ironed so that the seam is in the middle. Then you need to stitch or overlay the two edges of the fabric. The resulting loop is folded in half and the edges are sewn to the curtain from the wrong side. To make the loops multifunctional, they can be attached to the curtain with Velcro or buttons, instead of sewing them tightly to the curtain.
Master class: sewing curtains with hinges for the kitchen
The requirements for curtains in the kitchen will not be as high as for the living room or hall, so every housewife can take a master class and master the skills of sewing curtains with loops with her own hands.
For this you will need:
- Fabric for curtains according to the width of the window opening, taking into account the depth of the waves and a margin of 5-7 centimeters on each side;
- Threads in the color of the curtain;
- Scissors;
- Sewing machine, but you can also use your hands;
- Needles, chalk, bar of soap for basting;
- Iron;
- Tape measure;
- Velcro or buttons.
The window or windows in kitchens are usually smaller than standard sizes, so there will be one less window of fabric needed. Having accurately measured the size of the curtains in length and width, they must be laid out on a flat surface and the places of the waves and the fastening of the loops must be marked. Bastings are made if the edges of the curtain are already overlaid and ready for use. If the edges of the curtain fabric are not ready, they will need to be prepared before working on the loops. Measurements for waves and places where loops are attached can be calculated using a measuring tape so that the distance between the loops is the same. When the curtain fabric is ready, you can start sewing the loops. If you use the same fabric for the loops as for the curtains, the room will look gentle and harmonious, and the curtain will not stand out from the overall look of the kitchen.
If you use fabric in more contrasting colors for the loops, the curtain will look stylish and beautiful, standing out from the general appearance of the room.
After choosing the curtains and loops, you need to prepare the materials for the loops themselves. Using ready-made paper patterns or directly on fabric, the required loop sizes are marked. For a kitchen window, you can use loops thinner than 7 cm; if the fabric for the curtain is light or transparent, then the loops will fit up to 4 cm in finished form. This means that you need to cut a rectangular piece of fabric 8-10 cm wide and 10-15 cm long.
When the patterns for the loops on the fabric are ready, they must be cut out and stitched along the entire length from the wrong side, with an indent of 1.5 cm from the edge. The cut is turned right side out, ironed, folded in half and attached to the basted curtain. You need to do this with all the loops and only then start sewing them to the curtain fabric.
There are several options for connecting curtain fabric with loops:
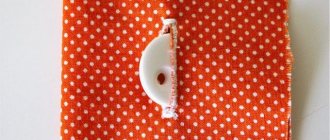
- Velcro loops . In order to attach loops to curtains with Velcro, you need to sew the main part of the Velcro onto the back side of the curtain, and a removable part of the Velcro onto the edge of the loop. In this way, the curtains will be removed from the curtain rod for washing, cleaning, etc. Velcro must be chosen wide, across the entire width of the loops, so that the loops can support the weight of the curtain. For curtains with Velcro, the loops should be located more often than on curtains with blind loops.
- Buttonholes . Sewing buttonholes involves painstaking work during sewing and during use of the product. Because for each loop you need to prepare a hole for a button and sew each button to the curtain fabric. But this method is no less convenient for household use, especially for the kitchen; the curtains can be quickly removed from the curtain rod.
- Loops on knots . Sewing loops on curtain knots is even more convenient than other loop variations. The prepared loops are tightly sewn to the curtain fabric and tied to the cornice with special pieces of fabric that are threaded into the loops. The fabric pieces should be 2 times longer than the loops, because they will form several knots when attached to the cornice.
- Overhead hinges . This is the most common method of sewing loops and curtains, when the finished loops are placed on the curtain from the wrong side and sewn with the main stitch on the front side. The hinges are attached to the cornice when dismantling the window frame. Such curtains in the kitchen will look discreet, neat and at the same time stylish.
How to knit
Even those who have not previously done needlework can cope with knitting with yarn with loops.
You should start working by counting the required number of loops, starting from the width of the product. To do this, lay the thread on any flat surface. Place the second one next to it - this will be the second row. It should be located above the first one.
The basic knitting is:
- Facial surface . You need to thread the loop coming from the skein from behind into the loops of the bottom row and pull it up.
- Purl . The loop should be threaded through the front and also brought up.
End of the row: the second loop passes through the first and stretches up. The loop of the next row stretches through it.
If you finish knitting, fasten the loop from the wrong side.
To decrease, pass the loop coming from the skein through 2 located on the knitted fabric and pull up. To increase, take 2 loops from the skein and pass through 1 on the canvas.
Note : if you want to get patterns, then change the sequence of loops, cross them. To create braids, knit 1 cross every 5-6 rows.
Decor
Bright and elaborate fasteners can sometimes become decorative elements themselves.
There are a lot of ideas for designing loops, let’s look at some of them.
- Form. You can attract attention with an unusual shape, for example, sew holders for a child's room window in the form of butterflies, flowers, animals or fairy-tale characters. To decorate with a marine theme - in the form of an anchor or seagulls. It is not necessary to make loops in the shape of rectangles - when cutting out, you can use any configuration.
- Color. Decorating with color will make the elements rich and attractive. If several types of textiles are used to decorate a window, it is not at all difficult to play up the tonality on the hinges. Sometimes the color of the fixtures supports some of the furnishings in the room, and therefore the entire style as a whole. For example, loops can follow fabric on bedspreads or sofa cushions. For the pop art style, you can choose the brightest colors. Fabric with a metallic sheen will suit loft or techno styles. Gothic will need dark, solid fabrics, and for romantics, something pink, lilac, soft lilac, blue or pistachio will do.
- Texture. It must also match the surrounding environment. For example, to support the colonial style, fastenings are decorated with stripes with folk patterns or fur, combining it with a carpet in the form of an animal skin. For the kitchen, the texture of the fasteners is selected from simple, understandable materials: cotton, linen, satin, fine wool.
- Decorations. Ruffles, bows, lace decorating curtain holders indicate a romantic style, Provence, vintage, country, shabby chic. Rhinestones, shells, stones, glass beads, embroideries, and appliques are used to decorate loops.
Preparing items for sewing
Features of furniture design, important nuances and stages of work
Before you start cutting and sewing, you need to prepare everything you need to create curtains with hinges. This:
- Fabric for the product itself and for the patches;
- Tailor's meter or tape;
- Adhesive backing tape;
- Threads;
- Needles;
- Scissors.
Save
You should also first place the cornice above the window. Remember that it should be located no lower than 10 centimeters from the top border of the window opening to avoid a strip of light between the curtain and the cornice. It is also necessary to take measurements of the width of the curtain or curtains, to determine whether the curtain will be pleated or smooth.
Calculation of canvas size
Save
Depending on how the curtain will be placed on the cornice - hang in the center or symmetrically on the sides, cover the entire wall or part of it - we calculate the size of the canvas. For smooth curtains, it is enough to measure the expected width and add seam allowances of 1.5 centimeters on each side.
For pleated curtains, in order to make the flounces spectacular, experienced craftsmen suggest calculating the width twice as large as what would be needed for a smooth curtain. For pleated curtains, the loops are not attached directly to the material, but to a special edging that is sewn or glued on the reverse side.
Similarly, we calculate the height of the curtain based on the height of the cornice. If you are going to sew a Roman curtain, be sure to add fabric to the horizontal folds.
Determining the size and number of loops
Save
Save
The next step is marking the loops. Decide on the quantity, try not to place them far from each other to avoid sagging. For thick curtains, the optimal loop width is about 6–8 centimeters, and for thin tulles, which weigh much less, narrower loops are also suitable.
Example: for a single curtain that will hang directly above the window, in an opening of a standard size of 140 centimeters, 6 loops each 6 centimeters wide, which will be located at a distance of about 20 centimeters from each other, will be sufficient
But you can make the number of loops even greater, focusing on them as an interesting decorative element
Cutting out curtain parts
After final preparation and taking measurements of the future curtain, you can proceed directly to cutting. It is recommended to make a pattern template for the main fabric and a standard loop, especially if you are doing this kind of work for the first time or plan to sew several curtains at once.
Save
Place the pattern on the fabric, measure the allowances on each side, and mark them. Cut out the fabric, trying to keep the warp threads parallel and perpendicular to the edges.
To cut the loops, measure exactly twice as much fabric in width (each loop will be double-sided). Insert stripes taking into account allowances.
Separately, you need to cut a strip of fabric for the facing - it will be approximately 10 centimeters wide and the same length as the width of your future curtain. For the facing strip, cut out a strip of 8 centimeters wide from the adhesive backing and the same length as the facing.
The main stage is sewing curtains ↑
Methods for making hinges - blind and detachable ↑
To sew one-piece rectangular loops, follow the algorithm:
- Fold the fabric flaps in half with the right side inward, step back 1.5 cm from the edge and sew the seams, leaving the narrower side unstitched.
- Turn the product right side out and iron it carefully.
- Fold the edges of the unsewn side of the loop inward and connect them with a stitch; if desired, trim the edges of the pata with a contour seam.
