Soft floor coverings have been around for a very long time. At first, the skins covered the floor of the cave, then they moved into the first human dwellings. With the development of mankind and the advent of weaving looms, carpets began to be laid in homes. Literally half a century ago it was impossible to imagine an apartment in which there would not be a carpet in a visible place - a sign of wealth.
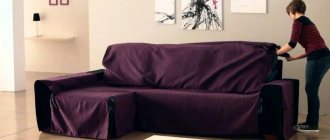
Products for the living room
In poorer houses, the floors were covered with rugs. Knitted rugs gave the house that feeling of comfort and warmth, which many still remember with excitement. Today everything has changed.
Anyone can buy carpets, but only a few create rugs with their own hands, and this makes them an exclusive decoration.
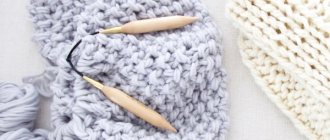
Threads can be used to knit and weave rugs
Types of rugs
There are a large number of knitted patterns, which can be combined into some groups:
- The created solid canvas is round or rectangular in shape;
- Knitted individual pieces (triangles, squares or circles), and then connected to each other;
- Work using the fillet technique: pile is inserted onto the mesh base;
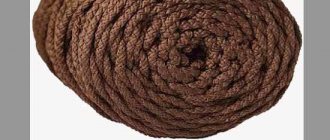
- Knitting with linen cord;
- Carpets made of synthetic materials;
- Fabrics made of knitted thread;
- Crochet rugs from unwanted jackets and sweaters.
Important: fabric made from old yarn turns out to be pale, since the brightness of the colors is lost over time.
Patchwork and grass rugs
Nowadays carpets with long pile, called “grass”, are fashionable. They are very soft and warm. True, it’s difficult to clean them without a powerful vacuum cleaner, but they look beautiful and cozy with them. Making such rugs with your own hands is not at all difficult, however, it can take a lot of time. This is if you decide to use threads. But it's very beautiful.
These are the results that can be obtained using this technique. But to make the carpet so beautiful, you need ribbon yarn or thick threads
The idea is outrageously simple: threads and strips of fabric are tied to a mesh base. There are two tying techniques - just using a knot, and making a loop. They give slightly different results, but both techniques are good. You can try and choose.
How to make rugs with your own hands from scraps
The same painting mesh is suitable as a base, but a rubber anti-slip backing for carpets is better. She's practically perfect. We tie threads or scraps of the same length to the cells of the grid - in each or through one.
Row by row we tie the scraps
If you do not have such perseverance, but you have a sewing machine, the process can be speeded up significantly. But the base must be woven. We fold “blade of grass to blade of grass” and stitch it on a typewriter. So row after row. Making patchwork rugs with your own hands is much faster with a machine.
You can also use a rubber mat with holes as a basis.
Knitting rugs using a crochet hook
Using a hook, you can create unique things, carpets that are unique in shape and appearance. The products can be laid on stools, a sofa, or placed by the door, in front of the sofa.
The simplest option is to knit tightly in the shape of a rectangle:
- Old clothes are cut into narrow strips;
- Then they roll it into a ball;
- The work begins with creating a chain of air loops;
- The length of the chain should be equal to the width of the future fabric (this is clearly visible in the photo of the knitted rug).
Product Features
Based on where the product will be located, its function and, accordingly, appearance (material, color, shape and knitting technique) will depend. Most yarn rugs are made by crocheting, but sometimes knitting may be used.
An economical but very beautiful way to update your interior
When knitting a carpet, the features of the interior are taken into account. The product will be a bright accent that should harmoniously fit into the overall style of the room.
Round option
For knitting, use the circle pattern:
- From one loop, 6 air ones are knitted, which are tied in half-columns;
- The lift is done with an air loop.
Creating a circle follows the pattern with double crochets:
- In the first row, two double crochets are knitted from each loop;
- Divide the circle into six segments;
- At the end of each part you need to add a double crochet.
Work according to this plan is carried out to the required size of the rug.
Crocheting a rug for beginners using this pattern is not difficult. The main thing is to first choose the right material and the right color scheme.
Master class on making pompoms
Every self-respecting craftswoman tries to decorate her product after it is made. The easiest way to disguise knots and other defects in work is with fluffy pompoms; there are several ways to make them:
- classic - the thread is wound on disks, cut along the edges and tied in the center, the advantages of this method are that the pompom is voluminous, the disadvantages are that it takes a long time to wind the thread in this way;
- fork - used in the manufacture of a large number of pompoms, here the yarn is wrapped around the teeth of a fork or a similar device made independently, also cut on the side and tied with an additional thread in the middle;
- rectangular - the easiest and fastest way, for which a toilet paper roll works perfectly. It needs to be folded in half, one thread should be pulled lengthwise to secure it, and the rest should be wound along the entire length of the sleeve.
Carpet on mesh
Weaving a fluffy fabric, where you will need not only a hook, but also a mesh. You can buy it at a hardware store made of plastic. The prepared shreds should be the size of the cell in width and 12-14 centimeters long.
Knitting pattern:
- 3 cm must be retreated from the edge of the grid;
- Stretch the fabric into the cell with a crochet hook;
- Tie into a strong knot;
- Perform the following actions in each cell.
The ends of the patches are all brought out on the front side, as shown in the video of knitting a fluffy rug. The surface should be slightly tousled to create a charming look.
What material is suitable?
Let's consider what features different materials for making pom-poms have:
- Yarn. A rug made from wool or acrylic threads is soft and warm. Yarn can be bought at the store or unraveled from old items. Knitting threads come in a variety of palettes, so the color of the carpet can be matched to the interior.
- Plastic. To create balls, ordinary garbage bags are used. The result is a moisture-resistant product with a massage effect. Pom-poms for such a rug should not exceed 4 cm, otherwise they will quickly wear down.
- Fur. A rug made of fur balls looks original and airy. True, working with fur is quite difficult - you should carefully handle the delicate material during production, use and washing.
- Old T-shirts. Knitwear cut into thin strips is a budget-friendly way to create a carpet from pom-poms with your own hands. The fabric balls are fluffy, dense and look very unusual.
Carpet made of knitted yarn
Beautiful rugs can be created from a simple column using old things. To do this you will need a thick large hook. Then you can unravel any sweater or jumper.
Or an option - an old T-shirt, dress. But the strips need to be cut thin to make it easier to knit.
- Knitting like a napkin can be started in different ways. For example, we connect 10 air loops in a chain into a ring. And then you need to knit stitches from each one. With or without a crochet - at the discretion of each craftswoman. This is one of the answers to the question: how to knit a round rug? You can knit a large carpet in this way or assemble a whole composition from small ones.
- If you need a thick carpet, then the idea of tying yarn around a cord will work here. There are no holes in the knitted fabric, it warms better.
DIY rugs made from pompoms
Making pompoms is not difficult, it just takes a long time. For a rug you will need many dozens of them. Doing one at a time takes too long. There is a method that allows you to make up to a dozen pom-poms in one go. Moreover, they will all be of the same density. All you need is a regular chair, thread and scissors.
Preparation of pompoms
Turn the chair upside down. We wrap threads around the legs as a base. In the photo they are wound on two legs, but if you need a lot of identical pompoms, you can wind them on four at once.
How to make pompoms from threads quickly
Having wound the required number of turns, we take it and pull it with threads over a certain distance. Pull tightly, pulling with all your might. Having made several constrictions on the chair, remove the tourniquet and continue making constrictions. The distance between them will be approximately equal to the size of the pompom. In reality, the pompoms turn out a little smaller (about 1 cm), so take this into account.
We take scissors and cut between the two constrictions in the middle. It's not that easy to do. Especially if the constrictions are close and the thread bundle is thick. We straighten the cut pompoms, cutting off the protruding threads. We get a dozen or more balls of thread at a time. Repeat with a different color or size.
By the way, you can also make pompoms from knitted ribbons, cut from old T-shirts or fabric. Everything is the same: winding, tying, cutting. Pom-poms look and feel different, but no less attractive.
You can make pompoms from old knitwear or towels
We recommend making the threads used to tie the tourniquet longer—leaving at least 10 centimeters of hanging ends. Then it will be easier to assemble the rug.
Base for rug with pompoms
Pompoms can be tied to any net. An anti-slip carpet underlay is best. You can take a piece of rubber mats that are sold by the meter for bathrooms. They also have holes, but they are much smaller. What's good about these options? They don't slip.
DIY rugs: base for a carpet with pom-poms
You can use a painting mesh with a large mesh, or even just a piece of fabric. But we tie pompoms to the mesh, but to the fabric we have to either sew them, which takes longer, or glue them, which is not so reliable.
Assembly and drawings
A rug made of pompoms is suitable for a child's room. Due to the fact that it can be made from multi-colored pompoms, it will attract the child's attention. The interesting texture of the rug also arouses curiosity. If you use pompoms of different sizes and colors, from different threads - smooth, prickly, shaggy - you can make an “educational” rug for babies. Children need to develop tactile skills and this rug will help.
Here's how to make your own rugs from pompoms
If you use pom-poms made of cotton, microfiber and other highly absorbent materials, you can place such a rug in the bathroom. It is very soft and pleasant. From small-sized pompoms, but tightly packed, you can assemble round, oval, flower-shaped, animal-shaped or any other shape.
We tie pompoms to the net
If you have found a mesh base, we thread the threads that remain after tying the pompoms through the mesh and tie them to several knots. If you have a hook, it is easier to use it to pull the threads through the cells. You need to tie it firmly; you can pull the threads through different cells several times, tightening them each time. This is important if you plan to machine wash the rug.
Can be glued to fabric using a glue gun
Pompoms can be glued or sewn onto fabric. If you plan to wash, glue is unlikely to work. The gluing option will not work if there are small children in the family. If they manage to tear off the pom pom, it will definitely end up in their mouth.
By the way, pompoms can be sewn. To do this, you will need to cut circles of different diameters, sew them along the edges with large stitches, fill them with padding polyester, padding polyester, etc. and pull the thread. See the video below for more details.
Denim model
Rugs made from old jeans are fashionable and original.
- Since the fabric is dense, thin strips are cut from it.
- Another problem is the flow of the threads along the cuts, so they need to be burned with matches.
- Then the strips are tightly tied together into one long thread. A long chain of chain stitches is crocheted.
- It is twisted into a spiral, the layers are secured to each other.
DIY rugs made from braids
Do you know how to braid hair? The usual one, of three stripes? You can make amazing rugs with your own hands. What’s great about homemade braided rugs is that you can make them from just about anything. Any old things will do. Literally any. The best place to start is with knitted t-shirts. Soft, flexible material that is easy to work with. You can also use:
- Old towels, sheets or terry robes.
- Knitted items (sweaters, jumpers, but not very thick). You can make amazing carpets from cords
- Fleece blankets and sheets that have lost their appearance or relevance.
- Cords - ready-made or woven, tied.
- Old bathrobes, colored sheets.
- Jeans. You can make very interesting and beautiful rugs from old things. And not only for the dacha...
- Children's tights (and women's, by the way, too).
- Jute ropes.
And whatever you find and consider possible to use. When selecting materials, we try to find them of approximately the same thickness and density. Then there will be no problems with weaving. At first, you don’t have to think about choosing colors. When experience comes, it will be possible to select colors. It’s more pleasant to work with knitwear and terry cloth, but old jeans and jackets can also work.
Preparing tapes
We prepare the material for the braids - we cut the found “treasures” into strips. The width of the strip depends on how thick you want the rug to be. To begin with, you can make knitted strips 6 cm wide. Strips of terry cloth are also made of the same width. But in the case of knitwear, the rug will be 2-3 cm thick, terry - at least 5 cm.
If you use T-shirts, cut off the “body” exactly at the armpits. We use the resulting pipe in this form. We cut into strips, but not completely, but leaving 5-7 cm uncut at one seam (as in the photo on the left). You'll soon understand why.
How to make a long strip of T-shirt for a homemade rug
Turn the uncut part towards you (as in the middle photo), take scissors, and cut along the bias from the bottom to the first cut. The next gap is also cut on the bias. And so on. You complete the last whole piece like the first - reduce it to nothing to the edge. The result is a long strip, several meters long, with barely noticeable seams. And there is less work - no need to sew. It’s easier with towels - you just cut off the edge, then cut it into ribbons, but they will need to be sewn.
During operation, the tapes will have to be connected. They can be tied or stitched. But there is a convenient way that allows you to reliably connect two strips of fabric/knitwear without a needle.
How to join two strips when weaving a rug
We place the edges of the strips one on top of the other, by 3-5 cm. We cut a hole 1.5-2 cm long approximately in the middle (with a strip width of 5-7 cm). We pass the free strip through this hole. The result is a reliable knot, which, nevertheless, does not interfere with weaving, does not stand out and is not felt later in the product. To understand how it works, try it on small pieces.
Braiding hair
The braid is usually woven from three ribbons. The length of the stripes should not be the same. They will need to be tied or sewn (it is better to sew). And it is much better if the connection points are spaced some distance apart.
Preparing the “material” for a braided rug
We fasten the selected strips together. They can be wrapped in thread, sewn, knitted. The thickest knot is obtained. This is not always convenient. We braid a pigtail. When one of the strips ends, we sew or tie the second one.
Footage - as needed or desired. It also depends on the thickness of the braid. If it turns out to be voluminous, you won’t need much length. If it is thin, then you will need 5-8 meters. In any case, you can not finish the weaving, but fix it with something so that it does not unravel. You can grab it with a thread and a needle, tie it with a rope, or use a binder.
DIY rugs made from T-shirts: you can start assembling and not finish weaving
Assembling the rug
You can make a rug of any shape from a woven braid: round, oval, square, rectangular. To make a round homemade rug from T-shirts, twist the braid into a spiral on the table. Take a large needle and strong thread and sew it together. We make small stitches, connecting the woven braid centimeter by centimeter. This is perhaps the most time consuming part. But with this method of connection, a double-sided mat is obtained.
Weaving a rug from fabric strips - sewing braids
To prevent the end of the rug from looking unsightly, make the stripes increasingly tapering for the last meter or so. So that the braid becomes thinner and thinner. The length of this “tapering” section is equal to at least half the finishing diameter of the rug. It’s not a problem to fold a narrow edge down and sew it there. You can also hide the “tail” under one of the stripes in the braid. In general, this completion is aesthetically pleasing.
Oval rug made from T-shirts, scraps, old things
If you want to make an oval rug, you need to twist the braid around a straight section. The longer the section, the longer the resulting rug will be. If you want a square or rectangular one, you will have to braid the braid “in place.” To ensure that the turns are not smooth, but sharp, a special technique is used.
How to make a twist in a braided rug
At the turning point, leave the bottom strip free. The one that is currently on top wraps around the middle one. You need to make two or three turns, sometimes more. Having turned the work, we weave in a third strip, directing it over the one that was wound and passing it under the “main”. It's difficult to explain in words, look at the picture above.
Special models
Braids woven from old things can be the basis of very interesting carpets and rugs. For example, you can make a number of braids of the same length. Tie them tightly along the edges, leaving 5-10 cm free and cutting these parts into “noodles”. Sew the resulting pieces together. You will get a rectangular rug. It will be convenient near the front door, in the bathroom, etc. You can also make a rather long rug that can be laid near a sofa, armchair, or recreation group.
Variations of rugs made from old T-shirts woven into braids
From fabric or knitted braids you can make a rug from small fragments. An example of this is in the photo on the right (see figure above). You roll up fragments of certain sizes and assemble them. From the same set of “materials” you can get dozens of variations of “carpets” and rugs.
Options for carpets made from old T-shirts. Beautiful and stylish
The imagination of needlewomen is limitless. Models of different shapes are assembled from circles of different diameters, and each of them is unique. This is not an ordinary circle or oval, these are original works.
Knitted “Sun”
Many housewives like to create rugs for the children's room. The canvases blend harmoniously with the interior and are beautifully knitted. We knit a rug from “Cotton” yarn; the colors are yellow and orange. The hook for work is suitable at number 2, 5. It is better to fold the yarn into two threads.
The six air loops cast on are connected into a ring with a connecting post. The yarn is taken yellow and knitted in a circle in this order:
- Row 1 – one chain lifting loop, nine single crochets in a ring.
- 2nd row - two single crochets are knitted in the RLS of the first row.
- Rows 3-8 – SC, adding six SC to each.
- Rows 9-32 – sc, knit eight in a row.
- Rows 33-60 – single crochet, six added to each row. From the 59th row the thread switches to orange. At this stage you can complete the knitting.
- The rays can be knitted separately in the shape of a triangle and attached to the base.
- The eyes and nose are knitted with orange, white and blue thread, each circle separately. The knitting is normal.
- A red stripe is knitted for the mouth.
The prepared parts are sewn to the base of the sun. The ears can be crocheted to the head.
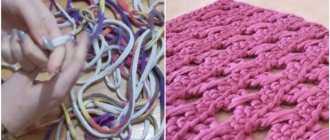
How to make knitting threads from unnecessary things
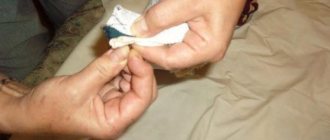
Everyone has clothes that are out of fashion, they are worn out and now you can’t wear them, but it’s a pity to throw them away. If you are a skilled craftswoman, make yarn out of it and knit a rug. There are no difficulties here. We take any thing and cut it into strips, wind it into a ball. You need to cut in a circle without stopping, this way you will get fewer knots.
To make rugs from garbage or plastic bags, strips of a certain width are also made from them: 1.5 cm for garbage, 3 cm for plastic. It is necessary to cut the package not across, but along, then connect.
Knitting threads can be taken from old clothes
Prefabricated mats
For women who are new to crochet, it is easier to work with a simple crochet pattern. But even beginning needlewomen can create a cheerful cartoon character for a nursery.
A simple knitting pattern is used to form the fabrics. The “Bear” rug, for example, is assembled from separately connected parts:
- The base (muzzle) is knitted in the form of a circle of the required size, the yarn is chosen in gray;
- The bear's ears are semicircles of white and gray;
- The white nose is a circle of arbitrary size (it is sewn to the muzzle);
- You can knit pink cheeks and sew them on;
- Eyelashes and the tip of the nose are cut out of leather or suede, and also sewn to the base.
All parts do not have a certain size, here everyone chooses according to their wishes, as they like.
Crocheted rugs are always in fashion. The beauty and uniqueness of canvases of different shapes, colors and materials will delight the eyes of the owners for a long time.
Bright colors lift your spirits. Rugs made with your own hands are also a budget option.
Using the product in the interior
The attractiveness of yarn products lies in their beauty and uniqueness. Most of the products are handmade, which can complement any interior.
They will look appropriate anywhere
Shabby chic
The products will fit well into a shabby chic style room. This is a combination of romanticism and elegance. A knitted product will help create coziness. It is necessary to choose a not bright, calm color, perhaps with a small pattern or floral design. Use beige, white, light blue colors. Typically, these colors are rarely used when knitting carpets, but for shabby chic they are a good option.
Openwork knitting will fit well . It can be the same shade, or better if it is the same knit with a blanket, pillow cover, furniture, or table napkin. The carpet can have patterns or weaves.
Most often, calmer colors are used for this style.
Modern style
Many modern crocheted rugs are made in neutral colors. For example, gray, dark gray, cream. But, based on trends, knitted items can be bright.
A rectangular cream rug woven from wool will look good on a dark floor. It will go well with other elements of the same shade in the room.
A rectangular gray rug can be placed in a minimalist interior . A large chocolate-colored rug will help visually add space and arouse the interest of guests.
It is better to shade light floors with carpets made of dark yarn
If there are animals in the house, then a small rug can be allocated for the pet. As a sleeping place.
Classic
For a large room in a classic style, oval or round shaped products are suitable. If the room is small, choose a rectangular shape.
If a small living room has plain wallpaper, then you can visually expand the room with the help of this work. Select a product with narrow stripes of a dark color.
Oval-shaped carpets are well suited for a classic style.
The yarn in the living room should not contrast with the shade of the floor. The product is selected to match the floor or a similar shade. If the walls in the room are decorated in light colors, then the yarn is selected in cool shades. If the walls, on the contrary, are in dark colors, it is better to choose a product of brown color with an ornament or beige .
A good design move would be to use knitted items in the same style as the carpet. These can be various small items, baskets, napkins, curtains, tablecloths, poufs.
You can make toys or decorative pillows to match the style of the carpet
This element will help soften the straight lines of furniture and walls. By choosing the right texture, you can feel the softness and warmth of the yarn.
VIDEO: Interior solutions using yarn carpets
Rugs made from knitted yarn
Interior ideas
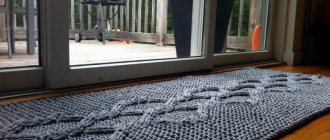
Photo of a knitted rug
For experienced craftswomen
Those who have been doing needlework for quite a long time and have experience can create chic models without any problems by choosing intricate patterns. They use stitches that are difficult to knit; a novice craftsman will not be able to cope with them. Craftswomen who know their craft can easily combine such complex patterns as pineapples and cones, floral motifs with pom-poms, etc. Using a napkin pattern, create a unique rug, and its size can be increased by combining a pattern or inserting rows from another pattern into the pattern . The canvas will fit perfectly into the overall interior.
The nursery needs carpeting that is in harmony and matches the decor. When arranging the room, adults are obliged to take into account the wishes of the child. Children love it when their room looks colorful, like in a fairy tale. If you have already hung curtains, purchased a bright blanket, but have not found a suitable rug, handicraft mothers will be able to knit it, but not a simple one, but an unusual one, for example, in the shape of some animal. It's not that difficult; it's enough to correctly connect geometric shapes - squares, circles, rectangles, ovals, pentagons, rhombuses and other shapes.
Crocheted rugs are elegant, fashionable, popular and impressive. Any person who comes to visit you will be delighted with the original thing, because not everyone has such a miracle lying on the floor in their apartment. Surely they will want to place an order for you, which in the future can turn into a good part-time job.
Crocheted rugs are elegant, fashionable, popular, impressive
Crochet pattern for openwork shells (fans)
Schemes of openwork shell patterns
Scheme of the pattern of openwork shells
Scheme of the pattern of volumetric shells
Materials and tools
- Yarn of any colors and thickness. The thicker it is, the fluffier and more voluminous the ball will come out of it.
- Yarn can be taken from any available material: wool, viscose, acrylic.
- Scissors, thread and needle.
- Material chosen for the base: mesh, fabric, foamed PVC.
- Cardboard, compass, pen or pencil.
- Crochet hook.
This is a sample list that you can vary. For example, a compass can be replaced with a bowl or plate.
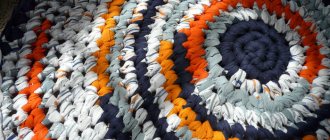
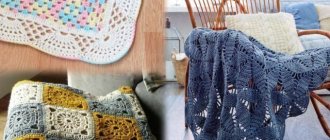
Round crocheted fabric rugs, or “grandmother’s rug”
Many people remember how on long winter evenings grandma made colorful rugs. How cozy it was in a house where there were runners and round items on the floor. It's not difficult to make them. You just need to cut things into strips, tie them and roll them into a ball. You will also need hook number 10. The rug is crocheted in RLS. We collect several VPs and close them in a ring. In the first row we knit 6 sc. In subsequent ones, we double the number of columns.
Thanks to the additions, you will get a flat knitted rug, not a convex or wavy one. If minor defects occur during the manufacturing process, steam and iron the fabric. So easily and simply in a few evenings you will create a wonderful model, it will be suitable for the floor, chair, stool or armchair.
Knitting such a rug is not difficult
Mat for sitting on a chair
The chair cover is made according to the dimensions and shape of its seat. Therefore, this type of product can be presented in different techniques and variations. One of them is a rectangular rug made from leftover threads of different textures.
Tools:
- knitting needles;
- remnants of various yarns;
- hook;
- threads;
- needle.
The step-by-step process of creating a sitting mat can be divided into:
- preparation of threads;
- knitting parts;
- assembly;
- processing.
So, the key elements of the rug are small rectangles measuring 5 by 25 cm. They are made with regular knit stitches. To get a small rug you will need at least 10 of these parts.
Important! Yarns of different types may not adhere well to each other. Therefore, over time, the rug may begin to disintegrate. To prevent this process, the product must be steamed in hot water and then ironed through gauze. This will make the connection between the threads stronger.
The next stage is assembly. All parts have a vertical pattern obtained from the weaving method. Therefore, when assembling the product, you need to pay attention to it and arrange the parts vertically according to the drawing, in a checkerboard pattern.
The finishing touch is tying the edges. This is done using a hook and yarn of one of the shades used inside the product.
A carpet of squares is knitted.
We knit a pentagonal rug according to the pattern
Crocheted rugs can come in different shapes. For example, a pentagonal canvas according to the pattern. A soft knitted yarn will do. We start work with a circle. We cast on 5 VP, 1st row is knitted like this: 3 VP, 2 Dc in the first loop, 2 VP, 3 Dc, 2 VP. We make five rows in a circle, the second one is knitted like the first, only after 3 dcs we knit 1 ch. Next, follow the diagram, and finish the corner of the star separately. The diagram can be easily found on the Internet.
Rugs can be of completely different shapes