A banquette can be called a popular type of furniture for the hallway. Over time, its design has not undergone fundamental changes. This is not only a comfortable pouf on which you can seat guests, but also a stylish piece of furniture; it will look great in the hallway, kitchen, bedroom and living room.
The stores have a huge selection of these soft poufs: with cabinets, shelves, drawers. Each manufacturer designs the banquette at its own discretion. But what to do if you still haven’t found a suitable option for your interior? In this case, the question may arise: how to make a banquette with your own hands?
The basic design of a banquette is quite simple - a stool with a soft seat.
The fabric is folded inward at the edges and secured with staples.
What materials will be needed?
Almost anyone can make a banquette with their own hands. For a beginner in this business, it is better to start working with wood rather than iron, since it is much easier with such material. Wood materials do not require professional skills or significant experience. For the frame you will need wooden material - for example, chipboard or plywood. If the product will stand on legs, you will have to purchase wooden blocks.
Their size depends on the height at which the master plans to place the banquette. You can buy ready-made legs in a store or unscrew them from an old stool.
The structure must be secured using furniture corners, screws and glue. Foam rubber is used for filling, and any fabric you like is used for upholstery. But you need to understand that the fabric must be wear-resistant and very durable so that it does not wear out over time. If you are planning a carriage screed, then it is better to use not only foam rubber, but also padding polyester.
Required tools:
- drill;
- a screwdriver suitable for the selected screws;
- furniture stapler;
- sewing machine;
- screwdriver;
- sandpaper;
- furniture varnish.
Step. tight fitting
Start pinning the fabric (or mat) to the edge of the plywood. It's best to take your time, plan out the angles and make sure the fabric fits on the seat just the way you like it. I decided to sew the two long sides first. The wrap looks like wrapping a gift. I found it was much easier to hold the mat in place and pin it together with extra hands (thanks to my wife).
Once you have the first two sides sewn together, it's time to fold the end edges over and sew them together as well. If you need to cut part of the rug to fit the size of your bench, you can use a little glue to keep the ends from unraveling and fraying.
Main stages of preparation
You can begin work only after creating a drawing of the banquette. Many may think that it is not needed, because the product is simple and does not require many structural parts. However, a drawing will be needed to determine the parameters of the product and compare them with the dimensions of the room in which it will be located. When choosing the type of product, it is better to choose a simple option. It is harder and longer to assemble a bench with a back or a drawer, so for the first time you need to limit yourself to a simple design. Having decided on the model, you need to draw a sketch. It is necessary to mark all the elements and their sizes. Wooden parts are cut out with a jigsaw, and rough edges are smoothed over with sandpaper. Then they can be varnished.
Beautiful ideas for inspiration
A banquette in the house is a useful and roomy thing. They are made not only from wood, but also from metal.
If you need an open storage system for shoes, choose a design with shelves and a soft seat, and if convenience is a priority, give preference to a banquette with a back that looks like a mini-sofa.
Do not deny yourself beauty and comfort when decorating your hallway. If desired, you can make a banquette yourself.
How to make a round pouf with a carriage tie?
A carriage tie is a non-standard way to decorate furniture. It allows you to create three-dimensional surfaces with various patterns. Models decorated in this way are suitable for interiors in a neoclassical style or for modern designs.
Making a pouffe bench is quite easy; a novice craftsman will have no problems. To carry out repair work, a standard set is required:
- hacksaw;
- drill;
- hammer;
- jigsaw (electric is best);
- saw;
- nails and other fasteners;
- glue;
- construction stapler;
- paint, varnish, brushes.
A pencil, ruler and tape measure will be useful, with the help of which you will mark the necessary parts and their location relative to each other. The materials used are plywood and cardboard tubes. To cover the bench you will need fabric, as well as filling for the seat - for example, foam rubber.
Making a pouffe bench with your own hands:
- The tubes are cut into several parts so that they are the same length. Then plywood circles are cut out from which the base will be made. For these purposes, use a jigsaw or (if possible) a band saw.
- Tubes are attached to the base. First, the parts are placed around the perimeter, then the inside is filled with them. When all the tubes are glued, they are wrapped in a layer of foam rubber.
- The base is marked into squares. At the corners of which through holes are drilled (you will need a 10 mm drill).
- Upholstery fabric is threaded through the holes, and decorative buttons are sewn on the front side. The body of the wedge must be completely covered from the outside. At the bottom, the fabric is folded and attached to the plywood - using a construction stapler or nails.
- For the manufacture of curly legs, special equipment is already required - for example, a machine with numerical control. If it is not there, you can order the part in the store or buy it at a hardware store. The legs are painted and varnished for decoration and protection from rotting.
- The legs are attached using a drill and holes cut from the underside of the base.
- At the final stage, finishing work is carried out. The pouf is decorated with decorative rivets and crystals, which are secured with decorative nails of small diameter. Fastening elements are also used for additional fixation of the fabric: they are driven in around the perimeter of the bench every 15 mm.
Tools
To create a high-quality and durable bench, you will need to use the following tools:
- Screwdriver and drill - these tools will be used to make various holes for fasteners.
- A hammer and a screwdriver are indispensable assistants for every carpenter.
- Construction stapler.
- Level – to determine the vertical position of the bench legs.
- Sandpaper - it should be of different hardness.
- Manual milling - in the case when the base of the bench is made of beams.
- Sewing machine – for sewing upholstery and covers. For such work you will also need scissors and a tape measure.
- Chalk.
First you need to cut out the seat. This is necessary because the creation of the remaining structural elements depends on its size. They are subsequently adjusted to fit the seat. In the absence of sufficient experience in creating pieces of furniture, it is necessary to divide all the work over several days. This way every detail will be done with due attention.
Master class on making a soft wooden model
The basis of such furniture is a wooden frame, which is covered with fabric and complemented with a seat with filling. The question of how to assemble a banquette or other products worries many. This is not so difficult to do, and the stages of work on different pieces of furniture will be similar. First, a drawing of the future furniture is drawn.
You can take an existing scheme as a basis or make a completely original one, but the first option is suitable only for those who already have experience.
It is best to create a project in special programs on a computer. This will allow you to see the three-dimensional model and understand how it will look in real life.
The SketchUp application is suitable for this purpose.
To carry out calculations, determine the actual dimensions of the banquette (based on the size of the room and the place where the piece of furniture will be located). A drawing is required in order to clearly determine the number of beams, consumables and fabric that will be used to create furniture.
After the preparatory stage, the actual repair work is carried out. Homemade banquettes are conventionally divided into two types:
- Firstly, they can be made from scratch.
- Secondly, there is the opportunity to make them from unnecessary furniture.
For the last option, an old coffee table will do. A low model with twist-off legs is best.
Before work, you should check whether it can withstand human weight.
The procedure is as follows:
- A square or rectangle of the same size as the tabletop is cut out of foam rubber. 2.5 cm is left along the edges of the material. Ordinary scissors or a construction knife are suitable for cutting foam rubber.
- If you use two layers of material, the bench will be softer. The sides with relief are placed inward and glued.
- The legs are unscrewed from the table and foam rubber is glued to the base. The dimensions of the parts must match completely, otherwise the base of the bench will be uneven. Press down on the filler as hard as possible.
- The next step is to cut out the second lining (using lavsan, non-woven fabric or thin foam rubber). It should be larger in size than the filler. Next, the parts are glued together.
- When finishing a banquette, use a piece of fabric cut with allowances of about 2.5 cm. The upholstery is attached using a construction stapler or decorative nails. The fabric is stretched along the edges, diagonally and towards the corners: it should adhere to the base as tightly as possible.
The edges are secured last. The material is smoothed out as much as possible using an awl or screwdrivers; As a result, there should be no folds left. For the bottom, anti-dust wear-resistant fabric is suitable, which is also attached with staples to the base. Before fastening, the edges of the material are folded.
Choosing a piano chair
join the discussion
Share with your friends
Excellent piano playing requires skill and talent. But incorrect posture and uncomfortable sagging of the arms will hinder even an experienced musician. A special chair, the height of which can be adjusted for each performer, helps you take the necessary pose. We’ll tell you about the types of chairs musicians have and which one is better to choose in our article.
Banquette made from old furniture
An excellent option for a spacious entrance area: a comfortable bench is made from scrap materials and requires almost no cost.
You can leave your bags on it after coming home, as well as change your shoes. Even a beginner can handle the production.
Tools and materials
To create a banquette you will need:
- An old coffee table, cabinet or sideboard with legs, the upper part of which has become unusable or is simply not needed.
- Foam rubber.
- Scissors.
- Spray glue.
- Roulette and ruler.
- Lining fabric.
- Durable upholstery fabric.
- Thin material to protect the bottom, for example calico.
- Furniture stapler.
- Hammer.
Step-by-step instruction
The main value of the original furniture is the unscrewing legs. The base for the bench must support the weight of a person. If it is not strong, you can purchase a furniture board and work with it. Let's start assembling:
1. Unscrew the legs and measure the base. We cut the foam rubber to these dimensions with a margin of 2.5 cm around the perimeter.
2. For softness, you can lay two layers of foam rubber and glue them together. Apply glue to the tabletop and lay it on pieces of foam rubber. We press.
3. We cut the lining fabric to the size of the tabletop, leaving allowances. Glue it to the base, laying it on top.
4. We cut the upholstery fabric so that the allowances cover both the foam and the lining. Smooth it out from the center to the edges. Gradually stretch the fabric, securing it with a furniture stapler, 3-4 staples each. When the upholstery becomes perfectly smooth, we go through the perimeter with a stapler again.
5. We handle the corners as carefully as possible, tucking them so that there are no wrinkles. This requires patience and professionalism.
6. We cut off the anti-dust fabric, turn in the corners and fasten it with staples so that the edges are not visible from the outside. We screw the legs.
7. Legs can be decorated at your discretion. The elegant banquette is ready:
Banquette with hinged lid
Useful and beautiful bench-banquette in a classic style with internal storage space for small items. Made from plywood, boards, baluster legs, polyurethane foam and fabric.
Tools and materials
To make a structure from scratch you will need:
- Plywood 2 pcs.
- Wooden balusters or ready-made furniture legs 4 pcs.
- Narrow boards to fit the size of the desired bench and legs.
- Jigsaw.
- Fasteners, wood glue.
- Nails and hammer.
- Screwdriver and screws.
- Sandpaper or sander.
- Varnish, paint or furniture wax.
- Polyurethane foam or foam rubber.
- Lining (batting).
- Upholstery fabric.
- Subtle matter.
- Furniture stapler.
- Furniture hinges.
Step-by-step instruction
Let's get started:
1. We take the necessary measurements for our hallway. We prepare the wooden elements: two sheets of plywood for the bottom and lid, two short and two long pieces of boards.
2. We fix the balusters to the future box using glue, screws and fasteners.
3. As a result, we get the following frame:
4. We take measurements and cut holes for the legs in the plywood. We secure the bottom of the box with nails.
5. Cover the bench with paint. If you want to leave a wood grain, stain, varnish, wax or wood oil are suitable.
6. Let's start creating the lid. Glue the polyurethane foam to the plywood.
7. We wrap the structure with batting, attach it with a stapler and cut off the excess.
8. We stretch and fix the upholstery. We protect the bottom with thin material.
9. We connect the base and lid with furniture hinges.
10. An aesthetic and neat banquette will decorate any interior.
Ottoman in the interior with different designs
The choice of ottoman option largely depends on the type of room. For the hallway, you should choose frame models with a rigid base. Cylindrical designs help smooth out the angularity of the room. Models with soft upholstery are suitable for a comfortable stay in the living room. To create an accent, you should choose a product made from a material with a bright color palette.
Round poufs are ideal for small spaces. Rectangular ones are recommended to be placed near armchairs and sofas. The product for the kitchen must be made of moisture-resistant fabrics. For a child's room, you need to choose safe, comfortable and soft models.
We hope that our master classes will help you understand in detail how to make a pouf with your own hands from simple materials. Homemade products will add comfort and coziness to any room. Original seats are suitable for different interiors.
Tags
with your own hands banquettes with your own hands with your own hands banquettes with your own hands. with your own hands no. with your own hands you won’t be able to do it Advantages of making your own How to make a banquette in the hallway made by your own Advantages of making a banquette with your own How to make a banquette How to make a banquette The point of making a cutter will make the legs to make it Assembling a banquette with your own Banquette with your own hands a banquette to make a banquette for with your hands banquettes We make the banquette your own.
ottoman
Banquette in the hallway yourself: step-by-step instructions
For the correct design of a bench, it is better for a novice craftsman to resort to the instructions: first you need to construct a round or square seat from plywood and chipboard without corners. Making corners will not be easy for a beginner. If the ottoman needs legs, they are attached to the bottom of the structure with corners, screws and a screwdriver. When creating a model that rests on the armrests, they are cut out in advance before assembling the pivots. They must have special end holes.
You can design carved legs using a hand router. The seat will be soft with foam rubber of the correct shape and fasteners at the bottom of the product. It is better to first glue the canvas to the bottom of the model, and then connect the canvas with a foam roller. To upholster an ottoman, you need to make a layout in advance by throwing fabric over a pattern and stitching it with staples.
- Molding of parts with assembly should be carried out in several stages, since assembly is a complex and responsible job. To avoid damaging the ottoman, you must follow the rules. For example, plywood needs to be drilled with self-tapping screws. The lid should be made evenly over the area of the body, so that later it will not be difficult to upholster the ottoman.
- Assembling the frame must begin by assembling the workbench from blanks and connecting them using self-tapping screws. The finished bottom is attached to the base of the frame. Then, using stain, the color of the structure is made from the inside.
- The sink should be about a few centimeters larger than the base of the pouf. In this case, the parts should be connected and covered with paint texture. To mount the lid, you need to cut out hinges 5 cm smaller than the sides of the body. This is necessary to ensure that the fabric does not tear during tying. The loop is secured to the white fabric and then attached to the sides of the pouf. To make it convenient to perform these actions, the bench must be turned upside down.
- The shell starts at the top. To do this, create the required shape of the lining and fix it with glue on the outside of the lining. If the ottoman does not have a top, foam rubber or other upholstery is attached on top of it. Then the sides are sheathed with this material. Finally, if desired, the product is decorated with decorative elements, for example, tassels, rhinestones, a carriage or a fabric bow.
- If you are creating a banquet with a large number of details, you should make a pattern, which will later form a decorative element of the interior.
Making a bench is not difficult. Everyone will do it to their own taste. The main thing is to do everything according to the scheme and taking into account all the advice of experienced craftsmen, giving preference to fabrics, cut, patterns and other simple materials.
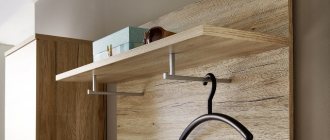
Arrangement of the shelf
Mounting the bottom
Setting the first standards
First you need to place the slats on the sides. To do this, you need to apply glue to the surface of the plank and attach it, then drive in a nail so that the element does not fall off while the glue dries. The resulting structure must be turned over to the right side. Using crosses, we make seams between the planks. After the glue has dried, you need to remove the crosses.
Gluing the strips
Putting crosses
Finished bottom
Return to content
How to update and cover a model with a backrest with leather: step-by-step instructions
The coffee table is not the only piece of furniture that can be given new life. You can also remake an old set, or rather, part of it - a bench with a back. The updated banquette will fit into the new interior after renovation or become its basis.
First, leatherette is selected for the covering, as well as plain fabric for the lining. The size is calculated depending on the area of the furniture (taking into account that there should be room for allowances). The set of tools will be similar to those used to make other types of furniture.
Creating a bench with a back:
- Old furniture is disassembled into parts, upholstery and filling are removed. You can use a flathead screwdriver to remove the staples.
- Parts for the seat and back are cut out of foam rubber. If there is a drawer inside, the lower part is made half a centimeter smaller.
- Fabric for lining is laid out on the floor. There is a filler and a wooden seat on it. The materials are attached to the base using a stapler.
- It is very important that the fabric is stretched as tightly as possible.
- The wooden frame can be painted or stained. First, one layer is applied, after 12 hours - another. When working with stain, place an oilcloth on the floor and put gloves on your hands, since it is difficult to wash off. At the final stage, leatherette is inserted into the side and front backrests of the bench, after which the parts are attached to the base.
- Leatherette is nailed on top of the fabric around the perimeter of the wooden parts. The edges of the upholstery are folded and carefully fixed from the inside.
- If desired, the product is decorated with pillows. You can also sew them yourself by choosing materials of a suitable shade.
- Pillows can be designed in a classic style, or they can be made in the form of animals or objects.
Unusual ideas
Talented craftsmen have long been using old products that have either become unusable or simply lost their relevance to create new pieces of furniture. Therefore, it is not at all necessary to create a product from scratch; you can restore an unnecessary coffee table or stool. The main thing is that you have enough imagination for it. An interesting option for creating a banquette is to use an old wooden box. To do this, you need to remove the locks and hinges from the box. If there are any irregularities, they need to be sanded. The box itself can be painted in a bright color, and the lid can be covered with leather (previously with foam rubber). The inside of the box also needs to be tidied up: sanded and painted.
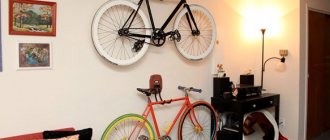
A banquette made from old chairs will look original. To do this, take two chair backs with rear legs and connect them using two bars. The bars need to be secured with corners and self-tapping screws. Then a seat is made from plywood and covered with foam rubber and fabric. A bench made of plastic bottles is this year’s trend. To make such a product, you will need to prepare approximately 40 bottles, cardboard, tape, glue and foam rubber. The bottles are fastened to each other with tape, and then glued to the cut cardboard on both sides: on the bottom and top. After this, the structure is covered with foam rubber and covered with fabric. An old shoe rack can become a multifunctional product. To do this, it needs to be sanded and painted. Then at the top you need to make a seat from a synthetic padding pillow, which is first placed in a cover and attached to the shelf.
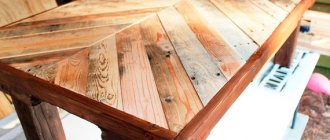
Creating a Bench
Remove the seats and front legs from both chairs using a screwdriver or screwdriver. To create a bench, you only need the backs, front and back legs of the chairs. If you don't want the material to go to waste, carefully disassemble it into pieces. You can use the remaining material for additional parts of the bench.
Now, using the chair legs and other parts, you should take them apart into parts, gluing them together to form a rectangle. In a word, make a rectangular frame connected to each other with screws and nails - at your discretion. We recommend using a drill for better assembly.
Next, if desired, take a saw and cut some more wood, and then add some material to the sides of the future bench to strengthen the side walls. This will allow the bench to be stable.
A student at the Vietnam Police Academy shared how she takes care of her facial skin.
Lost weight: what Sofia Tarasova sacrificed for the sake of “VIA Gra” (new photos)
Smooth and fresh skin: dermaplaning, or why a woman needs to shave her face
Drill two holes on the backs of the chairs. Screw the smaller pieces to the backs of the chairs and then attach the longer pieces of plywood to them.
Make sure the screws are attached evenly for added support. Add a bottom shelf to the bench. It's optional, but it looks awesome. Create another rectangle that is located in the middle of the chair legs at the bottom.
Decorations
To update old furniture and make a banquette out of it, you don’t have to spend a lot of time and effort. The main thing in such a product is softness and the availability of storage space (drawers, shelves). When the transformation of old furniture is already completed, it's time to think about decorations. When translating your ideas and fantasies into reality, you should not limit yourself. After all, the finished banquette should please the eye, and not stand sadly aside. Therefore, it is important to decorate it in such a way that it simultaneously catches the eyes of guests and harmonizes with the interior.
A product made in a classic style is suitable for the hallway. This is especially important if you also need a shoe rack. The purpose of the bench in this case is more for storing shoes than for comfortable sitting on them. At the same time, it should be noticeable and covered in leather or leatherette. In a children's room, such a product can have any style. The main thing is that he takes into account the situation. For a girl, the banquette can be decorated with velvet and voluminous flowers. It will be very interesting if the cover is knitted by mom. For a boy, a product in the shape of a soccer ball will be original. It will be even more interesting if there is space inside to store toys.
In the bedroom, a banquette is often used for beauty in front of a mirror or for reading. Usually it is covered with fabric of calm tones.
Often banquettes are made specifically for weddings. Guests can sit on them very easily and simply. All banquettes and poufs at this event must be made in the same style. So they look very nice against the background of the hall. Satin ribbons or embroidered patterns will look very gentle on them. Of course, this is painstaking work, but such products look impressive.
Types of decorative coatings and finishing of the facades of built-in wardrobes for the living room
Decorating will allow you to make the facade the most advantageous element of the room. The main types of finishes are:
- Mirror. In modern models, all mirrors are covered with shockproof film. This will save you from splinters and the risk of injury. In addition, such a mirror can withstand a heavier load. Visually enlarges the space due to reflection. Another decorative technique is partial tinting or applying a matte pattern;
- Perforated panels. They are of an overhead nature, so the openwork strips are attached to the base of the facade. Very beautiful, but accumulate dust inside the cavities of the pattern;
- Veneer. It consists of very thin sheets of wood or natural stone. They are used to cover the facades. This is also a very expensive way to decorate the interior. It is afraid of moisture and may warp because of it. Requires special care;
- Faux leather. It is made with a complete imitation of natural material and has a soft, pleasant-to-touch surface. The coating is durable, does not fade, and is easy to clean.
The leader in terms of decor is glass. Modern industry has learned to do a lot with it:
- Float glass Durable, smooth and shiny. Defects are not allowed;
- Optiwhite. This is the name given to clarified glass, in which the ability to transmit light is maximized. A wonderful option for films, enamel and color printing;
- Colored;
- Tinted;
- Lakomat. The entire surface is covered with a layer of matte varnish. The more it is, the lower the transparency;
- Matelux. Plain or tinted glass is etched with acids until partial or complete loss of transparency;
- Lakobel. The reverse side is painted in any desired color;
- Matelak. On one side the glass is painted, and on the other it is etched with acid until matte;
- Acrylic glass. Essentially, it is transparent glossy plastic that transmits light no worse than glass. Very durable, will last a long time. It comes with a mirror coating (plexiglass).