Design trends in interior decoration dictate the presence of natural textures and materials. Moreover, you won’t surprise anyone with Chinese consumer goods. To make the furnishings of the room look decent and original, you can either splurge on a designer decoration or make it yourself. Below we will look at how to make lamps from wood yourself and what nuances need to be taken into account.
Advantages and disadvantages of wooden lamps
Like any thing, a wooden lamp has its pros and cons. Advantages of natural interior elements:
- Natural materials are not toxic, unlike plastic and synthetic bases. They do not emit a chemical odor and can be installed in children's rooms.
- Wood is a malleable material; its processing does not require complex equipment or special skills.
- Wooden lamps give the room a cozy feel.
- No need to buy wooden blanks. To find a suitable piece of wood, you can go out of town.
- Wooden lamps are less fragile than glass ones.
How to make a chandelier with your own hands from a plastic bottle
YouTube channel Elyasaf shweka
What do you need
- Plastic bottle with a volume of 20 l;
- knife or other suitable cutting tool;
- gold spray paint;
- black spray paint;
- lamp pendant;
- bulb.
How to do
1. Carefully cut off the top of the bottle. The bottom one will no longer be useful. Remove the cover.
YouTube channel Elyasaf shweka
2. Paint the inside of the plastic with gold paint.
YouTube channel Elyasaf shweka
3. Cover the outside with black paint. Let the future chandelier dry completely.
YouTube channel Elyasaf shweka
4. Place the chandelier on the pendant and screw in the light bulb.
What other options are there?
To make this chandelier, we took a five-liter bottle and decorated it with the remains of wallpaper folded using the origami technique:
How to choose a tree
To make chandeliers from wood with your own hands, any available species will do. Each type has its own characteristics:
- Pine lends itself well to processing and has a striped textured base. Since the growth circles are separated by a resin layer, it is not used for small parts. Resin prevents rotting.
- The cedar has a textured pink base, all the rings are clearly visible in the section. Due to the density of cedar wood, small decorations can be cut.
- Larch is most often used for making furniture. They are dense, stronger than pine, and are not subject to rotting. It has a brown texture when cut.
- Oak has a high density, but can split. Therefore, processing it requires a certain skill. The most valuable bog oak. It has a darker surface but is difficult to process.
Regardless of what breed you take, the main thing is that the workpiece is well dried. The material should not have grooves from parasites, signs of rot or mold.
To determine the quality of a natural material, take several pieces of wood, weigh them, and place them in a container of water. After three hours, take it out and weigh it again. The less water the element has absorbed, the more suitable it is for work.
The root areas have the greatest strength and outward originality. The roots have a uniform texture, without annual rings and bizarre shapes.
Secret of success
Looking at the photo of a homemade floor lamp, it turns out that the secret of their universal adoration lies on the surface. The most original ideas and bold decisions produce the most attractive options.
So, clay, putty, liquid nails, and sealant can be used.
In addition, the floor lamp can be made from a vase, an ordinary umbrella, an old mesh with handles, or, alternatively, a denim skirt.
Step by step instructions
Regardless of the DIY craft option, the wood needs to be prepared. For this purpose, the following are used: fungicidal impregnations, which protect against the development of mold, impregnations to protect against moisture absorption. After treatment with impregnations, the workpieces are well dried.
Simple wooden chandelier
To create a pendant ceiling lamp with your own hands, you can use straight, thick sticks. The main requirement: the diameter must be sufficient to pull the cord. For a do-it-yourself wooden chandelier we will need:
- thick sticks;
- LED Strip Light;
- water-repellent impregnation.
Sequencing:
- drill each stick in the middle;
- cover with impregnation and dry for 24 hours;
- insert LED strip into the holes;
- connect the contacts of each tape to the cable and insulate;
- hang from the ceiling with staples or a hook.
Interesting video on the topic:
Board lamp
To create a lamp from boards you will need:
- Four plank blanks to form a rectangular frame;
- Rectangular mirror as a reflector;
- Varnish, glue;
- Drill.
Sequencing:
- We make a groove on the edge of each board for installing a mirror element.
- We make a rectangular blank from four planks, into which we insert a reflector on one side. Secure with glue.
- We make a hole with a drill in one block, insert a cable with a socket.
- Varnish or paint.
Another option is to insert darkened or multi-colored glass on both sides instead of a mirror. Then the lamp will produce multi-colored light or a muted diffused glow.
Making sconces
For a DIY wall lamp, it is better to choose geometrically correct shapes in the form of a rectangle or square. To create a wooden sconce we will need:
- flat rectangular blanks 2 pcs;
- corner block;
- self-tapping screws;
- drill;
- varnish, glue gun.
What to do:
- We treat the workpieces with fungicidal and water-repellent impregnation. After drying for two days, varnish or paint.
- We connect two blanks in the form of the letter “G” with self-tapping screws.
- Between them we install a corner with glue to impart rigidity.
- We drill a hole in the upper part for the wire and install the base.
The wooden sconce is attached to the wall with self-tapping screws or on a bracket.
We recommend videos on the topic:
An additional lamp can be installed in the L-shaped wall lamp. The color and texture of the wood will be emphasized by the warm, amber shade of the lampshade, and silver-coated glass will add contrast to the texture and color.
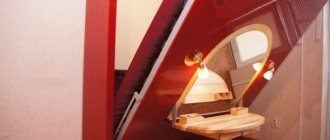
Features of making a floor lamp
You can make a wooden floor lamp with your own hands. For the floor lamp, wooden elements will serve as a stand. If you have a lathe, the stand can be made from cut timber. If there is no processing tool, the base for a floor lamp can be the trunk of a small tree.
In this case, dry the workpiece, remove the bark from the trunk, and sand the surface with sandpaper. Treat with anti-fungal and anti-moisture impregnations. Make a recess on the back side for the wires.
Place the trunk on a stable base. Make a frame on top with wire to install the base. On top you can put a lampshade made of fabric, paper or wood.
Wooden lampshade
You can make it yourself from thin branches. Due to their small diameter they dry faster. Small branches are more suitable for a ceiling chandelier because they have less weight than timber or solid wood. With a combination of thin elements, the lamp has an airy silhouette that does not weigh down the interior and makes the light diffuse, giving it an intimate feel.
For the lampshade you will need:
- branches;
- thick wire;
- glue gun;
- pruner
What we do:
- We sort out the sticks. Depending on the shape, we select either identical and even ones, or, conversely, with a large number of bends.
- We treat the branches with an antiseptic. If there are no special impregnations, soak for a day in a solution of potassium permanganate, dry at room temperature for a week.
- We make a frame from thick stainless wire. The shape can be any: classic trapezoid, ball, rectangle.
- We attach the sticks to the frame with glue. Don't forget to leave a gap for installing the base.
- We coat the wooden lamp with varnish. It will protect against moisture and fungus.
- We insert the lamp socket and secure it with wire.
General rules
There are a huge number of ideas for all kinds of lampshades, chandeliers made from branches, driftwood, and boards. In general, the process of making a chandelier comes down to making a frame, providing wire connections for sockets and elements for fixing the product to the ceiling.
To make the wires invisible, you can make grooves in the wood. Secure the wiring with special plastic ties or staples. If it is invisible from the outside, then there is no need to make grooves. Sometimes the wires are left completely visible - this is a design decision.
Wood must be used without rot or wormholes. If you find some branch or snag in the forest, then inspect it; perhaps it has begun to rot and collapse. This type of wood is completely unsuitable for a chandelier, unless it can be trimmed.
Some people are interested in how to make a beautiful chandelier from driftwood. One idea is this. The driftwood must first be cleaned, peel off the bark if there is any, cut off all excess, and sand the surface. It is best to use such a figured tree for a lamp stand. If you want to make a chandelier, you can hang a piece of driftwood on chains from the ceiling and run a wire to it, threading it through the links. In this design, hollow cylinders can be cut out of wood for cartridges.
You should not pile up a lot of branches, as this will make the chandelier heavier. In addition, such a product does not always look harmonious. A large volume chandelier is better suited for spacious rooms, while in a regular kitchen small lampshades will look more impressive.
Options from timber and driftwood
You can create wooden chandeliers with your own hands from thick solid timber. To do this, we need LED lamps that are built into the suspended ceiling. We measure the required length of the beam. Cover with varnish or stain. We drill round holes in the timber for the diameter of the lamps. We install the emitters with heat-resistant glue.
To attach a timber lamp to the ceiling, you will need several consoles. If you make a stable stand, the lamp turns into a floor version.
View this publication on Instagram
Publication from Maren Kozyreva (@marenka_kozyreva) January 7, 2022 at 6:40 PST
From driftwood you can make unusual DIY table lamps with intricate shapes. To do this, the driftwood is dried and varnished. The base is cut down smoothly or placed on a stable support. A hole for the cable is drilled in the middle, and a base is secured to the top.
A table lamp made of driftwood with one lamp will look laconic. To add more aesthetics to your table lamp, install a lampshade.
How to get an antique effect
Antique wooden lamps are distinguished by their deliberate roughness. Their designs often contain forged metal elements: chains, hoops, candlesticks. In general, wooden chandeliers and antique-style lamps are made from solid solid elements without small parts.
An old hunting-style chandelier might be a wooden cart wheel suspended from the ceiling by a chain. But for such a chandelier you will need ceilings of at least 5 m.
To add an antique flavor, you can artificially age the wood with your own hands. To do this, the workpieces are covered with an uneven layer of Pinotex. After drying, the surface is lightly sanded with a wire brush, then paint is applied unevenly. After several stages of painting and sanding, the surface of the wooden lamp takes on an aged appearance.
We recommend watching a video on the topic:
How to make a chandelier with your own hands from glass bottles
diynetwork.com
What do you need
- Glass bottles;
- glass bottle cutting machine;
- sandpaper;
- decorative wire;
- lamp hangers;
- light bulbs.
How to do
1. Rinse the bottles thoroughly and remove the stickers, if any. Cut the bottom using a machine and go along the edge of the cut with sandpaper.
diynetwork.com
2. Thread the wire into the neck and attach the socket. Randomly wrap the bottles with decorative wire and screw in the light bulbs.
diynetwork.com
What other options are there?
In this master class, bottles were attached to a wooden base and the chandelier was decorated with artificial greenery:
A few words about self-assembly
A big danger when using wooden lamps is fire. To minimize the risk, you need to correctly assemble the craft with your own hands:
- Leave a distance between the lampshade and the lamp of at least 15 cm, and between the base and the base 5–7 cm.
- As a radiation element, use energy-saving lamps up to 15 Watts or LED strip.
- In order not to drill through the workpiece, you can make a groove on the back side for the wires.
- When laying wires in a wooden trench with your own hands, they need to be insulated. Silicone sealant is used for insulation. After drying, it can be painted to match the wood and the wires will be invisible.
The evolution of wooden sconces
The definition of “sconce” means a lamp fixed to the wall using a suspension or bracket. Translated from French, this term means “hand” or “lever”. Depending on the model, the lighting becomes diffused or directed. Traditionally it consists of 3 elements - the body, the lamp and the lampshade. There are both rigid and movable structures.
Tips for caring for the product
To prevent wooden lamps from deforming or cracking, you need to properly care for them:
- Do not allow excessive temperature or humidity in the room.
- Do not place wooden lamps close to heat sources (radiators, fireplaces). The distance to them should be at least 1 m.
- To wipe off dust, use a dry, soft cloth.
- If contaminants cannot be removed, use an aqueous solution of ammonia (1:6).
- To remove scratches and add shine, mix vegetable oil and lemon juice (1:2) and wipe the wooden surface.
How safe is a homemade lampshade?
When manufacturing lamps, floor lamps, chandeliers in accordance with established regulations and standards, it is necessary to calculate the distance between the lamp and the shade. The length of the distance can be different and depends on the power of the thermal radiation of the lamp. You can also use an infrared lamp, which is an economical source of energy and an air disinfectant.
Nobody bothers with the details when making a lampshade for a chandelier on their own. And this is fraught with consequences and can create a fire hazard. In this regard, it is necessary to adhere to certain rules.
After installing the floor lamp/lampshade/plafond, you need to monitor for several days whether the material heats up during the long-term glow of the lamp. If you notice that the lampshade is warm, you may need to change the light bulb to a less powerful one. After this, it is necessary to re-check. And carry it out until the final goal is achieved.
Instructions for safety rules for the manufacture of parts for lighting devices:
- For lighting, use low power lamps. Options include housekeeper lamps or LED lamps. When choosing LED lamps, you need to pay attention to expensive ones, since they have good radiators made of metal and ceramics and dissipate heat well. Light bulbs with economical energy consumption distribute light evenly and have a long service life.
- It is better to buy ceramic cartridges rather than plastic because they are less fire hazardous.
- Never place flammable paper, cardboard, cotton, or synthetic products close to the lamp within seven centimeters.