by Alexey | Crafts Decor Workshop Furniture Cheap Accessories | Monday, October 07, 2019
| Follow Make-Self.net on Facebook and be the first to read our articles. |
If in a small apartment it is not possible to place a closet or a wall, then a small hanger will be the optimal solution to place things and save free usable space.
Original clothes hangers can well serve as decoration - almost all of the hangers shown are made by hand from materials that were on hand and created specifically for home decoration. Plus, these clothes hangers, despite all their originality, are quite capable of performing their usual functions and each of us can make them. Enjoy...
Purpose of the hanger
The main functions that this multifunctional interior item performs:
- Clothes storage. Thanks to her, it does not wrinkle, looks neat and hangs neatly in its place;
- Save time. You can immediately visually assess where and what is located, which allows you to save time and not waste it searching for this or that wardrobe item;
- Proper organization of space in the hallway or corridor, if they do not have a large area, and compact distribution of things in closets.
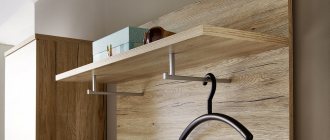
If there are built-in shelves, you can store items in them; there are also options with shelves for shoes and hats.
In addition, there are models that are used as a decorative element, to decorate and give a certain charm to the interior. They are not used for their intended purpose and are made from fragile, impractical materials.
Design tips
- Hooks in a highly artistic style can be used as a piece of furniture even without clothing.
- Metal products are more difficult to process, but the results exceed all expectations.
- Some projects proposed by interior design specialists are not complex, but fully serve their functions and are easy to make.
Making any home crafts yourself brings not only aesthetic satisfaction from the results of your work, but also gives pleasure to the creative process of creating unique things.
Materials and tools
The choice of material depends on your imagination and desire. It can be:
- Wood, which is highly environmentally friendly, since it is a natural raw material;
- Plastic is the most common and versatile option;
- The metal, the most durable of all possible options, should be small in mass;
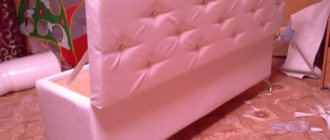
- Plywood, which can be covered with padding polyester and soft fabric.
- You can also use glass, chipboard or cardboard. Each modification has its own advantages and features. A combination of metal with wood and silicone coating are allowed to avoid slipping.
Since there are different types of fabrics, it is advisable to make them yourself or purchase hangers from different materials to maintain their neat appearance. It is important to take into account the sizes (for children they have smaller parameters).
Tools sufficient for manufacturing: tape measure, hooks (from various raw materials), blowtorch (heating device), jigsaw, needle with handle, sandpaper, hand saw, screws, screwdriver, pencil, fitting, screwdriver, measuring instruments, drill, drill bits , stain, screws. In some designs, it is not at all necessary to use all of the listed tools.
Types of design and construction
There are 2 types of structures: designed for storing wardrobe items inside the closet and outside it. The first type is the so-called “standard model,” that is, hangers with a hook. They fit in the closet, the hook is placed on the crossbar, and things hang on hangers. In this model, a crossbar is made between the sides so that trousers (skirts) can be hung over it, which makes it more multifunctional. Some are made with notches so that you can hook clothes with eyelets and straps onto them.
The second type includes those on which coats, jackets, raincoats, and fur coats are usually left:
- Floor-standing – they are a rack with hooks located at different levels. They can be on several legs, with wheels, special places for hangers;
- Built-in - represent a single unit with the rack. Differ in functionality;
- Wall-mounted – this model is usually supplemented with mirrors, shelves, and various accessories. All structures located outside the closet must be able to support the weight of heavy clothing.
Types and purposes of hangers
All models of hangers can be divided into two main groups - open and closed. The items are used to store clothes, thanks to them they remain in impeccable condition. When choosing products, it is necessary to determine their functional load, which depends on the specific type:
- Wall-mounted. They have a horizontal and vertical arrangement, there are corner and frontal models, and can be additionally equipped with a mirror, a shelf, and a crossbar (bar) for the shoulders. The design is suitable for small rooms, ideal for small hallways, public cloakrooms, and small organizations. The number of hooks is selected as needed.
- Floor-standing. Convenient to place in the hallway, bedroom, office, private clinic. There are several types of products - stationary and mobile on wheels, open or closed, transformable. The main selection criterion is stability.
- Hanging. Non-standard option. It is a round horizontal crossbar fixed to the ceiling using hangers. The number of hangers placed on it depends on its length. There are vertical specimens consisting of one or more hooks.
Making a hanger from perforated sheet
Materials used
To make this hanger you will need:
- Perforated panel made of plastic or metal.
- Threads of different colors (floss or knitting yarn).
- 4 hooks ending in a ball.
- Scissors.
Perforated panels can be purchased at specialized construction or furniture stores.
Manufacturing stages:
- The size is determined and the panel of necessary parameters is purchased.
- Select your favorite theme or word for embroidery.
- Embroidery is created on a perforated sheet using existing threads. Once the embroidery is completed, hooks are attached to the panel and it is hung on the wall using the existing holes.
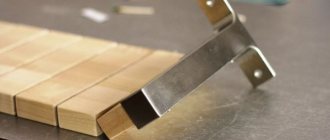
Scissors
Perhaps the most original device for storing clothes in a suspended state is scissors. In order to make such a hanger, you need to attach the ends of the scissors to a metal plate by welding. You can hang clothes on the loose rings.
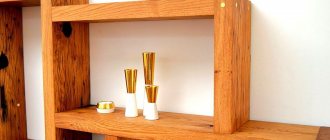
Corner hangers
Many users choose corner hangers. Due to their great popularity, it is worth considering separately all the positive and negative features of these designs. The corner hanger takes up very little space. In addition, it is usually installed in a corner, which allows it to be placed even in the smallest hallways.
Typically, corner hangers have a huge number of hooks and can accommodate a variety of clothes and hats, and you can also hang bags on them. If such a hanger is made for a large family, then it will be quite easy to assign a pair of hooks to everyone and everyone will be able to place their things very conveniently, without mess and fuss.
Corner hangers often turn out to be very functional. You can add an additional shelf or another row of hooks to the top of the structure for storing hats. This entire structure can be made independently from different materials.
Metal clothes hanger
A type of hanger-rack is a “U”-shaped hanger. This detail would be right in the dressing room, in a minimalist Scandinavian interior or loft style. To create a floor hanger with your own hands, you will need copper pipes: this environmentally friendly and durable material has long been used in the interior and does not lose its relevance.
Tools and consumables
To create a floor hanger you will need:
- Epoxy glue.
- Pipes 150 cm (2 pcs).
- Pipes 60 cm (4 pcs).
- Pipe 90 cm.
- Copper tees (2 pcs).
- Copper corners (2 pcs).
Step-by-step instruction
How to make a hanger with your own hands:
- We fasten the two bases on which the product will stand. We take two 60 cm pipes and fix them with glue and a tee. Using the same method, we create a second support.
- Let's make a crossbar. We connect two corner elements with a pipe 90 cm long.
- Before assembling the structure, you need to make sure that the glue has completely dried and held the parts together. We connect one and a half meter pipes by inserting them into tees.
- Attach the top crossbar to the vertical supports.
- The floor hanger is ready. It is so thin and light that, if necessary, it can fit into a closet or dressing room.
The most unusual hangers
Using different materials at hand, you can create amazing original designer items. For example, there are known floor models created in the form of pyramids from old skis or wooden cuttings from garden tools.
Unusual interior items can be created from old rakes, where the role of hooks is played by the teeth of the tool, from leather tems, which are used in the form of loops together with wooden parts, from hangers, on which it is convenient to hang textiles.
A similar towel rack, assembled with your own hands, will be appropriate in the hallway, in the kitchen, and in the bathroom. The wide base of the “hangers” will prevent the fabric from creasing and slipping.
Such a necessary household item as a hanger will find a place in the living room, bedroom, and nursery. This element of furniture will be most in demand in the hallway, bathroom and kitchen. A self-created item can fit into any stylistic interior design.
It will be interesting, unique and low in price. Original homemade products combine especially well with modern decorative elements of high-tech or loft styles.
Wall hanger made of branches in the hallway
A very beautiful and unusual hanger is made from branches and pine boards. This craft will not only surprise guests, but will also serve as an original gift for lovers of eco-style or handmade items.
Tools and materials
To work you will need:
- The board is 2.5 cm thick and 220 cm long.
- Saw.
- Branches (the number depends on their thickness).
- Pencil.
- Roulette or ruler.
- Drill and drill bits.
- Screws.
- Glue for joining boards.
- Putty.
- Sandpaper.
- Paint and brush.
- Wall mount.
Step-by-step instruction
Let's start making a wall hanger for the hallway with our own hands:
- We make markings using a pencil and a ruler, and cut the board. You should get 4 segments: two 70 cm and two 40 cm.
- We assemble the frame and make holes in the boards with a drill. We connect the elements with glue.
- We fix the parts with screws.
- We lay out the branches and determine their size using the finished frame.
- We secure the branches and cut them to the required length.
- Carefully make a hole in the frame and branch. We fix them with a screw. We repeat the steps for other branches.
- We apply putty to eliminate defects and get rid of indentations on the frame.
- Let the putty dry. We process the wooden surface with medium and fine-grain sandpaper.
- We paint the frame and branches in the same tone.
- We fix the fastenings using a drill to the back side of the structure. A hanger made from scrap materials is ready.
Unusual hook options
It is not necessary to purchase ready-made hooks, because they can be made even from scrap materials:
- Perfume caps. Sometimes bottles of perfume end up with rather interesting caps that are a pity to throw away. You can try to give them a second life and use them as hooks.
- Stones. This option will fit perfectly into a hallway decorated in a marine style. For such purposes, you can use various decorative stones brought from the sea.
- Branches. Various branches from trees can serve as an excellent option for making hooks and hangers. Options for making hooks from stones
Leather belts as hanger material
This hanger is similar to the one described in the previous section, but is more versatile. The labor costs for its production are insignificant, and with its originality it can make the interior of the house more attractive.
Required tools, materials and accessories:
- 2 soft leather straps.
- 2 pieces of hard leather.
- Wooden rod.
- S-shaped hooks.
- Needle and thread.
- Scissors.
Stages of work:
- The straps should be cut to the correct size, allowing for the length to wrap around the rod.
- Wrap the straps around the rod and sew them to secure them to the crossbar.
- To disguise the seams, cover the seams with a narrow strap, wrapping it around the main belt, and then sew it.
- Mount the hanger mount in the form of hooks on the wall or ceiling. Use a punch to make holes in the belts and hang the structure on hooks previously driven into the wall or ceiling.
- Place the required number of S-shaped hooks on the horizontal crossbar of the workpiece on which you can hang clothes.
Benefits of using hooks
Using coat hooks in the hallway is not only a functional necessity, but also an opportunity to decorate your interior with unusual details, which designers actively use. In addition, some craftsmen make such structures with their own hands, creating a truly unique product.
The hanger is used even for heavy items
Coat hooks are mounted on a wall or hanger, but the main convenience of such accessories is as follows:
- Hooks do not require much space. If it is not possible to allocate space for installing a cabinet or a large wall shelf, then you can always find a free section of the wall for a hanger with hooks. This is necessary in order to always have access to essential items, including: a bag, a key holder, an umbrella, a raincoat, and outerwear.
- It’s not entirely convenient to hold your things in your hands after coming home; it’s much easier to hang them on hooks and only then put them in their places.
- They have a low cost (if we are talking about simple products), so you don’t have to invest a large amount of money in such a purchase.
- Typically, such products are easy to attach, so anyone can handle such actions.
It is also worth highlighting that the hanger with hooks does not require any special care. If necessary, such a structure can be quickly dismantled.
The simplest hanger design
Copper pipe hanger
This craft will be useful for women who have hats in their wardrobe. In addition to hats, it can be used for drying, storing clothes and decorating the hallway.
The following materials and accessories will be required:
- Copper pipe.
- Clothespins.
- Cord.
- Scissors.
Manufacturing instructions:
- Cut and pass the cord inside the pipe.
- Attach several additional pieces of cord to the pipe, taking into account the minimum required distance between them. When hanging, hats should not wrinkle or become deformed.
- Secure the ends of the cord with the pipe to the ceiling or wall. If necessary, you should first install the fastening elements. Clothespins are attached to pieces of cord hanging from the pipe, with the help of which hats are hung. You can also hang a clothes hanger on the pipe.
Wooden hanger
An unwanted old pallet is suitable for this hanger. If it is not available, a regular board is used.
Required materials and accessories:
- Pallet or cardboard.
- Paint, brush (roller) and paint tray.
- Rubber or plastic gloves.
- Drill, drill.
- Puzzle.
- Grinding machine or emery machine.
- Pencil, tape measure, rags.
Work order
- Preparing the wooden base. A board from a specially prepared pallet or timber is cleaned of dirt and cut to the required size.
- Having previously measured the diameter, drill holes for the hooks.
- Mark the position of the hooks. Their position is not adjustable in any way and is done using a tape measure or ruler.
- The surface of the board is sanded or sanded to remove burrs and reveal the specific grain of the wood.
- To remove dirt, wipe the product with a cloth.
Painting the workpiece
- To prevent rotting, wooden parts are coated with antiseptic compounds.
- Paint the workpiece thoroughly and carefully so that there are no unpainted spots left.
- Considering the direction of the existing corridor style, determine the color of the future product. Acrylic paint is often used for painting.
Installation of fasteners and final assembly
On the back side of the part, install the parts with which the hook will hang on the wall. They should be equidistant from the long edges of the board. The hooks are fixed in pre-drilled holes. Using various techniques, you can decorate the finished product, giving it an original look.
From pallets
The main item for this idea is a wooden pallet. Before you start manufacturing, you need to remove all unnecessary elements (bottom, side wall) using a saw. You will need a part consisting of 4 long planks, fastened on the sides. The pallet must be thoroughly cleaned of odors, and all irregularities must be removed with sandpaper. After the surface is smooth, the product must be painted with wood paint and varnished on top. Use a marker to mark the places where the hooks will be attached. The pallet hanger is quite massive, and you need to choose a reliable fastening. Attach the hooks to the pallet, then use self-tapping screws and a drill to hang the pallet on the wall. Additionally, you can nail the shelves and holders.
From longitudinal and transverse boards
This roomy model will fit shoes, hats, and jackets. To begin, fix 2 longitudinal planks on the wall: bottom and top. The length is determined depending on how wide the shelves you plan to make. Using self-tapping screws, attach transverse bars to the longitudinal boards. The interval should be sufficient to store clothes, the quantity can be any - choose at your discretion. In order to make even fastening of the elements, use a level. To construct the support, use bars (in the future this will be a shelf for shoes). Use metal corners to secure the connections. Also, with their help, secure a shelf on top (for hats, hats, gloves) perpendicular to the longitudinal boards. The final stage will be attaching the hooks and decorating.
Where to install a hanger with hooks?
First, you need to select the wall where the structure will be fixed. At the same time, you should not be negligent about such an important stage, because some walls in modern apartments are made of plasterboard, which means that they can suffer from great severity. Therefore, if outer clothing is supposed to be hung on hooks, then they should only be secured to load-bearing walls.
The next step is to take measurements; you need to mark on the wall where the hanger will be attached. In the future, it is necessary to control the installation work so as not to go beyond these marks.
Even when installing a simple structure, wall measurements are required
Decoration
Unusual design solutions can transform any, even unsightly, hallway. To maintain a classic style, the hanger can be covered with leather (leather substitute) or preserve the natural beauty of wood, if that is what was used. Paint the hooks with bronze or gold paint. Upholster the hangers with velvet and satin fabric. For country music, use additional accessories in the form of horns; they can be cut from wood. For a retro style, the color can be artificially aged; the decoupage technique is used for Provence. Glue or draw flowers, images of birds, landscapes as prints. In a modern interior, experiments, unusual shapes, original accessories, silhouettes, and complex intricate patterns are acceptable. You can decorate and add originality with rhinestones, sequins, handmade decor, drawings, bows. Apply images of your favorite cartoon characters, TV series, books.
Adviсe
- To avoid cracks in the wood, it is recommended to drill holes with a drill before screwing in the screws.
- The diameter of the screw must be larger than that of the drill. Fill the holes with glue in advance, and then screw in the self-tapping screw - this way the product will be able to carry a lot of clothing weight and will be more wear-resistant and strong.
- For metal hangers, use paints and coatings that resist corrosion.
- At the planning stage, it is definitely important to take into account the dimensions of the wall, think about exactly how you will secure the workpieces, taking into account the material from which the wall is made (concrete, wood, plastic).
- All wood blanks must be processed with a grinding machine or sandpaper, at least 2 times: first with a coarse grain, and then with a fine grain.
What types of hooks are there?
In furniture stores you can find a wide range of different hooks, all of them differ according to the following criteria:
- size;
- number of horns;
- method of fastening to the wall;
- color;
- material;
- registration
Table No. 1. Varieties of hooks by number of horns
| Variety, illustration | Description |
| Single-horned | Typically, such products are intended for hanging large items. They are often used for various bags and heavy outerwear. These hooks should be installed in cases where you don’t have to place a large number of different things on one hanger. At the same time, they are able to withstand heavy loads. |
| Double-horned | These are the most popular hanger hooks. In addition, they are durable and can accommodate several items at once. They are most often installed in corridors and bathrooms. |
| Three-horn | Among other similar products, it is considered less popular and durable. Therefore, when installing such products, it is necessary to correctly distribute the load. Otherwise, such a hook will quickly break. |
An equally important criterion is the choice of material from which the hook is made. Therefore, such nuances should be studied before purchasing.
Table No. 2. Materials for making hooks
| Material, illustration | Description |
| Plastic | This is the cheapest option, which can even be secured with double-sided tape. However, it is not suitable for hanging heavy objects. Typically, such hooks are used for various small items. |
| Metal | Metal products are the most reliable and versatile. They can withstand heavy loads. It is important to choose the most durable options. Thus, aluminum hooks can quickly break off because such material is not durable. Therefore, experts recommend purchasing steel products for hanging heavy bags or jackets. |
| Tree | As in the previous case, this material is durable, which is why it is very popular. In addition, various decorative products are most often made from wood. |
Forged hooks made by hand by craftsmen are of particular value. They are treated on top with special substances to protect the metal from corrosion when exposed to high temperature or humidity. Thanks to such actions, they can last for a considerable number of years without requiring special care efforts.
Forged version of hanger with hooks
Video - The process of making forged hooks
Important point! Most often, hooks are fixed at a distance of 150 to 185 centimeters from the floor level. The exact height will depend on the height of the residents. In addition, you can provide hooks at a distance of 90-100 centimeters from the floor for children's clothing.
If years ago hooks were installed in one or more rows, now designers place them in different orders. They look equally stylish on a wooden or metal hanger.
Different hooks can be used on one hanger
The method of attaching the hook plays an important role. It is this criterion that affects the strength of the structure. Therefore, you should decide in advance what items are supposed to be hung.
You can read about attaching shelves to the wall without visible fasteners in our article.
Table No. 3. Types of hook fastenings
| Variety | Description |
| Self-tapping screws, screws, nails | This is the most reliable method of attaching hooks; it is most often used to fix metal products on a hanger. The only downside is the need to drill holes. |
| Glue | Only suitable for installing hooks made of plastic or wood. However, this method of fastening can hardly be called reliable. |
| Double-sided tape, suction cups | As in the previous case, such a mount is more likely to not withstand heavy loads. The only advantage is that the fittings can be moved to another location at any time. |
| Magnets | Fastening hooks in this way is used extremely rarely. This requires the installation of a metal hanger. |
Designer hanger model
From forks
If you want to somehow decorate the hallway and do something creative and unusual with your own hands, feel free to embody your ideas. The idea is very interesting, especially if you want to make a hanger out of forks. At first glance it may seem that this is not entirely possible, but you are wrong.
To create an unusual hanger we will need:
- table forks;
- board;
- self-tapping screws;
- screwdriver;
- spray paint;
- drill;
- pliers;
- varnish;
- brush.
First of all, we will need to bend the forks in a certain way. We do not touch the two outer teeth of the fork, we only bend them slightly for the convenience of further work. And we bend the two teeth in the middle using pliers into two parallel arcs. If you don’t get an equal arc, it’s okay, it will only give your hanger originality. You will also need to slightly bend the fork handle. The bend should be made approximately in the middle of the handle. This can be easily done by hand.
We carry out such actions on each of the forks. By the way, you can choose absolutely any number of forks on your hanger. Just remember to choose a board that is the right length.
To secure the forks to the board, you need to drill small holes in them for screws. The hole should be located slightly below the bottom edge of the fork's bent tines.
Next we prepare our board. If it's a little uneven, we'll have to cut off the ugly edges and sand them down to even out the surface a little. To give the board some shape, grind the corners a little. After this, we coat the board with varnish. It is advisable to do this on the balcony or on the street. Apply the varnish with a brush in one direction and leave until completely dry. If desired, the board can be painted in a color that matches the interior of your hallway. After the varnish on the board has dried, we can attach the forks. The forks are screwed on with self-tapping screws using a screwdriver or screwdriver. After securing the fork legs, bend them slightly upward.
Our fork hanger is ready. All that remains is to drill two holes with which the hanger will be attached to the wall.
From tassels
The idea to make hooks from brushes came to designer Dominic Wilcox when he remembered leaving painting tools in paint after work, only to find them frozen and unusable the next day. Well, brushes with curved bristles can still serve in the household. To make these, you'll need curing paint or some reliable glue.
A selection of interesting ideas
To make a luxurious hanger for a corridor or hallway, just find a slab of the appropriate size and coat it with varnish. The more textured the cut edges are, the more beautiful and rich the final result looks. To create a wall hanger, you will also need hooks: they are attached in one row at the same distance from each other.
A hanger made from rebar looks even more unusual. To weld the structure, you will need special tools and skills. The brutal design of the product will organically fit into a loft-style interior.
An even more crude, but original version of a hanger for a “man’s den” is a structure made of a metal pipe, mounted on the wall. Large construction hooks serve as clothing holders. Such a designer item costs several thousand rubles, but you can make it yourself.
Adherents of eco-style will appreciate this floor hanger made from real branched wood. To turn waste material into a useful and beautiful piece of furniture, you need to select a dry tree trunk of a suitable size and trim off excess branches. Small knots are useful for hanging light items. The bark can be peeled or left, depending on the artist. You can secure the trunk using self-tapping screws, branches, a round piece of wood or a regular board. If the bark is removed, it is best to cover the product with stain, varnish or paint.
A hanger made from a pallet will fit perfectly into a bright modern interior.
For its manufacture, it is recommended to choose a pallet that meets EUR or EPAL standards. First, you need to clean the workpiece from dirt and treat it with a grinder: there should be no dangerous defects on the surface. Then you should saw off the excess parts of the pallet, leaving only the frame. The structure can be painted or varnished. Lastly, you need to fix the hooks for caps, scarves and other things, after which the product can be hung on the wall.
Even the remains of pallets can serve as an original decoration for the hallway: just use your imagination.
A lightweight and inexpensive clothes rack can be assembled from ordinary plastic pipes. If you adhere to a certain manufacturing technology, the design will be strong and durable. For manufacturing you will need pipes with a diameter of 20-25 mm, right angle bends, T-shaped connectors, plugs, caps and glue. If desired, the product can be painted with spray paint with a metallic effect. This stand will look great in a country house or garden.
Types of materials for hangers
Hanger made from cuttings and branches
The main material for this hanger will not require any financial costs and will help the creative self-expression of home owners.
Hangers made from wooden pallets
Numerous photos posted on the Internet will be able to give an idea and help in choosing the desired design drawings for a wall or floor hanger.
The choice of size, shape, color, furniture and hooks is at the discretion of the apartment owners. Often, instead of varnish, the natural color of wood is used, pre-coated with antiseptic agents, then varnish.
Hangers made from improvised materials
Having familiarized yourself with the most successful ideas for homemade hooks, you can draw the following conclusions:
- The frame of the structure can be any material, from boards to rubbish.
- It is not always advisable to buy hooks for hangers. For example, they can be removed from broken hangers.
Hangers from items intended for disposal
Items that have lost their consumable properties can be excellent material for hangers, for example, old ski poles, oars, and so on.
Once again about hooks
Despite the large selection in the retail chain, homemade coat hooks will create a much greater effect and allow you to further decorate the hallway.
Photo gallery
If there is little space in the hallway, this disadvantage can easily be turned into an advantage by creating an open hanger or stand with your own hands. The finished product can become the highlight of the interior. Several more unusual options and original ideas are presented in our gallery.