Despite the fact that the modern market offers a wide range of desks, sometimes it can be difficult to make the right choice.
We offer you to make a table that will fully meet your requirements, room size, and technical specifications.
Advantages
In addition to the desire to make furniture on your own, you need to have a special tool and some skills.
If you have everything, then you can start making a table for a schoolchild. The advantages of making furniture items yourself include:
- saving money;
- the ability to make furniture of any design, size and shape;
- independent selection of consumables.
Pros of a universal table
So, again, this table is great. It will suit you if you are looking for:
- Wear-resistant surface;
- Modern appearance;
- Stability and lack of shaking;
- Speed of purchase, delivery and installation.
And all this for 4,100 rubles, with the opportunity to choose your own accessories.
Of course, you can do it cheaper and cooler - but it will definitely be many times more expensive or longer. Enjoy using it!
Design and construction
Before creating a drawing of future furniture, it is worth deciding on its design and construction. As for design, it’s worth starting from personal preferences, the general style of the room, and the needs of the owner.
The design of the table can also be anything, from simple to complex shape. If you are new to this business, you should start with a simple table shape without any additional elements .
Most often, such products include classic models consisting of a table top, sides and several drawers.
If you don’t doubt your abilities, you can make a table of complex design with:
- numerous drawers;
- shelving;
- add-ons;
- cabinets.
My search for a table
It turns out that buying a simple table, kitchen or computer, is an expensive proposition. For a simple dining room they ask for more than 5,000 rubles, and it is made of simple panels, for more or less decent kitchen ones they ask for around 10,000 rubles, for computer ones - even more.
Having studied the websites of IKEA and other furniture stores, and having visited a dozen stores, I came to the conclusion that good tables cost 15,000 rubles. and higher. The requirements were basic:
- Size for 1-3 people for the kitchen or 1 equipped place with a computer;
- Strong edges and coating of the tabletop itself;
- Stable legs;
- Lack of crossbars and shields under the tabletop to avoid hitting your legs.
I didn’t want to make a table myself - the Internet is full of diagrams of how people with golden hands make comfortable and very cheap tables from timber, furniture panels, laminated chipboard panels. Some people spend 500 rubles on a table, while others spend several thousand and get it done.
I didn’t need all this, I wanted a ready-made table that I could just bring home, or, at most, assemble it like in IKEA. It would also be nice for it to be comfortable and not scary - this became a challenge.
Wood, solid wood or furniture board?
You can build a table for a schoolchild from:
- furniture board . In its production, solid oak, birch, beech, and coniferous species are used. To work with this material, you must have experience in making furniture;
- veneer _ This lumber is classified as natural. Its thickness does not exceed 3 mm. Modern manufacturers offer a wide selection of materials of different textures, textures and colors. The advantages of veneer include: environmental friendliness, strength, affordable cost;
- solid wood. Using an array, you can make an exclusive and original piece of furniture. But keep in mind that working with natural wood requires special tools and experience. The advantages of wood include: mechanical stability, naturalness, and a wide palette of colors. Real furniture makers recommend using solid wood: pine, birch, oak. Solid wood products really look luxurious and noble in any interior.
MDF .
It is environmentally friendly, attractive and easy to use. This material is not afraid of moisture and other negative factors. Thanks to MDF lining with veneer, film and plastic, you can choose any shade and effect;- laminated chipboard. Products made from this material keep their shape for a long time. Laminated chipboard is resistant to high moisture and sudden temperature changes. It is durable and has a long service life. A wide palette of shades opens up endless possibilities for furniture makers. This table can be combined with different shades, and it will become the main decoration of the children's room;
- plywood. This material has been known since ancient times. Modern manufacturers produce plywood from special birch and cherry veneers. This material is not inferior in strength to natural wood. Plywood is in great demand in the manufacture of furniture due to its environmental friendliness, aesthetics and affordable cost.
Advice : if you are a beginner, it is better to opt for chipboard. But for real professionals in this field, you can try making a product from natural solid wood.
What materials are the structures made from?
In addition to the design of the future table, you should decide on the material from which it will be made. We will consider all kinds of options that are chosen by both experienced furniture makers and home craftsmen.
Table 2. Materials used in the manufacture of desks
| View, illustration | Description |
| Expensive, but at the same time safe, environmentally friendly material. There are a huge number of types of wood; they differ from each other not only in shade and structure, but also in rigidity and durability. Therefore, here it is also important to choose the most suitable option, because the table for a schoolchild should be strong. Experienced experts recommend using alder, birch, oak or beech for such purposes. Wood processing plays a big role here. First, it is dried, then impregnated with a special agent to protect it from rotting, and only then covered with stain and varnish. It is worth noting that solid wood structures do not lose their original appearance for decades. |
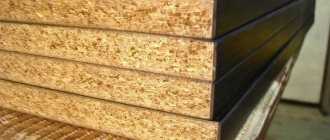
| This material is made by combining shavings with resins, which is why it is not recommended for use in the manufacture of children's furniture. In some cases, these resins release toxic substances, which is extremely dangerous for the health of the child. However, chipboard with a high environmental safety rating can be purchased to reduce the cost of a wooden structure and used in inconspicuous places. |
| This is a more modern and safer material. It is obtained by pressing chips under pressure. This is the option you should choose if you want to replace a natural array and save money. MDF looks aesthetically pleasing, and it can be painted in any color or covered with self-adhesive film. |
| Countertops and other parts of the structure are sometimes made from this material. A glass table will be weightless; it will be ideal for decorating a room in a modern style. The downside is that such a product will be too fragile and not entirely safe, so this type of furniture is unlikely to be suitable for a child. For a high school student, a table made of tempered glass is quite acceptable. |
| This material is often chosen for the manufacture of countertops and various shelves, because it is low in cost. In addition, manufacturers are now producing environmentally friendly types of plastic. The finished structure will be light, and if necessary, it can be moved to another place. One of the advantages is that it is easy to find plastic in various colors on sale. The main disadvantages are the short operating time and the likelihood of a large number of scratches on the surface. |
| Some parts of the desk are mainly made from this material - the legs or the frame for the table top, and the remaining elements are made from wood or other material. Thanks to this combination, you can get a strong, durable structure, the only disadvantage of which is its heavy weight. It is also not possible to process metal at home, so the workpiece must be ordered or purchased in advance. |
Scheme and drawing
After choosing materials for making furniture, it is worth making a drawing of it. Without a well-designed project, it is impossible to make and assemble a table the first time without making mistakes. To make a table drawing without errors, you need to be a specialist in this field. If you do not have such experience, contact professionals or use special computer programs.
When drawing up a drawing, all the nuances are taken into account: the materials used to manufacture the product, its dimensions, and the features of the product.
Help : with the help of a sketch, it will not only be convenient for you to detail the product, but it will also be much easier to assemble the table.
Simple drawing with dimensions
If ease of manufacture is critical to you, we recommend using the following drawing:
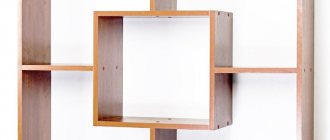
Drawing with boxes
If you value convenience and functionality, take a closer look at this option:
The box itself:
The first workplace for a student
Before you make a desk for a first-grader with your own hands, carefully examine the drawings. You can adjust the height of the legs depending on the height of your child. For example, if students are up to 115 cm tall, tables should be no more than 46 cm, and if students are 130 cm tall, tables should be no more than 50 cm.
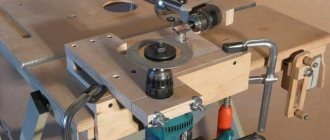
Tools
Tools you will need :
- jigsaw;
- drill;
- hacksaw;
- chisel;
- screwdriver;
- hammer;
- drill.
If you are planning to make a complex model of a table, also prepare:
- milling machine;
- sander;
- clamps.
As for materials , you need to stock up on:
- lumber;
- bolts, nuts, washers;
- self-tapping screws;
- furniture glue;
- dowels;
- paint and brushes;
- liquid nails;
- varnish;
- tape measure;
- pencil;
- building level.
How to make and assemble a table for a schoolchild?
Let's start making and assembling a desk for a schoolchild.
Making furniture begins with cutting the necessary parts . This can be done in special companies, or using a jigsaw. If you contact a specialized company, they will make a competent detailing of the product, according to the created drawing. All you have to do is simply assemble the parts in the right order.
After making all the parts, you can start assembling the children's table.
Attention : when assembling furniture, refer to the drawing.
For a rectangular table, the assembly diagram will be as follows:
We prepare the details : table top, sides, back wall. If the parts are already trimmed, you can begin assembly. If not, carefully trim all the PVC parts with an edge and a hair dryer.- Armed with a drill, we make holes on all parts for fastening . Here again you should carefully check the sketch.
- We start assembly from the side parts. Here it is worth aligning the parts using a building level.
- We connect the parts with furniture screws.
- We put the tabletop on top and tighten it with confirmats.
- We seal the screw caps with special furniture stickers or plastic plugs.
We looked at the manufacture and assembly of a simple table for a schoolchild. If you want to make a more complex model, then the manufacturing process will require the following:
We take the drawing and prepare the materials (in this case, furniture board);- We cut out 8 blanks for product supports.
- Each leg will consist of 2 parts. Therefore, we glue the parts together and secure them with a clamp.
- We cut out recesses inside the frame of the product.
- We make a long groove along the inside of the cross member.
- We make a protrusion on top of the supports using a chisel and a hacksaw.
- We drill holes in the sidewalls with a diameter of 8 mm.
- For assembly accuracy, insert pencils into the holes made and apply them to the legs.
Using wood glue and dowels, we connect the base and support .- Using a router, we make grooves for attaching the upper part of the product.
- We cut out the side walls with a jigsaw according to the drawn sketch.
- Carefully sand all cuts.
- We make grooves in them.
- We cut out the parts for the drawers , glue them together and reinforce them with furniture nails.
- We attach the facing board to the front part of the product using self-tapping screws.
- Carefully coat all attachment points with glue and leave the item until completely dry.
- We fasten the tabletop to the base with legs using dowels.
- We select fittings for the drawers.
- We carry out decorative work if the product was made of plywood, wood or MDF.
Description of work
- Mark one end panel. Then transfer it exactly to the second similar part. The first hole should be 5 cm from the top edge of the parts, for the second, measure 35 cm. The markings of the end walls should completely coincide.
- Using a drill, prepare holes for self-tapping screws in the end parts, so you will not damage the structure of the material during assembly. Then use a larger drill bit to widen the recesses so that the head of the screw does not protrude from the surface of the product when fastening.
- Connect the end panels to the inner wall (which will serve as a stiffening rib) with self-tapping screws, having previously lubricated the joints with glue. When assembling a desk, control the angle of connection of the parts (90 degrees).
- Similarly, you need to make holes in the lid of the product. Keep in mind that the table cover should protrude slightly above the edges of the base elements, which will make the product more convenient to use; also, the indentation will allow you to place the table close to the wall or in a corner, not paying attention to the baseboard. The tabletop can protrude 6.5 cm on the sides, 5 cm in front/back. Screw in the screws.
- Close the screw heads with the prepared plugs.
You will appreciate the advantages of this simple model: it is easy to make with your own hands, it is neat, and you will find a place for such a desk for a first-grader even in a very small room. In addition, desks (like other products) made of chipboard can be painted in any color that matches the interior of the room.
Decoupage
After making and assembling a table with your own hands for a schoolchild, it needs to be decorated . You can do this using:
- coatings with paints and varnishes;
- installing countertops in contrasting shades;
- pasting self-adhesive film;
- decoupage with napkins or wallpaper.
Important : using the decoupage technique you can decorate not only a new piece of furniture, but also an old desk. For decoupage you can use: napkins, wallpaper, drawings, ornaments and pictures.
To give your table an attractive look using decoupage you will need:
- sanding machine or coarse sandpaper;
- brushes for varnish and paint;
- PVA glue;
- acrylic lacquer;
- materials for pasting.
The workflow itself consists of the following sequence:
- Degrease the surface to be treated.
- Cover the table with primer .
- If we are decorating an old table, we cover all its surfaces with the selected tone of paint in two layers. We are waiting for it to dry completely.
- Using glue, we attach the selected pictures and ornaments.
- We cover the product with acrylic varnish . This will keep the table looking attractive for a long time.
Tip : The decoupage technique can also be useful when decorating a laptop table, sand painting, or even a coffee table.
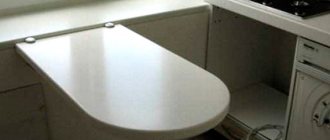
A place to study and write
Time goes by quickly, and now you need something more than just a children's desk. An interesting model for middle and high school students would be a compact table made with your own hands. You can not only do your homework behind it, but also put your student’s writing materials, notebooks, and first scientific projects in numerous drawers and compartments. The option we propose is more suitable for a classic interior.
This desk has a height of 90 cm, a width of about 94 cm, and a depth of 55 cm. If such a product is too tall for you, the length of the legs can be adjusted when making it yourself. This piece of furniture can be classified as furniture of medium complexity. Be attentive to details, and the job description and drawings will help you complete the job and be satisfied with its result.
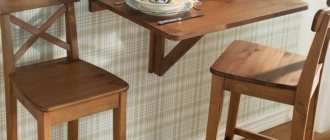
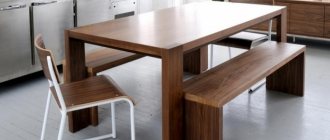
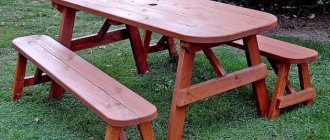
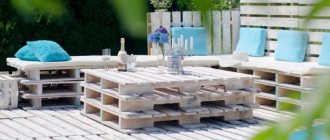
Photo
Regardless of the chosen drawing and material, you can get excellent results: