If you are a lover of everything unusual and stylish, if you like to bring fresh ideas to life, then we suggest you make a chandelier from threads with your own hands. This master class will give impetus to your imagination and teach you a new technique that will help you create an unusual lamp. A few hours of work and your room will literally and figuratively shine with bright light, making you look up and see the reflection of the magical world in a beautiful hand-made lampshade made of threads.
Advantages of using a thread lampshade
The interweaving threads of the lampshade will create fancy shadows on the walls, drawing intricate laces that will tremble and sway from the slightest draft in the room. Warm, calm light will sprinkle small rays and draw smiles on the wallpaper and ceiling. Lightness and weightlessness, the measured swaying of the lamp will give peace and quiet joy, which is akin to light meditation on the shore of a warm, gentle sea.
Look through your yarn baskets and find threads that match the color and texture to match the color scheme of the room. Then your creation will live in a single ensemble with a common atmosphere, and complement and decorate the interior of the room.
Thread to thread, circle by circle... And before your eyes a unique pattern of colored yarn will be born. And you won’t be able to create a second work like this; each thread lampshade will be special and unique. Turn on the music, free your mind from unpleasant thoughts and immerse yourself in the meditative process...
Tools and materials for work
In every home you can find almost all the elements to create such a lampshade:
- For the basic shape of the chandelier, you can choose an inflatable balloon, a small ball or the frame of an old chandelier or sconce, you can also use an embroidery hoop.
- Cotton, linen, wool or mixed threads. White balls made of cotton threads look ideal, this is a win-win option. Choose yarn that matches the main colors of the walls and wallpaper, maybe 2-3 shades darker or lighter. And if you or your children love holidays, then choose bright, rich colors in contrast to the main color.
- Glue (PVA, transparent stationery) and varnish for covering a ball of thread.
- For the electrical part you need a cartridge and a stranded wire 15-20 cm long
- If you want to make a wall sconce, then to work you will need a stand for the sphere, a wire with a plug and a light switch. Consider the lampshade option before starting work.
- If you choose to make a pendant from several small balls, then purchase or take out a garland with light bulbs from the New Year's box.
Frames and their decor
Frames are made from various materials - metal, wood, plastic. To make a metal frame for a lamp with your own hands, use rigid wire.
Using pliers, bending the wire and strengthening it, create the intended shape. Wrap with cloth, paper, jute. If there is a ready-made metal frame, use it. A simple twist changes shape.
A metal mesh reinforced around the frame will give additional impulses for the development of creative thought. The mesh is attached to the frame with plastic clothespins and decorated with three-dimensional elements, for example, plastic fasteners.
Jute or decorative rope is passed through longitudinal and transverse stripes to form a braid, or they are wrapped around the lampshade. If necessary, paint with acrylic paints.
An original and effective way to decorate a lampshade is to use keys from beer cans.
You need to accumulate quite a lot of them. A cut is made in each of the keys, then folded in half to hang on the top wire ring. This creates the first row. The two keys of the top row are hooked to the key of the bottom row, etc.
A simple frame is covered with a beautiful fabric that matches the interior, glued with silicone glue.
Corrugated decorative paper looks good. Plastic bottles and spoons and beads are used. For lovers of patchwork and decoupage, the horizons of practical application of these techniques are opening up. The photo shows lamps made by yourself.
In addition to standard lighting using a socket and a light bulb, a lightweight, sticky LED strip with a 12 V constant voltage source is attached to the inside of any lampshade.
DIY thread chandelier
- We inflate the balloon to the size we need and tie it well with thread. If it deflates, the shape of the lampshade will be sloppy and loose.
- Apply Vaseline or baby cream to the ball. This is done so that the adhesive threads come away from the ball well at the end of the work.
- On the top of the ball (where the tie is), carefully draw a circle with a felt-tip pen with a diameter of 5-7 cm, depending on the size of the lampshade. You can put the glass down and circle it.
- We need to soak the entire thread with glue. To do this, take a plastic cup and make two holes near the base, corresponding to the thickness of the yarn. Pull the end of the thread through the holes.
- Pour glue into a glass. We attach a bobbin of wool or a spool of thread to a pin so that the ball does not roll away during work. Carefully pull the yarn through the cup of glue.
- The creative part begins. We wind the thread evenly around the ball, trying not to make large gaps (unless this is part of your idea). Leave the chuck surface open. Let the ball dry for several hours. You can hang the lampshade by a thread, or put it in a pan so that the shape does not wrinkle.
- After the ball is dry, pierce it with a needle, or release the air from it and remove it from the inner sphere.
If desired, you can coat the lampshade with furniture varnish, this will give it rigidity and shine.
Clothespin lamp
It’s a great idea to use clothespins not only for their intended purpose, but also to create an unusual lamp. To do this you need to prepare:
- Wooden clothespins;
- Glue;
- Plastic tube;
- LED strip.
To begin, the clothespins are freed from the springs and taken apart. Next, each individual element is glued, creating a square. Then, each structure is glued together, and, if desired, each of them is rotated 90 degrees.
While the product is drying, a diode strip is wound around a plastic tube and inserted inside the structure after it has dried.
Assembling the electrical part:
If you have an old lamp, then the task is simplified: take all the components and parts from it. But if it is not there, our instructions will help.
Let's prepare a set of materials:
- socket for an electric lamp;
- cartridge holder;
- the wire.
You can assemble such a structure yourself.
- We cut a hole in the center of the plastic cover to the size of the cartridge. It is advisable to take a cartridge with external threads and clamping rings. Secure the rings at the top and bottom of the lid.
- We attach the cover with the cartridge to the lampshade.
- We connect the wire from the cartridge contacts to the ceiling terminal.
If you want to make a sconce, table lamp or night light, then connect the wire through the switch to the plug for the electrical outlet.
Chandelier assembly
Then everything is very simple:
- Take a pre-prepared plastic jar. A hole is cut in the center.
- The workpiece is painted in a suitable color.
- The cartridge is connected to electrical wires, passed through a hole in the can, and suspended from the ceiling base.
- Next, the selected light bulb is screwed into the socket, and a hand-made lampshade made from yarn is hung from the socket.
- The lighting device is ready!
Expert opinion
Ivan Zaitsev
Lighting specialist, consultant in the building materials department of a large chain of stores
For your information! To free yourself from all these additional operations, a ready-made base for a ceiling chandelier can be purchased at a store of lighting equipment and accessories for it.
Lampshade made of threads on an old chandelier frame
An old lampshade will do the job. It is necessary to remove the old decorative material, correct the shape of the frame if it is deformed, and wind threads of the desired color, thickness and quality.
To make your work look neat, wind the threads evenly covering the area. You can place the yarn randomly, or you can lay the turns diagonally or perpendicular to each other. Thanks to this, beautiful intricate patterns will be created, and they, in turn, will cast fancy shadows on the walls and ceiling.
You don’t have to use glue in this option, but after finishing the work you will need to apply varnish to all layers of thread. Next, dry the frame well for 8 hours.
Useful tips for choosing lamps
Be careful when choosing lamps for lampshades made of threads, since glue, varnish, and threads are flammable materials. They should be kept away from sources of high temperatures and open flames. Therefore, discard the old model incandescent lamp and opt for a fluorescent or LED lamp. They heat up slightly and consume less electricity, and their lighting intensity is higher.
The retail chain has a large selection of LED lamps, both in size and current consumption. A 9 W lamp produces the same light intensity as a 60 W incandescent lamp. They cost more, but with long-term use the savings on energy consumption are obvious. And the most important advantage is that the risk of fire is reduced.
Very often our taste preferences do not find options when choosing chandeliers, lamps or sconces in stores. In this case, you can create an interesting interior object with your own hands, using the proposed ideas and tips.
What to consider when making a night light
Firstly, fire safety requirements must be met. In this regard, a good solution would be to choose LED lighting elements. They have less heat transfer, which will minimize the risk of heating and fire of the night light body.
When choosing materials, consider their environmental safety class. Try to avoid using materials that, when heated, can evaporate harmful and toxic substances. Take this seriously!
Decide on the type of power source: mains, battery, and accumulator. Power supply from the mains seems preferable, but makes the device stationary.
The use of batteries and accumulators will allow you to move the night light in space regardless of the presence of an outlet, but will require their periodic replacement. What's better? Everything here is at your discretion.
Decide where and how the night light will be placed. Will it be wall-mounted, floor-mounted, or hanging?
Taking these nuances into account at the initial stage will save your time and avoid possible difficulties.
What kind of interior would this lamp be suitable for?
A chandelier made of threads can harmoniously fit into any interior of the room. It all depends on the design and material:
- for the corridor, kitchen, the ideal option is made of dense threads or strong rope;
- for a nursery and a high-tech room - made of thin threads in the shape of a ball;
- for the bedroom, kitchen, living room - from knitted napkins.
The chandelier is good for Provence and country style. In this case, it is worth choosing threads of white, brown, yellow, orange, and beige colors. You can decorate the lampshade with butterflies, birds, fruits, leaves - made of thick paper, plastic bottles, foil. Then this lamp will perfectly decorate a country house.
Balloon lampshade for a lamp in a nursery from what is at hand - “My Own Inventor” Magazine
To create a fairy-tale atmosphere in a nursery, a small detail is enough, for example, an interesting decor or an unusual chandelier. An atmospheric decoration, an unusual and very cute solution is a lampshade in the shape of a balloon: it will add airiness and lightness to the room, and in combination with other thematic details, such a solution will look very interesting.
But where can you get such a lampshade? You can do it yourself, it’s simple and unusual, intelligently combining it with the interior of the room, choosing the ideal color palette.
DIY Balloon Chandelier
You can use various materials to create a balloon-shaped lampshade. A paper lantern (you can buy one at Ikea), pieces of paper, magazine or newspaper pages, colored paper or thread are suitable as a base. For any material, the operating principle is similar.
For the balloon you will need:
- White paper;
- Balloon;
- The brush is dense;
- PVA glue;
- Glue gun;
- Thin branches;
- Decoupage varnish;
- Rope;
- Scissors.
As well as elements for decoration and optional paint.
Tools and materials
Before starting creative work on a future chandelier, you need to prepare everything you need. You will need metal wire, threads of the required thickness, fabric, as well as auxiliary tools:
- scissors;
- gloves – medical, rubber, rubber;
- a good quality balloon or other base;
- vegetable oil, Vaseline or fatty cream;
- felt-tip pen;
- a couple of electrical sockets in case you can’t make the correct connection the first time;
- PVC or wallpaper glue;
- light bulb – better LED;
- container for glue.
The selection of materials depends on the specific model of the lamp.
Where to get the base
The threads themselves cannot hold their shape until they become strong with glue. Therefore, the shape of the lamp must be created using a solid base. The basis can be:
- frame from old lamps;
- balloon;
- plastic bottle;
- glass jar, bottle;
- silicone beach ball;
- frame made of metal wire.
The shape of the lampshade will depend on the chosen base. The foundation can be temporary or permanent. If you use metal wire, then in this case it can either remain or be removed after drying the thread dipped in glue.
Attention! For beginners, it is better to use an old frame from a former lamp. Such a product will look more aesthetically pleasing, even if the craftsman has little experience.
Night light made from tin lids
If someone has a large number of tin cans, then you should not throw them away, because the lids from these cans can be used to make an excellent lighting device. To build such an unusual lamp you will need:
- Tin can lids;
- Old night light;
- Wire frame base;
- Wire cutters;
- Bulb.
First, the lids are removed from the jars. A wire frame base in the form of a circle is attached to the old night light at the top and bottom. Then the first caps go around the upper base of the wire, with the ends facing down.
Next, a cut is made at each cap to hook it to the previous one. When the structure reaches the bottom, the same procedure is done as at the top, the lid bends around the wire, thereby ending the chain.
Now we can say with confidence that from almost every available material you can make a lamp that will please the eye, or will simply suit the design.
This article contains only a small part of what lighting fixtures can be made from, but there are many groups on the Internet where there are not only photos of homemade lamps, but also a detailed description of each of them.
Which lamps to choose
For chandeliers made of threads, ordinary incandescent lamps are not very suitable. They can heat the frame, and this is a fire hazard. It is better to choose energy-saving ones. LEDs are preferable. They are more expensive than usual, but do not heat up and do not burn out quickly. Their service life is up to 3 years.
If the choice falls on a regular light bulb, the diameter of the lampshade must be large enough. The distance from the lamp to the wall of the lamp should be at least 7 cm. If even at this distance the lampshade starts to heat up, you will have to replace the light bulb with a less powerful one. In any case, even an ordinary incandescent lamp cannot be more powerful than 100 W if we are talking about a lampshade made of thread or fabric.
How to make a chandelier from threads: making a lampshade with your own hands
You can make a chandelier from threads with your own hands, either using a permanent frame or a temporary one. A permanent frame can be a metal wire, which has been given the appropriate shape, a frame from an old floor lamp. A temporary one is a balloon, a ball, a plastic pot, a jar, a plastic bottle, on which a thread is wound and given rigidity by means of glue.
Ball of thread or yarn
A great idea is to make a lampshade in the shape of a ball. You can make a completely closed ball or a half-open one. You can decorate such a lamp by weaving threads in the macrame style, as well as gluing pre-woven flowers and circles. You can use multiple colors to create a intricate web of patterns. To work you need:
- inflate the balloon to the desired size;
- tie tightly with strong thread;
- Apply vegetable oil or cream over the entire surface of the ball;
- soak the yarn in wallpaper glue (dilute it thicker than according to instructions) or PVC glue (proportion of water to glue 1:3);
- Using a felt-tip pen, draw a circle about 70 mm in diameter on the base of the ball - the entrance for the lamp socket;
- draw a circle for the hole opposite to the cartridge, if this is in the plans;
- secure the end of the thread with glue and begin to wrap the ball without touching the areas marked with a felt-tip pen;
- After winding, secure the end in an inconspicuous place and seal with glue.
You need to wrap it beautifully, evenly and not tightly to get a pattern. When the winding is completed, you can carefully untie the ball and blow air into it. This will allow the threads to stretch better. Once again coat the threads on the ball with glue. And then you need to hang the ball until the yarn dries completely. About a day or two, it all depends on the quality of the threads and the room temperature. Then pierce the ball and remove it through the hole for the lamp. To make the product shine, you can coat it with varnish and let it dry.
Attention! Be sure to lubricate the ball with oil or cream before winding. This will allow you to easily separate the lampshade frame from the ball. If the threads stick to the ball, all your efforts will be in vain.
Knitted lampshade
For such a lampshade you will need several crocheted or knitted napkins of round, oval, square shape and different sizes. Finished napkins should be ironed. Having prepared them for work, you can begin to create a mini-masterpiece. Algorithm of actions:
- inflate the balloon to the required size;
- coat it with rich cream or vegetable oil;
- we place the largest napkin on top, where the entrance of the socket with the light bulb will be;
- We glue the remaining napkins in a circle with a slight overlap.
For this lamp, you can knit napkins of different colors or the same color, from thin threads or from large woolen yarn. There is a lot of room for imagination. It is important to think about their location in advance. Such a lamp can be open or closed in the form of a ball. We must remember that when open, more light will enter the room. The closed one perfectly diffuses light and creates a special play of light.
Fabric shades
This type of lampshade requires a frame. You can use a ready-made one from an old lamp, or make it yourself from wire. Usually they are made in a cylindrical or cone shape.
The choice of fabric depends on your own preferences. Usually they choose cotton, silk, taffeta. It is worth paying attention to the color. One color of fabric will give a cold light, the other will give a warm light. In the first case, it is good to use green or blue fabric, in the second - yellow, orange, red. Designers advise matching the color of the lampshade to the color of the curtains in the room.
If you use a frame from an old lamp, you just need to cover the base with glue and glue the new lampshade. If you use a wire frame, it is better to first paint it and then wrap it with cotton tape.
Step-by-step instructions for making a fabric lampshade:
- Make a template for the future lampshade.
- Attach the resulting template to the frame of the lamp and determine whether everything is done correctly, cut off the excess.
- Cut the fabric, not forgetting the allowances.
- Try on the fabric parts to the frame.
- Sew a lampshade on a machine.
- Press the seams well.
- Apply glue to the fabric.
- Glue the fabric to the frame by stretching it.
You can use ribbons, bows, flowers or lace as decoration.
Fabric lampshades require a rigid frame. If you make it from steel wire, then one tie will not be enough. It is recommended to coat the connected ends with Moment glue, then it will serve reliably and for a long time.
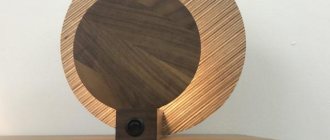
Timeless classic
Massive wooden ceiling chandeliers appeared at the dawn of the 16th century.
Most often, the main ones were tree branches, the edges of which were crowned with candles. Castles of wealthy gentlemen and churches were the main areas of application for unique lighting devices at that time. But if previously wooden chandeliers performed a purely practical lighting function, now more attention is paid to the appearance from the point of view of decorating the room.
The emergence of new practical materials and the development of technology have not weakened interest in natural sources. The tendency to care about the environmental friendliness of surrounding objects and one’s own health is one of the reasons for the growing popularity of wooden chandeliers.
Attention! The variety of forms of wooden lamps allows them to be used not only in traditional rustic styles, but harmoniously introduced into more modern interior trends.
For country and chalets, antique wooden chandeliers are still relevant. Adherents of a brutalist interior can easily assemble a simple chandelier with their own hands, where the frame is a powerful wooden beam.
For lovers of original configurations, the designers have prepared a lot of interesting ideas, many of which can be implemented independently.
Concern about the high cost of a chandelier is justified only when choosing complex configurations that require jewelry processing of the array or where additional expensive materials are present. In most cases, the price is in the budget category.
A variety of wooden chandeliers are shown in the photo:
Peculiarities
The main advantages of wooden lamps are natural material, ease of installation and operation, as well as aesthetic effect. In addition, during the production process such products are coated with special solutions that can prevent deformation of the wood structure and the appearance of harmful insects.
Let's take a closer look at the pros and cons of using wood as the main raw material for making lamps.
Pros:
- Environmental Safety. The tree does not contain synthetic impurities that can be hazardous to human health. Minimal modifications occur to the wood during processing;
- When heated, wood releases a number of substances beneficial to the human body. It has a particularly positive effect on patients suffering from chronic respiratory diseases. Therefore, we can safely say that wood has a healing effect, especially when it comes to coniferous species;
- You can create a product of any shape from wood. Any design idea will be realized in the skillful hands of a master;
- Wide range of applications. Wood lamps are suitable for use in almost all types of interiors. They can have a wide variety of shapes (round, square, timber-shaped, etc.) and fit into all styles;
- Aesthetic effect. A lighting fixture made of wood always looks good and elegant. Wood looks harmonious next to objects made from other materials, such as plastic, glass or metal. Built-in design elements will not create a feeling of clutter, but, on the contrary, will advantageously hold together the entire design structure.
Minuses:
- Low level of fire safety. Wood ignites easily and the fire begins to spread quickly. That is why wooden lamps cannot be placed in rooms where open flame sources are located (fireplaces, gas stoves, etc.);
- Favorable environment for insects. Indeed, wood is a very attractive material for termites and other small pests;
- High sensitivity of the material to sudden temperature changes and changes in environmental humidity levels. Therefore, it is highly undesirable to install wooden lamps in the kitchen or bathroom.
The disadvantages of using wooden lamps can be minimized by using special solutions that protect the wood structure from deformation.
To avoid various dangerous situations when using wooden lighting fixtures, you must follow a number of simple rules:
- install the electrical appliance at a safe distance from open flame sources;
- the ideal place in the house to place a wooden lamp is in rooms with optimal levels of humidity and temperature;
- Do not install incandescent lamps in wooden lighting fixtures - they can heat up to a critical temperature for such lamps, which can cause a fire. Fluorescent, halogen, and LED lamps are ideal for such products.
Kinds
All currently existing models of wooden lamps, depending on the type of construction, can be divided into three groups: ceiling, pendant and spotlight. The most popular are hanging models.
This is due to the recent growing demand for retro. Wooden ceiling lights are good for large rooms or halls; they will add an element of pretentious elegance to the interior. On the contrary, spot models are ideal for small rooms with low ceilings.
By style, wooden lamps can be divided into several categories:
- East style. Wood or solid wood without any additional impurities is used as the raw material. When constructing the design for such products, correct geometric shapes and lines are used, as well as motifs characteristic of Eastern cultures (Persian, Japanese);
- "Country". Models of wooden lamps made in this style do not have excessive elegance and rich decor. In comparison with other similar products, they may look too simple and even a little rough. However, if they are correctly integrated into a suitable interior, they will look advantageous and additionally create a feeling of comfort and unity with nature;
May be interesting How to insulate the front door in a private house: step-by-step instructions
- Retro . These can be quite extravagant products, stylized to resemble deep antiquity, or classic models that duplicate the fashion of the past two centuries;
- Modern . Such lamps are created thanks to an advantageous combination of wood and forged elements (grids, volumetric elements or original patterns);
- Chalet . To create wooden lamps in this style, exclusively natural materials are used. Any element in a chalet-style interior is designed to emphasize the unity of man and nature;
- Classic style. Smooth lines and shapes are used here. Such products are mainly made of wood and stained glass. The design can also take the form of a lampshade;
- "High tech". Creative wooden lamps made in this style consist not only of wood, but also metal, frosted glass and other materials that can reproduce the designer’s fantasies;
- African style. Such models are only suitable for creating different ethnic interiors. They look rough inside other styles.
Antique chandeliers
Antique wooden lamps can be divided into groups according to the category of complexity. Some are presented in simple forms and can be made by hand even by novice craftsmen. Others are more complex and require specific woodworking skills and special processing tools.
Studying the wide range of models will give you an idea of the possible options for decorating a room with a wooden chandelier.
Simple geometric shapes connected by chains and decorated with spotlights are quite easy to assemble yourself. The deliberate roughness of a wooden chandelier will look trendy in a village hut or a simple country house.
Another original model of a wooden chandelier, demonstrating the simplicity of a rustic style. The highlight of the lamp is given by light ropes, contrasting in color with the dark wood. The configuration is ideal for DIY assembly. A suitable setting for such a lamp is a country-style interior.
Another example of a chandelier made of wood with a laconic shape, which does not require significant effort to make yourself. A couple of bars, a small piece of chain and 4 LED lamps - and the main part of the kit is already at hand.
Artificially created contrasting veins are part of the designer’s intention. You can assemble a similar model of a wooden chandelier in one weekend. The only thing you should take care of in advance is to find suitable lampshades; classic glass would be inappropriate here.
Working on numerous lampshade strips can take a lot of time and effort, so if you don’t have enough experience, it’s better to purchase a similar wooden lamp ready-made.
A chandelier that harmoniously combines wood, metal and glass invisibly immerses you in the atmosphere of the Middle Ages, where you can meet a knight in armor along dark corridors. This lamp will fit perfectly into the interior of a spacious living room in a country house or a cafe, where the theme of antiquity is interestingly played out.
Candle-shaped lamps most closely match the antique theme. A ceiling chandelier made of wood with numerous hanging elements can dispel the darkness even in a large room. If you have experience working with metal, you can assemble such a wooden model yourself.
Another example of the designer’s original concept, where everyday objects become an accent element of the interior. A hunting lodge or a village tavern is a suitable place for a non-trivial wooden chandelier.
Comment! Such wooden models on chains are best hung in rooms with high ceilings. The standard height of 2.5 m will not be enough.
Unique torches are another easy way to find yourself in a medieval setting. The finishing of the wooden lamp with metal and the lamp in the shape of candles fully corresponds to the idea of antiquity.
The wooden chandelier, where the frame resembles the steering wheel of a ship, looks more sophisticated than previous examples. A similar wooden model will harmoniously fit into an interior with a Mediterranean style. It will be difficult to translate the idea into reality with your own hands due to the presence of small parts and glass shades.
Experienced craftsmen will be able to make such a chandelier from wood. The lamp is ideal for interiors where eco style prevails.
Horns of wild animals as the frame of a wooden chandelier - what could be more interesting. It will be difficult to find such a base, so it is better to satisfy the idea you like with a ready-made lamp.
The section of antique wood chandeliers ends with a photo of a unique combined example of the two previously presented models.
Assembling the lamp: step-by-step instructions
Once the lampshade is ready, assembling and hanging the lamp is not difficult. We do the following step by step:
- Pull the lamp socket through the hole.
- Pass the fishing line along the edges of the hole for the lamp with the socket and tighten it to the diameter of the socket.
- Check that the lampshade is securely attached to the socket.
- Hang it from the ceiling, connecting the phase, grounding, and neutral wire.
- Connect the wires to the floor lamp if we are talking about a floor or table chandelier.
Lamp made of metal pipes
Schemes for DIY lamps in the loft style are very simple. To create such unusual lighting you need:
- Non-functioning water pipes;
- Incandescent lamps;
- Connecting elements;
- Cable for connecting lamps.
To begin with, a cable is passed through each sample and connecting element, thereby creating a single structure. Next, all the elements are screwed in, and a light bulb with a socket is inserted into each end. It is better to use brass pipes.
Main conclusions
Making a lamp from threads is not difficult; anyone can do it. Especially thanks to our master classes.
- prepare all necessary materials and tools;
- prepare the base;
- follow the manufacturing instructions;
- observe fire safety.
The result of the work will be a unique lamp - a masterpiece that you cannot buy in a store. In skillful hands, simple things can turn into a work of art.
A children's room is an ideal place to embody the most unusual design ideas. Here, as nowhere else, wall painting, shaped furniture or a lamp decorated by the hands of mom and dad would be appropriate. The manufacture of such lamps will be discussed in the article.
Additional recommendations
- Choose high-quality glue that will not turn yellow after drying. Otherwise, the color of the threads will change.
- It is not recommended to hang such lighting fixtures in bathrooms and saunas. Humidity in the air can negatively affect the product. The lampshade will simply become wet, the glue will not hold the thread, and the entire structure will fall apart.
- Use additional decorative elements, glue them to already dried threads. Butterflies or stars, petals or flower buds will only add unusualness and style to your product.
- You can also use openwork napkins, lace or light-transmitting fabrics instead of yarn.
No. 1. Lampshade made of ball and thread
A user of livejournal.ru under the nickname lifestroi explains on his page how to make a simple and cute lampshade from thread and glue.
What you will need for work:
- balloon;
- cotton threads of the desired color;
- PVA glue;
- brush;
- hanging cord;
- bulb;
- scissors;
- needle;
- cotton swabs, cotton wool;
- fatty cream or Vaseline.
1. Cover the table with oilcloth. Inflate the balloon to the size of the future lampshade, tie it securely and treat it with cream.
2. Evenly wrap the ball with thread in a random order in different directions, periodically coating it with glue.
3. Hang the workpiece by the tail overnight to allow the glue to dry. Then peel off the workpiece, carefully pressing the ball with a cotton swab in the spaces between the threads, and deflate the ball.
4. Select the location where the cord will be attached. Make two cross cuts to fit the light bulb inside. At the point where they intersect, cut a small hole that will be smaller in diameter than the fastening element in order to secure the lampshade to it.
5. All that remains is to insert the lamp with the socket inside and hold the edges of the thread with the holder.
This instruction can be improved by replacing the threads with other unusual materials:
No. 2. Cloud chandelier made of cotton wool
A do-it-yourself chandelier for a nursery can be made in the form of a cotton cloud.
What you will need for work:
- LED lamp;
- lampshade or wire frame covered with fabric;
- cotton wool;
- hot glue gun.
1. The first step is to insert the light bulb into the lampshade. For ease of use, you can immediately hang the lamp from the ceiling. Next comes a lot of work: you need to glue the lampshade, tearing off small pieces of cotton wool and gluing each one with a minimum amount of glue.
2. When the frame is completely hidden, you can give the cloud the desired shape by adding cotton wool in certain places. Of course, it is much easier to achieve the desired shape if you use a cloud-shaped frame.
3. With the onset of evening, such a lamp turns from a fluffy cloud into a thundercloud, illuminated by reflections of lightning. If you choose colored light bulbs to make it, it will look even more interesting. You can decorate table and floor lamps in the same way, but “clouds” floating under the ceiling will still look more impressive.
Do you like creating things with your own hands? Read how to make your own highchair
Bottle night light with LEDs
Instructions on how to make a lamp with your own hands using an ordinary glass bottle. For this idea you will need:
- Bottle;
- Garland;
- Glue;
- Pencil;
- Sandpaper;
- Drill with drill;
- Double-sided tape;
- Water;
- Clay.
Once you have prepared the necessary items, you can begin making the night light. Take a washed bottle and mark the hole where the garland will go. A clay ring is placed on the mark to prevent chips and cracks.
When drilling, it is necessary to add water, as the drill and bottle will heat up. All uneven elements are cleaned with sandpaper moistened with water.
After receiving the hole, the garland is threaded, but only the lighting part. It is also necessary to take into account that the light bulbs get very hot, so a garland with LED lamps is used. The regulator remains outside and is installed on the bottle with double-sided tape for convenience.