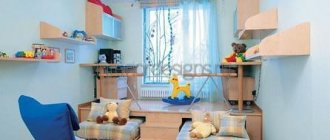
A bed for children is furniture that has to be changed from time to time, given the age of the child. If you can’t buy a crib, you can make it yourself. There are undoubted advantages to this. The crib will meet the child's wishes. If you use high-quality material to create the structure, you will be sure that the furniture will not harm the child’s health. Often finished pieces of furniture emit toxic, unpleasant odors for years. Well, saving money is an important factor in making a decision.
In the article we will look at how to make a comfortable baby crib with your own hands, what you will need for this, we will introduce you to different types of baby beds, we will present the sequence of actions and drawings.
Requirements for homemade furniture
New furniture, especially a crib, should be appropriate for the age and height of the child. In addition, there are a number of requirements that must be met when constructing a bed:
- A crib should be comfortable for a child of any age.
- Reliability of fixation.
- For bunk and loft bed models, a sturdy ladder is a must (and the best option is to have a ladder with handrails).
- All materials used in the work must be environmentally friendly and do not emit harmful toxins during operation. Compositions for decorating surfaces must also be safe for humans.
- After installation there should be no sharp edges protruding beyond the surface of nails, screws or notches.
All work on constructing a children's bed with your own hands must be carried out strictly according to a pre-prepared drawing.
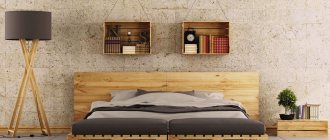
Simple DIY wooden bed. If you don’t drink your husband, go ahead and drink it yourself!
A large, comfortable wooden double bed costs less than 4,000 rubles. Is this possible? Of course available! We will need a minimum set of tools, pine boards, screws and wood oil.
Convenient can be cheap. I made a bed that cost no more than 4,000 rubles.
People often tell me something like: “If we had such tools or such equipment, we would also do a lot of things!” I have a lot of tools in my arsenal that I use in my work. But in this case I would like to show how to make a good bed using only the most necessary ones.
Materials required for work
To make a baby crib with your own hands, you will need the following set of materials and tools:
- Wood or chipboard panels. Plywood and wooden pallets are not suitable for construction work. In this case, we are talking, first of all, about the safety and comfort for the child, which means that only durable materials should be used. A wooden crib is an example of the most reliable and safe furniture.
- Accessories for drawers (special slots, handles, movable rollers).
- Compositions for impregnating surfaces: antiseptic, antipyretic, moisture-resistant and antifungal solutions.
- Finishing materials (stain, transparent acrylic varnish, veneer).
- Bras
- Tape measure, building level, pencil.
- Puzzle.
- For the manufacture and installation of stairs you will need metal pipes and an angle grinder. The staircase frame can also be made of metal structures, which must be coated with an anti-corrosion compound and then painted.
You will also need drawings and diagrams, step-by-step instructions on how to make a children's bed with your own hands.
Project, calculations and creation of a drawing of a children's bed
The project was created taking into account the age of the child. Key points to consider:
- for children under 6 years old, the lower surface can be up to 35 cm high;
- there should be a distance of no more than 10 cm between the bed and the wall;
- between the wall of the bed and the beginning of the bottom of the slats - no more than 12 cm;
- the number of slats is calculated based on the distance between them - 5 cm.
You can make the drawing yourself or draw it in the program. If the bed is made according to standard sizes, then any pattern is taken from the Internet. For example, in the diagrams: a single bed for a 6-year-old child, a teenager and a product with drawers.
Preparatory stage
After calculations and purchase of material, it is necessary to prepare wood and other consumable components:
- if the boards are not processed, then they need to be processed on a machine (width 7 mm, thickness 35 mm);
- timber is used for the frame, which also needs processing and polishing;
- if you plan to coat the product with impregnation, it is better to do this before assembly.
You should start working after sanding and drying all the parts (2-3 days). Paint is used only on a completely finished product.
Making bed parts
Before starting assembly, you need to make parts. And decorate after assembly. Decoration of the finished product should be done at the last stage.
Frame
The frame consists of a back and a base. The dimensions are determined by the size of the mattress. Work process:
- The length of the crossbars from the edged boards is calculated (about 120 cm).
- Using a jigsaw, the material is sawn (2 pieces).
- 25x50 mm strips are installed from the edges of the crossbars using glue and self-tapping screws.
- The corners connect the frame and the headboard.
- The fastening points are lubricated with a mixture of wood putty.
It is better to drill holes closer to the edge so that the board does not burst.
Base
Then the mattress is placed on the base. The material for it must be of increased strength.
How to do:
- Trim 20x20 sheathing boards to fill the base with minimal gaps.
- The installation step to the frame beam is 10 cm, and one beam is attached with two self-tapping screws using glue.
- Holes are drilled in advance, and by turning, the cap is firmly nailed to the tree.
Upon completion of work on the foundation, all slats are well sanded.
Supports
The legs of the bed are placed not only in the corners, but also in the center to make the bed more durable.
Scheme:
- Blanks are cut from 50x100 bars, taking into account that they are longer at the head (8 blanks).
- They are glued in pairs and combined with self-tapping screws.
- The joints are strengthened with putty.
Be sure to sand the legs. Also, to save time, both the frame and legs are treated with impregnation or texture and left to dry.
Headboard
For the headboard, boards with ribs are used. Process:
- Headboard and footboard tables are being prepared.
- A groove is prepared under the headboard for the slats, which is filled with glue.
- The boards are placed in grooves and secured.
- The headboard and footboard are installed and fixed with glue with self-tapping screws.
The headboard can be higher than the footboard, or have the same height.
Assembly and fastening
The assembly of a children's bed is carried out according to the principles:
- All parts are well polished.
- Chips, irregularities, and fastening points are sealed with putty.
- All elements are fastened at a uniform angle of 90 degrees, which is checked with a square.
- At each stage of work, the quality of the future crib is measured by its level. Consistency of measurements allows deficiencies to be corrected in a timely manner.
At the end of the work, the furniture is covered with paint and decor. Use only safe paints and varnishes for interior work.
Decorative design
As a final touch use:
- Parties. Installation purchased or flashed yourself. They are selected in accordance with the general style of the children's room. It can be made either as a whole or as individual pillows.
- Paints, decorative stickers for interiors. They are easy to apply and help quickly give the bed a finished look. Pastel colors are popular: pink and beige for girls, light blue for boys. Stencil designs: car wheel mark, stars, crown, roses.
- Carved frame. They make it in the shape of a crown if the bed is for a daughter, and in the shape of a car if it is for a son. Templates are publicly available.
The main requirement for finishing is environmental friendliness and safety. All parts must be well secured. At the end, when the product is ready for use, you need to once again inspect the frame for chips, roughness and eliminate any defects.
Blueprints
Before you start work, you need to decide what the structure will be and draw up a drawing of it. Before choosing the dimensions of the furniture, you need to decide where it will be installed and accurately measure the room. An important parameter is the size of the mattress that will be laid on the finished product.
If the design is planned to be retractable or folding, then you need to take into account how much space the ottoman will take up when unfolded. It is important to leave some extra space. For example, if the size of the mattress is 1400x2000 mm, then the dimensions of the frame should be 2-3 mm larger, which will allow the mattress to be conveniently placed in the base.
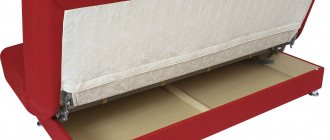
The ottoman bed is a simple design. This is a rectangular sleeping place that consists of a frame, bottom, legs and headboard. If desired, you can also model the side border, thus turning a simple ottoman into a corner one.
Having a drawing of the model and dimensions, it is necessary to develop an assembly diagram - the sequence of interconnection of structural elements. You can look at ready-made assembly diagrams for similar products and adapt them to your own.
Wood for children's bed
Solid wood is the most optimal material for making beds. The types of wood chosen for work are alder and ash. The wood of such species is particularly durable, absolutely safe for humans, and does not contain toxins or allergens.
The tree needs special treatment with moisture-resistant compounds and antiseptics to prevent the development of pathogenic fungi. For decoration you can use veneer, stain, acrylic varnish.
Teachers with the necessary artistic skills can use stencil painting or wood burning as additional decoration. A DIY wooden children's bed has a winning design and special practical properties.
Advantages and disadvantages
This material has both advantages and disadvantages. So, its advantages include its relatively low cost. For example, furniture board costs much less than the same chipboard. But he is more afraid of moisture. By the way, in the bedroom the air humidity is usually moderate, so it is quite possible to use a furniture panel to make a bed without fear for the fate and condition of the product in the future.
Advantages of furniture panels
If we compare furniture panels with natural solid wood, the latter has higher strength characteristics. But to make a solid wood bed, you will have to spend more money. And the furniture panel, thanks to the high-quality connection of its individual elements, still has fairly good strength. However, it is easier to work with it than with wood, due to its special pliability.
Furniture board has a number of advantages
Also furniture panel:
- able to influence the level of humidity in the room;
- hygienic and looks very beautiful;
- not dangerous to humans;
- can be used for many years.
Most often in the store you can find furniture panels made of pine, which is considered an ideal inexpensive option among other coniferous species. Furniture made from such a panel is often placed in the bathroom or kitchen, as well as in offices and other various rooms.
Pine furniture board
On a note! Pine furniture panels can also be used for the production of interior doors.
If we talk specifically about pine boards, they are considered durable, high-quality, and environmentally friendly. Can also be used for interior decoration. They are inexpensive compared to other shields.
The nuances of making a model with drawers
Parents have different views on the designs of children's beds. Some people like the space below to be free for easy cleaning, others prefer functional children's furniture. These parents are wondering how to make a bed with drawers for their children's room with their own hands. To make a drawing of such a bed, you need to consider the following points:
- type of boxes - they come in two types: on rails or on wheels. With laminate flooring, the second option is not entirely suitable, since the percentage of floor wear will be more significant;
- number of boxes, which can vary from 1 to 3;
- bed base, of which there are two. If it is a metal frame with legs (orthopedic base), then a drawer will be formed around it. If the mattress is made of sheets or chipboard, then the bed frame will be load-bearing;
- size (bed length and width), which can be standard or non-standard.
Calculations can be made using a regular standard bed as a basis, but the front bar will be slightly narrower in width so that the built-in drawers have greater depth. An inset design with drawers is considered simpler when assembling furniture. With an orthopedic bed frame, it is necessary to place the drawers at the existing height, and also surround the legs with the frame. With a plug-in design, the recess from the edge of the box increases. The best model is considered to be a bed with drawers on wheels, since in this case you can do without an insert structure. Just install the partition in the center.
We can highlight the design features of beds with drawers:
- drawers are mounted 10 mm above floor level (more with carpets);
- The front strip is attached last, as it covers the inserted structure.
The project of making a cradle with your own hands is individual in nature and depends on the master’s idea. This work involves a number of subtleties and nuances, depending on the purpose of the product, its size, shape and design. Every craftsman faces a huge number of problems when making it. But this work always has a noble goal. All problems are forgotten when you see the happy smile of a child, for whom it was made with great love.
Additional items
The standard model is supplemented with various elements for beauty, space saving, and increased functionality. The boxes are designed at the drawing stage, but they can also be replaced with baskets made of lightweight, safe material. In this case, the height of the furniture should be sufficient for their location under the base.
The sides of the crib are made from safe cotton material. They are made in the form of cartoon characters, animals or simple geometric shapes. Restraints for older children can be made of wood or transparent thick plexiglass - they will prevent the baby from falling while sleeping. It is advisable to think through monolithic elements at the drawing stage.
Children's beds are often created with canopies. They give comfort, tenderness, airiness. The element is secured to the bed using racks or hung from the ceiling. Choose calm, soft shades, translucent fabrics that are pleasant to the touch. For independent sewing you will need: the material itself, scissors, a marking pencil, threads, needles, pins and a pattern. If desired, the canopy is decorated with ruffles, pompoms, and lace.
It is better to attach a children's canopy for little ones to a wide ring and hang it from the ceiling.
A bed for a child should be strong, safe, and reliable. You can independently build a model of any complexity. The algorithm boils down to drawing a drawing, preparing materials, procuring parts, processing and assembly. It all depends on the financial capabilities and skills of the master. Even a basic model must meet safety requirements.
Boxes
Side
Canopy
Beds by type of construction
Depending on the design features, the following types of beds are distinguished:
- Classic children's bed with storage drawers.
- Double room with stairs.
- High bed.
- Do-it-yourself bed-house.
- Transformable children's bed.
Each of the presented models has a number of advantages and difficulties in independent work, however, you can do any options with your own hands.
Slatted bottom
From 45x20 mm bars we make a slatted bed bottom. Some questions arose here regarding reliability, so I decided to shorten the step between the slats and laid an additional board at the headboard. There was no need to buy anything, since the scraps that were not used in the design came in handy.
We fasten the edges of the slats with self-tapping screws and secure them in the center with ribbon. Why can't you use screws everywhere? There is an opinion that with such fixation the bed will creak. We won't take risks.
The slats were not coated with oil, I think there is no need for that
Laying out the mattress. The design turned out to be reliable. Looks nice. Plus, I managed to save a lot of money.
Do you want the same bed? Watch detailed video instructions.
Crib house - a cozy fairy tale
We all remember the unique feeling and mystery of quilted houses. So why not pamper your baby and improve his crib by “building” his own house in which to sleep so comfortably?
To do this, we will make some adjustments when making the back of the crib.
That is, by making the railing a little larger, first using a hacksaw or miter saw, cutting off its upper parts at an angle of 75 0. We attach the bases of the “roof” of our house to them. It is better to fasten the connection with tenons, but given the complexity of such a product, self-tapping screws are also suitable, the main thing is not to forget to glue it.
The last step will be attaching the ridge beam, which will connect the frame base of our “house”.
Thus, the baby will receive a personal “fairy tale” made by the caring hands of her father, and the veil discarded by her mother will serve as a reliable roof.
Put maximum effort, care and love into your product, and this bed will give your child good dreams, and you joy and satisfaction from the work done.
Of course, what we have described does not reflect all the subtleties of the process of making a children's bed with your own hands. During your work, you will encounter many obstacles, and you will have to think through the nuances more than once. However, we hope that the instructions for making simple furniture that can raise parental authority to a new level will be useful to both the young father and the head of a large family.
Rocking chair made of maple with wicker back and seat.
A rather complicated chair to make. The author cut some parts on a CNC machine according to his own drawings, and some had to be finished by hand. The author used maple; it is a fairly hard tree, so to give the necessary shapes it was necessary to soak some parts in boiling water for a long time. The back and seat wrapping requires special work; how to do this, see the step-by-step photos and this video on YouTube
Cable reel rocking chair
If you have a cable reel that does not belong to anyone else, then you can make a rocking chair out of it. Below you can watch a detailed step-by-step master class on how to make such a rocking chair.
As you can see from the photo, the coil is disassembled, a groove for the boards is cut out in the circles, the rods are moved down, under the future seat, and everything is fastened together. It turns out not very difficult and quite a nice chair.
Possible mistakes
Anyone who has not previously encountered furniture making may make a number of mistakes. Here are the most common:
- Using fresh wood. Since over time the material will dry out, become denser and, accordingly, decrease in size, the structure will simply fall apart. For a bed, you should only buy boards that have lain for two to three years in a dry, ventilated area or have been machine dried.
- Neglect of polishing parts. All parts of children's furniture must be properly processed to prevent injury. Since a child can put his hand even in narrow crevices or crawl under the bed, even those inside the frame need to be sanded.
- Connecting parts with bolts. This mounting option looks good anywhere, but not on children's furniture. Under the influence of constant loads, the thread will destroy the structure of the wood fibers, and over time the structure will become loose. To assemble the parts, use the special bolted connections shown in the figure below, and be sure to glue them with wood glue. To strengthen areas subject to the greatest loads, metal ties are used.
Assembling the frame
Let's start with a 40x95 mm board. Let's cut it for the legs. We should get 2 elements 910 mm long and 2 410 mm long.
Blanks for legs
From a 45x20 mm board we will make the perimeter of the bed and a couple of blanks for the headboard. Since the factory cut of the workpieces is not very even, I will trim the workpieces manually with a Japanese saw. The peculiarity of this saw is the presence of very small teeth and their “multi-directionality”. This saw gives a beautiful thin cut.
I trim blanks with a Japanese saw
The following frame parts: 200 cm and 165 cm. We made them from boards with a section of 145x20 mm.
Blanks for the frame
We will also prepare the parts on which the slatted bottom of the bed will rest, an element for supporting the slats and a stand. The stand will be attached to the support in the center of the bed. It is needed for greater reliability.
1. Two sidewalls on which the slatted bottom will rest; 2. a beam in the middle that will take on part of the load
All ends and rough surfaces should be sanded. We will also soften the edges of the details. Using self-tapping screws, we attach the slats to the longitudinal walls of the frame, on which the slatted bottom will rest.
I attach supports for the slatted bottom
To fix the legs to the bed, I used corners that would provide rigidity in the diagonal direction, and in some places I fastened the parts with an oblique screw.
We assemble the structure using corners and fastening with an oblique screw. I highly recommend buying a jig for fastening with an oblique screw. You will need it more than once
The legs of the bed protrude 1 cm above the frame. We make the appropriate markings and attach the parts to the base of the frame. We connect all the parts of the bed frame. I assemble the parts at the headboard using an oblique screw and a corner, at the foot - only with an oblique screw.
Assembling the frame The frame is ready Trying on the slatted bottom. 6 hours have passed since the start of work
The bed frame was coated with teak oil on site. I brushed the boards for the headboard to emphasize the active wood grain. I use nylon brushes for this. As a result, we obtain a surface ready to be coated with a decorative composition.
I didn’t start dusting the apartment. Brushing boards for headboards outdoors
I connect two boards to each other “with an oblique screw” and fix them on the frame.
Connecting the headboard and legs of the bed
Cover the finished frame with oil.
Methods for connecting wooden knots
When making a children's bed, various horizontal and vertical connections and the formation of corners may be necessary. This can be done in several ways. We present some of them for your reference.
1 - half-tree connection; 2 — connection “on the paw”
1 - complete cutting; 2 — the incision is not complete; 3 - steel corner
1 - connection with rectangular dowels; 2 – dovetail dovetail connection; 3 - connection at the root thorn
Preparing all the tools
In addition to lumber, you will need the following tools for manufacturing:
- Saw or hacksaw.
- Self-tapping screws, screws, possibly nails.
- Wood glue.
- Metal corners.
- Be sure to have a tape measure, rulers of different lengths and squares for marking right angles.
For work you will need a saw and other tools.
In addition, in order to create a high-quality product, you need to purchase varnish for wooden surfaces. But keep in mind that for baby furniture you should prefer water-based mixtures that are environmentally friendly. This is a prerequisite to keep the baby healthy.
Processing parts before assembly
According to a pre-prepared drawing, the bed parts are cut out of wood or chipboard (supporting structures, platform for the base, parts for assembling drawers, headboard, elements of the house installation). The edges of the cuts are carefully sanded with sandpaper.
The next stage is special impregnation of surfaces with antiseptic, antipyretic, moisture-resistant and antifungal solutions.
Sources
- https://svoimirykami.guru/detskaya-krovat-svoimi-rukami/
- https://ProDomostroy.ru/detskaya-krovat-svoimi-rukami/
- https://www.rmnt.ru/story/furniture/detskaja-dvuxjarusnaja-krovat-svoimi-rukami-chertezhi-sxemy-foto.1118473/
- https://mblx.ru/kojka/malysh/991-detskaya-krovat-svoimi-rukami.html
- https://severdv.ru/mebel/krovati/kak-sdelat-detskuyu-krovatku-samomu-v-domashnih-usloviyah/
- https://1PoMebeli.ru/detskaya/krovat-svoimi-rukami.html
- https://RemontSpalni.ru/detskaja/detskaja-krovat-svoimi-rukami/
- https://babyplayroom.ru/mebel/detskaya-krovat-svoimi-rukami.html
- https://roomester.ru/interer/detskaya/detskaya-krovatka-svoimi-rukami.html
- https://mebel-sovet.ru/krovati/dlya-rebenka/975-detskaya-svoimi-rukami
- https://weller.ru/svoimi-rukami/detskaya-krovat-svoimi-rukami-chertezhi-i-foto/
- https://berkem.ru/krovati/detskaya-krovat-svoimi-rukami-iz-dereva/
- https://remoo.ru/mebel/detskaya-krovat-svoimi-rukami
- https://kakpostroit.su/detskaya-krovat-iz-dereva-svoimi-rukami/
- https://mebel-v-nsk.ru/krovati/detskaa-krovat-svoimi-rukami-iz-dereva-1000-foto-certezi-posagovye-instrukcii.html