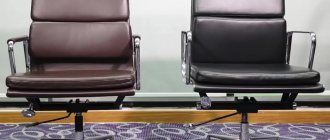
Using a chair-bed instead of full-fledged individual pieces of furniture is important for small spaces. A successful combination of seating and sleeping space allows you to ergonomically organize the space of the room.
The search for options for arranging the space of a small apartment often leads to the idea of buying a folding chair.
Buying such an item may not be profitable. But you can make furniture yourself if you have the skill. Many people who equip their apartments and houses with handmade items know how to make a chair-bed.
The benefits of making it yourself
There are many advantages to making furniture yourself. Firstly, the basic materials that are used can be found at home or in the country, and can also be bought in specialized stores at a price incomparably lower than the finished item.
Blanks made of wood or its derivatives, filler and fabric are what you will need, not counting the various types of fasteners.
To make a chair bed with your own hands, you will spend 2-3 times less money. In addition, you can independently choose the design of the structure, coating material and color scheme.
All this allows you to create an original model that is convenient for your home.
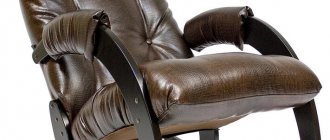
Almost classic furniture
The proposed chair-bed is such a simple piece of furniture that drawings for it are simply not needed. Such furniture can always be offered to a sleeping guest. Traditional materials - wood, plywood, polyurethane, textiles - make it a reliable assistant for many years.
Materials and tools
- High-quality plywood boards and boards will be used to make the frame (backrest, railing, seat base).
- Glazing beads.
- He saw.
- Furniture hinges.
- Self-tapping screws.
- Screws with nuts.
- Electric drill, drills.
- Wood glue.
- Grinding machine with attachments of different granulometric compositions.
- Varnish or paint for finishing.
You can choose the dimensions of the parts yourself, depending on personal preferences and capabilities.
Description of work
- First of all, we assemble the sides of the chair. The frame consists of:
- vertical racks, the lower part of which will serve as legs;
- three intermediate bars;
- bottom rail;
- railing
Before assembly, the components must be processed: remove roughness, smooth out corners. Drill holes in the bottom of the railing, bottom rail, posts. Connect the structure with glazing bead and glue. The main thing is to prepare the same parts for the right and left parts so that they are identical to the mirror.
- Glue the decorative strip onto the railing, moving it 2-3 cm forward.
- Attach the beams with self-tapping screws to the bottom rail inside the railing. This is where the seat base will be mounted.
- The back of the chair can be made in a similar way, but completely symmetrical and without legs. That is, the lower crossbar is installed at the ends of the side. The back of the chair will not be installed on the ground, but higher, so the height of the parts cannot be increased.
- Measure the length of your lower back. This size is the side of 3 identical squares that make up the base and folding bed. The side parts are made of bars, the bottom is made of plywood. For additional structural rigidity, we installed additional rods in the middle of each drawer. All connections are made with self-tapping screws.
- We install hinges on the drawers, 2 for each joint, so that when unfolding, we get a smooth surface.
- We place the folding parts between the side walls. We fasten the bottom drawer with 4 screws to the side walls, as can be seen in the photo.
- Install the backrest of a folding chair. The bottom edge of the backing should be slightly higher than the edge of the top box. So this part will not unfold/fold and will not interfere with the transformation.
Deciding on design and construction
Chair-beds are divided into two main types:
- Frame;
- Frameless.
Intraspecific differences in furniture vary based on the choice of shapes and the mechanism of transformation.
Traditional materials make it a reliable support for many years.
It is more difficult to make a frame model. Furniture with a rigid base is complemented by a layout mechanism, which must be done correctly so that the “liner” can be easily removed and straightened without distortion. A design with two folding legs is easier to make than one with four.
You can choose either a wooden or metal base for the supports.
It is necessary to determine one or another suitable design not only based on the complexity of creation, but also on its style, safety and convenience for relaxation. For a folding chair, you can choose materials such as chipboard, plywood, fabric of a certain density, foam rubber for upholstery, if a frame option is intended.
This furniture is compact and ergonomic, its dimensions are noticeably smaller than a standard bed, but it is not inferior to it in terms of relaxation comfort.
A product without a rigid base can have a streamlined shape, and it is also lighter in weight.
Whatever designs you choose, they must be durable and safe.
Don’t forget about comfort - the body should be comfortable during sleep or daytime rest. Remember that the base must be wide enough - at least 60 cm, otherwise the sleeper will not be able to turn around on the bed.
Today there are many varieties of this furniture. All of them find their place in the interior of the apartment.
Drawing up a drawing
Ready-made drawings and diagrams can be found on various online services. Standard sizes of chair beds range from 60 to 140 cm in width, 170–200 cm in length, 10–40 cm in height. At the same time, compact modules with a width of 60–70 cm (80–90 including armrests), double sofa chairs with a berth of up to 120–140 cm, corner models with two backrests 100 cm wide are conventionally distinguished. The dimensions of the chairs are selected taking into account height owners and room sizes. In conditions of limited space, compact models look best; in rooms with high ceilings, placement of bulky products is allowed.
Features and types of corner sofa bed, selection criteria
If you have instructions with a drawing explaining what and how to assemble the chair from, with a detailed description of the parts, you should not deviate from the recommended dimensions. The slightest changes in the thickness of the materials used can lead to distortion of the structures. When choosing general sketches, the approach changes - the dimensions of the parts of the chair-bed are adjusted to each other, based on calculations. Detailing, special programs, and cardboard templates help to avoid mistakes.
Necessary materials
To make a frame model you will need the following materials:
- chipboard;
- Fiberboard;
- Wooden blocks;
- Plywood;
- Foam rubber;
- Self-tapping screws;
- Loops;
- PVA glue;
- Sandpaper;
- Upholstery fabric.
We will make a simple but convenient thing in everyday life that will be strong and reliable to withstand any unexpected guest.
Other materials can also be used to create the structure. For upholstery, it is better to choose a special fabric that is dense and easy to clean.
For frameless furniture the following are used:
- Material for covers;
- Foam rubber;
- Strong threads.
For upholstery you will need high-quality foam rubber.
Regular door2
Next on the list of brilliant ideas is an ordinary door that everyone has. At least we really hope so. Here, just like with the bed, the system of tying the partner with belts will work. All you need to do is attach them to the top of the door.
One end of the strap has a thicker and weighted end, while the opposite end has a special tie point. It usually acts as an O-ring or D-ring.
When the door is closed, the weighted ends will not be able to slip through the small gap in the door, which ensures that your partner is securely secured in a defenseless position. This manipulation can be done with most modern models. Command and have fun!
But remember that most door systems are not designed to support a person's weight. Use them only for tying, but do not hang them. The fastenings may simply not hold up.
Required Tools
To make your intended piece of furniture correctly and firmly, you will need:
- Long ruler or tape measure;
- Simple pencil;
- Staples and construction stapler;
- Scissors;
- Hacksaw;
- Screwdriver;
- Sewing machine (for making a frameless chair).
Tools for work.
If the design includes decor (for example, in the form of appliqués), then a stencil cut from a thick file folder will be useful.
Product assembly
It is necessary to cut out all the parts, from the sides to the bottom of the folding part.
The latter should be more durable, made of plywood. Sidewalls can be made from pressed sheets. When the sides and back are ready, they are screwed with self-tapping screws to one of the plywood squares - the one that will serve as the base of the entire structure. To fit the dimensions of the square, two identical frame elements are created, each of which must have at least two additional slats in the center. Plywood is stuffed onto the frame. When folded, all three squares should create a single, even structure. 4 bars - legs - are nailed to the frame from below.
The final stage is framing the frame. If you need removable covers, they must be sewn on a machine, adding zippers. The simplest option is to simply put sheets of foam rubber on the seats, then fabric, pull its edges under the frame and attach it to the plywood with a construction stapler. The sides, armrests, and back are upholstered in the same way.
Subscribe to our Social networks
Manufacturing process: step-by-step instructions
Before starting work, it is imperative to complete a drawing of the product, where the exact dimensions will be indicated and parts of the model will be drawn in detail.
Product drawing.
To make a frame-type folding chair you will need a lot of space. Choose a spacious room.
First we make the body:
- Measure out sheets of chipboard, fiberboard and plywood.
The first ones will go to the sides, back and bottom. Plywood – for the folding part. Saw off the excess along the marked lines. - Connect the side parts (aka support parts) to the bottom and back using self-tapping screws.
We connect all the parts with self-tapping screws and glue them well.
Then we start creating the folding part. Make 2 frames from beams the width and length of the seat. Attach sheets of plywood to them.
Connect the frames using long loops.
To ensure that the chair reclines evenly, use a metal transformation mechanism - attach steel contours with through hinges to the sides.
The main thing is how to make a chair bed yourself, so that the parts folded together form a beautiful and even square.
This cute chair bed that we made with our own hands can be painted, varnished, or upholstered with foam rubber and stylish, beautiful fabric.
The next step will be plating:
- Glue pieces of foam rubber cut to size, 2-3 cm high, to the top of the frame.
- Lay the fabric evenly and use a stapler to attach it to the beams at the bottom.
- The sides can also be upholstered using a thin layer of foam rubber.
For a folding structure you will need legs.
They are made in the middle and front part of the frame, level with the bottom point of the bottom or slightly higher. For armrests, use wide bars sanded with sandpaper.
The seat easily unfolds without clinging to the sides, and just as quickly turns into a chair.
The frameless model is much easier to manufacture. It requires foam rubber, which can be used in 2-3 layers, and dense fabric like a “raincoat” (or less slippery). The cut material is sewn on several sides. the remaining opening is intended to be placed inside the foam.
In order to prepare the chair-bed for sleeping, you should unfasten the straps, then pull the top pillow towards you.
Equip the unsewn section with a zipper. For more practical use of the frameless sample, make an outer case.
Since it does not have a rigid base, the backrest should be placed against the wall
Frameless option at home
This piece of furniture looks stylish and original. It will become a bright decoration for a children's room or living room. The main advantages of a frameless chair-bed include:
- mobility design. It can be moved from one place to another without any physical effort;
- light weight, thanks to the absence of wooden elements, even a small child can easily and simply fold and unfold such furniture;
- practicality and reliability. If you make a separate cover for such a product, the chair will serve you for many years;
- safety. Due to the absence of metal and wooden elements, it is impossible to get hurt or hurt with this piece of furniture. Therefore, it is often made for young children.
This furniture consists of the following parts:
- backs;
- belts;
- strips of fabric connecting pillows;
- lower seat and middle and upper parts.
For work we will need:
- foam;
- thick upholstery fabric;
- belts;
- sewing machine;
- flash of lightning.
The manufacturing process will look like this:
- We cut the fabric according to the design and sew it on several sides, leaving a hole for filling with foam rubber. The standard dimensions of this piece of furniture are 40 x 60 x 10 cm.
- Sew a zipper in the remaining place where the foam rubber is filled.
- We prepare a strip of fabric that will hold the pillow frame and sew it to the covers.
- Sew the straps to the side pillows. They are necessary for fixing furniture when folded.
Since the frameless model does not have a rigid base, it is better to place the back of the chair against the wall.
What is foldable sleeping furniture: Unfasten the straps and pull the top pillow towards you. The length of the mattress will be 170 – 190 cm.
Tip: In order for the frameless chair to serve you as long as possible, it is recommended to make a removable cover that will be easy to clean and wash, and if necessary, it can be replaced with a new one.
Decorating a chair-bed
In order to give the finished product a stylish and original look, use your imagination.
The design of the created item can be improved through the use of interesting prints and appliqués.
Tapestries look good from the fabrics used for decoration. If you want to make the upholstery softer to the touch, choose materials with a pile like faux velvet.
This material is also more durable and durable.
It is better to sew appliqués before the upholstery process. To keep them neat, prepare in advance stencils and scraps of different colors, matched to or contrasting with the main color scheme.
For a frame-type folding chair, the front legs, which are not retractable in all models, can be made carved or metal.
To prevent the surface from collecting dust and rubbing, use a cape or sew a special cover. Carpeting of the appropriate size and faux fur are also suitable - this will make sitting in the chair more comfortable and cozy. Another option is to sew replaceable covers from lightweight fabric.
This will make caring for the upholstery easier.
Recommendations
Here are some useful tips that will make it even easier to make a chair from wood with your own hands. To begin with, let's say that before creating any structure made of wood, you should carefully think about how it will roughly look and what you want to see it as. This will allow you to at least approximately determine how much of a particular material you need.
Another important aspect is that you should not neglect such a thing as drawings. For some reason, many people do not pay enough attention to them, which is why they end up with crooked chairs and armchairs. In this matter, everything should be thought through to the smallest detail and the parameters of each detail should be checked. It would not be superfluous to say that it would be better to use a circular saw for cutting longitudinal parts, and a jigsaw for transverse parts.
Another important issue concerns the connection of the chair elements. Everything is quite simple here. In connections where the main load occurs, it is better to use self-tapping screws or self-tapping screws. But in other cases, you can use adhesive or chopsticks made of wood. Choppers can also be used to secure the upper parts.
An important point will be the selection of materials for processing. But here everything will depend on how high-quality the wood is used. If it is “clean” and has no defects, then it will be enough to treat it with stain and apply varnish. But if there are stains on it and there are some defects, then you should putty them, then cover them with a primer and only then paint. Another important point is that you should not paint the wood right away. It must be pre-treated with drying oil. Otherwise, it will quickly be absorbed into the surface. Then there will be bald spots, which will ruin the appearance of the chair.
Chair-bed in the interior – 50 photo ideas:
PreviousArmchairsDo-it-yourself rocking chair
Next
ArmchairsHow to fix an office chair if it falls down?
Which ones can you create yourself?
Anyone can make a chair at home, the main thing is to be able to work with tools and have imagination. Having purchased the necessary materials and found free time, you can begin creating drawings, work plans and procuring parts.
Next comes the process of assembling the product, which takes place taking into account the plan.
Before you start making a chair, you need to determine its type. Not all chairs can be made independently, and some are completely beyond the control of a beginner.
Types of chairs that can be made independently:
- The soft one consists of a frame, filling and upholstery. This view is suitable for a harmonious relaxation, where you can sit with an interesting book or a mug of coffee.
- The foldable consists of a lightweight yet durable frame that can be folded for storage or transport. This option will become indispensable when traveling outdoors or when visiting unplanned guests.
- Kentucky - a garden chair consisting of bars and wire. This is a fairly easy-to-make type that looks great in a summer cottage.
- The bucket is a sports seat with good fixation, which is achieved due to the possibility of attaching several seat belts.
- Futon is a fairly popular model that turns from a comfortable chair into a mattress with a slight movement of the hand.
- The sliding one performs two important functions: a full-fledged bed and a comfortable seat. Ideal option for a small room.
- On wheels, it can be moved around the room thanks to its stable wheels. This chair can be used to travel throughout the apartment, which may be necessary for elderly or sick people.
- With a high back – thanks to its design, this chair is comfortable to sit in for quite a long time. There are many models with a high back, including soft and hard products.
Basic requirements for a balcony sofa
The specifics of the loggia dictate special rules for the selection of furniture and interior items. Due to the small space and constant exposure to sunlight, the sofa must meet the following basic requirements:
Pros and cons of making your own sofa
To make the final choice in favor of creating a sofa for the balcony, you need to familiarize yourself with the nuances of independently arranging this type of structure. The main advantages include:
There are no obvious disadvantages to self-development. The only thing that needs to be taken into account is that full responsibility for the quality of the furniture and its service life lies with the master. Therefore, when making a balcony sofa, craftsmen recommend that you carefully consider the choice of material, installation and assembly process.
Photo selection of interesting ideas for self-made balcony sofas
The choice of a suitable sofa for the balcony depends on the dimensions of the room and the imagination of the master.
A folding sofa on the balcony is not only comfortable furniture for daytime activities, but also an additional sleeping place. A prerequisite for such a design is that after unfolding, the dimensions of the furniture should not block the passage. If there is sufficient heating on the loggia, such a sofa can be used for sleeping not only in the summer.
A sofa with drawers is a practical option for storing a large number of things on the balcony. The competent design of retractable furniture mechanisms allows you to place conservation items, seasonal household items and clothing. Such a sofa frees up the main space of the apartment and makes the loggia functional.
A narrow balcony will be organically complemented by a corner sofa with soft upholstery. This sofa gives the loggia a finished look of home comfort. The static corner design is quite variable: it can accommodate three to four people in a sitting position and a full-fledged place for one person to sleep. Adding a floor lamp, folding table or footstool to the loggia gives the room soft comfort.
One of the most budget-friendly options is to make a sofa from simple pallets. This design is relevant for a fairly wide loggia space. Installing strong wooden pallets and placing soft pillows on this base allows you to create a sofa without complicated assembly.
Choosing a wood species
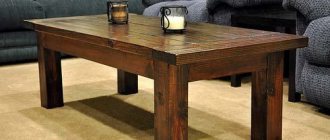
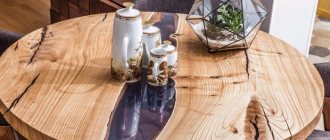
The choice of wood when making furniture plays an important role. Each tree can be processed differently and has different textures and technical qualities. The following types of wood are suitable for this:
Oak. An oak chair will delight users with its high strength, wear resistance, and durability. It will harmoniously fit into a classic interior and will look noble and elegant in it .
A rich variety of wood colors allows you to choose an option for any interior.- Beech.
Beech furniture goes well with classic motifs. Due to the elasticity of the material, the product is given curved and complex shapes. Beech is easy to process. It sticks well and dries quickly. Its positive qualities include: wear resistance, strength, beautiful texture on cuts, the ability to maintain natural color even after varnishing. - Nut. This breed is distinguished by an abundance of shades from red-brown, light, greenish-gray to yellowish-gray. Black walnut, used in the manufacture of exclusive and expensive furniture, is considered the most valuable . Thanks to the solid texture, complex openwork carvings are made on the array. During the work process, no chips are formed on the wood.
Budget options include products made from:
- Pines. This tree has good qualities and an affordable price. The material copes well with sudden temperature changes. Therefore it is suitable for making garden furniture.
- Birches. Lumber lends itself well to processing, which allows you to create real masterpieces in the furniture industry. The chair can be decorated with decorative carvings, reliefs and ornaments.
- Alders.
It is easy to carve, dries quickly, polishes well and practically does not warp. But when used in the fresh air, the wood acquires a dark shade . Therefore, it is better to paint it with paint. - Ash. This material bends well, practically does not crack when dried, and when bleached it acquires the original shade of gray hair. But ash is poorly polished and is quickly damaged by wormholes . When making furniture items from ash, the wood must be treated with antiseptics.
Tip : to make a durable piece of furniture, it is recommended not to skimp on consumables.
Frame
Let's call this stage the chair frame.
Of course, almost the entire skeleton will be covered with foam rubber and fabric. Only part of the legs will remain visible.
The back legs are the most important parts of a wooden chair because you need to make them at some angle.
Without thinking for a long time, to make the back part of the chair structure, we took an ordinary dining chair that was available, although it did not have a seat. But he was well suited for the role of template. You can take some old grandma's chair.
Markings were made on a 50x150 board.
Be sure to mark the level of the seat of the chair, make it the same as for the chair. In this case it was approximately 410 mm from the floor.
Use a jigsaw to cut out the legs of a homemade fireplace chair.
Then we used the finished part as a template to make three more legs, because we are making two chairs at once with our own hands from scrap materials.
The front legs will be straight and square - 55x55 mm. To obtain such a cross-section, you can glue the boards together and then saw them to the required size. We glued 2 pairs of 2 boards, 120 mm wide and 30 mm thick.
While the front legs were drying, we finished assembling the back frame - we made the upper part, the upper part of which has a slight rounding. Then we made the rear seat support bar.
We assembled all parts of the back using self-tapping screws 60 mm long. Before tightening the screws, it is necessary to apply wood glue to all connections and drill mounting holes.
We continue to make our wooden chair with our own hands. The blanks for the front legs were glued together and dried. We saw them down to the required size of 55×55 mm.
Place them on the backrest structure and check the length of the legs and whether they lie on the same surface so that the chair does not wobble during use. If the lengths are different, then align them.
The ends of the front legs need to be narrowed. To do this, make small bevels on all four sides.
Make side bars 400 mm long and secure them as shown in the figure below. For better fixation, it is advisable to use screwing screws at an angle, having previously made auxiliary holes.
Install the front seat support bar. It is the same length as the back bar.
To make the English armchair with ears strong, we prepared four parts, the ends of which were cut at an angle of 45 degrees. We applied glue and secured them with screws in the corners of the frame.
Then we cut a piece of plywood to fit the size of the seat. Plywood thickness 18 mm. We secured them with self-tapping screws, after applying glue.
If you want to make the seat softer, then instead of plywood you need to use furniture textile tapes. We will use such ribbons when making the backrest.
The chair must have armrests, otherwise it will be a chair. Let's look at the stages of their manufacture. The front post and the armrest crossbar must be installed at a right angle. Determine the height of the armrest yourself, it will be 200-300 mm. The cross-section of the bars is square - 50×50 mm.
Secure them with self-tapping screws, screwing them in at an angle.
A classic chair should have “ears”. To make them, prepare a board and a block of the same thickness for each side. Study all the photographs of the “ear” making process. Connect the blanks with self-tapping screws, then draw a curve and cut along the lines. Attach the finished assembly to the back and armrest.
You may think that making a chair with your own hands is not such an easy task, but I want to assure you that the hardest part is behind us.
Before we start upholstering, let's strengthen the frame a little - add crossbars to the back and armrests, as shown in the photo.
Let's add a strip to level the surface of the armrest, round it and sand it.
Types of sofas on the balcony
If the balcony or loggia has a huge area, which is completely observed in apartments with a modern layout, then you can afford to purchase a ready-made sofa, and the problem of arranging an additional soft place has been solved.
But if the balcony is small, you first need to create a design for the future interior and decide which sofa to choose and its purpose, so that later the room really becomes a comfortable and favorite place to relax.
Oriental style sofa for the balcony
There are several types of sofas for the balcony:
In order to choose a sofa for your balcony, you need to understand in detail all the models, their ease of layout, mechanisms, and ease of use.
The Eurobook sofa is one of the long-established and conventional designs. When folded, it looks like a book, the backrest is standing and comfortable for sitting. In order to transform the structure into a bed, it is enough to pull the seat forward and place pillows from the back on the horizontal part. You can easily make a clothes dryer for the balcony with your own hands. Such an additional sleeping place will completely decorate your balcony, give the interior comfort and a unique look.
The chair-bed is suitable for a narrow balcony. Its design is very simple and does not require much effort to unfold. The seat is folded like a book; if you lift it and pull it forward, comfortable legs are installed, and the backrest is placed in the free space. This chair cannot seat several people, but it is perfect for you to lie down and read a book or relax in the fresh air.
Difan-transformer. If you keep up with the times and take care of every square meter of your home, a transforming difan will be a beautiful acquisition for your own balcony. This is one of the modern and prestigious types of furniture. Its construction and design can be completely different, but one feature unites them all: thanks to a special mechanism, the sofa simply transforms into a table and back into a sofa. DIY mosquito net for a wooden window. If you have a one-room apartment, this design is perfect for a schoolchild, during the day for doing homework, and at night for sleeping.
Corner sofa . Furniture showrooms and factories present a large assortment of corner sofas that have an original look and give a small room more comfort, coziness and convenience. If you decide to install this type of furniture, it will emphasize your practicality and good taste. A corner sofa helps to increase space; it is not only comfortable to sit on, but also to lie on.
Corner sofa on the balcony
There are many types of beautiful and modern upholstered furniture for a balcony or loggia. DIY ceiling clothes dryer for the balcony, folding table for the balcony. 33365 0. The design and structural features of sofas are generally not very different, but if the sofas do not have additional boxes and niches for bedding, this always upsets the owners. Therefore, before purchasing upholstered furniture or making it to your own order, you need to take into account this important fact.
Also, when developing an individual sofa design, you need to think about its purpose and future use. Since you are making a sofa for yourself and the size of the balcony, this is not enough. Its design must be equipped with all necessary components:
How to make a sofa on the balcony
How to make a sofa on the balcony
.
If you put in a little effort and imagination, it is quite possible to make upholstered furniture with your own hands
. Whatever design you choose, the main thing is that the furniture pleases you, is cozy and soft, so that you can sit and lie down comfortably. Furniture made by yourself will not only bring a lot of positive emotions, but will also save the family budget.
How to make a sofa for a balcony yourself
Important! If you have a one-room apartment and a little free space, the only right option is to convert a balcony or loggia into a cozy and multifunctional children's room. You can install a transforming sofa in it, which folds out like a cozy bed at night, and during the day it turns into a table with a soft seat.