It is not always possible to purchase new furniture. But if you have an old wardrobe left as an inheritance, or a recently purchased shelving unit that is already tired of its boring and faceless appearance, we offer an interesting, and most importantly, simple idea on how to update furniture using leftover wallpaper. Decorating furniture with wallpaper is not a new thing; a similar technique was used by ancient cabinetmakers, decorating the back wall of cabinets and sideboards with colored fabric or paper.
Updating your furniture with wallpaper has a number of benefits. Firstly, almost always after renovation there are remnants of wallpaper. Even if they are not there, you will need one roll for decoration, which will not be a huge burden on your family budget. Secondly, the work process itself is very simple and does not take much time. Thirdly, such a simple and inexpensive renovation of old furniture amazingly transforms it, changing the style and mood according to your desire.
How to refresh furniture with photo wallpaper?
We all know that decorating furniture with wallpaper has become very popular. Now many people decorate it with various stencils, stickers, and paint it with bright paints and varnishes, while significantly extending its lifespan. Pasting with paper is one of the most inexpensive decoration options, which greatly attracts lovers of originality. But not only standard wallpapers are suitable for this entertaining procedure. Cabinets can be covered with the following materials:
- photo wallpaper;
- paper wallpaper;
- non-woven or vinyl wallpaper;
- textile;
- self-adhesive wallpaper.
Photo wallpaper for your closet should not only match your tastes, but also fully correspond to the style of the room. But simple design solutions for playing colors never go out of fashion. If the room is made in lighter colors, bright or dark wallpaper will become a real highlight of the room and vice versa. If the wardrobe has a built-in structure, then its interior decoration may be an original option.
You can also cover an old cabinet with wallpaper left over after renovation. Vinyl wallpapers with relief look especially good, as they have good thickness and relief on the surface, which allows you to hide minor imperfections in furniture. Now in construction stores you can easily find self-adhesive film with various designs. It is designed specifically for this design, is easy to apply, prevents moisture from entering and does not require special care.
How to decorate a closet with your own hands with photos
There are different approaches to decorating furniture.
Wallpapering
This simple, quick and inexpensive method of decoration has significant artistic potential. To implement it you will need:
- Fragments of wallpaper. The most important part is to choose wallpaper with a good design or pattern. They should not merge with the walls of the room, surpassing them in color saturation by at least several tones.
- Wallpaper glue. Apply it to the prepared surface of the furniture, place the wallpaper on top and smooth it so that there are no air bubbles or wrinkles anywhere.
- PVA glue and water-based varnish. After gluing, cover the wallpaper with a neat layer of PVA glue diluted with water. Apply a final layer of varnish.
IMPORTANT ! Before you start gluing, make sure that the combination of wallpaper fragments you have come up with looks harmonious. Draw a detailed sketch or attach what you are going to stick to the doors.
Plaster pattern
A three-dimensional pattern of plaster on the surface of the wardrobe focuses attention on this piece of furniture, turning it into the highlight of the room. Technically, such a pattern is easy to make using:
- Stencils. Make it yourself from cardboard, plastic or thick film. Floral or geometric patterns, ethnic patterns, and stylized images of animals and birds are often used.
- Masking tape. Take the resulting blank and secure it with tape on the surface of the cabinet.
- Plaster. Apply decorative plaster to the surfaces of the furniture, over the stencil.
IMPORTANT ! The stencil must be removed before the plaster dries!
After drying, treat the resulting composition with paint or acrylic varnish.
Wardrobe decor with fabric
Fabric can be a good alternative to wallpaper. Textiles also have a wide range of colors and prints; they make up very expressive and effective compositions. To fix it on the surface of the wardrobe you will need:
- PVA glue, furniture stapler or liquid nails. In a word, what to attach fabric blanks to the closet.
- Varnish. To process the resulting surface. However, this stage is sometimes neglected. After all, textiles often have a characteristic, pleasant-to-touch texture that you want to preserve.
Decoupage technique
Decoupage is the transfer of patterns and designs from ordinary napkins onto a prepared surface, followed by fixing them with varnish. Create a whole collage in this way on the doors and body of your clothing furniture.
IMPORTANT ! This technique is best performed on a light base. There are no traces of glue on this one, and it’s easier to find napkins. If the cabinet has dark doors and walls, paint it white, beige or cream before decorating.
Use of craquelure varnish and gilding
Using these two ingredients, a very interesting cracked paint effect is achieved. Furniture treated in this way takes on the appearance of rare, exclusive antiques. To achieve this transformation you will need:
- Craquelure varnish. It is applied in two layers. After the first one, wait until it partially dries and thickens. And only then paint the surface again.
- Gilding. Rub the gold into the cracks formed in the varnish with a sponge.
- Matt lacquer. It is needed for the final processing of surfaces in order to reliably fix the resulting coating with characteristic golden cracks.
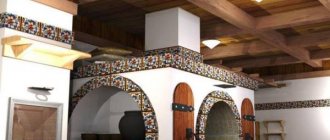
Mosaic decor
Another type of embossed and bright furniture design is mosaic. It is made from fragments of ceramic products, buttons, shells, glass, pebbles and glue. Any small multi-colored elements from which you can create a pattern or picture will do.
IMPORTANT ! Before fixing the mosaic pieces, mark their location on the surface of the cabinet - lay out the entire composition without using glue. And only after making sure that it looks harmonious, start working.
Aging
One of the methods of artificial aging of furniture - craquelure - has already been described above. However, it is not the only possible solution. There are other options. For example, painting a cabinet with a large dry brush with a minimum of paint will create the effect of a peeling surface.
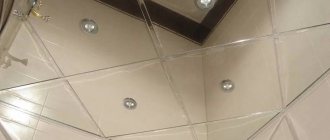
Mirror decoration
Mirror mosaic, shaped elements cut from reflective materials, stripes, geometric shapes - all this can become a decoration for your closet. Such fragments are often used to hide defects in furniture, while visually expanding the space.
What to consider when choosing cabinet decor options
The interior of the room, the features of the cabinet, your preferences - these are the three fundamental things that influence the choice of how to decorate old furniture.
Preparatory work
If you have already purchased photo wallpaper for an old wardrobe, then do not forget about the building material. The list of necessities includes:
- pencil, tape measure, ruler;
- sandpaper;
- construction glue or PVA;
- roller or brush;
- cloths for smoothing wallpaper.
Updating a cabinet with your own hands is a fairly simple job, but it has its own nuances. For example, some parts of furniture may lose their original appearance, such as handles or hinges. In addition, this will interfere with further operation, so it would be wiser to replace them with new ones.
Before gluing, be sure to prepare the surface. Use sandpaper to remove the old coating. If the cabinet was varnished, then you can heat it up with a hair dryer and remove the paintwork from the surface with a scraper, but after that you can sand it thoroughly. After this, remove all dust from the surface with a damp cloth and allow the furniture to dry thoroughly.
In order for the pasting to be even, you can disassemble the cabinet fittings. This will allow you to better glue joints and other hard-to-reach places. Remember, assembly based on the results of the work should be done only when the product is completely dry; this may take from three hours to a day.
Preparatory stage before decorating the cabinet
Before starting the transformation process, a number of resuscitation works are necessary:
- Parsing. Remove all doors from a piece of furniture, take out drawers and shelves. In a word, take it apart into its components. Further work will take place with each of them separately.
- Updating of fittings. Thoroughly clean all metal elements from dirt and rust, or even replace them with new ones, depending on their condition and your design ideas.
- Surface preparation. Completely clean the doors, shelves, and body of old coating and dirt using a spatula, sandpaper, brush, rag and water.
Then carefully inspect all surfaces looking for chips and cracks. Defects must be repaired. Use mastic to eliminate minor damage; for more serious damage, putty will be used.
Pasting process
There should be no difficulties with self-adhesive film, since all that is required of you is to correctly take measurements and cut out the parts on the roll. With simple wallpaper the process will take a little longer. First of all, you should prepare all the necessary parts for your cabinet. Here you will also have to take all measurements and transfer them to paper. Next, coat the surface of the product with construction glue or PVA. It will not be difficult to apply pieces of wallpaper, since they are not large in size.
When purchasing photo wallpaper for an old wardrobe, pay attention to the picture. It must exactly match the size of the cabinet, especially for certain patterns, for example, in a children's room. Pasting with them needs to be done more carefully, controlling the joints and transitions.
The pasted surface is carefully smoothed with a piece of soft cloth in order to remove any remaining air under the paper. When covering with fabric, a special pressure roller is used. When carrying out all work indoors, get rid of possible drafts. Just like wallpapering walls, this process can affect the quality of the result. As a result, the entire surface of the cabinet can be covered with a layer of varnish. This will not only protect the surface from external influences, but will also make it possible to care for the furniture without causing harm to it.
Wallpaper restoration
It is necessary to wallpaper a closet if it is made of chipboard. This is a direct consequence of the properties of this material. There is no other way to convert laminated chipboard at home.
Paper wallpaper is easier to glue, but it is not durable, although the latter does not matter much if you cover it with varnish
Let's consider an example with a cabinet made of chipboard. Before wallpapering the facades, they need to be removed. Further, if there are frames of slats on the doors, it is advisable to also dismantle them. A layer of acrylic paint is applied under the wallpaper.
This is an important condition not only visually, but also technologically. Acrylic paint has high adhesion (penetration), and, in turn, can well absorb subsequent layers of glue.
Before applying paint, the doors are cleaned with sandpaper (helps increase absorbency). After applying several layers of the previously chosen color, as well as the complete drying of the facades, they immediately begin wallpapering. Apply a layer of glue to the wallpaper sheet and to the door.
The doors of this closet are covered with wallpaper left over after the room was renovated.
If you use paper wallpaper, you cannot smear it with glue, as it is very thin and will tear at the first opportunity. In this case, the adhesive is applied only to the elements of the old cabinet.
Separately, you should paint the frame, which is subsequently attached to its original place. The interior space can also be covered.
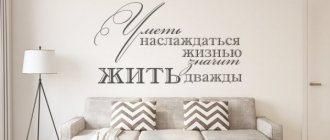
Another decor option when the closet merges with the walls
Do not forget about the compatibility of the color palette, as well as the wallpaper pattern with the overall design of the room. A handmade sideboard must complement the interior and match it.
Furniture decor with wallpaper. A sea of ideas
It is not always possible to purchase new furniture. But if you have an old wardrobe left as an inheritance, or a recently purchased shelving unit that is already tired of its boring and faceless appearance, we offer an interesting, and most importantly, simple idea on how to update furniture using leftover wallpaper. Decorating furniture with wallpaper is not a new thing; a similar technique was used by ancient cabinetmakers, decorating the back wall of cabinets and sideboards with colored fabric or paper.
Updating your furniture with wallpaper has a number of benefits. Firstly, almost always after renovation there are remnants of wallpaper. Even if they are not there, you will need one roll for decoration, which will not be a huge burden on your family budget. Secondly, the work process itself is very simple and does not take much time. Thirdly, such a simple and inexpensive renovation of old furniture amazingly transforms it, changing the style and mood according to your desire.
How to decorate furniture with wallpaper
To work you will need:
- wallpaper:
- sandpaper;
- primer;
- wallpaper glue;
- water based varnish.
If you need to restore or paint wooden furniture, do this before working with wallpaper. Of course, you can immediately glue the wallpaper using wallpaper glue or regular PVA, thereby simplifying the process, but it is possible that all the beauty will soon come off. According to the rules, for a longer service life of such decor, it is necessary to clean the wooden surface, prime it, then stick the wallpaper, preferably with wallpaper glue. If you are covering the front surfaces of furniture that you will often touch (drawers and doors), then it is better to take thick vinyl wallpaper that is easy to clean. Paper wallpaper should be coated with water-based varnish to protect it from damage and dirt. Remember that varnishing will make the color of the wallpaper a couple of shades darker. It is advisable to apply a layer of protective transparent primer or the remaining wallpaper glue under the varnish. As an option, you can use self-adhesive wallpaper or decorate with napkins using the decoupage technique, which is suitable for small areas.
Let's see what options there are for decorating furniture using leftover wallpaper.
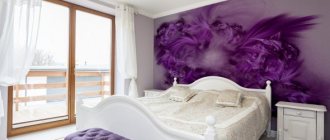
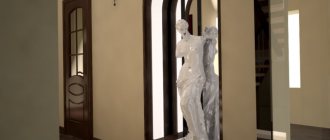
Restoration in Art Deco style
Art Deco gained its greatest popularity at the end of the twentieth century. The characteristic features of this design are luxury, shine, and high cost of finishing materials. The colors of the interior and furniture are predominantly white, black, and gold. Accenting with purple, red, green and brown colors is allowed. Black and white portraits of famous people of the past would be appropriate here. This style is inherent in the gangster layers.
Stylish dark purple wardrobe with golden elements
In DIY furniture design, this direction can be expressed in different ways. Regarding cabinets and chests of drawers, these can be either plain facades and panels painted with acrylic paint in one or two colors, or decorated furniture using decoupage.
Decoupage napkins or film are a universal and practical way to give the interior and furniture a creative look. Its shapes, patterns, colors, prints are widely represented in paint stores. In Art Deco, these could be the same faces of the bandits of the past, or, as has become very fashionable, the figure of the unforgettable Marilyn Monroe.
First, the entire cabinet is painted in primary colors. To make the borders clear, use masking tape.
Then the panels are decorated using decoupage technique
The final stage is applying a protective layer of varnish
It would be interesting to use a special varnish that has crackle properties when covering decoupaged furniture facades.
A pattern made from mosaics with your own hands will look original. To do this, you need to have several unnecessary porcelain or ceramic plates, mostly black and white and gold. The plates are broken into small pieces, and then assembled into a pattern or figure using a stencil. The resulting fresco is filled with epoxy resin or plastered with tiled plaster to match the color of the interior.
Pieces of tiles are an excellent material for original decor.
Furniture fittings, small parts, as well as the slatted frame are painted with gold acrylic paint.
Chic cabinet decor with seashells attached to the prepared surface with hot glue
Decor of the facade, side walls and doors
You can wallpaper almost any surface of a closet, cabinet or chest of drawers. Most often, cabinet doors and drawer fronts are covered as the most important element of furniture, which is the center of attention. But you can do the opposite - wallpaper everything except drawers and doors.
Color and stylistic solutions may also vary. You can use the same wallpaper on all surfaces to be pasted, you can alternate different ones, or decorate using the patchwork technique, that is, paste them over with multi-colored squares. It is absolutely not necessary that the wallpaper on the furniture matches the wallpaper on the wall. Feel free to experiment with contrast, for example, for a room with pastel wallpaper, make a closet with bright colorful doors.
Overlays for decorating the end of the cabinet
Usually the ends of the cabinet or any cabinet furniture are covered with simple melamine tape or PVC edge. If the equipment uses an overhead facade, this is quite enough. After all, the end of the cabinet will be completely closed by the door.
But there is always an opportunity to play with this inconspicuous element of furniture in a beautiful and interesting way! Moreover, the thickening on the sides gives the cabinet a more solid and respectable appearance. There are several ways to do this.
For example, use special overlays for the end of an MDF cabinet. At the same time, some changes are made to the design of the box.
A simpler, budget-friendly way is to cover the end of the cabinet with a plank made of the same material, chipboard. It will cost much less than MDF overlays, and the look of the furniture will become more interesting.
Decorate the end of the cabinet (more precisely, prepare it) for the subsequent installation of LED lighting. If you provide special projections and strips in the design of the cabinet body, then the lighting will look much more harmonious.
Fans of streamlined, radius-shaped furniture without protruding corners will like the design of the ends of the cabinet using special connecting corner inserts.
A similar method is widely used for assembling display glass into single structures. True, the connecting profile itself looks somewhat rougher.
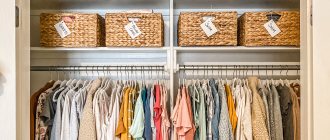
Decor for the back wall of shelving
A great way to decorate with wallpaper is to cover the back wall of open cabinets and shelving. Manufacturers of modern furniture almost never pay due attention to decorating interior surfaces. Agree, against such a background any souvenirs or dishes will seem festive and bright, and the furniture itself will sparkle with new colors. In this case, it is better to play with contrast and use wallpaper that differs from those with which the walls are covered. It is advisable to use wallpaper with patterns and patterns, especially for furniture with a light facade. By the way, you can take wallpaper that covers the walls in other rooms; this technique will help connect different rooms.
If the rack is divided into square or rectangular sections, then each can be covered with different wallpaper, again creating an analogue of patchwork.
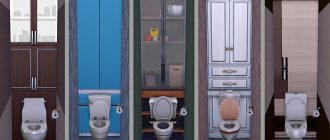
Interior decor in drawers and behind doors
There is another technique for decorating furniture with wallpaper, which is used extremely rarely. If the decoration on the facade of the furniture complements the interior, then the decor of the interior space is intended solely to please the user. Wallpaper can be used to cover the inside of drawers of a cabinet or chest of drawers, the back surface of doors, including radius doors, as well as shelves and the inner wall of the cabinet behind the doors. You can first purchase wardrobe doors and then decorate them. In this case, the choice of pattern and color of wallpaper depends on your wardrobe and your own preferences, and the color of the walls in the interior does not play any significance here. Again, experiment with contrast. If you have a lot of monochromatic items in your wardrobe, choose wallpaper with flowers and ornaments; if colorful dresses and skirts predominate, stick on striped wallpaper.
Did you like the article? Subscribe to the channel to stay up to date with the most interesting materials
How to reliably cover a cabinet with film?
To improve the design of a room, it is not necessary to resort to buying new furniture. You can use the option of covering the cabinet with film. This method will give old furniture an unforgettable look and will save the family budget. To do the work yourself, you need to familiarize yourself with the gluing technology, prepare the necessary tools, and study all the possible problems that you may have to encounter in the process.
Criteria for choosing self-adhesive film
Before choosing film for a cabinet, you need to know what it consists of and what criteria to choose. The film has 3 layers:
All layers play their role. The very first one is made from:
- Vinyl, PVC or polyester are the most durable materials, the use of which allows you to glue the film to the front sides of the cabinet and are not afraid of damage.
- Staniol is a material that is susceptible to damage, so gluing should be done on the surface of hanging cabinets.
- Paper is a fragile material, easily damaged, it is best used for pasting the end sides of racks.
The film can be single-layer or double-layer. Single-layer is more durable, formed into rolls. Two-layer is made of a base and a top layer, but is less durable.
When buying self-adhesive film, you need to take into account the moment on the surface of which furniture it will be used. If it is in the kitchen, where it is constantly exposed to temperature changes, or in a children's room, where there is always a threat of spoilage, a protective layer is needed. The protective layer has:
- moisture resistance;
- protects against ultraviolet radiation;
- thermally stable.
Cheap options do not contain a protective surface.
Antiquity in noble craquelure
Create with your own hands an antique rarity from a cabinet with a beautiful gilded texture, consisting of many small and deep cracks, “testifying” to the venerable age of the item.
Craquelure is a painting method in which the base layer of paint, enamel or putty cracks.
To create a “magic potion” you will need:
- Two-phase craquelure varnish;
- Transparent acrylic varnish with a matte texture;
- “Golden” powder as a grout (powder made from non-ferrous metals crushed to a finely dispersed state - bronze, aluminum, copper);
- Grout sponge.
To ensure that the paint becomes cracked, the surface is first coated with craquelure varnish.
Sequencing.
- Apply the first phase of craquelure varnish. Wait until it dries to a thick sticky consistency.
- Apply and dry the second phase in the same way.
- Use a sponge to rub the “golden” powder into the cracks that have formed.
- Apply a final coat of matte varnish and dry thoroughly.
A cabinet aged using the craquelure technique will look like an expensive antique.
ON A NOTE! Instead of powder, a special composition for patination and bitumen wax, “dry” pastel are suitable. The longer the craquelure layer dries, the deeper the cracks appear on the surface of the furniture.
Wardrobe pasting
Before starting work, preparation of the necessary raw materials and tools is required. Everything is prepared taking into account all the problems that may arise.
Required tools and materials
Tools and materials:
- Wood putty, primer - will be needed if the surface of the cabinet requires correction of unevenness.
- Coarse sandpaper.
- Self-adhesive.
- Pencil, ruler or tape measure.
- Sharp scissors, knife.
- Dry, soft cloth, rags - smoothing the material.
- Degreasing mixture.
- A roller or special devices for smoothing the surface and removing air.
- Spray bottle with soap solution.
- Talc, powder.
- Hair dryer.
Possible problems when gluing the cabinet
Every job can cause problems. When pasting a cabinet, a person may encounter some difficulties:
- Taping corners can cause the problem of poor bending. To solve this you will need a hairdryer. It warms up the film and it becomes more elastic.
- An even joint cannot be obtained; the material diverges, forming a gap. To solve this problem, each subsequent canvas is superimposed on the previous one with an overlap of 1 cm, then a metal ruler is applied along the center and a cut is made with a stationery knife.
- Using the dry method, problems may arise with the rapid gluing of surfaces. This can be avoided by using talc or powder sprinkled onto the surface.
- If, after gluing, large inaccuracies are noticed, it is better to remove the film. To do this, use a hairdryer, it will heat the surface and the adhesive base can be removed without difficulty. Remove the remaining adhesive base with solvent.
- When bubbles form, take a regular needle and pierce the place where the air accumulates. Then, by lightly pressing, the air is expelled, the film in this place is smoothed out.