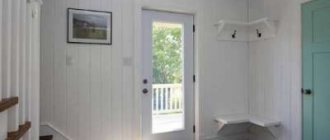
It is absolutely impossible to imagine an apartment or a house, and even more so an office, without shelves. These are very multifunctional pieces of furniture that are used both for decorating space and arranging various souvenirs, and for convenient storage of various things.
Often they fit so well into the interior that they are able to emphasize its style and individuality . But hanging shelves is sometimes not so easy. Often apartment owners want to secure them so that the fastenings are not visible.
This is done in order to maintain the integrity of a particular style or for a number of other reasons. However, attaching shelves to the wall without visible fasteners is not such a difficult task as it seems at first glance.
Attaching shelves to the wall without visible fasteners
Shelves in a modern interior
In any house, if a person lives in it, there are always a lot of different jars, bottles, maybe books, souvenirs, photo frames and much more. And in order to keep order in the house, it is recommended to put each thing in its designated place. And often a wall shelf acts as such a place. It usually serves two functions - it is a convenient stand for something decorative or useful, and it can also be the highlight of a certain design.
Wall shelves in the interior
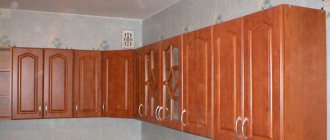
Depending on the room in which the shelf is installed, it can perform a very different role. So, in the kitchen there may be a set of spices on it or some elements of utensils. In the bathroom , a shelf is a must-have for arranging various bottles and bottles. A shelf is also needed in the bedroom , where you can place on it various things you need before going to bed. Of course, these interior elements are also in the living room - books, flowers, and souvenirs can be placed on them. Often they are able to significantly save space, as well as overcome clutter in the room, because from now on everything will be in its place. That is why this piece of furniture is absolutely irreplaceable, despite the fact that there may be many wardrobes or chests of drawers in the house.
Wall in the form of shelves
On a note! The shelf is appropriate and functional in absolutely any interior, regardless of its style. The main thing is to choose the right and suitable option and place it in a place where the shelf will look organic and as part of the interior.
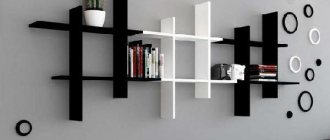
Black and white shelf
Moreover, it is important to choose not only a shelf that is suitable in style, but also one that you will like and look aesthetically pleasing when hung. When creating certain styles, it is important that the fastenings on it are invisible. In general, there are several variations of fixing shelves on the wall.
Wood shelf
Shelves-tubes for toys
If you want to keep your playroom tidy, you can easily make round shelves from empty paint buckets.
And, voila, the furniture is ready! This DIY shelf is an economical idea for creating storage space for small items.
Sliding shelves - a solution to eternal problems
For wine connoisseurs: how to make the right shelves with your own hands
Source
How can I mount a shelf on the wall?
To hang a shelf, you do not need to have great skills and abilities. Sometimes it is enough to have the shelf itself, a hammer drill and a building level on hand. Next, the work will go quickly and smoothly - hanging the shelf will take five minutes. However, these interior items can be fixed in different ways. This is often influenced by the type of shelf, the owner’s desire to use visible or invisible fasteners, and a number of other factors. Sometimes the type of fastener is important.
Table. Methods of fastening shelves.
| Mounting option | Short description |
| Bracket or holders | This option assumes the presence of visible fastenings for shelves. They can be seen, and they are fixed both below and above the shelf. The brackets can also be hidden. Visible brackets can be simple or decorative. They come in both plastic and metal, ornate and simple, etc. One side is attached to the wall, the other to the shelf itself. However, it is important to understand that this option is not suitable for every interior style. |
| Loops and corners | This is the choice of those who save on mounting costs, but want to install the shelf as quickly and easily as possible. It is suitable for almost every interior. Moreover, this is a fairly reliable fastener, and depending on its size, you can vary the load on the shelves. |
| Fastenings for glass options | These fasteners are used only for fixing shelves made of glass and characterized by their large mass and fragility. They are usually made of metal and have special gaskets that will allow you to securely fix the shelf itself to the wall, preventing it from falling. There are also suction cup fasteners for glass, but they are not very reliable. As a rule, the suction cup is fixed on the underside of the shelf. Typically, such fasteners are small in size. |
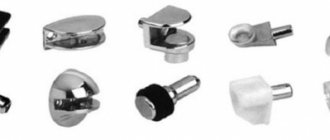
| Invisible | This option will allow you to install the shelf so that the fasteners themselves will not be visible from any side of the shelf. It will seem like it's just glued to the wall. |
Concealed shelf holder
Mounts without visible fasteners
Many people now choose fastenings without visible fasteners, since this option involves completely invisible fixing of the shelf on the wall , without unnecessary elements. It is the reluctance to see additional elements on the walls for one reason or another that drives the owners of shelves and apartments to choose this option.
Brackets for mounting shelves in the wall
There are three options to secure the shelf to the wall so that the fasteners are not visible.
- Using small hanging loops. In this case, the fixation is carried out using small loops that are attached to the back of the shelf and remain almost invisible. They are put on screws screwed into the wall in advance. In this case, it is important to apply the markings correctly and hang the shelf evenly. This type of fastener is not suitable for products that do not have a frame as such, that is, shelves consisting of one board. Otherwise, the shelf will not hold up.
DIY zigzag shelf made of chipboard - Using metal pins. This option is just right for shelves consisting of one board. You need to fix long metal pins in the wall, and drill holes of a suitable depth from the end of the shelf and put the product on the pins in the wall. The shelf is supported by the fact that it rests on these metal elements. It can support quite a lot of weight.
Fastening with metal pins - Using a long wooden block. This method of fixation cannot be called completely invisible, since a block of square or rectangular cross-section is used as a kind of base for the shelf. It is fixed on the wall, and a shelf is attached to it in the desired position. Or it can be fixed on pins coming out of the bar. This option is inconspicuous, since if you choose a block of the same color and texture as the shelf itself, it will not be noticeable. Rather, it will look like some element of the product itself. To fix the shelf on the block, hidden fittings such as pins or pins are used, onto which the shelf is placed.
Hidden fastening of shelves to the wall without visible fasteners
The most reliable option for fixing the shelf is with metal pins, as this will provide the ability to seriously load the shelf. Moreover, this is the most inconspicuous option, even in comparison with other methods related to secret ones.
Types of shelves and fixtures
Everyone, even those who have never encountered such a task, knows that attaching a shelf to a wall can only be done with the help of fasteners. In stores and along with shelves you can find dozens of types of fasteners, which may differ in both appearance and design. But they can be divided into two main types, with hidden fastening and external.
In addition, the shelf mounting itself can also serve a decorative role, creating the desired design effect.
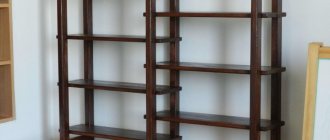
The shelves themselves are also very diverse both in their appearance and in the material from which they are made, and they also do not have a clear classification; they can be single-tiered or multi-tiered and intended for any room. The type and material of the shelf depends only on your needs or tastes. If you wish, you can even make a homemade shelf.
How to choose a fixation type?
This is not an easy task, since when choosing a method for attaching shelves, several factors must be taken into account. And they are the ones who will influence the final decision.
- The thickness of the wall itself on which the shelf is fixed. This is one of the main factors to consider when choosing a mounting option. The fact is that it is not always possible to use, for example, a hidden pin fastening. It is better to avoid it if the wall is made of soft materials such as plasterboard. The thickness of the partition should not be less than 10.5 cm if it is made of concrete, and less than 25 cm if it is made of brick. If the wall does not meet these parameters, then it is better to choose another fixation option. In relation to drywall, a shelf can be hung using a hidden fastener only if the wall thickness is at least 10 cm, and only light souvenirs and nothing heavy or giving a serious load will stand on the shelf.
Brackets for mounting shelves in the wall - The thickness of the shelf itself and its weight also have a serious impact on the choice of fixation method. So, the shelf should not be too soft or damp. If you plan to place only light objects on it, then you can choose a shelf with a thickness of at least 3 cm, and if you plan to place heavy elements and possibly an increased load, then the shelf should have a thickness of at least 4.5 cm and no more than 6 cm.
Relationship between shelf depth and load on each mensolo holder
Important! You can choose the right mount only if you know the answers to the questions: “What will stand on the shelf?” and “Which wall will the product be fixed on?”, only then can you make the right choice.
It is also important to estimate the number of fasteners in advance. So, if the shelf is shorter than 1-1.5 m, then a couple of fasteners are enough. If the length is greater than the specified parameters, then it is better to increase the number of fasteners in order to evenly distribute the load on the product and the wall. Moreover, again, the number of fasteners can vary greatly depending on the thickness of the shelf itself and its quality.
The free space above the sofa is organically filled with shelves to match the walls
Fixing the shelf on the wall using hidden fasteners
Step 1. In order to fix a shelf on the wall using a hidden fastening option, you will need to prepare a hammer drill with a drill of a certain section, 2-3 special titanium pins, a building level, a square, a drill and a bit, the shelf itself, and a pencil for marking. The pin is a metal rod that is threaded on one side and smooth on the other. The threaded part will screw into the wall, and the smooth part will need to be fitted with a shelf. Typically the pin diameter is 10-12 mm. The drill is selected with the same diameter as the purchased titanium.
Special metal pin
Step 2. First of all, you need to apply markings to the shelf itself. By the way, you can make it yourself from any part of other furniture that has served its age, rather than buying new one. Using a ruler, you need to set aside the required distance from the end edge of the shelf. In this case, a distance of 12 cm was chosen.
Marking
Step 3. Having chosen the distance, you need, using a square and a pencil, to draw a line perpendicular to the plane of the shelf at the end where the hole for fastening will be drilled.
A perpendicular line is drawn at the end
Step 4. Next you need to find the middle of the end of the board and make a corresponding mark for the drill. It is important to understand that if the shelf consists of two sheets of chipboard glued together, then in this case it is better to drill a hole for fastening not in the middle, but with a slight offset towards one or another board (better - towards the bottom, it will be more reliable).
A mark is placed for the drill
Step 5. Similar markings must be applied on the opposite side of the shelf.
On the other side the same markings are applied
Step 6. Next, to the end of the shelf where the markings are applied, you need to attach a building level and directly on it make marks parallel to those previously applied to the board, as well as marking the edges of the shelf itself. The level cannot be moved while the marking is being transferred. Pencil marks can then be easily erased from the surface of the level, but this technique of transferring markings will make it easy to make markings for drilling holes in the wall.
The level cannot be moved while the marking is being transferred.
Marks are made at the level
Step 7. Then you need to select the approximate location of the shelf on the wall. Having applied it to the surface, you need to mark the boundaries of the product directly on the wallpaper with a pencil.
The shelf is attached to the wall
The boundaries of the shelf are marked
Step 8. Now you need to take a building level with markings and, attaching it to the wall in the selected and marked place, align and transfer the markings from the level to the wall, also using a pencil. In this way, you can easily and quickly make precise markings for the locations for drilling holes for the pins without unnecessary movements.
Transferring markings from level to wall
Step 9. Next, in the end part of the shelf, in the designated places, you need to drill holes for the pins. They should be the same depth as the length of the part of the pin on which the board will be placed.
A hole is drilled in the end
The depth of the hole should correspond to the part of the pin on which the shelf will be placed
Step 10. Now you need to take a hammer drill with a drill of the same diameter as the pin and make holes in the wall in accordance with the previously made marks. To prevent dust from concrete from falling onto the floor, it can be removed immediately using a switched on vacuum cleaner, the hose from which will be held by an assistant.
Holes are made in the wall
Step 11. Both titanium pins need to be installed in place, that is, inserted into the holes in the wall. If they are difficult to enter, you can carefully knock them out with a hammer or screw them into the wall using a key.
The pins are inserted into the holes
Step 12. All that remains is to put the shelf on the pins in the wall, aligning the holes with the metal fasteners. The shelf is installed. By the way, for better fixation, you can add a little glue to the holes of the shelf - then the connection will be even more reliable. This mounting option will allow you to achieve an effect where it seems as if the shelf is supported on the wall by itself.
The shelf fits onto the pins in the wall
Finished shelf without visible fasteners
Video - How to install a shelf with invisible fasteners
Progress
The design of the shelf consists of two parts: a frame - the shelf holder and a sleeve, which is put on the frame.
First, we make a holder from pine bars 1 by 2 cm thick (thicker is possible). You will need 2 bars 70 cm long (this is the length of the shelf), 2 bars 20 cm each and 5 bars 18 cm each. We connect them all as in the diagram with self-tapping screws.
The sleeve is made from two rectangles of plywood 72.5 by 21 cm, between which there is a “U”-shaped base of bars (see diagram).
When all parts of the shelves are ready, you need to sand them with sandpaper or a sander and paint the sleeves.
Now, using a level, screw the shelf holders to the wall.
Source
Fixation on drywall
Many people now prefer to line the walls with sheets of plasterboard or make room partitions from this material. And it is clear that attaching shelves to it using pins is not the best option. Drywall is a fairly thin and fragile material, not designed for heavy loads . So the option of hanging shelves on the partition is completely eliminated.
Types of fasteners for drywall
But if the walls were leveled with plasterboard and it was already known where the shelf would hang, then you can use a trick and still use invisible fasteners. To do this, it is enough to install a reliable wooden block between the wall and the sheet of drywall in the place where the shelf will be attached. Next, you will need to fix the shelf itself so that the pins pass immediately through the drywall, through the block, and through the concrete wall. However, it is important to understand that such a piece of furniture should not be heavy in itself, and you should not place massive or significant objects on it. Also, special fasteners for drywall can be used to fix lightweight shelves.
How to hang shelves on drywall
That, in fact, is all that could be said about invisible options for attaching shelves to walls. Everything is quite simple and should not cause any difficulties even for a beginner in this matter. The main thing is to purchase everything you need in advance, and the work can be completed within 30-40 minutes. A shelf will appear on the wall that will stand “by itself.”
Features of fastening to various surfaces
Partitions of a certain thickness and material can withstand various loads. How to find out whether a shelf can be mounted on a particular surface, what the thickness and load should be for the structure to be durable. These answers are easy to obtain if you think about the density, flexibility and size of the materials.
If there is a need for drilling, take into account the depth of the wall so that the self-tapping screw does not drill through the concrete. A dowel or cap is inserted into the hole, a device that, when screwed in, expands and securely fixes it. The diameter of the dowel is 1 mm larger than the diameter of the screw, but equal to the circumference of the drill if the drilling surface is dense and 1 mm less if it is porous.