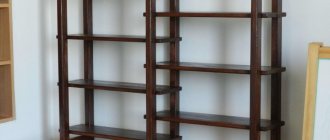
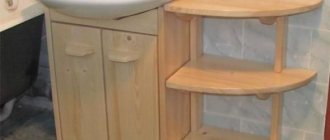
A wardrobe is an extremely useful piece of furniture anywhere. You can store everything you need in it: from clothes and books to heavy tools. At my dacha there are several large homemade tool cabinets (metal case and wooden shelves), in the garage there are a couple of metal cabinets, and on the balcony there are plastic open shelves.
I made all these cabinets myself: in some places I just hung shelves, and in others I made everything completely from scratch. First, I’ll tell you how to make shelves in a closet with your own hands, what to look for and how to choose fasteners.
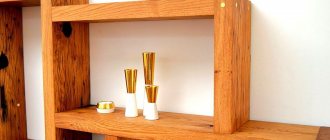
Source pinimg.com
Features of fastening shelves depending on the type of wall
When installing fasteners for shelves to the wall, it is necessary to take into account the characteristics of the material from which the base is made. The higher its strength, the more reliable the attachment of the hinged structure will be. Soft wood and fragile drywall surfaces do not provide adequate support. Methods for attaching shelves and the type of fittings used vary.
Concrete wall
To drill a hole in a solid concrete surface, you will need a hammer drill. The work must be carried out using a special drill for concrete, the diameter of which is selected based on the size of the dowel. The depth of the hole should correspond to the length of the fastener.
The drill is placed at a right angle; at the slightest inclination, the diameter of the hole at the entrance will increase, and therefore the dowel and self-tapping screw will not be firmly secured. This may cause the shelf to fall later.
Fixing the shelf on the wall using hidden fasteners
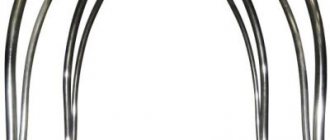
Step 1. To attach the shelf to the wall using a secret fastening option, you will need to prepare a hammer drill with a drill of a certain section, 2-3 special titanium pins, a building level, a square, a drill and a drill, the shelf itself, and mark a pencil. The pin is a metal rod with a thread on one side and smooth on the other. Using the threaded part, it will be screwed to the wall and the shelf will have to be placed on the smooth part. Typically the diameter of the pin is 10-12 mm. The drill is selected with the same diameter as purchased titanium.
Special metal pin
Step 2: First, label the shelf itself. By the way, you can make it yourself from any other piece of furniture that has served its purpose, and not buy a new one. Using a ruler, you need to take the required distance from the end edge of the shelf. In this case, a distance of 12 cm was chosen.
Marking
Step 3. Having chosen the distance, use a square and a pencil to draw a line perpendicular to the plane of the shelf at the end where the hole for fasteners will be drilled.
At the end a perpendicular line is drawn
Step 4. Next, you need to find the center of the end of the board and make a corresponding mark for the drill. It is important to understand that if the shelf consists of two sheets of chipboard glued together, it is better to make the hole for fastening not in the center, but with a slight offset to one or another board (better down, it will be safer).
Marked for drill
Step 5. A similar mark must be applied to the opposite side of the shelf.
On the other hand, the same signs apply
Step 6. Next, at the end of the shelf where the marks are made, you need to attach a building level and directly on it make marks parallel to those previously applied to the panel, and also mark the edges of the shelf itself. The layer cannot be moved when the markup is transferred. The pencil marks can be easily erased from the flat surface later, but this method of transferring marks will make it easier to make marks for drilling holes in the wall.
The layer cannot be moved when moving elevations
Markings are made at the level
Step 7. Then you need to choose the approximate location of the shelf on the wall. After application to the surface, you must use a pencil to mark the boundaries of the product directly on the background.
The shelf is attached to the wall
Shelf limits are marked
Step 8. Now you need to take a building level with marks and, gluing it to the wall in a selected and marked place, align and transfer the marks from the level to the wall, also with a pencil. This makes it easy and quick to accurately mark pin holes without unnecessary movements.
Transferring marks from level to wall
Step 9. Next, at the end of the shelf in the designated places, you need to drill holes for the pins. They should be the same depth as the length of the part of the pole on which the board will slide.
Eventually a hole is drilled
The depth of the hole should correspond to the part of the pin on which the shelf will be placed
Step 10. Now you need to take a hammer drill with a drill of the same diameter as the pin and drill holes in the wall according to the previously marked marks. To prevent concrete dust from falling onto the floor, it can be removed immediately using the included vacuum cleaner, from which an assistant will hold the hose.
Holes are made in the wall
Step 11. Both titanium rods must be installed in place, that is, inserted into the holes in the wall. If they are difficult to insert, they can be carefully knocked out with a hammer or screwed to the wall with a wrench.
The pins are inserted into the holes
Step 12. All that remains is to place the shelf on the studs in the wall, aligning the holes with the metal fasteners. The shelf is installed. By the way, for better fixation, you can add a little glue to the holes of the shelf, then the connection will be even more reliable. This mounting option will allow you to achieve an effect where it seems that the shelf will be held against the wall.
The shelf is installed on studs in the wall
Finished shelf without visible fastenings
Video - How to install a shelf with invisible fasteners
Sources
- https://severdv.ru/mebel/polki-i-stellazhi/kak-krepit-polki-v-shkafu/
- https://csdesire.ru/mebel-interier/mebelnaya-styazhka-58.html
- https://AmiPlus.ru/zona-otdyha/bokovye-polki-k-shkafu.html
- https://englishpromo.ru/2019/12/kreplenie-polok-v-shkafu-bez-vidimogo-krepezha/
- https://kraska.guru/dom/xozyajstvo/polki-v-nevesomosti-paryashhaya-konstrukciya-bez-vidimogo-krepleniya-na-stene.html
- https://MebelRus64.ru/polki-i-shkafy/kak-sdelat-dopolnitelnuyu-polku-v-shkafu.html
- https://shkaf-info.ru/kreplenie-polok-v-shkafu-obzor-vozmozhnyh-variantov/
- https://KrepezhInfo.ru/ustanovka-polok-so-skrytym-krepleniem/
- https://infomebli.ru/gostinaya/shkafi/krepim-polki-svoimi-rukami.html
- https://papa-carlo.su/materialy/dsp/kak-krepit-polki-v-shkafu.html
- https://udobno77.ru/kak-prikrepit-polku-mezhdu-shkafami/
- https://dd-space.com/chastye-voprosy-professionalov/mebelnye-krepezhi/
- https://mebel-expert.info/kreplenie-polok-k-stene-bez-vidimogo-krepezha/
- https://MebSam.com/vidy-mebelnyh-krepezhej.html
Installing shelves in a closet: types of fasteners
Furniture fittings vary both in purpose and in the nature of the connection provided.
Shelf fasteners vary in purpose and type of connection. According to their intended purpose, fasteners are:
- Frame.
- Assembly.
- Power.
According to the nature of the connection:
- Collapsible.
- Doesn't add up.
Typically, fastening involves the use of tools such as a drill, Forstner cutters, countersinks, screwdrivers, hex keys, chisels, and wood glue. In addition, some types of fastenings require the use of very specific tools, which limits their ability to be used (Lamello Invis tie).
Tools are needed to attach the shelves.
Before choosing the type of fastening, you need to carefully consider the nature of the cabinet's use, so that in the future you can ensure trouble-free maintenance of individual elements or complete disassembly.
Euroscrews (Euroscrews, confirmats)
Used for joining elements of wooden furniture (chipboard, MDF). Such fasteners for a shelf in a closet require a wall thickness of at least 16 mm. Confirmations are made in a specific length range from 20 to 70 mm.
The wall for this mounting should not be thinner than 16 mm. Preparing the hole requires special drills with a countersink in the base and special keys to hold it in place. They are relatively easy to assemble, but may not fit all types of furniture since the screw head remains exposed. In addition, Eurovits do not allow organizing the longitudinal arrangement of shelves at the same height in the presence of vertical jumpers.
Such fastenings are quite reliable.
Fastenings for shelves in the closet: rastex (minifix)
This equipment belongs to the so-called eccentrics, which indirectly indicates their principle of operation. This type of fastening provides good joint strength, but is difficult to manufacture, as it requires high drilling accuracy. Structurally, it consists of a bushing for the pin (footer), the pin itself and a pressure bushing.
This is what Rastex frames look like. The footer is installed into the furniture wall in a pre-prepared location. A pin is screwed into it. For shrink wrap, the cutter selects a piece of wood to fit the shelf. A hole for the pin is made perpendicular to it at the end. After assembling the connection, the bushing lifts the pin and secures it thanks to the groove in the side wall (hence the ex src=»https://pro-dom-mebel.ru/images/wp-content/uploads/2020/07/sverlenie-dlya-rasteksa .jpg" class="aligncenter" width="1500″ height="1143″[/img] This fastening requires precision drilling skills. Such a connection has two significant drawbacks: it cannot be used in a finished frame, and when marking it, it should be taken into account that when fastening the shelf can be moved in the plane.
Conical coupler
In this case, installing shelves in a cabinet is similar to installing them using a minifix. In addition, their circuit diagram is also quite similar: both have a footer, a pressure sleeve and a pin. The only difference is the storage method.
This is what conical screws for fastening look like. If this is provided in the raster using a groove in the bushing body, then fastening here is carried out with a special conical screw, which, screwed into the cavity of the bushing, enters the corresponding hole at the end of the pin and tightens it, thereby creating the necessary tension.
Screw tie
Typically, such fastening is used to extend (join) shelves, especially in the presence of vertical walls. This solution provides both a fairly convenient installation method and high reliability. This can be considered a further strengthening of the frame.
The screw clamp is easy to install and reliable. The concept of this solution is extremely simple: using a utility knife, a piece of wood is cut out from the edge of the shelf, forming a recess. A similar one is formed on another shelf. A hole is drilled in the wall large enough to accept a grub screw or screw. Specially shaped staples with a side hole are inserted into the grooves. The pin is inserted into the clamps and then tightened with nuts on both sides.
Fastenings for shelves in the closet: Rafix
Another representative of the eccentric type, but unlike the minifix, it does not require drilling the end channel. The circuit diagram is approximately the same, only the pin is held in place by a special screw.
This is what Rafix furniture frames look like. The choice of sleeve is made at the edge of the shelf, so that after machining with a router, the end is provided with a sufficient hole for the passage of the pin, which is installed on the cabinet wall. Next, a shelf with inserted bushings is put on the pins. Fastening is carried out by tightening the bolts. The disadvantages of Rafix include the inconvenience of installation, especially with low shelf heights.
Shelf holder
The simplest option, and no less effective for attaching shelves. Structurally, it differs between mortise and hinged. The insert involves a pin piece with which it is installed inside the wall. Hinged - fixed with self-tapping screws or glue.
Shelf supports can be mortise or hinged. With this method, the shelf sits freely on supports (under its own weight), which makes it easy to disassemble if necessary. Structurally, a typical support for a shelf in a closet can be equipped with a built-in platform with spacers or a special protrusion to prevent the shelf from moving towards the door.
The convenience of such stands is that the shelf can be easily disassembled at any time.
Dowel
The same pin, only made of wood, is the oldest way to connect furniture. Structurally, it is a small (20-30 cm long) chop with waviness along the side surface. The connecting parts of the frame (or shelves) contain coaxial inlet and outlet holes so that a pin installed at the end of the shelf fits into a hole in the cabinet wall.
The wooden dowel has the shape of a small chop with grooves along the side surface. In principle, installing dowels is sufficient. However, for the reliability of the connection, as well as to strengthen the frame, adjacent ends are additionally glued (sometimes confirmations are screwed in). An obvious disadvantage of this type of fastening is the difficulty of disassembling. As a rule, such fasteners for shelves in a closet are used in non-demountable structures.
The disadvantage of such an attack is the difficulty of dismantling the shelves.
Corners
Also a simple and at the same time reliable type of fastening hardware. They differ in both design (in details) and material of manufacture. Of course, it is better to install metal corners, as they are stronger and more durable. However, they have one significant drawback - their appearance.
Corners are simple and reliable accessories for attaching shelves. Since the installation of corners both on the wall and on the shelf is done with self-tapping screws, this may not always be acceptable. In such cases, the installation of shelves in the closet is carried out using open or closed plastic corners. The closed type lid has a special cover that hides the less aesthetically pleasing interior.
However, recently metal corners have begun to be supplied with decorative covers.