If you think that making table legs is difficult, know that it is not so. With simple hand carpentry tools, not much hand-eye coordination, these guidelines will help you create traditionally beautiful table legs for your furniture. The photo on the left shows Cabriole Legs made of walnut, but with equal success, you can take any dense hardwood to make them. Before starting the actual production, I prepared 8 bars measuring 25 x 50 mm and gluing them together to get 4 blanks (legs) measuring 50 x 50 mm.
Selecting good wood for table legs.
It is better when the leg preparation has a large supply of lumber. Always use a generous allowance on the blank, at least 1/4" in width and 4" longer in length than the length of the finished Cabriole Legs, unless you plan to paint them. Otherwise, poor selection of fibers will ruin the appearance of the leg. Pay great attention to the selection of wood structure and grain direction. The first step is to determine your foot measurements. Table legs come in different sizes, but most often production starts with the basic dimensions of 10/4”-16/4”. It is better, when you prepare the support blanks, not to touch them for several days until the final formation of the blank. Once you have decided on the size of the finished leg, you need to make your own template. Three-dimensional appearance or S-curves Cabriole Legs, at first glance, may seem like complex parts. Luckily, a 2D template makes it easy to mark and cut a 3D profile on a band saw. All that's left to do after the bandsaw is a little handwork to fine-tune the shape of the leg. The base template shape is made from 1/4" thick plywood (chipboard). The template should be the same width as the Cabriole Legs and 4” longer than the finished leg length (28”).
What to make of: wood or metal?
The first step when approaching the manufacture of legs for a future table is to choose the appropriate material . The material determines how functional and reliable the table will be, and these, by the way, are the two most important criteria for furniture.
What should you start from when choosing what to make legs from? There are three options:
Plastic .
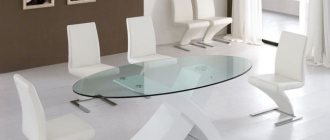
It is very problematic to make supports for the tabletop from plastic yourself. In addition, plastic legs do not have a high level of strength and reliability - they may not withstand impact and may crack. This material is chosen as usual for children's furniture and for finished products.- Metal . As for metal, it is considered the most reliable, functional and aesthetic. Designer furniture is increasingly placed on chrome supports and looks very beautiful.
- Tree . It is as durable, reliable, looks designer as metal, and is also easy to process. But there is a risk that the wood will crack.
Advice . Most often, chrome supports are the best choice.
Transfer the Template to the Blank.
Before applying the markings from the template to the leg, check the direction of the grain and the structure of the wood again; at the end of each leg, use an arrow to indicate which of the two sides the markings will be applied to. Put all the blanks in one place and in the same direction, this will help to avoid confusion in the future.
Place your leg on a flat surface and use a pencil to transfer the outline of the template to the indicated two sides of the leg. Check that the template was transferred correctly.
Determine the control point on the edge of the workpiece. From the top edge of the workpiece, measure the distance, usually to the point of greatest deflection of the line, and on both sides, take measurements of the distance from the point to the curved lines. Identical indicators indicate the correct transfer of template dimensions. This distance will be needed in the future when we shape the leg. In the same place, on both sides, we leave a small jumper (bridge).
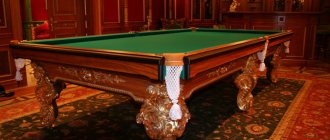
Cabriole style with carvings
You can make a design of legs that was used by the ancient Chinese and Greeks. In Europe, it became fashionable at the very beginning of the 18th century, when it was included in the curvilinear styles of furniture produced in France, England and Holland.
Today, it is much easier to create such a shape with your own hands than before, because there are electric tools that speed up the work. In any case, carved bent legs should be made from a single piece of wood without knots or core, and not from laminate.
- The first step in production is preparing a template drawn on hardboard or cardboard. After which you can start working directly.
- From the template, the drawing is transferred with a pencil to two adjacent sides of a block of wood. Accuracy and correctness of markings are very important.
- Then the shape is carefully cut out.
- Carved wooden legs are placed in clamps and, using rasps, they begin to be rounded.
- Then the leg is polished. The goal is to achieve smooth, fluid lines. Perfectly round shapes are the result of the work of a true master.
- Next, when all 4 elements of furniture are made by hand, carvings are applied to them.
- The carving is made according to the design using a special knife. This is perhaps the oldest way of working with wood.
Cut out the Leg Shape.
Using a band saw, cut out the profile of the front and back of the first side of the leg. Be sure to leave bridges intact.
When the front side and back of the leg were cut out, many of the line markings on the second side of the leg were removed. These lines will be needed when we cut out the second side. Attach the template and complete the lines.
Turn the workpiece 90 degrees and make a cut on the second side of the leg. Notice how the bridges support the base of the leg while cutting. Cut carefully. The goal is to remove as much material as possible, as cleanly as possible. This will reduce the amount of manual work later.
The bridges are cut after the leg profile has been completely formed.
Here are the table legs after making the cuts on the band saw. As you can see, the products have curves and a general shape, they just need some refinement. This is where things get interesting.
Materials
Among the most common materials for making a kitchen table are the following options:
- Chipboard
- laminated chipboard
- Solid wood
- Wooden beam
- Boards
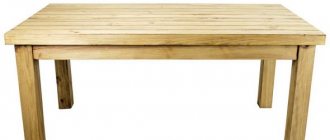
Of course, the most ideal, but expensive material for a table is oak, which is incredibly strong and wear-resistant. For those new to carpentry, pine is the best wood to use as it is easy to work with. A detailed drawing of a kitchen table is needed if the design of the table is complex.
Drawing Model Lines
We mark the modeling lines on the first side; they will be needed for the final formation of the leg. Apply marks with a pencil from the middle of the ankle at the bottom of the workpiece. Hold the pencil at a distance equal to half the thickness of your ankle. Use your middle finger as a depth gauge and draw a line that is parallel to all four edges on the profile. There is no need for precise marking of model lines. Remember that these are just recommendations.
Marking the model lines on the second side is done in the same way as on the first side.
How to attach to a tabletop?
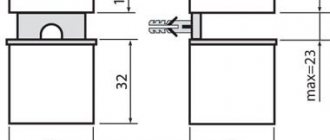
The most optimal and inconspicuous fastening is fastening using surface plates. How to do this step by step:
Purchase eye and eye bolts for large tables and threaded dowels for small tables- Buy the plates . The holes in it must match the dimensions of the purchased bolts. That is, the purchase must be made jointly: bolts + plate
- Mark the center in the section of the leg and drill a hole in it. Screw a bolt into the upper parts of each leg (you can start screwing it by hand, then use pliers)
- Turn the tabletop upside down. Screw the plates strictly at the corners, aligning all the edges of the table and plates, onto the dowels
- Screw the legs all the way into the plates until tightened
- Place the table on the floor and make sure it is level
Ready.
Smooth Leg.
Use a file to shape the leg. Study your foot carefully to see which areas need shaping.
After shaping the leg, it's time to sand. Sand the table legs with sandpaper to the final shape. Connect your legs to the apron. Once the legs and aprons are connected, cut off the top uneven parts of the legs on a band saw. Use a rasp and sandpaper to align the legs with the apron. Legs done! Use this technique on legs of any size and proportion.
Size selection
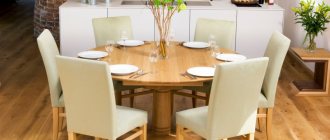
When choosing the size of the kitchen table, you need to consider how large the room is and how many people will be seated at it. For one person you need at least half a meter to be comfortable and convenient.
If the area of the kitchen or dining room allows, then you can make a large table that will be practical and can accommodate not only household members, but also guests. For a small kitchen, a DIY kitchen folding table is suitable.
Types of supports
Based on functionality, the following types of legs are distinguished:
| Photo | Type of support |
| Standard legs They have no additional functionality. For example, you cannot change their height. Ordinary racks are inexpensive, practically undecorated, and have a simple shape. | |
| Sliding supports They allow you to use a simple mechanism to select a furniture height that is comfortable for users. Telescopic stands are attractive in appearance and multifunctional. | |
| Decorative stands Their main purpose is to decorate furniture. They may have an original style and configuration, different designs and heights. Sometimes this is detrimental to the functionality of the table. |
Photo
We advise you to look at non-standard design options for legs:
Sources
- https://www.WildBerries.ru/promotions/vse-do-399-rubley/nakladki-protektory-dlya-mebeli
- https://www.livemaster.ru/popular/100711-reznye-nozhki-dlya-mebeli
- https://www.4dwood.ru/leggs.html
- https://get-wood.ru/furniture-legs/
- https://mebel-expert.info/kak-sdelat-nozhki-dlya-stola-svoimi-rukami/
- https://NedvijDom.ru/gostinnaja/stol/derevyannyie-nozhki-stola.html
- https://samodel.guru/mebel/sdelat/stol/nozhka.html
[collapse]