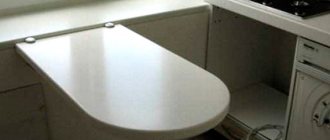
A table is a necessary attribute of kitchen furniture. Today, manufacturers use a lot of materials to produce tables. There is a great variety of table leg shapes; there are more than twenty of them. The traditional version has four legs. In most cases, standard models have a square or rectangular tabletop shape.
Wooden rectangular dining table with four legs
A table with three legs is usually round. It can be used as a small coffee table or as a dining area.
Round wooden kitchen table with three legs
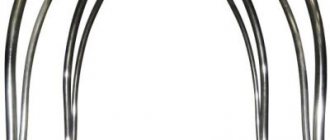
Tables are also produced with two legs; they can be of various types, but the most common models are those with two X-shaped legs or durable ones made of solid wood.
Wooden table with X-shaped legs complete with chairs for a summer cottage
Mounting methods
The legs of the table are attached to the sides of the supporting frame, and the tabletop is, in turn, attached to them
Many craftsmen know that improperly secured legs are the root cause of the table swaying and tilting. There are adjustable mounts that can correct a large percentage of tilt, but quality assembly is paramount.
There are several options for attaching legs to tabletops:
Attaching the leg with surface plates
Attaching the Legs with T-Nuts
An option for attaching the table top to the table frames without using additional fittings using screws
Using small metal Z-brackets is another popular way to secure a countertop.
| Fixation with surface plates | Let's say you bought legs without the appropriate fittings. To install them, you will need eye bolts for larger tables and threaded dowels for smaller ones. |
| Fixing with T-nuts | This mounting option is suitable if you intend to restore the front surface of the table and thus give the interior an updated look. You should have T-nuts, eye bolts and eye bolts available. |
| Screw mounting | This is a common and time-tested method of attaching the table surface to the drawers without the use of auxiliary fittings. Suitable for classic furniture. |
| Application of Z-shaped holders | The use of small iron Z-fasteners is another popular method of fixation. The main advantages of this method are low cost, simple and reliable installation. |
| Use of wooden clamps | An easy and durable method of attaching a tabletop without using commercial hardware. They are similar to Z-shaped holders. They are made from any scraps; it is enough to observe the orientation of the fibers. |
| Using Figure Eight Holders | These metal fasteners are widely used in securing countertops. They come in two types - with washers of the same and different sizes. |
| Application of spacers with grooves | In this case, 2 or 3 auxiliary spacers with rectangular grooves, the length of which is 10-15 mm, are attached to the frames of the kit. |
Using homemade wooden clamps is a simple and reliable way to attach a tabletop to a tabletop without purchasing hardware
Steel figure-eight fasteners - an option using inexpensive fittings
In this case, two or three additional spacers with rectangular grooves 10-15 mm long are attached to the side frames of the headset.
Advantages and disadvantages
There are no advantages without disadvantages, but kitchen legs have many more advantages than disadvantages.
The positive points include:
- aesthetic appearance. Furniture with legs looks lighter and airier. This point is especially important in small kitchens;
- extra space. It is very convenient to store bulky items under the kitchen unit: building materials left over after renovation (cuts of skirting boards, profile pipes), skis, etc. The main thing is to push items away so as not to spoil the appearance of the kitchen;
- headset protection. Legs save the lower cabinets and their contents in case of a flood. In most cases, supports are made of materials inert to water (plastic, metal). Therefore, when flooding occurs, only the flooring suffers, and not the furniture;
- ease of adjustment. During installation, height-adjustable legs make it very convenient to level the tabletop. With their help, you can smooth out differences caused by floor defects;
- free access to communications;
- additional ventilation. It is especially important if the kitchen has built-in appliances;
- Possibility to fix the plinth . The presence of legs allows you to remove and install the base if necessary. With its help you can change the appearance of the kitchen.
There are significantly fewer negative aspects. The main disadvantages can be considered:
- difficulties with cleaning. You can only get rid of dust and dirt around each support manually, which is tiring. But if this is not done, cobwebs and debris peeking out from under the headset will spoil the appearance of the interior;
- objects rolling into the gap between the set and the floor. During the cooking process, any fallen round-shaped vegetable (onions, potatoes, etc.) will certainly end up under the kitchen cabinets. If there are animals or small children in the house, there will be many times more unnecessary items under the set. Without noticing in time an apple that has rolled under the cupboard, after a while you can find a lump of rot and mold there;
- higher cost. No, standard plastic supports are relatively inexpensive, but they do not have a very aesthetic appearance. They are usually hidden by additionally installing a base. Designer legs made of metal or wood cost many times more.
Most manufacturers of high-quality furniture make it with legs. Only budget models of headsets of not very high quality are produced on a non-removable base (a box made of MDF or chipboard). Such a support swells very quickly from moisture and loses its appearance. Even the silicone base covers (covers) that are sold to protect the box do not help.
Manufacturing process: step-by-step instructions
Drawing of a wooden table with four legs
First, you must make a drawing. Decide which legs you will attach - purchased ones or make them yourself. The form can be any.
Curly balusters or legs for a homemade table
If the tabletop is 0.8 m wide, then the legs should be 1.2 m long. To ensure the tabletop is smooth, sand it with a sander. There should be no gaps between the joints. To prevent the tabletop from deforming due to high humidity, the boards must be laid with a counter texture.
Tabletop boards at least 30cm thick
At the ends of the boards to be joined, you need to drill holes 8 cm deep, keeping the gap between them at 10-15 cm. We go through the prepared areas with sandpaper and lubricate the edges, dowels and holes with glue. We insert the dowels into the holes, thus connecting the tabletop. Remove excess glue.
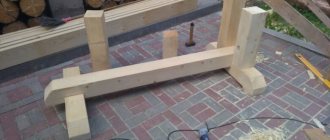
Option for attaching legs to a wooden table
Using glue and screws, we connect the transverse and longitudinal boards to the legs. On top of the latter we make two recesses to attach the tabletop. We wait twelve hours and install it. We cover the structure with varnish, stain or paint.
Table with fixed top, frame and legs
Important! When using stain, consider the following: choose the thinner wisely, the surface before coating must be carefully sanded, the main thing is to properly adjust the gun (the shape of the torch should be oval, and the layer you apply should cover the existing one by half).
Cover with varnish or wax to protect the top layer
Having familiarized yourself with the options for attaching legs to the tabletop, it will not be difficult for you to make a table with your own hands, thereby updating the interior with such an original thing.
Required Tools
Each fastening method requires a list of tools. Accordingly, in the order of listing the installation methods, you need to prepare the following tools:
- Screwdrivers or screwdriver - to facilitate the screwing process.
- Drill for drilling holes, hammer, pliers, screwdriver.
- A screwdriver (you can additionally use glue) for better fixation of the drawer. You will also need a semicircular chisel to make a pocket for a self-tapping screw.
- Screwdriver or screwdriver.
- Saw or machine for making wooden clamps. You also need a chisel and screwdrivers.
- Saw or thin chisel for cutting a cavity in the drawer, chisel, screwdrivers.
- Saw or thin chisel for drawer, screwdriver.
It is important not only to install it evenly, but also to properly secure the legs to the tabletop. There are various ways to attach the legs to the table, all that remains is to choose the most suitable option. There is nothing difficult about making a dining table with your own hands. This makes it possible to take into account all the design features of the kitchen unit and the dimensions of the room. Making a table with your own hands is a task that even novice craftsmen can do.
Video: Solid wood table top. My mounting option
There was a table with an excellent top. However, during operation, the scabbard mount (it was plastic) cracked and had to be removed. How to attach the legs to the tabletop so that they last long enough?
It depends on what kind of “legs” (they are also furniture supports), as well as what material the tabletop is made of and, most importantly, how thick it is.
Here is an example of a fastening option: metal supports (legs) are attached with self-tapping screws to the table top.
The self-tapping screw is shorter than the thickness of the material from which the tabletop is made.
Necessary materials
The materials that are used to make tables are very different; we will tell you about some of them.
Solid pine for making a table with your own hands
Chipboard is an inexpensive material option for making a dining table
MDF is suitable for making a table, it is of higher quality and environmentally friendly
On the structural influence of seasonal deformations
Any board, be it laminated board or solid wood, is subject to swelling and shrinkage depending on the time of year and fluctuations in humidity. Tightly fixed countertops, deprived of the ability to freely contract and expand, begin to deform under the influence of internal stresses - warp, bend, twist and eventually crack.
With seasonal changes in humidity levels, wood expands and contracts predominantly across the grain. The countertops of a room or kitchen set vary in width within 1 cm, depending on the size of the lid and the type of wood. Linear changes along the fibers are insignificant.
How to choose?
The main job of kitchen legs is to support the weight of lower cabinets and their contents. Therefore, the main selection criterion should be the reliability and strength of the support. Flimsy models with thin walls can shorten the life of the headset.
When purchasing kitchen legs, they must be checked for defects. There should be no cracks or places with thin soft metal or plastic (the wood is usually solid, so such problems arise less often with it). If the product can be bent by hand, it is unreliable.
Depending on the width of the supported module, a different number of supports are required:
As for the height of the supports, there are no strict regulations, rather wishes.
In kitchens with low ceilings, a set with high legs looks disproportionate. But when choosing the height of the supports, you must first focus on your own height.
It will be inconvenient for a tall person to cook on a low countertop, just as it will be inconvenient for a short person to cook on an excessively high one. Choosing the wrong height can lead to back problems.
Fastening the tabletop with screws
This is a simple and time-tested option for attaching the table top to the table frames without the use of additional fittings. The special conical extension selected in the frame ensures slight mobility of the screw when changing the size of the tabletop. The cover itself is securely attached to the body.
Having made the basic markings, an end hole is drilled in the drawer. After this, using a wide semicircular chisel, select a pocket for hidden installation of a screw.
Using a narrow chisel, make an angular expansion on the upper edge of the drawer. The extension of this groove is always done across the grain of the tabletop, since wood expands and contracts in this direction.
Using Z-shaped holders
Using small metal Z-brackets is another popular way to secure a countertop. The main advantages of this method are low cost, maximum simplicity and accuracy of installation, and no need for additional structural elements.
One end of the steel holder is screwed to the table top with a screw. The second is inserted into a groove sawn in the upper edge of the drawer. The recess is made in such a way that the edge of the bracket does not rest against the wood and moves freely in the groove as it expands. Thus, the fasteners allow the tabletop to change its dimensions in any direction without consequences.
Mounting on wooden clamps
Using homemade wooden clamps is a simple and reliable way to attach a tabletop to a tabletop without purchasing hardware. Clamps work on the same principle as metal Z-clamps. They are easy to make in series from scraps that can be found in every workshop. Of course, this takes time, but often not much more than it takes to go to the store for accessories.
When making wood clamps, be sure to maintain the correct grain orientation as shown in the diagram to give the bracket proper strength.
Installation of tabletops using figure-eight holders
Steel figure-eight fasteners are another popular hardware option used to secure countertops. The bracket is installed in a small recess drilled with a Forstner drill or a square recess selected with a chisel so that it is flush with the upper edge of the drawer. The holder is fixed with two screws: one to the body, the second to the back side of the tabletop as shown in the photo. As the board swells or contracts, the bracket rotates slightly, preventing the wood cap from bending. The recommended distance between fasteners is 15-20 cm.
Figure-eight holders come in two types: with washers of the same and different sizes. In the latter case, a washer with a large diameter is attached to the drawer. When deciding to attach the tabletop to a kitchen or room set in this way, you need to make sure in advance that the thickness of the drawer matches the diameter of the washer.
Stages of work
Installation of countertops made of chipboard or MDF is carried out in stages. The work is carried out in a clear sequence. Before you begin, you should carefully read the practical guide.
Preparation
The base is positioned so that the front wall of the floor cabinet is strictly parallel to the edge of the tabletop. Markings for fitting begin with the apron. The edge of the adjacent slab should lie in the same plane as the facade. Next you need:
- Trim the edge taking into account the roughness of the wall.
- Make recesses for the pipes.
- Make cutouts for the sink and hob.
- Fasten and align to the base along the façade so that the tabletop protrudes forward by 35–45 mm.
Pruning must be done carefully, accurate to the millimeter. You can use a power tool. After this, you need to prepare the fasteners for the base of the kitchen table.
Trim edge
Make recesses for pipes
Make cutouts for the sink and hob
Fasten and align to the base along the façade
Joining parts
This stage is needed if the tabletop is prefabricated. Its fragments are combined into a single monolith. Where there are joints, screeds are made. Step by step sequence:
- Glue the ends.
- Connect the parts, lay and secure the ties.
- Polish the joints.
- Strengthen the seams.
For work you will need aluminum strips. They come in corner and connecting types. Self-tapping screws are used for fastening.
Even the slightest gap during joining will significantly complicate installation. The parts should fit as closely as possible to each other.
Glue the ends
Connect the parts, lay and secure the ties
Polish the joints, strengthen the seams
Installation of the canvas
Before installing the countertop, you should cut holes for the hob and sink. To do this, you can use a ready-made template. It is usually included with the instructions. Step by step guide:
- Place the tabletop on the cabinet.
- Level it up.
- Fix the plate in a stationary position.
- Secure with corner brackets.
To simplify the process, it is recommended that two people perform this step. An assistant should press firmly on the tabletop. This is necessary to make it easier to fasten it with screws.
Place the tabletop and level it
Fix the plate in a stationary position
Pin
Installation of skirting boards
The plinth performs a decorative function, covering the joints on the kitchen table. It also reliably protects them from moisture and mold. This element is glued or screwed using self-tapping screws. Step-by-step instruction:
- Measure the required length of the plinth and cut it.
- Treat the installation area with silicone to protect against moisture penetration.
- Install the profile, securing it with self-tapping screws.
- Cover corners and joints with decorative trims.
If you decide to use glue, the base must first be degreased. After this, the profile is attached. The rest of the steps are exactly the same.
Measure and cut to desired length
Treat the installation area with silicone
Install profile, close corners and joints
Using slotted spacers
In this case, two or three additional spacers with rectangular grooves 10-15 mm long are attached to the side frames of the headset. When changing the width of the tabletop, the screws will move freely in the grooves, thus preventing structural deformations of the wood. Additional strips act as a tie; they increase the rigidity of the body and protect the drawers from deformation.
Fastening the table legs
The legs of the table are attached to the sides of the supporting frame, and the tabletop is, in turn, attached to them. In order to ensure a tight connection between the drawers and the legs and to compensate for the shrinkage of the wood due to fluctuations in humidity, the following fastening methods are used.
Joiner joint tenon-socket
Advantages : high strength, lack of additional fittings and unnecessary fasteners, ease of manufacture.
Disadvantages : the connection is non-separable and does not compensate well for shrinkage.
Wooden corner ties
Advantages : proper connection strength, the ability to disassemble, good compensation for seasonal deformations of wood, an alternative to purchased fittings.
Disadvantages : difficult to manufacture, rarely used for mass production of furniture.
Connections on dowels
Advantages : reliable carpentry connection without visible fasteners, as simple as possible to manufacture.
Disadvantages : inseparability, poor compensation of deformations.