Undoubtedly, decoupage is one of the most popular and simple techniques for beautiful and unusual design of interior items. Decoupage does not require special knowledge and materials; any needlewoman can get acquainted with this technique at home and at minimal cost. Craftswomen all over the world most often choose bottles of various elegant shapes and sizes for decoupage, because each of us has some unusual bottle lying at home that it would be a pity to throw away, but we can’t find a use for it.
Your soul requires a creative act - decorating bottles with your own hands.
Types of decoupage
This technique has its roots in ancient China, where artisans decorated screens, ceramic vases and even the facades of some buildings with designs! But after the Great Silk Road was laid in the Middle Ages, the decoupage technique migrated to Europe and French craftsmen began to decorate furniture, dishes, and tapestries with paper ornaments. Despite the fact that decoupage is a type of decorative and applied art in China, it has a French name, and translated means “to cut out.” This is what it's all about, cutting out the paper and gluing it to the surface. But modern craftswomen don’t limit themselves to this; they tie unusual scarves and ribbons on the decorated bottles, glue rhinestones and beads. And a layer of paint is also applied on top of the decorations!
At your service there is always a master class in the company of a master or an online version of the work process.
It is not at all surprising that decoupage has undergone a lot of changes and acquired many types throughout its centuries-old existence. Of these, five main ones can be distinguished.
- Decopatch. This method of decorating a product is reminiscent of sewing a patchwork quilt. Indeed, the decor is created from individual pieces of paper or napkins. They can be combined with each other thanks to a common theme, colors and texture, or they can be completely opposite to each other. There are even special decopatch kits on the market, which are combined in style, meaning and colors; they will help the novice craftsman in making a bottle that will please the eye, but no one will forbid you to create such kits yourself!
Design ideas can be seen on forums where needlewomen share their achievements.
- Direct or classic decoupage. This type of decoupage is suitable for those who are just trying themselves in a new type of creativity. The technology for making the work is very simple and will be understandable to every master; even a child can handle it. The image applied to napkins, photo paper or rice paper is carefully cut out and glued to a previously prepared surface. You need to work very carefully so that the finished work is not damaged by folds, bubbles or tears. There are many ways to paste a picture, but three main ones can be distinguished: using a file, a fan-shaped brush, or an iron.
Each of the methods is good in its own way, but not everyone is suitable for applying an ornament to a bottle.
- Reverse decoupage is the opposite of classic decoupage. Suitable for decorating objects made of transparent thin glass. In this case, the drawing is applied to the inside of the object and all steps for applying it are performed in the reverse order.
It is worth remembering that a bottle made using reverse decoupage is not suitable for storing liquids.
- Artistic or, as it is also called, smoky decoupage. This type of decoupage is suitable for those needlewomen who want to create the effect of a painting or fresco on the product they are decorating. This effect can be achieved due to the fact that the drawing seems to dissolve into the general background, smoothly transitions into it, creating a smooth flow of one part of the picture into another, without sharp transitions that hurt the eye.
A simple way to decorate is decoupage with photos.
- Volumetric decoupage appeared in the creative world relatively recently and quickly gained unprecedented popularity. Many of you have most likely seen bottles decorated with fabric, semolina, shells, glass, and dried flowers. This is volumetric decoupage. Advanced craftsmen use a special structuring paste to create volume, which is purchased in specialized stores for creativity.
After processing, a picture, photograph or postcard is pasted onto the bottle.
As you can understand from this section, there are no strict rules in decoupage. You can use not only standard paper or napkins for decoration, but also whatever your heart desires. The main thing is not to be afraid to try something new and connect your imagination to the creative process!
Decoupage technique: features and basics of application
The French term used for this original decoration technique actually means carving. The applique, transferable to a variety of surfaces, is suitable for processing and decorating products made of wood and metal, glass and polymers, of different shapes and sizes.
An interesting and easy-to-implement technique helps transform the appearance of any objects and decorate them with thematic images. Thanks to its simplicity and ease of use, it has deservedly gained popularity among modern designers and home craftsmen who strive to express individuality.
Decoupage is carried out using a certain technology, including several simple steps using pre-prepared materials. The creative process is so exciting that once you have mastered the technique of decorating objects with appliqué, it is difficult to stop and you want to realize more and more ideas.
Tools and materials for work
The main thing to do before starting work is to properly prepare your workspace. Decoupage, although a simple technique, takes quite a lot of time. Work in a well-ventilated and lit area; decoupage varnish has a rather pungent odor that can make you feel sick and dizzy. Also make sure you have a comfortable chair and table, you don’t want your back to hurt, do you?
In order to get a taste for decorating, simple manipulations with the object are enough.
For DIY decoupage with napkins, you will need the following materials, most of which you already have at home.
- Glass or bottle with a smooth surface without cracks or chips.
- Special cards for decoupage, magazine clippings, three-layer napkins
- A degreaser such as acetone or alcohol.
- Acrylic paints, watercolors and pastels for drawing small details or creating additional effects.
- PVA glue or special glue for decoupage
- Brushes of various sizes. If you plan to work with small details, then you will need small flat brushes with thin artificial bristles. To apply acrylic paint or primer, a regular dishwashing sponge can be useful, but keep in mind that it creates a rough texture, which is not necessary for every job. To create a smooth surface, a large synthetic brush is required. Thin brushes made of synthetic bristles are suitable for drawing small details on the finished work.
It is worth remembering that separate brushes are needed to apply glue, paint and varnish.
- Acrylic or craquelure varnish
- Additional decorative elements. Ribbons, fabric, beads
- Nail scissors for cutting out small details. A stationery knife or cutter is suitable for the same purposes.
- Masking tape;
- A piece of sponge. Needed for applying primer.
- Sandpaper. For sanding surfaces during preparatory work or for correcting minor mistakes. Choose paper with fine and medium grain in several gradations.
- Priming. Serves to improve adhesion between layers of glue and napkins.
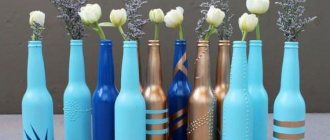
The colored decor of the bottle adds mood to the interior.
Work organization tips for beginners
Most of us don’t have extra time and money, so you should take care of organizing your workplace in advance - so that later you don’t have to suffer excruciatingly from the sight of furniture damaged by glue and paints.
So:
- It is recommended to cover the working surface with an unnecessary bag, film or paper;
- It is important to use only high-quality tools: sharp scissors, brushes with natural bristles. If desired, you can purchase ready-made decoupage kits;
- It is better to always keep nail polish remover on hand in order to remove excess paint stains in time;
- To make your craft the highlight of the celebration, pay special attention to choosing a picture to transfer to the bottle. It should please the person to whom your gift is intended, or match the style of the holiday table setting. You can even create a drawing yourself in any graphics editor and print it on a laser printer.
What varnish is needed for decoupage
Varnishing is a very important process in decoupage. But today in stores you can find such a large number of varnishes of different varieties that it is sometimes difficult for a novice master to decide on his choice. Due to the fact that the final appearance of the work will depend on the quality of the varnish, its choice should be approached more than responsibly.
The decoupage technique is quite simple to perform, but the effect it gives is amazing.
First you need to figure out what functions the varnish performs in decoupaging bottles with napkins.
- Protective function. By covering your work with varnish, you are guaranteed to protect it from moisture, scratches, dust and dirt.
- If you apply several layers of finishing varnish, you will get rid of the step between the background and the ornament, which will help bring your work closer to perfection.
- If you plan to work on a large scale with drawing a large number of small details, then each new layer should be varnished. This will help correct and prevent errors.
- If you moisten the ornament with varnish, it will be easier to glue it to the work.
With the help of ordinary drawings you can transform old bottles.
Volumetric decoupage of plates with napkins and paints - master class for beginners, step-by-step video
Decoupage for beginners with napkins and paints can be voluminous, as in the master class from the video below. Unlike the technique with craquelures for plates, using this version of decoupage it is possible to create dishes, and not just decor on them. If desired, it can also be used for more complex items (furniture, cutting boards, bottles, boxes). True, such crafts made from paper are not as durable as those made from wood, so they are purely decorative. Learn more about what is needed for volumetric decoupage of plates with napkins and paints (list) and the technique itself in the step-by-step lesson below.
Types of varnishes for decoupage
- Acrylic varnishes. More often than others it is used for decoupage. Compared to others, they dry quickly, forming a durable film. Brushes are easy to clean; just wash them thoroughly with soap and dry them with the nap facing down.
- Polyurethane. They are often used in baths and saunas, so you can safely cover with them those products that will often come into contact with water.
- Alkyd varnishes. They provide a very durable coating, as they are used for their intended purpose for floor coverings.
- Decorative varnishes. Can be purchased in specialized stores to create various effects. For example, aging or scuffs.
The easiest way to learn decoupage is to start small.
As you can see there are many different types of varnish on the market. There are both water-based and adhesive-based, with different effects (antique, with glitter, cracks) and finishes (matte, glossy, semi-matte, semi-gloss). Choose water-based acrylic varnish, as it is more versatile, but the effect and finish should be chosen based on the desired result. Both regular construction varnish and a special one for decoupage are suitable for the job, but this is a more expensive option for advanced craftsmen.
For the first experiment, you can use empty containers and perform decoupage on glass or plastic bottles.
Design options
Classic (straight)
Suitable for beginners. In this format, you can easily and quickly learn how to glue selected paper pictures (napkins, cardboard, photographs) onto a prepared base. As a result, you achieve complete coverage of space;
Reverse (illustration inside)
Used for clear glass. The element is glued with a pattern to the glass, decorated with a background accordingly, thereby creating a window behind which the intended content can be seen;
Artistic (smoky)
To perform in this format requires some experience in using color (shading, stretching, shadows). Paint with halftones and shadows is applied around the selected image, the result is a non-standard picture on glass;
3D volume – living design
To work, you can use fabric, relief paste, beads, ribbons, flowers, branches and many different little things. By connecting the elements in the planned sequence, you get the expected unique three-dimensional pattern.
Decopatch is considered a type of decoupage. The principle is to cover the required area with small pieces of paper. This way the entire product is covered, creating the appearance of an antique cracked painting.
What glue is needed for decoupage
A lot also depends on the decoupage glue. Good and high-quality glue will not cause peeling, will not cause the paper to turn yellow when exposed to sunlight, and will even prevent the development of fungus and mold on the finished work.
Craftswomen use a wide variety of elements as materials for decorating surfaces.
Properties that decoupage glue should have.
- Colorlessness after the adhesive layer has completely dried
- Medium consistency of adhesive composition
- Average setting time. The glue should set gradually, giving the craftsman time to smooth out wrinkles and correct possible mistakes
- Over time, the glue should not turn yellow or darken
To transfer a newspaper or magazine clipping to glass, you will need to first prepare the paper and the drawing itself.
Craft stores sell jars of special glue for decoupage, but again, it is of no use to beginning craftsmen who just want to try themselves in a new technique. PVA glue from the middle price category (do not take the simplest children's one) diluted with water in equal proportions is suitable.
How to Preserve Bottles of Unusual Shapes and Sizes
After the next spring cleaning, a lot of useless items accumulate in the pantry or on the balcony that are a pity to throw away. But there is no point in storing them for a long time, so home craftsmen are looking for ways to use them in the household, for crafts and interior decoration.
This is also true for bottles with intricate and elegant shapes, which can become real decorations for any room in the house. They can be used to store all kinds of liquids, as practical vases for fresh flowers or dry compositions, or as absolutely decorative decorations.
How to make decoupage from napkins on a bottle
Do you have glass bottles left at home after the holidays? Don’t rush to throw them in the trash, because with the help of available tools you can turn them into a real work of art, for example, into a vessel for storing alcoholic drinks or cereals, as well as a vase with a unique design. Moreover, the decoupage technique does not require special and expensive materials; even a child can do it! The main thing is to have a lot of inspiration, some free time and patience! In this section we will look in detail at how to make decoupage for beginners on a bottle.
The best place to start mastering the decoupage technique is with table napkins.
Bottle using decopatch technique
This decoupage technique is reminiscent of patchwork - sewing things from small patches of different textures. Therefore, you will need multi-colored scraps and scraps of paper of any density. Napkins, old gloss pages, newspapers or special paper are suitable here. Bottles decorated with sheet music look very interesting.
Choose one characteristic that will unify your patchwork bottle - such as style, theme, color or texture. They don't have to be identical: use the color wheel principle or contrasts. The main thing is that there is a concept, and a brand new bottle will not look tacky. Decopatch is good both as a background and as a full-fledged independent decor.
Photo: domsdushoy.ru
Preparing the glass surface
Nowadays, each bottle from the store has various labels with information about the manufacturer, place of manufacture, composition and expiration date. But this will interfere with high-quality decoupage, so you need to get rid of the stickers. To do this you will have to put in a little effort, but the result is worth it. Leave the bottle in a solution of water and dishwashing detergent for several hours, then easily remove the paper. Use medium-grit sandpaper to remove any remaining glue and paper. Go over the entire surface of the glass with a degreaser and sand the glass again.
Don't forget about this action.
Important! The final result will depend on how carefully you complete the preparatory work.
Using tights
Thanks to their qualities, tights have become a popular material for decorating bottles. They are easy to drape, tightly fit the product, taking any shape. The work is carried out as follows:
- Remove labels from the bottle and degrease the surface.
- Trim the tights to make a stocking. Coat it with glue, squeeze out excess glue and pull it onto the bottle. Distribute the folds on the edges of the stocking evenly around the perimeter. Leave to dry for several days.
- Cover with acrylic paint.
- Decorate the product according to your preference and apply varnish.
Using the technique of decoupage, it is possible to transform the appearance of an object, giving it a new, more interesting look. A bottle decorated in this way will perfectly decorate a festive table and surprise guests.
Primer
This stage is needed to make the drawing brighter and much easier to stick to the glass base. The bottle is covered with a layer of acrylic painting primer or plain acrylic paint (usually white) using a sponge or large wide brush.
If necessary, layers of paint and primer can be layered.
If you think that the drawing looks bright enough without primer, then you can skip this step.
Option 3. Decoration using decoupage card.
Here's what you need to get it working:
- as usual, a bottle of sparkling wine;
- card for decoupage, or a colorful napkin with New Year's motifs;
- gloves;
- alcohol;
- Matt lacquer;
- brush;
- acrylic primer;
- scissors;
- decoupage glue;
- white acrylic paint;
- sponge or sponge;
- various decorations (ribbon, fir branches, etc.).
For detailed MK, watch the video:
DIY New Year's gift - decoupage of a champagne bottle. Master classes on Podarki.ru
Carving the ornament
If you decoupage a bottle with napkins, then only the topmost napkin layer is used for the work. Carefully cut out the design you like and attach it to the bottle, outlining the composition of the work. If you decide to use magazine clippings for decoupage, then you need to remove the glossy layer from them. To do this, coat the tenderloin with several layers of varnish, dry completely, and then put it in warm water to soak for 20-30 minutes.
Peel off the bottom layers of the soggy paper, and you are left with a beautiful translucent glossy picture in your hands!
Toilet paper in product decor
To decorate a bottle with toilet paper, you need some of the following materials:
- toilet paper;
- napkins;
- salty dough;
- acrylic paints of different colors;
- beads for decoration.
In this master class it is not necessary to use toilet paper; you can decoupage bottles with napkins. Prepare a bottle for decoration. Wash it and remove all labels. Take toilet paper and tear it into pieces. Cover the entire product with them. The next stage is preparing ropes from napkins. Cut the napkin into strips, the width of which will be approximately 1.5 cm. Divide them so that some are double-layered and the rest are single-layered. As a result, you will get ropes of different volumes. Ropes are made in a very interesting way, which is demonstrated in the photo. Pour some water on the table. Take one strip and wet it with water, only in some places. When you roll it, the liquid will be evenly distributed throughout the napkin. Twist it first with your fingers and then with your entire palm.
Paper balls are made in the same way. Prepare salt dough. Dissolve salt in hot water and add flour. Now you can knead the dough. The pattern that you have in mind can be drawn with a pencil, and then decorated with paper and dough. If you don’t like something, it’s easy to change it right away.
When your work is ready and dry, you can paint it black. Spray paint works great.
The master class is approaching its final stage. The photo shows how the bottle is painted golden. You only need a little bit of it. After that, add beautiful stones or rhinestones, as in the photo. They are fixed with a glue gun. Now all that remains is to put the bottle in a visible place. This method is also used to decorate cans for bulk products. Create them, for example, in a nautical style.
Gluing a picture to a bottle
The most interesting part of the job is gluing the ornament onto the bottle. The glass must be dry, grease-free and thoroughly primed. Lubricate the surface on which you plan to stick the drawing with a pre-selected glue, then glue a dry napkin, magazine clipping or decoupage card. Coat it generously with glue using a brush, trying to get out all the small bubbles and smooth out any irregularities. Work very carefully!
Don't tear the paper, otherwise you'll have to start all over again.
Note! Before applying to the bottle, decoupage cards should be soaked briefly in warm water and then dried on a soft towel.
Reverse technique
Reverse decoupage of bottles will require a product made of transparent glass, since the placement of decorative elements occurs on the inner surface of the product. The technique involves a slightly different order of actions.
Note!
- DIY gifts for February 23rd - a large selection of ideas for creating unusual gifts for Defender of the Fatherland Day
- What to give a 2-year-old boy - a list of the best options for an interesting and useful gift (120 photo ideas)
Papier-mâché - TOP 120 photo reviews of original products. Detailed instructions for beginners on creating beautiful crafts
Fixing the result with varnish
To protect the result of your painstaking work from external influences, for example from dust, water (this is very important for a bottle), scratches, air, you should cover the work with a varnish layer. Before doing this, thoroughly dry the product from glue and moisture.
To make your work look better, cover it with several layers of varnish.
Napkins, paper
For decoupage, napkins and paper with a printed pattern are used. They are glued to the surface and covered with varnish. There are the following types of materials for this type of decor:
- Napkins. Most often they are three-layered - the bottom two are not used. The design is applied to the top layer. It is separated and used during work. You need to know how to work with napkins, as they are very thin, stretch, bubble, and tear. In general, you need a certain skill in work. Napkin decoupage for beginners is not always easy. The average price is 12-18 rubles per pack.
Napkins for decoupage are soft and thin, you need to work with them carefully - Decoupage card on rice paper. The design is applied to a canvas made of rice or mulberry fibers. It is easier to work with because it is more elastic, stretches better, and does not deform when working with compounds containing water. There are different sizes (up to A4 format and larger) and density, the cost of one card is from 70 rubles.
- Cards for decoupage on paper. Plain paper is used, on which drawings are applied. They are good when gluing on flat surfaces, as they practically do not stretch. It differs not only in size and patterns, but also in density. The cost of paper cards for decoupage is from 35 rubles.
Paper decoupage cards - can be tried on flat surfaces - Prints on photo paper. You can order a print of any unique image. It will be transferred to thin photographic paper, but to work with it, you need to know certain techniques.
In general, they also use special pastes to create three-dimensional images, ordinary photographs from which the bottom layer of paper has been removed, and other drawings. But it’s not easy to work with them, and this is not decoupage for beginners, but for those who are already developing their skills.
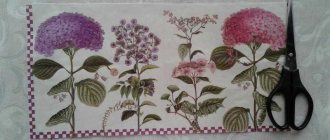
Decoupage a bottle using rice paper
Of no less interest is decoupage made using rice paper.
Rice paper is a loose, easily wet paper that is used in baking and handicrafts.
Prepare rice paper and a floral pattern before work.
This is a win-win decoupage duet that will decorate the interior of any kitchen or living room.
Thoroughly degrease the entire surface of the bottle.
It is more profitable not to cut the rice paper, but to tear it into pieces to get uneven edges, which give a beautiful effect.
There are two ways to glue such paper to a bottle.
The first involves applying glue and gluing rice paper onto it. In the second method, wet paper is applied to the glass and dried with a hairdryer.
The finished work should be varnished.
Option 5. Decoupage “Santa in the house”
As in the previous options, you will need a bottle, primer, acrylic paints, sponge, napkins, glue, varnish, brushes, and also:
- file;
- polystyrene foam for windows;
- putty or salt dough for the chimney;
- thin rope;
- putty knife;
- hot glue gun.
Detailed instructions in the video:
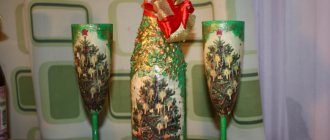
Decoupage of a bottle of champagne for the New Year // Decoration of bottles of champagne for the new year.
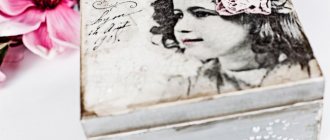
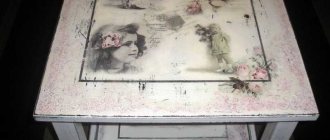
Vintage bottle
An unusual vintage vessel can be decorated using the craquelure method.
To obtain a spectacular antique bottle, a special craquelure varnish is applied to the surface covered with paint. When dry, it will crack, creating the appearance of a surface that has been fairly worn by time.
In addition, it is easy to paste the bottle with paper elements of the corresponding theme: ancient writings, geographical maps, floral motifs.
At the end of the work, the product must be varnished.