Articles
All photos from the article
One of the most important kitchen utensils is cutting boards. It is on them that cutting vegetables, cutting meat and many other tasks are performed that allow you to prepare delicious dishes. Next, we will get acquainted with the characteristic features of plywood models, and also learn how to make them ourselves.
Photo of a plywood cutting board
Selection of material for manufacturing
We sweep away plastic, ceramics and glass immediately. And not only because these materials are difficult to process manually. But also because of their high hardness and negative impact on the knife blade, which quickly becomes dull when in contact with such surfaces.
Cutting board materials
Let's focus on wood, as a natural, beautiful and pliable material, most suitable for our purpose.
Second coat of paint
After applying the first layer, the board needs to be dried. The paint dries completely in a maximum of 2 hours. If the layer is thin, this will take 30 minutes.
Next you need to apply a second layer of acrylic. To do this you need to use a sponge. The sponge does not leave streaks on the surface being painted, which is typical for a brush.
We recommend reading:
- DIY furniture decoupage: TOP-150 photos of original ideas. Step-by-step instructions + master class with examples
Children's room decor: a review of interesting solutions + step-by-step instructions on how to make beautiful decor in a nursery with your own hands (130 photos of new designs)
Features of the cutting board
There are various cutting board designs. They may look like this:
- simple rectangular design;
- cut out figure using a jigsaw;
- manufacturing a structure that includes a waste box, knife storage areas and other options.
There are a large number of design options for this product. Limits are set only by a person’s imagination.
“>
Advantages of decoupage
This technique has a number of special advantages. These include:
- bright visual effect;
- simplicity. Beautiful decoupage of boards is accessible to any diligent person;
- relative cheapness of materials;
- durability of the applied drawings.
Features of manufacturing work
Housewives want the cutting board to not only perform direct functions, but also decorate the room. When making a product from plywood, it is worth considering that the surface of this material cannot be decorated with carvings. It is worth using other types of decoration.
The aesthetic appearance is achieved through unique contour lines and decorative patterns that are applied to the surface of the board. To make the board beautiful and original, you should pay special attention to the shape.
There are two ways to make plywood boards: solid and glued. Each option has its advantages over the other. A solid board is easier to make, while a glued board is more functional. When starting work, you should adequately assess your skills and capabilities.
Dimensions and shape
The dimensions of the wooden block are also of great importance. They are determined based on the required dimensions of the finished product, taking into account the method of its manufacture and waste from trimming.
The dimensions of the board, in turn, depend on its purpose. If a small board is enough for cutting cheese or fruit, then for cutting meat it should not only be large, but also thick enough to withstand the blows of a kitchen hatchet.
Cutting board for chopping meat Cutting board for cutting baguettes
However, you should also take into account the dimensions of the kitchen workplace. A large board will be of little use if it simply does not fit on the countertop between the stove and the sink, for example.
The cutting board must match the dimensions of the countertop on which food is cut.
This applies not only to products for working purposes, but also for decorative purposes. After all, quite often they are made exclusively as decoration for the kitchen interior, and not for their intended purpose. Decorated with carvings, paintings or appliques, such accessories are an integral part of kitchens in a rustic or Provencal style.
Decorative carved cutting board Wood painting
The dimensions and shape of the board should be such that it is convenient not only to use, but also to store. For example, when storing in a hanging position, a hole must be provided. It can be located in the middle or in the corner of a rectangular product or in the center of a long handle.
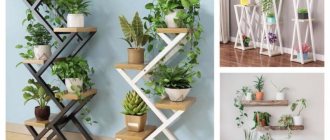
Storing cutting boards
Cutting board storage stand
The golf course has many surprises in store. Holes are hidden somewhere, kitchen knives are hidden somewhere
If the product will be used not only for cutting and cutting food, but also for serving, it is worth giving it a non-standard shape.
Cutting boards for the sink
Tools for work
To make a plywood board quickly and efficiently, you need to use the appropriate tools. If the work on making a kitchen product is being done for the first time, questions may arise regarding tools.
To make the simplest board you will need the following tools:
- If you think about how to cut plywood, then the ideal option would be a manual or electric jigsaw.
- To form the holes you will need a drill with a set of wood drill bits.
- A set of sandpaper with different degrees of grain.
- Sander.
- Milling machine.
- Rasp.
The set of tools for decorative finishing depends on how and with what the product will be decorated. Array
Basic Rules
The service life of your craft will depend on the quality of the wood you choose. We immediately refuse budgetary, but too soft pine - for the board we need a denser and more moisture-resistant solid that will not warp from constant washing, and will not be afraid of a knife. The best way to cope with this task is:
- Acacia;
- Pear;
- Cherry.
The shape of the board can be very different, as well as the size, but in any case it should be convenient to work with a certain type of product. The method of storing homemade utensils is also worth thinking about right away. And if you, for example, plan to hang it on a hook, then you will need to provide a fairly large hole somewhere on the edge or on the handle.
When making a board with a handle, make sure that its axis exactly coincides with the center line of the main blade. Otherwise, holding a bulky object will be difficult and inconvenient.
Cutting board mockups
Drawings of plywood cutting boards are very easy to make; just select the paper of the required format, a ruler and a simple pencil. The drawing is created in accordance with the following requirements:
- You need to decide on the shape of the future product.
- Consider the dimensions of the cutting board.
- Create a sketch of the product on paper.
- Using a ruler and other drawing tools, a layout is created.
The drawing recreates marks regarding the dimensions and other features of the future product.
Types of wooden boards by manufacturing method
Based on manufacturing technology, these kitchen accessories are divided into solid and glued. The first ones are cut according to a template from a single piece of wood (a wide board or a cross-section of wood) and processed.
Solid wood cutting boardPuzzle cutting boards
Glued boards can be assembled from longitudinal bars, end cuts or various shapes like puzzles or mosaics. They are more durable and practical, as they are less susceptible to internal stress and deformation.
Glued end cutting boards
For reference! Particularly valued are the so-called end boards, in which the wood fibers are located not along the working surface, but perpendicular to it. When cutting, the knife blade does not bump into hard fibers, but seems to fall between them, so it remains sharp longer and requires sharpening less often.
Image overlay
After the second background layer has completely dried, you can proceed to overlaying the image. This is a responsible matter and cannot be rushed.
There are two most common methods of this operation - wet and dry. They will have to be considered separately.
How to make an end cutting board
In this case, the manufacturing process will be a little more complicated, because much more work will be required with wood. You should use cuttings from fairly hard wood species, for example, pine or oak. They should not be affected by diseases such as fungus, and they should not have knots or cracks.
The blanks will be processed on a jointer, and then strips 2.8 cm wide will be cut. The number of parts made of oak and pine should be the same. When the blanks are made, use a jointer and sandpaper to grind the parts down to a size of 2.5 cm, and lay the pieces one by one.
Next, we glue all the blanks together to create a solid product, and here it is important to note the fact that you cannot use an adhesive composition that contains formaldehyde. It is also not worth using epoxy compounds, and most often use PVA-based substances. The main advantage of such boards is that they are much stronger than ordinary ones, which are made of solid wood. In addition, end cutting boards are much less likely to dull knives during use.
Surface preparation
In order for the applied paint to adhere better, it is necessary to sand the surface. Regular sandpaper will do for this.
For greater effect, it is recommended to first go over the entire area with coarse sandpaper. And after that, repeat the operation, but with fine-grained sandpaper.
We recommend reading:
- Volumetric decoupage is the best master class for beginners. Step-by-step instructions and all the features of the decoupage technique (100 photos + video tutorial)
- Paper for decoupage - an overview of all types. Instructions on how to choose and use the right material using the decoupage technique (120 photos + video)
- Decorating furniture with your own hands - an overview of the best methods. 100 photos of the best options for modern furniture decor
DIY making
Below are examples of how to make wooden cutting boards yourself.
Solid boards
First you need to choose the size and shape of the board. If it has a complex configuration, you will need a paper template, drawn to a real scale by hand or in a computer program, and then printed on a printer. It’s easy to transfer it to the board by cutting it out and tracing the outline with a pencil.
Transferring the template to the board
Advice! If the product has a symmetrical shape relative to the axis, it is enough to draw half of the figure on a sheet folded in half, and then cut it out, using scissors to grab both layers of paper.
In addition to the wooden blank itself, you need to buy beeswax and oil to impregnate the board. It will give the wood a more pronounced texture and rich color and will protect it from moisture. You can use special mineral oil to impregnate countertops. But flaxseed or Vaseline bought at the pharmacy will do.
Oil
As for tools, you don’t need anything special to make a solid wood board. Of course, if you have a planer, sander and jointer, circular saw, router and jigsaw, the job will be done quickly and effortlessly. But it is quite possible to get by with a hand jigsaw and sandpaper, especially if the shape of the product is simple, without small radius elements.
If all this is available, you can get started.
Step 1. We transfer the outline of the future product onto a wooden blank and cut it out with a jigsaw or a hacksaw for metal with a fine tooth - it does not make large chips.
Sawing the workpiece
Step 2. Using sandpaper, a file or a grinder, we process the planes and ends of the board, eliminating broken chips and wood fibers and making the product smooth.
Grinding
Step 3. If you have a router, you can use it to round the edges or cut a hollow around the perimeter.
End processing with a router
Step 4. Drill a hole and process its edges.
Drilling a hole
Step 5. If this is provided for by the project, we decorate the board with carvings, paintings or other means, keeping in mind the purpose of the product. If this is an applied accessory, it is better to decorate only one side. A drawing or carved ornament is allowed on the working surface only around the perimeter or in a small area at the edge.
Wood carving
Step 6. Treatment with a protective composition. Since food comes into contact with the cutting board, it cannot be coated with varnish or other synthetic compounds. It is better to use the oils listed above to impregnate wood, applying them with a brush, sponge or piece of lint-free cloth. The number of layers depends on the absorbency of the wood. Each layer should be given time to dry and absorb, after which you should walk over the surface with the softest sandpaper. The last layer is applied with a mixture of oil and melted beeswax in a ratio of 3:1. If it is not completely absorbed, it is heated with a hairdryer and the excess is wiped off with a paper napkin.
Treatment with a protective composition
Video - Wooden cutting boards
As a starting material, you can use not only boards, but also plywood, furniture panels, and transverse cuts of wood.
A simple option for beginners
To work, you will need an edged board with a thickness of at least 20 mm. Here it is better not to skimp and choose the best type of wood - Extra or class A, that is, without knots and wormholes. The tools are standard for DIY woodworking: jigsaw, drill, sander, chisel, yew, as well as a pencil and tape measure.
Work order:
- Cut out a template from paper - it is best to draw it on a piece of paper folded in half to achieve precise symmetry.
- Using the pattern, make markings on the prepared solid board.
- Using a jigsaw, cut the workpiece along the contour. If you have a complex sketch that includes arcs of small radius, it is better to cut through these areas using a metal file - it gives a more accurate line.
- The board blank must be thoroughly sanded using wheels of different grain sizes. Be sure to chamfer and sand all corners.
- Treat the finished product with Vaseline oil, allowing it to absorb well and dry, repeating this operation several times. By the way, you shouldn’t chase super-expensive mineral oil “especially for boards.” This is the same liquid that is sold in any pharmacy, just named differently.
- When the oil begins to appear on the surface, it should be removed with a dry rag and the board should be left for a day until completely dry.
What products is it suitable for?
First of all, you should know that you cannot cut all types of products on one surface. There should be a separate board for meat products, fish, vegetables and fruits, cheese and baked goods. If you cut raw vegetables for salad after cutting meat, there is a risk of bacteria and parasites entering the human body. This can happen even if the surface is thoroughly washed with a special product. Another argument in favor of having multiple surfaces: after using a particular product, a specific odor remains, which is transferred to other products during subsequent use. The aroma and taste of dishes can be spoiled if food is cut on one board. Some housewives wipe the surface with fresh lemon or a cotton pad soaked in vinegar, but this folk method does not always completely eliminate unnecessary odors. This is why it is advisable to purchase several wooden surfaces for cutting different products.
What can be carved on wooden planks:
- Meat and fish products;
- Sausages, cheeses;
- Vegetables, greens;
- Fruits;
- Bread.
You can separately purchase boards for rolling out dough, as well as for chopping onions and garlic.
Speed up blow drying
If you don't have enough time, you can use a hairdryer to speed up the drying of the paint. The device must be placed at a distance of at least 30 centimeters from the product, and the air flow should not be too hot. The minimum or, in extreme cases, average speed of the device will be enough.
DIY cutting board photo
Help the site, repost