Share on social media networks:
The chest of drawers can be used to store a variety of things. At the same time, in an online store that is located many kilometers from home, you can choose an option that will fit perfectly into the interior of any room. But these items are sold unassembled. Accordingly, after purchase they will have to be collected. The easiest option is to turn to professionals for help and pay for the services. On the other hand, this is not a very difficult task, you can handle it yourself, you just need to learn how to assemble a chest of drawers.
General Basics and Rules
This universal piece of furniture is very convenient, from the point of view of the fact that you can hide a lot of useful things there at your discretion and it requires very little space. However, this depends on which option is preferred. The modern market offers the buyer a variety of styles and colors to suit every taste, for example, Camellia, Grace, Beijing, Grand, Rondo models. You can buy an inexpensive chest of drawers in an understated style or an artsy one in the form of a timeless classic. But no matter which option is chosen, the item will need to be collected.
Chests of drawers Turin new and others can be stationary and mobile. The latest models, for example, Matrix, are equipped with rollers with stoppers; they can be oriented in different spatial directions in the room. There are such groups of them:
- wall (will be against the wall);
- suspended (they can be strengthened, for example, with the support of a conventional bracket);
- third-party (located near furniture);
- island (used as separation).
The top of the drawers is varied: a changing table, a built-in mirror or an ironing board.
It is important to remember that before you start collecting, you need to:
- Unpack the set.
- Find the assembly instructions.
- Determine the presence of all components.
Take a look at the component parts, their unity, and the absence of damage during transportation. Carefully study the assembly manual and especially its order. Then you need to prepare everything you need and only then start assembling.
Where can you put a chest of drawers in the house (proper location)
The appearance and dimensions completely determine the place where the chest of drawers will be located most harmoniously and most conveniently. Since retractable elements take up a lot of space, this type of furniture should definitely not be placed in the aisle, near doors or in narrow rooms.
A standard chest of drawers will fit harmoniously into any interior.
The ideal location would be along the edge of the room next to other interior elements. The chest of drawers can also serve as an excellent table for cosmetics, in combination with a mirror, or as a good TV stand.
Required Tools
To assemble the chest of drawers K800, 700, 1102 and others, you will need a minimum of equipment that is found in almost every home.
Namely the following:
- screwdrivers for tightening bolts or screws, ordinary ones can also work, but only with them you will have to spend more time on assembly;
- hammer, as you need to nail the back cover;
- tape measure, without it it is difficult to assemble the item;
- an awl, you can use it to make holes into which screws will be inserted.
In order to improve visibility and convenience, the chest of drawers are located on the floor, and the devices are in the box. This usual procedure is necessary so as not to lose small components and speed up the process. It’s also worth studying the manual, diagrams and drawings to avoid possible mistakes, and then assembling the room’s furniture.
Preparing to create
Making a chest of drawers with your own hands begins with its design. Before making calculations, determining the appropriate size of the countertop, assembling drawers, etc., you need to choose a place to install the chest of drawers. Take a careful look around your room. Study the structure of the baseboards, see if there are switches, sockets, etc. on the wall, which must be taken into account when choosing the size of the chest of drawers. It is important that it does not cover anything and that nothing interferes with its use.
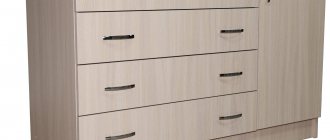
Making a chest of drawers with your own hands begins with its design. Before making calculations, determine the appropriate size of the tabletop, assemble drawers, etc.
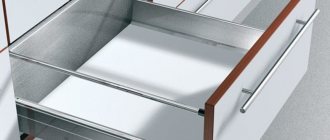
Figure 1. Chest of drawers.
Next you need to choose the size of the chest of drawers. The most comfortable chest of drawers is considered to be one with a width of 80-130 cm and a height of 80-85 cm. The best chest of drawers is one that you would be comfortable using. If you can't figure out what your chest of drawers should look like, visit your local furniture store. Surely you will like something, and in the future you will be able to focus on the model you like.
Most often, home craftsmen make chests of drawers from wood. This is a relatively cheap and easy to process material. If you have never made furniture with your own hands before, opt for a wooden chest of drawers.
Next, you will need to create a project for your homemade chest of drawers. To do this, you can use special computer programs or draw it on paper. The main task at this stage comes down to determining what parts the chest of drawers will consist of. Next you will need to create a drawing. You can take the diagram in Fig. as a basis. 1.
A drawing is a must. If you can still do without a project, then you won’t be able to work without a drawing.
The drawing must show at least a side or top and front view.
It will be better if you can depict it in cross-section. Be sure to include the dimensions of each part. This will allow you to see how all the parts will fit, where indentations are needed, etc. When drawing up a drawing, it is recommended to focus on the following dimensions:
- thickness of wood or slabs – 1.6 cm;
- the distance between the outer parts of the drawers and the back wall of the homemade chest of drawers is at least 1 cm;
- a gap of 3 mm must be added to the dimensions of the inset facades, i.e. 1 mm for each individual end.
Return to contents
Developed chest of drawers assembly diagram
Before starting work on a wenge or other color model, you need to find out the presence of all parts. The manual should contain a list of what is in the package on a separate sheet. If something is missing, you should immediately contact the store where you purchased the item.
A necessary stage of assembly is checking the product for the presence of all important elements. This should be done at the stage of transferring the chest of drawers from the dealer to the client, since otherwise it will not be easy to justify the incomplete set of the product. If everything is in place, you can start assembly at any convenient time. Here are the instructions step by step:
- Read the manual. If you didn’t include it when packing the furniture, you can use advice from other sources.
- First you need to assemble the frame. The lower end is secured with the support of steel angles. They are also used to connect side walls. Screws are used to secure components. First of all, you need to screw them in with a screwdriver, which will speed up the process.
- Drill holes in the horizontal links to secure the cover. Screws with a diameter of 4 mm are used as clamps.
- Fold the pieces as directed in the instructions and insert them into the frame. Particular attention must be paid to the installation of guides along which the boxes will move. Before installing them, you need to find out the accuracy of the measurements.
- Attach the back cover. Often, fiberboard or plywood is used for this. To fix it, craftsmen mainly use nails. But to make a safe fastening, you need to use screws.
At the last stage, the handles on the drawers and other decorative components are installed.
Inspect parts for defects
The path that furniture takes from production to the end user is usually multi-stage, and therefore no one is immune from defects. It is better to check the furniture for the latter immediately before purchasing.
First, examine all the parts of the dresser before assembling.
Sometimes the case may be scratched or slightly damaged, and sometimes the damage may be significant. The chest of drawers comes with an assembly diagram, so don't be lazy to check the package before starting work.
In addition, the instructions should have a picture of this chest of drawers.
Guide installation guide
There are two types of sliding devices: roller and ball (telescopic). Each of them has its own characteristics. But these systems are identical. They are divided into two parts: one is attached to the box, which guarantees smooth sliding, and the second is attached to the inner wall of the side frame.
As a rule, rails are marked on the part for fastening. If not, you need to provide them yourself. For this you will need a tape measure and a pencil. On both sides, attention should be paid to the uniform spaces on the walls of the building. The guides are fixed along the markers with a screwdriver.
We pick up the instructions or look at the diagram on the Internet
In our case, there are only two boxes. Let's unpack and first find the instructions. If it is not there, we are looking for at least a picture of the appearance of our piece of furniture. It can be pasted on the outside of the box. If this is not the case, then we can only rely on our own heads and these recommendations, or take a standard diagram as a guide:
First, let's look at the option with instructions. Depending on the responsibility of the furniture manufacturer, the instructions can be either detailed or brief (without part designations), but in both cases it contains an image of the appearance of the product.
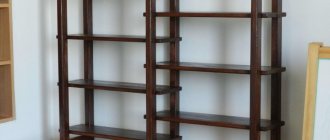
Assembly should begin with the largest structure; in the case of a wall, it will be a cabinet with shelves for books.
Installing Items and Shutting Down
The assembled parts of the box must be installed. Next, the stability of the structure on a flat surface is checked. The parts should fit tightly, without gaps or distortions, and the drawers should be removed smoothly. If necessary, tighten bolts and eccentrics. The final touch is to properly attach the caps. The self-build process is complete.
After installing the main elements of a luxury chest of drawers, guides are installed on the inner surface of the sides of the case and on the drawers. If they are installed correctly, they will be able to ensure smooth movement of the elements and they will not cling to each other.
Which IKEA furniture is better not to assemble yourself?
Despite the fact that the Swedish brand has won the hearts of millions of people around the world precisely thanks to the ease of assembling their own products, there are still complex projects here. The Apartment Therapy portal conducted its own survey and identified the three most exhausting IKEA puzzles, for the assembly of which it is better not to skimp and hire a specially trained person.
1. Any bunk bed
2. Bed frame with drawers and headboard with shelf Brimnes
3. Trisil bed frame
Recommendations for the master
A person who is not a professional can quickly and easily assemble a luxurious Lux chest of drawers with his own hands, following the general rules.
Here are some tips:
- The assembly starts from largest to smallest, first the main body of the structure, and then the parts are attached.
- To eliminate distortion, assembly should be performed on a horizontal surface.
- It is important not to damage the plastic and wooden parts of the chest of drawers.
- To avoid the chest of drawers tipping over, if the system has a standard changing table, it must be attached to the wall using corners or plastic fasteners.
- If the model involves auxiliary parts (mirrors, interchangeable surfaces), then the assembly instructions change. Auxiliary plastic components are attached to the finished product using a screwdriver.
Thus, after performing a number of simple operations, it is quite easy to assemble a chest of drawers. Once you have mastered the design of chipboard cabinetry, you can easily move on to making complex items such as cabinets. Assembling a chest of drawers with a mirror, in general, is also not difficult.
However, without at least the simple skills of a home craftsman and suitable tools, you should not still assemble furniture - it is preferable to seek help from a professional. A qualified specialist will help you assemble the chest of drawers quickly and at the proper level.
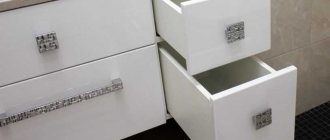
How to remove a drawer
It is not difficult to pull out the structure: black clamps (tongues) are visible on the surface of the guides on the left and right sides. To completely release it, just hold these “flags” on both sides and lightly pull the handle in your direction.
The system may differ slightly on different pieces of furniture.
For example, if the furniture has telescopic guides with wheels, you just need to lift the bar so that the wheels come off the rail - the structure will slide out perfectly with minimal effort.
By performing each action sequentially, you can easily pull them out of the guides without damaging the structural elements.
If there are no “antennae” and wheels, the rail will simply have to be disconnected. The screws are unscrewed from one side and the other, and the shelf is pulled out.
In order to return everything to its place, follow the steps of this instruction in reverse order.
From the chest of drawers
Most often, you have to remove a shelf from a chest of drawers when there is a thing or object inside that does not allow the structure to be completely closed.
Having lowered the plastic holders on both sides and holding them in this position, begin to smoothly push the drawer to the end, pulling it out in this way.
It doesn’t matter whether there is a closer or not, the following actions are performed:
- pull the shelf towards you as much as the guides allow;
- press and slightly turn the plastic latch, which is located in the place where the hardware strips meet each other;
- Repeat the steps for the other side, pull the mechanism a little and pull it out.
You can only understand which model you have by trying to release the arrow. If it does not go down, then do not press harder, otherwise you will break and damage the structure. Just lift it up and everything will work out.
Note! If the latch is made of plastic, do not yank it too much - this will break the latch. You can use a thin screwdriver, but it is better to do everything carefully with your fingers. Do not pull the clamp completely out of the guide system!
On the retractable part there are special stoppers in the form of plastic tabs that prevent the structure from fully extending on its own.
Kitchen set
To open or remove a shelf on kitchen furniture, you will have to perform a number of these steps:
- empty the items and open the structure all the way;
- on the inner slot there is a black flag, made of plastic;
- press out the “tendril” using a small flat-head screwdriver: press it onto the flag and pull it towards you.
Important! The element should not be clamped too tightly - this could break the plastic. The flag can move either down or up on one side or the other.
- when the “tendril” goes beyond the end of the body, you cannot pull it out further. Try to lower the flag down; if that doesn’t work, move it up;
- simultaneously press the clamps on both sides and pull the box towards you.
You need to pull it out carefully so as not to bend the guides. The middle section should come out of the strip mounted to the wall of the compartment. Be sure to check the condition of the balls: they must be lubricated. If they are dry, lubricate them with the simplest grease.
Only with a correct understanding of how a thing works can you use it correctly.