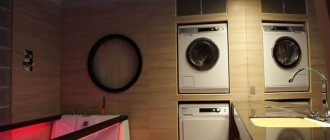
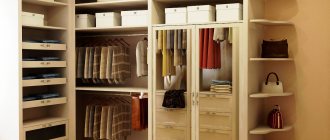
Installing a washing machine in the dressing room is an advantageous option that will allow you to carry out all manipulations with laundry in one room. This design will appeal to many housewives who want to rid all other rooms of this device. In order to understand whether it is possible to place a washing machine in the dressing room or not, you need to familiarize yourself with all the nuances of the procedure.
Most often, this option is widespread if the apartment is small enough. Then you can easily organize a separate room. But there are several main nuances here:
- Under no circumstances should the dressing room be located above the living space.
- It is possible to connect all communications.
- The redevelopment has already been approved by the relevant authorities.
Advantages and disadvantages
When considering the issue of installing a washing machine in the dressing room, people are faced with doubts and prejudices, the pros and cons of the idea. It is worth highlighting the main advantages of this solution:
- Such a design will free up extra space in the bathroom or kitchen.
- Installing the device in a storage room saves time, because you can sort through, store and rinse clothes in one room. Here the washed items are hung on hangers and dried.
- The washing machine can be installed in a special cabinet with a spacious lower compartment. This will complement the design of the dressing room and save space.
Despite significant advantages, this layout option has its disadvantages:
- During installation of the machine, owners may encounter technical difficulties. This includes the availability of outlets, ventilation and suitable space.
- A large washing machine in a dressing room can damage the floor covering, so it is better to install it on concrete tiles.
- If the dressing room is located at a large distance from the sewer pipe, there may be a problem with pumping out soapy and dirty water.
Installing a washing machine in a storage room is an original and profitable idea. However, before implementing it, it is worth weighing all the pros and cons in order to avoid unpleasant consequences.
Is it possible to install a washing machine and dryer from different brands?
Not worth installing
devices one on top of another just like that.
This is a gross violation of operating rules and regulations and is therefore strictly prohibited. While the dryer
,
the washing machine
should be turned off and vice versa.
Interesting materials:
How much does it cost to change the screen on iPhone 11 PRO? How much does it cost to change the screen on Honor 10 lite? How much does it cost to change the screen on Honor 10i? How much does it cost to change a computer screen? How much does it cost to change the screen on Xiaomi Redmi Note 5a? How much does it cost to change the screen on a tablet? How much does it cost to change the screen on a Samsung J2 Prime? How much does it cost to change the screen on Xiaomi Redmi 4x? How much does it cost to change the screen on Xiaomi Redmi 6A? How much does it cost to replace a computer screen?
Design Features
Before installing the equipment, you need to inspect the selected room and determine the most advantageous place for washing. Owners should consider the following points in such cases:
- You shouldn’t immediately gouge the walls to identify a new outlet. Initially, it is worth assessing the chosen location for compliance with the protruding elements, height and width.
- In addition to the main size of the device, it is worth retreating about 10 cm, since hoses will be located on the back side of it.
- When a place has been allocated, you will need to check the strength of the floor. If the apartment is old and the flooring leaves much to be desired, it is better to fill the allocated space with concrete or lay tiles on it. Wooden pop can cause the body to collapse. The floor structure must support up to 90 kg of weight.
- If the floor in the apartment is uneven, then there is no need to worry. You can adjust the stability of the equipment using a building level.
- It is also worth choosing a place that is located near a sewer pipe. If it is located at a distance of more than 3 meters from the washing machine, dirty water will be difficult to drain, which will lead to subsequent breakdowns.
- Before installation, you need to inspect the hose from the washing machine. Usually it has a length of up to 1.5 m. If this size is not enough, it is worth changing the hose to a longer one.
Once all the parts are prepared, you can begin the installation process.
Possible difficulties
Imagine that the size of your pantry allows you to install a washing machine, but you will have to solve some problematic issues that will arise during the work.
First you have to figure out how to connect communications. As a rule, there is not even an electrical outlet in the pantry, and what can we say about other communications in the form of water supply and sewer networks. If the central communications pipes are laid in the apartment at a distance from the storage room, and moving them causes certain difficulties, this idea should be completely abandoned.
In addition, the pantries do not provide another communication system - a ventilation system, which negatively affects the functionality of the washing machine. This issue can be resolved, but additional financial costs will be required.
In addition, if the pantry is located in the hallway, then its floor covering does not always allow the installation of a washing machine. If there is a smooth concrete floor, the issue will be resolved positively, but old boards or chipboards will have to be replaced or strengthened.
If the listed difficulties do not scare you, you can safely get to work. After this, do not forget to arrange a storage room with a washing machine and make sure that the communication lines do not spoil the design of other rooms.
Installation of equipment
Before starting the process, you should prepare for the fact that owners will face additional material costs. Their level depends on the characteristics of the room and equipment. What does the preparatory process look like:
- The first step is to provide the necessary ventilation for the dressing room. Constant washing causes dampness, which leads to the formation of fungus and mold. Constant air circulation will solve problems and eliminate unnecessary inconvenience. Many residents skip this point and hope for a constantly open door. However, this brings constant inconvenience and leads to air pressure.
- Now you need to think about connecting the equipment to the water supply and sewer pipes. Previously, the procedure was carried out using special taps and rubber hoses. Today, such techniques are already outdated. Because the drain and inlet hoses are already installed in the equipment.
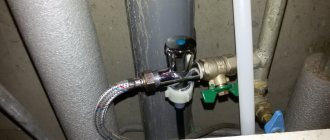
- When installing adapters, it is better to rely on the shut-off valve. It allows you to shut off the water after the end of the cycle and during repair work.
- Now you need to cut a special recess to install the tee. Tools for work are selected depending on the material of the main pipe.
- Next, connect the equipment to the sewer. Here residents may encounter difficulties, so if they do not have the proper experience, it is better to contact an experienced master.
- Now comes the turn of the sockets. They are rarely found in the dressing room. Therefore, they must be done near the washing machine. If there is an old outlet in the room, it is better to replace it. Sufficient power is required for stable operation of the equipment. Old sockets will not be able to provide this. This will lead to equipment failure or fire. It is worth noting that connecting equipment to the network using extension cords is prohibited. It is best to provide direct access to the network.
- To install the socket, you should focus on parts with a moisture-resistant housing; they are characterized by a long service life and reliability.
- They make a place for the electrical network at the same level as the washing machine. Before starting the process, you will need to turn off the power supply to the apartment.
- Now you can make the markup. The optimal distance is up to 100 cm from the floor. You need to mark the measurements using a simple pencil.
- Next, you need to determine what size wiring is needed to lay the path from the equipment to the junction box. It is better to measure out the extra 30 cm in case of repairs or changes in design.
- Select a drill attachment suitable for a specific wall and drill holes. If you don’t have a variety of attachments at home, it is recommended to use the standard one. All actions are performed using a respirator and gloves.
- Next, based on the markings provided, you need to drill a small hole for the future outlet.
- Using a grinder, make a 4 cm groove.
- Thoroughly clean the resulting holes from dust and dirt, fix the socket box in the hole made.
- Place the wire under it. One end of it will need to be connected to the shield, and the other to a drilled hole in the wall.
- To make the structure invisible, it is masked using plaster or putty. It is imperative to wait until the mixture hardens.
- Now you can insert the socket itself and connect the wires.
When connecting wires, it is better to use terminals that will help make the procedure safe. When testing the outlet, you should listen to the smell. If there is no haze or burning, then everything was done correctly.
Connection to water and sewerage
The most difficult thing is to connect the unit to the water supply and sewerage system. Moreover, the earlier methods of connecting to the central water supply using taps and a piece of rubber hose are no longer relevant. Now the inlet and drain hoses are already built into the washer and you need to screw them to the pipes using bends or tees.
It is better to install adapters with a shut-off valve, which will allow you to turn off the water after the end of the cycle, during repair work or moving the machine to another location.
The task is simple - cut a hole and install a tee in it. The sequence of actions and the necessary tools depend on the pipe material. So, it’s easier to cut into PVC with cold water supply: install an adapter with a tap and connect the washing machine hose to the outlet. The machine is also connected to the sewer. But if you do not have the proper experience, it is not recommended to do the installation yourself: it is much safer to turn to a professional plumber for help.
Ensuring stable ventilation
After installing the socket and connecting the machine to the sewer, you can safely wash your clothes. However, if the dressing room is not large in size and does not have windows, you should think about normal ventilation in the room. Otherwise, mold and a damp smell will appear in it, which will appear on hanging clothes. To organize ventilation, the following measures are taken:
- Make a small hole between the floors and a door.
- Install a special door containing bars.
- Make holes in the walls, which are kept at a distance of up to 30 cm from the floor covering. According to user reviews, this is one of the most reliable options.
- Make a hole in the floor. A similar method is used in private houses with a basement floor.
Normally, the dressing room should be regularly ventilated and there should be good air circulation. The integrity of the clothes, their smell and the degree of contamination depend on this. It would be a good idea to organize an exhaust duct. It is made using a special grille, which is installed right under the ceiling.
If the dressing room is large, it is better to make several similar channels, which will be located at a decent distance from each other.
Decorating the storage room
We have already found out whether it is possible to install household appliances in a cramped room. True, there is little free space here, and it is not recommended to clutter it further. Containers placed on hanging shelves are used for storing washing powders and other laundry products.
As follows from user reviews, this solution allows you to save at least thirty percent of usable space. Illumination in the room is best done from spotlights, placing them on the central part of the ceiling. As you can see, even such a small room as a pantry can bring significant benefits.
Installing a machine mount
During washing, the equipment produces strong vibrations and shocks, which put strong pressure on the floor. Because of this, it is not recommended to install the device on wooden or weak floors. To get out of this situation, you can use the following constructions:
- Using a special mat with an anti-vibration function. It helps reduce the percentage of pressure on the floor and protect the washing machine from damage.
- Installation of a massive concrete slab. Such a design will take time, however, it can reduce the level of vibrations during washing. It is worth remembering that concrete coating will not correct problems with the floor and will not make it smoother.
- Construction of an installation elevated above the floor. To do this, you will need to cut 4 holes in the floor, insert metal pipes into them and cover them with a durable plywood sheet. This design reduces the amount of vibration, but quickly becomes unsuitable for use.
When all the details are prepared, you can safely use the washing machine installed in the dressing room.
Strengthening the floor
During operation, the washing machine vibrates; some modifications even “bounce” at high speeds, thus creating strong pressure on the floor.
Before placing the washing machine in the pantry, it is necessary to repair the floor so that it becomes hard and level, which will ensure the normal operation of household appliances, protect the equipment from premature breakdowns, and extend the service life of household appliances.
It's bad if the floor in the pantry is made of boards. It will not be suitable for installing a washing machine; you will have to carry out repair work by following certain steps:
- First, the area where the washing machine is planned to be placed is precisely marked on the floor covering. Ten centimeters are added along the perimeter of the applied rectangle to avoid destruction of the platform when using washing equipment;
- the floorboards of the pantry are carefully dismantled;
- a formwork structure is installed in the prepared rectangle;
- a reinforcing mesh is laid, providing additional strength to the concrete base;
- the prepared site is filled with concrete mortar, the mixture is carefully compacted;
- Place logs along the edges of the base to prevent the boards from hanging.
All that remains is to wait for the concrete pad to completely harden and return the boards to their original place, firmly fixing them along the joists. The floor covering of the pantry for the installation of a washing machine is prepared; all that remains is to install the equipment in the room and begin its operation.


