Home » Decor
Decor
Alyona
50310 Views 1 comment
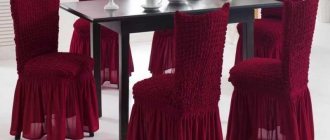
Today, DIY chair covers can be increasingly found in interiors of various styles. They combine several functions: they protect new furniture from dirt and the claws of pets, and in old furniture they hide imperfections and scuffs. They also make it relatively easy to update the interior without high costs; they can be quickly changed depending on the time of year or event.
Options
There are quite a few options for covers, but among them there are several main ones.
- Seat cover - such a cover will protect the original upholstery from dirt and prevent rapid wear.
- A half-cover is a product that does not completely cover the chair.
- Another option is separate covers for the back and seat. The back cover is great for the holidays; unlike other options, this one is the easiest to sew.
And finally, solid covers that cover the entire surface of the chair, hiding absolutely all defects. But in terms of tailoring, it is a rather complex product that requires the most materials and time to manufacture.
Types of models
There are different types of cases. Before making a pattern, decide which option you will make:
- solid (they cover the entire chair, can hide imperfections, but are more difficult to sew and require more fabric than other options);
- separate for back and seat (suitable for a children's room);
- semi-covers (they do not completely cover the chair);
- exclusively on the back (easy to sew, often used for festive decoration);
- only on the seat (protect the upholstery from dirt).
Unfortunately, it is simply impossible to find a cover pattern that would fit any chair or stool. You can find some patterns on the Internet, but most often you have to create an individual pattern for a specific product.
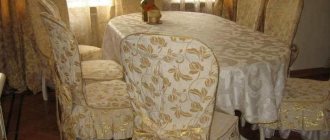
White color is not practical for everyday use
Measurements and pattern
In order for the pattern to be accurate and the product to fit well, you must first take measurements.
We take measurements. Depending on the model of the cover, you need to measure the height and width of the seat and back, as well as the estimated length of the product. Pay special attention to the measurements of the chair legs, as in some models they may widen downward. In this case, you need to take several measurements at the top and then at the base of the chair.
We mark the widest and narrowest areas in our drawing.
- Drawing. Before transferring the measurements taken to the pattern, draw a drawing on paper and mark all the measurements taken there. The simplest pattern is for a one-piece cover: it simplifies sewing, but requires a little more fabric than cutting all the parts separately.
- Pattern. After that, we proceed directly to the full-size pattern. It can be built on tracing paper, newspaper or leftover wallpaper, repeating the schematic drawing.
- Checking the pattern. To be completely sure that the pattern is correct, apply it to the chair and secure it with tape. This way we can see all possible inaccuracies made when constructing the drawing and correct them before sewing begins.
- Final version. Then we build the final version of the pattern - with seam allowances (about 2 cm on each side).
Making a pattern
There is no universal pattern that can be used to sew covers for any chair. Therefore, you will have to arm yourself with a measuring tape and build an individual sketch. There are two main approaches to making patterns. Traditional - taking measurements and drawing a drawing on paper or tracing paper. For this you need the following dimensions:
- Seat - depth, overall width (as well as along the outer edge and closer to the back), thickness.
- Backrest - total height, distance from the floor and seat to the top edge, width of the top and bottom, thickness.
- Legs – height (distance from the floor to the top edge of the seat).
This is enough for a standard chair. Additional measurements are taken if the design has some features. The main ones:
- rounded parts;
- legs made at an angle outward (in all directions, only back or only forward);
- The upper part of the back is concave.
Sometimes it is difficult to take into account all the subtleties, so it will be much more reliable to use the second method. This is a pattern that is built on fabric (an old sheet or a piece of non-adhesive interlining). Sequencing:
- throw the fabric over the chair, press it, repeating the shape, pin off the excess fabric with pins;
- Use a marker to draw boundaries and folds;
- remove the layout, remove the pins, cut out the parts along the drawn lines.
The material should be light so that the marker lines are clearly visible.
When the sketch is ready, you need to calculate the approximate fabric consumption, for this:
- lay out tailor's tape (1.5 m) on the floor or table;
- combine the approximate layout of the pattern parts;
- calculate how much fabric of different widths is needed: from 0.8 to 1.6 meters.
It is important not to forget about the reserve for allowances, hems and making ties. On average, a simple case will require 1.5–2 meters. In order not to spoil the main fabric, when sewing a chair cover with your own hands, it is recommended to sew a test product from unnecessary material, try it on and, if necessary, make corrections to the pattern.
Fabric selection
The main criteria are functionality and stylistic combination.
In addition, it should match the curtains and tablecloths. It is recommended to buy covers with fabrics that are pleasant to the touch; they are perceived differently by people, so an individual approach is needed. It is important to pay attention to the ability of the material to maintain high quality after washing and be resistant to stains (depending on the color).
There are about 6-8 commonly used types of fabrics.
- Gabardine has a dense structure.
- Synthetic materials are worse in all respects: they quickly get dirty and dry out.
- Crepe-satin is elastic and soft, quite thin and has a shine.
- Lycra (supplex) is elastic, looks beautiful, and is easy to care for.
- Spandex does not allow water to pass through, but breathes well, so it is durable.
- The brocade is heavy , thick and looks expensive. It is difficult to care for, so it is better to use dry cleaning services.
How to take measurements from a chair correctly
As in most cases, the first measurement is taken along the longest side - the height of the chair. If necessary, the length of the cover can be adjusted. After this, the height from the floor to the seat is measured. If the base of the chair is solid, without legs, then the sides are measured, and if with legs, then the distances between them, taking into account their own thickness.
Measurements should be taken at the widest point, usually near the floor.
Many people make the mistake of measuring the backrest in width and height between the frame - you need to find out the full parameters. You need to measure the seat in a different way. If it is raised relative to the level of the frame, then the readings are taken along the boundaries of the seat. And if at the same height, then along the edges of the entire structure, but if you need to sew a cape only on the seat, then it is better to measure only the soft part.
A seat of this size will be enough for comfortable sitting.
Variety of models
They can be whole or separate. The second subtype can consist of several parts or be connected with Velcro. There is a wide variety of half-cases. They are intended mainly for seats, but at various special events and ceremonies you can see options only for the back. Products are also classified according to the method of planting. On sale you can see covers that do not stretch, but are simply placed on the chair, and if the model is also designed for the back, then the second pillow is attached to the chair with ties or straps. This is the so-called free variety. “Dense” models fit over the entire chair from top to legs and hold tightly to it. Euro covers are tight at the top and looser at the bottom. The covers may have a comfortable seat, but there are options without it. Such capes perform only decorative and protective functions.
Drawing and transferring the pattern to fabric
The paper is applied to the seat of the chair, secured with tailor's needles and traced around the edges. Make a reserve of about one and a half centimeters for allowance. Next, the part is cut out.
The pattern from the back is done in the same way.
Then a rectangle is drawn on the sheet, corresponding to the length of the legs and the width of the seat at the front of the “skirt”, and 10 cm of the pattern on the side, 5 cm at the bottom and 1.5 cm allowance for the top seam are added to it. The sides are drawn in a similar way. 15 cm is added to the edge next to the outer part of the back. A long, wide sheet is applied to the outer part.
- In the drawing of the back legs of the chair, 5 cm is added at the bottom and 1.5 cm for the allowance.
Patterns are smoothed out because any unevenness will interfere with sewing. Next, the drawing is transferred to the material, taking into account the position of the shared thread. You can draw on fabric with a pencil, a bar of soap or chalk. The pattern is made in two samples.
Instructions for sewing different models
Dense covers that exactly follow the shape of the furniture consist of a dozen individual parts. Their production requires a high level of skill. But simple chair covers have the same functionality, but at the same time every housewife can create them. Below are step-by-step instructions for some models.
One-piece
The simplest pattern for a chair cover consists of one piece; in this case, the seams can be replaced with ties or fasteners. Sketch construction:
- draw a rectangle according to the dimensions of the seat;
- step back 15 cm from the bottom side and extend the part - the front part of the cuff of the future cover;
- in the same way, build the side parts of the cuff 15 cm wide to the left and right of the seat part;
- Measure the length from the top edge: double back height + thickness + 15 cm (cuff width).
Designing and assembling a stool with your own hands, decor options
Cut out the finished pattern and attach it to the chair. Check the elements for compliance and make adjustments if necessary. Lay the fabric right side down, pin the piece and trace the outlines. Seam allowances are 1 cm on the sides of the cuffs, on all other sections - 1.5 cm on the hem.
Following actions:
- Stitch the side and front cuffs, trim the seam allowance close to the seam at 45°. Press seams.
- Overcast seam allowances. For non-flowing fabrics, the seams may not be processed.
- Fold the bottom edge of the cuffs 0.5 cm, then another 1 cm, stitch along the edge of the hem. Also trim the bottom edge of the back cuff.
- Fold the side seams and press.
- To attach the cover to the chair legs, sew 4 pairs of ties on the wrong side of the cuffs at a height of 7 cm from the bottom edge.
- To connect the side panels of the cover on the front part of the back, sew three hinged loops along the left and right edges, placing them evenly along the height of the back.
- On the back, sew buttons opposite the loops.
DIY chair covers are ready. The front and back parts are connected not only with the help of button fasteners - you can make ties, insert a zipper from the top edge to the bottom edge. If the back of the chair is of small thickness, the edges can be sewn; in this case, when cutting, you need to provide a margin of at least 5 cm for a loose fit so that the cover can be easily removed.
Cover for high chair
The highchair cover consists of three layers: main fabric, padding polyester and lining. In addition to the main part, you need to cut out fastenings in the form of pockets, with which the cape is secured to the upper part of the back and sides.
- Finish the free edges of the pockets. Place them on the lining fabric pieces face to face, align the edges, and baste them to the lining.
- Place the main fabric piece over the lining fabric and baste along the contour. It is important that both parts are facing each other.
- Apply padding polyester to the main fabric piece. Combine edges, baste.
- Sew the cover along the lines, leaving a 10 cm section unsewn to turn it right side out. In corners and rounded areas, cut allowances close to the seam.
- Turn the cover inside out, straighten the corners, iron the edges. Sew up the unstitched area by hand using a blind stitch.
- Place a stitch along the edge at a distance of 1–3 mm.
- On the back, stitch in a random order to secure the soft layer.
- If there are fastening straps, mark the location of the slots and sew them with a stitch for sewing buttonholes.
- Sew an elastic band on the sides, which is threaded under the plastic seat and holds the cape in place.
For round chairs, the back and seat are sewn separately using the same algorithm. The finished parts are sewn together on the wrong side with a stitch placed close to the edge.
Preparing the pattern
Cut out the linings
Short side hem
The lining is sewn to the main fabric
To make the cover softer, it is necessary to lay padding polyester between the material.
Finishing the edges of the product Holes for the belt Ties
Seat for round stool
To make a soft cover you will need a piece of foam rubber, a piece of fabric and an elastic band of length equal to the circumference of the stool. Step-by-step instruction:
- Make a pattern directly on the fabric: turn the stool over, trace the outline of the seat. Add 10 cm to the edges, cut.
- Fold the edges of the part to a width of 1 cm, tuck and stitch, leaving an unstitched area of 1.5 cm.
- Hook a clothespin onto the edge of the elastic and thread it through the drawstring along the edge of the cover.
- Place foam rubber on the seat of the stool. Holding it with your hand, trim the excess with scissors to the desired shape.
- Place the cover over the foam rubber and tighten the elastic so that the seat holds tightly. Tie or sew the ends.
The cover for the round stool is ready. The foam pad can be attached to the top: stitched or tied with thread in several places. Then the pillow will be as firmly attached to the seat as possible.
Case with long frill
This cape is sewn based on the pattern of a one-piece cover. For the frill, you will need additional measurements: the total length of the three front cuffs, the back cuff and the distance from the bottom edge to the floor. Step-by-step actions:
- Cut out two strips of fabric with a width equal to the length of the frill plus 1 cm seam allowance and 1.5 cm hem allowance. The length of the stripes is 1.5 times the length of the cuffs.
- Fold the bottom twice and hem it. Also process the side cuts.
- Step back 0.5 cm from the top edge and stitch. Pull one thread and gather the fabric to the desired width.
- Distribute the ruffles evenly, securing with pins, and baste to the bottom of the cuffs.
- Sew on the ruffles, overcast and iron the seam. Sew the cuffs on the front side, at a distance of 1–2 mm from the stitching line.
The “skirt” of the cover with folds or pleating is sewn using the same principle.
Trying on and sewing tips
When the drawings have already been prepared, all that remains is to make the layout and find out the material consumption. When sewing chair covers, an optical illusion occurs, as if only a little fabric is needed. Seams and decorative elements (ruffles, folds) “require” an additional amount of material and forethought from the craftsman.
Beginners will need an “experimental” case.
The pattern is placed on a perfectly flat surface. Dimensions are double-checked vertically and horizontally. Allowances are made along the edges. After eliminating all the shortcomings, shapes are cut out of the fabric with scissors. Trying is carried out several times. Based on its results, adjustments are made. If necessary, the workpiece is ripped apart, and again you will need to create a “test” cape.
The product should take on its final form after it exactly matches the contours of the chair.
The cut is sewn on a sewing machine. It must be borne in mind that the parts must be placed in the direction of the grain thread. Straight covers will fit better if their seams are equipped with zippers.
Using a ready-made pattern, you can practice and make patterns, fitting and sewing a cover for a certain type of chair.
What types of chair covers are there?
Chairs decorated with covers are found in a wide variety of interiors. Covers are used to disguise any imperfections in furniture, to improve its functionality and as a stylish decoration. There are several types of such covers.
- Solid. The product completely hides the chair, leaving only part of the legs visible. Well suited for masking furniture defects. It features the most complex cut and sewing.
- Half covers . Only the seat and back of the chair are covered.
- Separate. They consist of two elements, one of which is put on the back, the other on the seat of the chair.
- For the back . Covers only the top of the chair. Very often used as holiday decor. Extremely easy to sew.
- For sitting . Most often it is performed in the form of a soft pillow, which makes sitting more comfortable.
Covers of any type are made according to individual patterns; there are no universal options.
Photo: Instagram heimtextilien_almaty
Which option to choose
You can buy covers, however, it is much more interesting to create them yourself. To sew one cover you will have to spend about 1-2 meters of fabric.
If you don’t have sewing skills, then you can turn to professionals who are ready to create a unique version of the case. They will be happy to create the required product after listening to the customer’s wishes.
We sew a cover for the back of a chair with our own hands
To create a pattern, you will need to measure the width and length of the back. The pattern will be a rectangle. Its upper part can follow the shape of the back of the chair, that is, be either straight or rounded. Seam allowances must be added on each side. For the cover you need to cut out two parts from the main fabric. The product is worn on the back, so one side is not sewn up. Let's look at the sewing technology.
- Place the pieces with right sides facing each other, align the cuts, and baste. You can carefully pin it with pins.
- We sew three sides of the cover, leaving the bottom part unstitched.
- Turn the product inside out and straighten the seams.
- We hem the lower part of the cover with a hem seam either by hand or by machine.
The product is ready. You can decorate it in any suitable way. Knitted covers look very good. One of the possible options is in the photo below.
Photo: Instagram surovaya_nitka
Choosing fabric for sewing
Sewing can be done from a variety of materials. It all depends on the final purpose of the cover. For daily use you need a practical and inexpensive fabric, and for the holidays you need a beautiful and elegant one.
In addition, they take into account the room in which the chairs are located, its purpose and its own interior.
Important! For everyday use, you should choose a wear-resistant material that can be removed and washed or knocked out at any time. One of the criteria is also the absence of electrification and absorption of contaminants. Some of the best fabrics for sewing are considered to be cotton, microfiber, linen or silk.
Cotton fabrics
Among them, the priority is satin, calico, denim or twill. Their key advantage is that they hold their shape well, do not cause allergies in sensitive people and are machine washable. Cotton fabrics are inexpensive and come in a variety of shades, colors and patterns.
They also have disadvantages : rapid fading and getting wet.
Linen fabrics
These include matting, linen itself and canvas. They are environmentally friendly, highly durable, dirt-repellent and can be subjected to intensive machine washing and intensive use.
Also, linen does not absorb dirt well, it is hypoallergenic and easy to care for.
Rough, minimally processed linen fabrics are ideal for everyday slipcovering. The disadvantages are: difficulty in cleaning and ironing, rough texture. Linen covers are suitable for everyday use in country or ethnic style rooms.
Flock and microfiber
These materials are new generation materials. Their main advantages were:
- Wear resistance;
- Attractiveness;
- No creasing;
- No deformation when washing.
Important! Despite this, microfiber and flock cannot be subjected to heat treatment: dry on a radiator and iron. This is not necessary if there is no creasing.
Silk
Silk fabrics include: brocade, satin, crepe-satin. Their advantages are that they are durable, noble and resilient. Silk fabrics make it possible to create spectacular folds and draperies. There are also disadvantages: high price, demanding care and washing, careful ironing.
Such canvases are suitable for creating holiday covers in classical and neoclassical, Indian and Arabic styles.
Materials and tools
The fabric for chair covers is selected depending on the purpose of the furniture. Inexpensive textiles that are easy to wash and iron are suitable for the kitchen:
- Cotton: calico, teak, satin. It is advisable to duplicate thin material with double thread or a layer of non-woven fabric, so it will hold its shape better.
- Linen looks great due to its texture, but is difficult to iron.
- Fabrics containing synthetic fibers: polycotton, gabardine - wrinkle less and are easy to wash.
Drawings and procedures for assembling a step stool with your own hands
If we talk about new products, you can pay attention to supplex - elastic knitwear. It easily adapts to shape, does not accumulate static tension, and dries quickly. In addition, this material comes in bright colors, so suitable for the kitchen.
In the living room, chair covers are made from fabric that matches the rest of the textiles:
- jacquard, tweed, velor, flock - they have a rich texture and hold their shape well;
- corduroy and denim are appropriate in a modern interior or a teenager’s room.
Decorating halls for a wedding or other celebration involves elegant, well-draped fabrics. Flashy but inexpensive materials are suitable, since the case will be used for several hours. Optimal options:
- satin and silk are slippery, shiny, flowing fabrics that require lining and reliable fastenings;
- crepe-satin, gabardine, knitwear - their texture is more restrained and allows you to create beautiful frills and draperies;
- taffeta, veil - used to create airy flounces and lush bows.
Moms take different paths when choosing fabric for a highchair cover. Those who need practicality take waterproof materials, others value the baby’s comfort, and still others find a universal but expensive option. Each of them has both advantages and disadvantages:
- Eco-leather - oilcloth-based fabrics are easy to clean and are not afraid of spilled milk. But they are not hygroscopic - in the hot season the child will sweat.
- Velor and knitwear are soft - pleasant to the touch, but they will get dirty, and the cover will have to be washed often.
- NANOtex is a material with microparticles of silver with a water-repellent effect, breathable, does not cause allergies, spilled liquid can simply be blotted with a napkin.
Before cutting, the fabric must be wet-heat treated so that the finished product does not shrink. This is especially important for linen and cotton.
Additional materials that may be needed when sewing:
- lining fabric;
- padding polyester or padding polyester;
- fastenings and fasteners: elastic band, Velcro tape, buttons or zippers;
- braid, fringe, lace and other decorations.
In addition to the sewing machine, you will need: a measuring tape, a marker, scissors, pins and thread.
NANOtex Corduroy Denim Jacquard
Linen Cotton
Step-by-step instructions on how to sew a cover for a chair with a backrest
You can order tailoring from purchased fabric from a craftsman, but it is much more profitable and enjoyable to do it yourself. The only caveat: all measurements must be accurate and take into account seam allowances and fabric shrinkage when washing.
For this, one or one and a half centimeters should be enough.
To get started, you need to prepare all the necessary materials and tools:
- Threads and needles;
- Sewing machine;
- Adhesive tapes;
- Scissors and awl.
Step-by-step manufacturing instructions are as follows:
- Make a pattern on tracing paper or film that will fit well on the furniture to take all measurements;
- Cut out a seat from soft synthetic padding and make allowances of 1 cm at the edges and 3 cm at the back;
- Attach the padding polyester to the seat and measure out the recesses for the legs at the back. Cut notches along the contour;
- Determine the height of the cover and, leaving the bottom of the furniture open, measure the sides and back wall of the chair;
- Transfer the pattern to the selected material and cut it out, not forgetting to leave allowances for seams and shrinkage;
- Round the corners on the sides for a better “seat” of the cover;
- Sew all the parts together using a sewing machine. Make notches on the rounded edges to avoid wrinkles in the fabric;
- Sew decorative elements in the form of braid or beads around the perimeter of the seat;
- Try on a chair cover;
DIY cover options
It all depends on skill and imagination. It is recommended to take several master classes. The color and stylistic design may not match the design of the room, this is acceptable. There are mainly two types of seat cover shape: circle and square. The seat can be thin, medium or thick. The upper part of the cover can be made similar to a thick seat, but with straps for fastening. If the cape is made in a traditional manner, that is, it fits the chair on all sides, then it can be made in many ways. A one-piece cover covers all parts of the furniture, with the exception of the bottom - this part is made in different ways: either right up to the floor, or slightly covering the seat. The separate option allows you to choose the length for the back. The top cape will also be attached with ties or fastenings-ties (to the sides of the back). You can sew an elegant “version” with bows, ruffles, and an extended hem.
Chair cover with fabric back
First, measure the length and width of the backrest, as well as the height of the chair. For the kitchen, it is recommended to make covers not the entire length, but with a margin of up to 30 cm. For the hall, covers up to the floor are suitable. When sewing, you need to take into account the thickness of the back, as it can be very thin (less than 1 cm) or thick (up to 6 cm). The width of the piece of fabric should be 2-5 cm larger than the chair. The length of the fragment is determined by the sum of the two lengths of the backrest, the length of the seat and its height, multiplied by two. To this number you will need to add a margin for seams. The cut is placed over the chair, the lengths are adjusted, and places for fastenings are marked. As a result, the cape is sewn so that it is tied to the legs with ties or connected between the floors with ties. In the second case, two or three such elements will be enough. It is better to place them at the back on the back.
DIY seat
First, the pattern is prepared. You will need a pencil and newspaper. Then these measurements are transferred to the material folded in half. For each of the legs you will need two ties about 10 cm long. A padding polyester is cut out according to a similar drawing. The width and length parameters are reduced by 1 cm. The laces must be folded in half in width, inside out; After that, stitch and turn right side out. With several large stitches you need to attach the padding polyester to the back and the ties to the corners. Now the entire seat is stitched, except for a gap 20 cm long. Through it, the cover will be turned right side out. The edges of the parts are sewn with a hidden seam. Next the seat is ironed. If you wish, at the very end you need to start final decoration using ribbons and various decorative elements. All this will take no more than a few hours, and if you have experience in sewing, half an hour to an hour.
Even before the stitching begins, the seat should lie like a glove.
Cover for a round stool
The manufacturing principle is similar to the method of sewing a cape for a square seat. The simplest option involves using an elastic band. First of all, measurements are taken from the stool and the diameter is determined. The fabric is marked with an allowance of about 5 cm. The reverse side of the fabric is folded by 2 cm. You need to stitch the edge 1 cm from the fold - the result is a “tunnel”. The elastic band will be located in it. The next stage is filling. Small cuts are made in the workpiece. The padding is distributed evenly throughout the seat. The incisions are carefully sutured - this is done only by hand. Then the product is machine stitched around the perimeter. Some cape models are visually similar to jar lids. Knitted covers will also look good on a round stool. In the process of creating them you need to use various loops:
- Airborne.
- Half columns.
- Columns, with and without crochets.
Crocheted covers
Such a product is quite easy to wash, and in order to knit it, you do not need much experience. It does not slip on the surface and is suitable for chairs where children sit. Among the crochet techniques, it is worth highlighting a stitch with three, two or single crochets, a single crochet, a double crochet, a strong stitch, an air loop and a half-crochet. Those who have little experience should find out which options are the simplest and master them first. It is necessary to decide on the pattern and knit without allowing it to unravel. For one cape you will need about 200 g of yarn, which is approximately one skein. There is a fairly simple scheme for creating a round cape. First, the diameter of the stool is measured. Then air loops are knitted and closed in a circle. Next, rows of different loops are made. The angle is leveled by skipping one of them. Once the required size is reached, you need to knit the sides for secure attachment to the seat.
Cover made from an old sweater
Equipment you will need:
- yarn needle;
- button;
- yarn;
- sewing pins;
- scissors;
- pencil;
- ruler;
- sweater (preferably wool).
First, the clothes are washed and dried on a radiator. The material will “shrink” and the sweater will decrease in size. A cape made of such wool will keep its shape well. Next, two rectangles are cut out with the same width but different lengths (with a difference of 8 to 10 cm). This stock should be used to create the cover of the case. It will close with a button. A fragment is cut out in such a way as to capture the elastic at the bottom of the sweater (if there is one). The edges will not have to be processed, and the cape itself will look neater. In order for everything to work out as efficiently as possible, you need to use a paper template. The cut out parts of the sweater are folded right sides inward. They are aligned and secured with pins. They are stitched everywhere except the top. The cover is turned inside out and ironed with steam. Finally, yarn is wrapped around the button.
Dressing up a children's chair
You will need approximately 1 m of fabric. Sewing a cape is not difficult, especially if the back is of a standard shape and there is no need to adjust it to fit the belts. All you need is two pieces of fabric and filling. Both fragments are stitched together. It is recommended to look for waterproof material that is easy to clean and wash. It is better to take the filler as soft as possible. Measurements are taken from the furniture. First of all, the length and width are determined. If the chair has an unusual shape, with a lot of allowances, then the easiest way to make the correct configuration is to attach the fabric to the chair or to an old cape and accurately repeat its outline. The next step is creating a pattern and marking the canvas. After this, the final stage remains - sewing to measure. The cape needs to be applied to the chair from time to time so that it does not have to be cut out and remade later.
High chair cover
You can make a three-layer cape. The front part should be made of velor or cotton fabric, the middle part should be made of siliconized padding polyester, and the top part should be made of rigid cotton fabric with or without synthetics. The high chair is placed on the floor, and a pattern is made from non-woven fabric or tracing paper. Holes are cut in places for stitching. To mark, place the pattern on the chair, press it tightly and mark the lines of the slots for bends and straps. The lapel details and gasket are cut out first. Then the edges of the parts are connected to the main gasket. After this, side folds are performed. The finished gasket is placed on the velor with the folds down. It is stitched with thread, and then velor is cut out. The structure is placed on padding polyester. The cover is stitched, but a hole is left for later turning the product inside out.
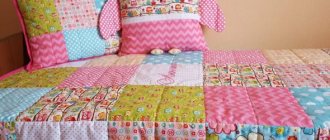
Patchwork style covers
First you need to sew the pieces of fabric together. This is done randomly from scraps of different widths or in regular rows from identical fragments. In addition to the main part of the product, you will need scissors, a needle, a machine, threads, fabric for the back, tape for the cover, and a sealant. Next, you need to work on the pattern. On a large sheet of paper you can outline the seat and draw seam allowances. A3 size is suitable, but you can also join several smaller sheets together, for example using tape. The pattern is cut out and tried on the chair. Next, three blanks of the same size are made: from the lining material, the seal and the fabric itself for the cover. The front part and the seal are folded, lines for stitching are marked. All components are superimposed. The ribbons are placed inside and the fabric is then stitched. The product is turned inside out through the gap left. You can use multi-colored pieces of the same fabric with the same pattern or parts of different materials:
- gabardine;
- jeans;
- leatherette.
Foot covers
These products are designed to maintain the good condition of the floor covering. In addition, the chair will not make unpleasant sounds from moving across the floor. There are many interesting ways of doing it, including covers in the form of socks and “cat’s paws”. Most of these products are knitted. Covers can be quickly made with your own hands, so there is no point in spending money on them. For knitting, it is recommended to use Darnichanka thread - it is very durable. The process begins by creating several air loops. Single crochets are made around them. In the third row you need double (two) single crochets from one loop and regular single crochets. In the next row, the same columns are sewn, but behind the far bow of the loop. In addition to them, it is necessary to make a sc from one loop and behind the far bow. In the next row - again regular single crochets. The thread is cut and secured. And so four cases. If desired, they are further decorated.
Office chair cover
The following devices will be needed:
- Scissors.
- Pins.
- Chalk.
- Linen elastic.
- Threads.
The main material should be comfortable and durable: wool, too soft and “biting” fabrics will not work. Gabardine is a good choice, it is durable and looks beautiful. First of all, measurements of the seat parameters are taken with a “meter”. Then they are transferred to the fabric. The drawing is made using a small piece of chalk. Space is left for allowances of about 10 cm. The pattern is cut out - the corners must be rounded. The edges are overlocked with an overlocker, folded one and a half centimeters and secured with pins. A stitch is made on a sewing machine, 3-4 mm from the edges of the hem, the pins are not removed. Thanks to this, the product does not need to be swept manually. The last 2-3 cm are not stitched, leaving room for an elastic band. It is passed around the perimeter and cut off. Ponytails up to 25 cm long are left.
Holiday case
The process of making a holiday cover yourself is no different from creating a cover for a chair with a backrest. The main difference is the cost of materials. Chairs should emphasize the festive atmosphere, so they are decorated with a variety of decorative elements: bows, ribbons, patterns. Such capes are used at banquets and ceremonies. The reason for creating a festive cape can be events such as Christmas, New Year, traditional holidays, receiving guests, birthdays, anniversaries. The New Year's cover should be decorated with Christmas trees and "Santa Claus hats." It is recommended to select the most expensive textiles, in bright colors. But any more or less elegant fabric will do. It is appropriate to use curtains and tulles under the sewing material. Velcro is sometimes created on the cover to accommodate various applications.
Wedding covers
The backs of such capes are elongated, square and round; Both glossy and matte surfaces look equally good. Crepe satin is suitable as a material. The main part of production begins with measurements and patterns. The characteristics of the chair model are taken into account. The parameters are marked on the sketch, after which you can start cutting. Then all the fragments are applied to the chair. After the first fitting, you need to create a pattern. If the shape of the back is not rectangular, but round or even more complex, then you will have to adjust the fabric several times, trying it on the chair itself. In order for the cover to perfectly emphasize the shape of the chair, you need to apply the paper directly to it and mark the narrowing and widening in all places. If the master does not have sufficient experience, then he will need to make several “trial” products.
Options that are easy to use
Let's look at all the options that you can easily do with your own hands. All the nuances and step-by-step implementation are below.
We sew a cover for a chair with a back
After we have measured the height of the back, legs, and width of the chair, we make a pattern of three elements: rectangles covering the sides and the back with the seat. Don't forget to add a couple of centimeters to the seams.
- Transfer the pattern to the fabric. Since we are dealing with rectangular parts, you can use a ruler for greater accuracy.
- Carefully cut out all the details, taking into account the shared thread.
- First of all, we sew the side edges.
- Then we move on to the side and bottom sections of the back of the back. They should be folded and then stitched.
- Sew the side parts to the seat.
- We tuck and stitch the sections of the side and front parts of the product.
- Ready-made covers can be decorated with a bow or other decor on the back of the chair.
Are you sewing for the first time and doubt your abilities? Try making a test piece first from inexpensive fabric, or at least basting it by hand.
We sew a simple seat
The easiest option, which is suitable even for beginners, is a regular stool seat. It's fairly quick to sew.
- We make a template from cardboard or other material according to the shape of the stool seat;
- using the resulting pattern, we cut out three parts of the same shape and size from the fabric (for the front, back side + padding polyester);
- We place the padding polyester between two pieces of fabric and secure it with pins;
- to quilt the future seat, you need to sew even lines parallel to each other;
- we baste the pre-prepared bias tape for edging, leaving the ends as future ties;
- We carefully fold the ties in half and stitch them on a typewriter;
- We sew bias tape on the sides of the product using a machine.
If you plan to sew several identical covers at once, you should cut them all at once. This will save fabric.
Elastic cover for a round stool
Such an accessory can be sewn even from a small piece of fabric.
- First, as usual, we make a pattern. In order not to bother with measuring instruments when calculating the diameter, you can simply attach a sheet of cardboard or newspaper to the surface of the stool, then cut it along the contour.
- We transfer the drawing to a new sheet of paper, adding a few centimeters along the contour.
- Based on the resulting template, we cut out the piece from the fabric.
- We put an elastic band on the edge of the fabric, fold the fabric, and stitch it.
- Our cover is ready - all that remains is to put it on the stool.
- To add softness, you can sew foam rubber or padding polyester into the seat.
Crochet chair covers
A knitted cover can be an interesting option for decorating a room. Crocheting will take more time than sewing a simple pattern, but the result will be a special and original item.
Crocheted furniture will look especially cozy in winter, as it creates an atmosphere of comfort and warmth.
Most often, round or square models are crocheted for seating stools. Let's look at an example of knitting a simple round cover:
- We make the upper part from rows of lush columns, separated by short chains of air loops.
- We make the hem by knitting several rows in stitches without adding. This way they will form an even side (for greater stability we make the side higher).
- In the last row we knit air loops - at the end you can insert a fixing elastic band or cord into them to secure the product to the stool.
Using various knitting patterns, you can knit absolutely any model with your own hands. For example, the so-called flower cover or models crocheted from motifs (they can also be decorated with crocheted flower appliqués).
There is no need to be shy in choosing bright, rich colors. Multi-colored knitting threads can add originality and enliven the interior.
Cover made from an old sweater
If knitting is not your thing, but the beauty and comfort of knitted covers haunt you, try making them from an old sweater. Any item of the desired size and color, knitted with knitting needles, large or medium knit, is suitable for this.
The edges of the sweater must be carefully processed so that the resulting item does not unravel in the future.
Depending on the size of the sweater, you can sew a cape only on the seat or on the back, or you can get a whole accessory, for example, by using several old products.
Large volumetric patterns in delicate bed colors look especially atmospheric.
Knitted items can stretch, so it is better to make them 1-2 cm smaller in width or diameter.
You can also sew models not only from knitwear, but also from other old things in good condition. For example, from jeans or coats that have become too small. The main thing is that the style of the resulting product matches the interior of the room.
On a children's chair
Chair covers in a children's room are more relevant than anywhere else. Bright, elegant fabrics can decorate the interior of a nursery and interest little fidgets. In addition, they are indispensable in protecting furniture from dirty handprints, spilled drinks or traces of children's creativity.
When sewing such accessories for the nursery, you can give free rein to your imagination: images of cartoon characters, funny animals, flowers, cars, princesses - everything that the child will be incredibly happy about.
The product is sewn according to a standard pattern, as for a regular stool. All measurements are taken in advance. Very often, for children's furniture, capes are sewn only on the back: two rectangular pieces are cut out and sewn in three places. At the end, you can apply a design or decorate it with fabric, sew on “bunny ears” or, for example, design it in the shape of a snowman.
On the inside, so that the cover does not slip, you can sew decorative laces that will be tied behind the legs of the stool. You can also use buttons, ribbons or elastic.
Where can it be used?
It's amazing how a simple covering of furniture can radically change the appearance of the entire room, hide a boring color or defects in the upholstery, and add a bright accent to a boring interior. The use of these accessories on chairs in a children's room, kitchen or dining room is especially popular. Sewing covers is much cheaper than changing upholstery or furniture. You can’t do without them during special events, for example, when decorating interiors during holidays and wedding ceremonies.
These covers will decorate your interior
DIY cases
Today you can find furniture covers of various colors and styles in many stores, and order the tailoring of the desired model in any studio. But it’s much more interesting to make them yourself, choosing the right fabric and deciding on the style of the future product. This will also help save money, especially if you are decorating several pieces of furniture at once.
The cases are distinguished by their beauty and possibilities of use, as well as ease of manufacture. Even a not very experienced craftsman can sew such an accessory on his own.
The ability to radically change the look of an entire room
Interior style where chair covers are appropriate
Chair covers for the dining room, kitchen, and children's room look most organic. In order for the covers to fit perfectly into the design of the room, you need to take into account the design features and color palette of the textiles.
Provence
Romantic style always remains popular.
Many people like soft natural shades (pale pink, blurry lavender, blue, light green). Characteristic features of this interior trend: textiles with small floral patterns, decorating furniture with knitted and sewn products (tablecloths, covers).
Designer textiles in the Provence style (tablecloths, curtains, napkins) are decorated with ruffles and lace.
At first glance, the interior may seem shabby, and things old and abandoned. However, vintage antiques are not without sophistication. Openwork tablecloths, chair covers decorated with lace, decorative vases, and cute trinkets look elegant in the setting. The color palette is based on light shades.
Warm beige, faded pink and blurry pearl gray tones will add tenderness to the interior.
Country
The color scheme of the style is based on natural shades (milky, beige, light brown). Accents are emphasized with contrasting tones (gray, black, burgundy, bottle green). A balance of opposite colors must be maintained. Wooden furniture of simple shapes and forged products are welcome.
Natural fabrics (linen, tapestry) fit organically into the decor. Textiles with large floral patterns or checkered patterns bring home comfort to the room.
English style
The interior with an English character is the embodiment of elegance and restraint. The stiffness of the setting is softened by textiles with floral prints or small patterns. Furniture upholstery uses both soft plush or exquisite leather, as well as chintz with a printed pattern.
A combination of materials with large and small prints is welcome. To furnish the room, select dark or light products from oak, pine, and mahogany.
American style
The multinational peculiarity of the country is reflected in the interior of the premises. The design mixes and harmoniously combines Oriental, European, and African decorative features. Furniture is most often placed in the center of the room, so an island or peninsula is the hallmark of an American-style kitchen.
Most often, bar stools with high legs are used indoors. Common colors are shades of beige, olive, and white.
Case styles
Classic design involves the use of expensive materials. Brocade, satin, silk are used. Synthetic fabrics are appropriate in modern style. The eco-style case is made from coarse environmentally friendly materials. One of the substyles, boho, involves finishing with burlap. A direction such as Provence is characterized by a predominance of muted colors. Cases in high-tech style have simple colors, but at the same time interesting shapes. If the room is decorated in the spirit of the English aristocracy, then it is worth purchasing a cover made of expensive mother-of-pearl material. A patchwork style cape is a great option for making it yourself. The execution method involves creating things from scraps and unnecessary leftover materials. If there are many fragments of various fabrics stored in the apartment, then it is worth using them.
It can be:
- old dresses;
- unnecessary trousers;
- suspender;
- armrests.
Choosing fabric
When choosing fabric, you need to start from the purpose of the cover: everyday or festive. For the first option, it is advisable to sew capes from durable, easy-to-clean or waterproof materials, while taking into account the abrasion of the threads.
And for celebrations, you can look for removable furniture accessories made of shiny fabrics.
Cotton
The fabric is a budget option. The material quickly fades due to frequent washing and bright light. However, it is hypoallergenic, easy to wash and ideal for covers on children's or kitchen chairs.
Silk
The fabric is best suited for decorating a formal setting. Intricately cut slipcovers can decorate the furniture in the dining area for a festive lunch or dinner.
Biflex
The material is both dense and elastic, stretches well in any direction. Supplex does not wrinkle, is easy to wash and dries quickly. This is a universal option for office chair covers.
Flock and microfiber
Fleecy fabrics are pleasant to the touch, look like suede, are practical, and at the same time they are much cheaper. Excellent performance qualities allow us to sew European covers for high chairs in the dining room and kitchen.
Caring for fabrics is simple - stains can be removed with detergents.
Organza
The refined and airy fabric holds its shape well. Organza covers are an ideal option for decorating furniture at any special event. Transparent capes do not wrinkle. It is easy to create a product with curvy shapes or with original folds.
Spandex
The stretchy fabric is sold at affordable prices and is great for chairs in any room. Ideal for decorating furniture in banquet halls.
Gabardine
The fabric is quite thin, but elastic. Since the composition of the fabric can be different (cotton, wool, silk), it can be used to sew kitchen covers or elegant capes for living room furniture.
Chair covers by purpose
Covers perform several functions simultaneously:
- decorate furniture, giving it uniqueness;
- extend the life of the item, protecting it from scratches and chips;
- mask minor defects if the chair is old.
It is recommended to have several sets designed for different occasions: for every day, for holidays. Owners who like to frequently change the design of their home purchase separate sets for each season.
Everyday
Everyday covers are capes for daily use.
Covers “for every day” are simple in terms of sewing and decor. Such items are sewn from non-staining fabric that can withstand frequent washing without losing their appearance or other performance properties. Hypoallergenicity is an important factor for textiles used daily.
Covers “for every day” will have to be washed often, so they should be easy to remove
Advice: for items that are used every day, it is not advisable to use overly textured decor, which is easy to get caught on.
Holidays
Elegant chair covers can set the tone for the entire holiday
Such products look luxurious, replete with details, volumetric elements, and valances. They are made from:
- brocade;
- lycra;
- velvet;
- decorated with sparkles;
- ribbons;
- brooches.
Decoration options
The style of the interior in which the chair will stand dictates the methods of decoration. Laconic minimalism or modernism do not tolerate overload, but will accept a combination of fabrics by color or texture, discreet details: pockets, folds.
To decorate cases in a classic interior, the following are suitable:
- long frills;
- edgings emphasizing the clarity of the form;
- thin golden or woven braid;
- imitation of antique lace.
This trend is generally characterized by ceremonial decor and regular geometric shapes.
Rustic style, country and Provence suggest natural fabrics and very cozy finishes:
- frills, ruffles;
- crocheted lace;
- braid with ornament;
- lacing.
In banquet halls, chair covers with backrests are decorated according to the general style of the room. Beads, satin ribbons, rhinestones, and brooches are used for decoration. Artificial or fresh flowers will also come in handy.
Such “clothing” for furniture will protect new chairs and stools from dust and damage, and will give old ones another chance.
In addition, hand-made chair covers will add comfort and beauty to your beloved home. And if you create several sets, then with their help you can update the interior every season.
Benefits of using chair covers
The advantages far outweigh the disadvantages. The first quality worth noting is the low price. In addition, you can make the case yourself. You don't need to know how to sew to do this. It is enough to wrap the chair in fabric and simply leave the free raw edges hanging. The cover will protect the seat from dirt, water and grease. This is a fundamental nuance for rooms such as the kitchen. The appearance of the interior can be varied or changed with the help of covers. In winter, it is preferable to use cold tones, and in summer, warm ones, or vice versa. For each season it is better to make covers of different thicknesses. Another functional purpose is protection from pets: from their “traces” and claws. The thick cape does not need to be washed; a thorough cleaning with detergent and a brush is sufficient. This is a practical thing that can be stylish and beautiful.
Using covers will help you save a lot of money on buying new furniture or repairing old ones!