For several decades, walls during major renovations were decorated with plasterboard, which was subsequently covered with wallpaper or paint. This is a rather labor-intensive process that takes a lot of free time and requires special training. Currently, there are a large number of modern facing materials with different requirements for installation work. According to user surveys, the most popular finishing product is considered to be an MDF panel. This choice is justified by the fact that covering walls with MDF panels has a number of positive qualities for creating an interesting room design and does not require special knowledge of installation work.
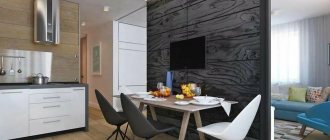
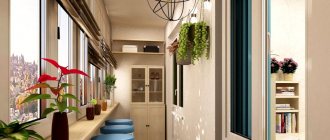
Living room design with MDF boards in a classic style
Finishing MDF is an easy way to transform a room at minimal cost
Today we will look at such a material for interior decoration as MDF panels. This type of product is excellent for carrying out budget repairs, and an additional advantage of this solution is that the installation work can be done without any problems with your own hands. I will describe the whole process in as much detail as possible, and you just need to use all the recommendations from this review.
Using MDF wall panels, you can transform a room in one day
Preparing the premises and marking
Preparing the room is done in different ways and depends on the type of fastening. When attaching MDF panels to the wall without using a frame, you will need the following preparation:
- Clean the surface from old finishing material;
- Treat against dampness;
- Dry the walls;
- Check them for changes. If they are large, it is necessary to plaster and prime the walls.
You will also need to make markings. This is done with a level and a pencil, as well as a homemade or purchased weight.
Markings are done with a level and a pencil, as well as with a homemade or purchased weight.
How the work is carried out
I’ll say right away that there are many ways to attach decorative MDF panels for interior wall decoration, but I’ll tell you about the option that I personally tested. The method is suitable for any base and allows you to quickly level even the most problematic surfaces.
We will talk about installing panels on a wooden frame; this is the most budget-friendly solution, which, among other things, is one of the easiest to implement.
What you need for work
You cannot start installation without having everything you need at hand; you will have to constantly be distracted and look for tools or go shopping in search of the right material. Therefore, make sure in advance that all the most important components are available:
The choice of options is great, so you can decorate the interior in different ways.
| Materials | Application |
| MDF panels | You can buy MDF wall panels for interior decoration at any more or less serious hardware store. Their colors can vary significantly depending on the manufacturer and collection, but most often the elements imitate the texture of wood, but there are also options for stone or brick. The width of the products is most often 250 mm, length 2.7 meters, as for the cost, it averages about 200 rubles per square meter |
| Wooden block | We will make a frame from it, the cross-section of the elements can be different, personally I use the 20x40 option, it is convenient and takes up little space. But if a balcony or loggia is being finished, then it may be necessary to lay insulation in the frame; in this case, the size of the block should be no less than the thickness of the heat-insulating material |
| Fasteners | The easiest way is to use special fasteners, which are called clamps and are staples that secure the finish. Here it is important to choose an option according to the thickness of the protrusions on MDF, most often it is 2 or 3 mm, it is important that the structure is fixed securely |
| Universal corner | If you have internal or external corners, as well as joints, then you cannot do without a special universal corner. It is a strip with a line in the middle, along which the element can be bent both outward and inward, or you can use it straight as a connecting strip. This is very convenient, because you don’t need to buy different components |
| Liquid Nails | This composition is necessary for fixing the corners, it can also be used when finishing the door slope, I will talk about this in a separate section. Any composition that is suitable for MDF will do; all the information is usually indicated on the packaging, so choosing the right option will not be difficult |
MDF finishing corners bend the way you need
If you cannot find clamps, then you can use finishing nails 20-25 mm long and no more than 1.6 mm thick; with their help you can also quickly and reliably fasten MDF.
MDF wall panels for interior decoration are installed using the following set of tools:
- If you have walls made of brick or concrete, then you will have to fix the frame elements using quick-installation dowels. In order to drill holes for them, you need a hammer drill with a drill of the required diameter and length;
- For wooden bases, there is no need to drill holes; you can directly screw screws into them, and for work we need a screwdriver with attachments of the required size and configuration. If the wood is very hard, then you can use the same screwdriver to pre-drill holes of small diameter;
- Claypers are most often fastened with nails, so do not forget to take a small hammer - a weight of 300-400 grams is enough;
- MDF wall panels are fairly easy to cut, but to ensure perfect edge quality and speed up the work process, it's best to have a jigsaw on hand. Use it with a blade with a fine tooth size to ensure the best result. If you don't have a power tool, a fine-tooth wood saw or even a regular metal hacksaw will do.
For MDF, canvases marked T101B and T101BR are best suited
Source: obustroeno.com
How to install correctly - installation options
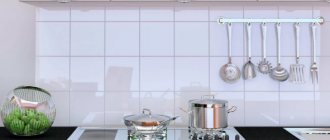
How to install an apron in the kitchen from MDF sheets? And although the process of installing an MDF apron is quite simple, there are several issues that a novice installer may encounter. There are many videos on the Internet of installing an apron in a kitchen made from MDF material.
Below is a step-by-step installation of an apron in a kitchen made from MDF panels. Here is a list of preliminary work before installing the MDF apron. Take correct measurements of the work area. Thanks to the ease of processing MDF panels, you can give the desired shape to the apron. Much depends on how long you plan for the apron.
Some owners want the space from the bottom of the cabinets to the floor to be covered with an MDF sheet. In this case, you need to measure the space from the bottom of the wall cabinet to the floor.
And additionally add another 20 centimeters to the value so that the panel extends slightly under the hanging cabinets. This approach will provide additional aesthetics to the design.
This method is effective if the lower part of the kitchen unit is not solid. Otherwise, you will overpay for extra meters of material, which no one will see anyway, but the strength of the structure will be much higher.
It is almost impossible to carry out interior finishing work without putty. Here you will find out how long the putty takes to dry.
Partial fastening method
Another option for attaching a kitchen apron made of MDF is partial. You do not overpay for extra meters and attach only the visible part of the apron between the tabletop and shelves. Fasten the MDF panel with a margin of about 25 cm, this will allow you to additionally fix the apron plate.
Horizontal measurements are also important, especially if there are sockets or switches in the kitchen splashback area. To do this, make a pattern with marked places where the sockets are located.
How to install in the kitchen
How to hang an MDF apron in the kitchen? After the preliminary work necessary for correct fastening of the apron, you can install the MDF sheet itself.
Work carried out using a frame structure takes more time, but provides additional reinforcement and a longer service life without defects. How to fix an MDF apron in the kitchen using the frame method? The work area assembled from parts allows you to quickly assemble the apron.
How to install with self-tapping screws
How to attach a kitchen apron made of MDF with self-tapping screws? Here you will also need planks on which the entire structure will be supported. It also needs to be treated with special antiseptics. Then, in the marked places along the perimeter of the planks, the MDF sheet is attached to dowels.
It is better to fasten an MDF apron for the kitchen with help to avoid defects. Below is a video on how to attach an MDF apron in the kitchen using self-tapping screws.
For more information about installing a kitchen apron made of MDF, watch the video:
Do-it-yourself installation of MDF panels on the wall - step-by-step guide
MDF panels are one of the most affordable and easy-to-install finishing materials for wall decoration. You will need a minimum of components, a little skill and the desire to decorate the room beautifully. And, of course, the most important thing is our instructions for installing lamellas.
After finishing a wall with MDF panels, it may look like this. Cute, isn't it?
More about the benefits of plastic panels
The finishing material is strong, durable, plastic, has good sound insulation, is moisture resistant, does not fade in the sun, and is easy to clean. Oddly enough, thanks to special additives, it is environmentally friendly, resistant to high temperatures, does not burn and does not emit unpleasant odors. Therefore, you can replace the usual electrical wiring with circuits that allow you to install LEDs, halogen, and spotlights.
Finishing the ceiling with plastic panels makes it possible not to pay attention to the unevenness of the ceiling surface. If pipes or wiring are visible, the panels will reliably disguise them. True, they will eat up to one and a half centimeters of the height of the room.
What are MDF panels
MDF or MDF (Medium Density Fiberboard) is a wood-fiber board produced by dry hot pressing. The raw materials used are fine sawdust of industrial wood species, binders and some additives that provide the material with plasticity and relative moisture resistance.
MDF boards are convenient because they can be produced in any thickness and are easy to process, cut, mill, and veneer. Therefore, they are used to produce wall panels with a thickness of 6 to 16 mm. The width of the products varies from 12 to 37 cm, length - from 2.4 to 3 m. The surface is most often decorated using plastic or paper-resin films designed to match the texture of wood, natural stone, ceramics, fabric, leather.
MDF panels are equipped with a tongue-and-groove connection system, that is, there is a tongue on one side of the plank and a groove on the other. As components, manufacturers (Kronostar, Soyuz, Kronoshpan, etc.) produce thin outer and inner corners from the same material with a decorative surface imitating wood, stone and other materials.
The tongue-and-groove system allows you to connect panels firmly and without gaps
The main method of installing panels is frame or glue. The first is more complex, but reliable. The second requires more careful preparation of the base; accordingly, time, labor and material costs can increase significantly.
What do you use to cover it with?
This kind of cladding is now made from 3 materials:
- Plastic.
- MDF.
- Tree.
Plastic and MDF cladding are often of the same type, but with wood it is a little more complicated; in addition to wood species, the lining is also divided into classes and types.
Plastic lining
The width of the planks varies from 100 to 380 mm, and the length from 2000 to 6000 mm. The thickness varies around 10 mm.
PVC lining is most often used; it has a wide range of models and a reasonable price, but there is one serious drawback: polyvinyl chloride fades in the sun. Acrylic panels are more expensive, but they do not fade, plus the colors are brighter and the material itself is stronger.
MDF planks
MDF planks are used only for interior decoration, but unlike plastic, they cannot be installed in wet rooms.
Modern MDF lining differs from laminate flooring in its density, but otherwise these materials are similar.
Wooden lining
This cladding is regulated by two standards:
- Domestic GOST 8242-88.
- European DIN 68-126/86.
As for wood species, linden, spruce and pine are considered popular. Elite finishes include oak, larch and Karelian birch.
The name eurolining does not guarantee that the material was made abroad. It’s just that the planks are made according to the DIN standard, and they could have been made at the nearest sawmill, which has the appropriate equipment.
- Dimensions according to domestic GOST . In stores, the length of wooden lining ranges from 1500 - 3000 mm, the minimum width is 76 mm, the maximum is 200 mm. The thickness depends on the configuration, so thin strips such as Standard, Shtil, etc. have a thickness of 12 - 16 mm, and semicircular lining (Blockhouse) reaches 40 mm.
- Dimensions according to DIN standard. The most common length of eurolining is 2.7 m, width 80 - 120 mm, and thickness 12.5 - 19 mm.
In theory, both of the above standards allow for the production of planks up to 6 m long, but due to difficulties with transportation, such material is usually made to order.
The configuration of the planks is also very different, both in price and in appearance:
- Standard, Shtil and Softline are considered the most popular and affordable.
- Eurolining is the same Standard, only with different sizes.
- Semicircular lining or Blockhouse is more expensive, now this model is very popular.
- Landhouse and American models are considered specific in the domestic market. Their price is average, but their popularity is lower than that of traditional lining or Blockhouse.
Contours of different types of lining in section and appearance in the photo
What you need to install MDF
To install MDF panels with your own hands, you need the following set of tools and components:
- Panels and fittings made of MDF or plastic (external, internal corners, finishing F-, U- or T-shaped).
- U-shaped steel profiles for gypsum boards and components for forming the frame. An alternative is timber 30x50 mm, 40x40 mm, 40x60 mm, etc.
- Strengthening primer composition for concrete or antiseptic impregnation for wood.
- Self-tapping screws for metal or wood, nails or special clamps.
- Insulation (isolon, polystyrene foam, mineral wool, EPS and others).
- A hacksaw with wood blades or a jigsaw, metal scissors.
- Tape measure and construction pencil.
- Gyro level and metal corner.
- Hammer, screwdriver or drill. As an alternative, you can use a construction stapler or Liquid Nails glue.
Advantages and disadvantages
The undeniable advantages of MDF include:
- many textures and colors;
- the strength endowed with wood fiber material;
- resistance to pathogenic factors: insects, fungi and mold;
- simultaneous creation of form-building and decorative surfaces;
- good insulating properties for noise and heat;
- low price compared to other materials.
MDF ceiling panels are available in various sizes, which allows them to be used to create the most sophisticated interiors. Since the elements are fastened to a pre-assembled frame, the ceiling made of MDF panels can be made in several levels.
The ability to bend significantly allows you to form fancy decorative and architectural elements.
MDF is a material that can be processed even with non-professional tools. Skills in handling a hammer, a hacksaw and a hammer drill, and the ability to install simple structures will be enough to make a ceiling made of MDF panels turn out well. The methods of connecting individual parts, integrating decorative and finishing elements into the finished surface, installing and fastening ceiling lighting fixtures are intuitive and accessible even to an inexperienced craftsman.
The decorative surface of MDF panels is obtained as a result of diversified finishing processing. There are three ways:
- Painting pre-polished workpieces with enamel compounds. The variety of colors provides unlimited design possibilities in creating interiors.
- Lamination with polyvinyl chloride film materials. Glossy, matte, structured films imitate the natural patterns of wood and rocks.
- Pasting the front side of the blanks with natural veneer or plywood. Panels decorated in this way are no different in appearance from solid wood slats.
Step-by-step instruction
Let's consider the most common method of installing panels on walls with your own hands - frame. The bottom line is that a “skeleton” is formed from wooden slats or steel profiles for gypsum boards on the walls, to which decorative slats are subsequently attached.
When installing MDF boards on a frame, the wall does not need to be thoroughly plastered, puttied, leveled, or removed the old covering in the form of wallpaper or paint.
It is enough to treat mineral crumbling substrates (concrete, plaster, brick, cement) with a deep-penetrating strengthening primer; wooden ones - with a fire-retardant impregnation or an antiseptic non-washable primer to prevent the development of mold, fungi, and bugs.
Installation of MDF is carried out in the following order.
Step 1. Preparing the walls
The surface must be treated with a protective and strengthening compound. If necessary, secure thin insulation using plastic dowels or a construction stapler - regular or foil foamed polyethylene (Izolon, Penoizol), EPS up to 7 mm thick (Pufas, QS) or others.
At this stage, work is also carried out with electrical wiring and other communications. Outputs of sockets, switches, cables are marked.
Step 2. Formation of the frame
The main rule when installing planks with your own hands is that logs or profiles are attached perpendicular to the direction of installation of the panels. As a rule, MDF is mounted vertically, so the slats need to be fixed horizontally.
First of all, you should check the evenness of the wall with a level and mark it. It is advisable to cut off particularly protruding areas, mark the holes and depressions with a pencil, so that when installing the sheathing, thin fiberboard, chipboard or plywood dies can be placed in these areas for leveling.
First, a frame is formed around the perimeter of the wall. The lower and upper beams or profiles are installed at a distance of 3-5 cm from the floor/ceiling. Between them, the sheathing elements are placed in increments of 40-60 cm. The metal guides are fastened with metal screws or anchors; for wooden slats, you can use nails, dowel-nails or wood screws.
Example of a sheathing device
Along the perimeter of door and window openings, the sheathing is mounted with an indentation of 3-5 cm from the edge. The distance between adjacent profiles should remain standard - 40-60 cm.
Additional sheathing strips can be installed around door and window frames to increase rigidity.
Between the elements of the finished sheathing, you can install insulation boards - mineral wool, polystyrene foam, extruded polystyrene foam and others.
Step 3: Installing panels
MDF must be carefully cut to size in advance. Installation starts from the corner. The panel is placed against the wall, verticality is checked with a hydraulic level and fixed from the ridge side to the sheathing using small nails or special clamps. The next lamella is inserted with a tenon into the groove of the previous one until it stops and secured on the other side with hardware. The remaining panels are mounted in a similar way.
The clamp securely fixes the lamella to the sheathing, although small nails can also be used for this
After the work is completed, the corners and edges around windows and doors are decorated with MDF fittings. Folding corners made of MDF or plastic are attached using Liquid Nails, Titanium and their analogues.
Initially, an MDF corner is not a corner at all, but a plank. Depending on the type of angle (internal or external), it is bent in the desired direction
Excess adhesive should be removed immediately with a damp cloth. The upper part can be hidden under a decorative plastic or polyurethane cornice, while at the bottom you can install baseboards with your own hands to match the color of the floor or wall covering.
The covering of MDF panels is ready. It is recommended to use a vacuum cleaner or a slightly damp cloth to remove dust and dirt. Do not use rags heavily moistened with water, abrasive or aggressive detergents to avoid damaging the surface of the slabs.
Detailed video instructions for installing MDF panels:
Method one. Installation using lathing
- recommended in cases where the base surface has severe unevenness that cannot be corrected manually;
- for rooms with high humidity, it is best to use metal profiles rather than wooden slats as a base for the frame;
- the method using lathing is indispensable in cases where additional wall insulation is planned.
The main disadvantage of this option is the need to install a frame, which slightly lengthens the duration of the work. In addition, the frame takes up a certain number of centimeters of free space. Are you ready to put up with such “arbitrariness”? Very often you simply have no options, because achieving an ideal surface is not possible every time you need it.
Sheathing device
A very important point is to know the method of attaching MDF panels to the wall: vertical
or
horizontal
.
The nature of the design of the auxiliary frame directly depends on this.
- horizontal arrangement of MDF panels - vertical sheathing scheme;
- vertical arrangement of MDF panels - horizontal lathing scheme.
As you can see, everything is quite simple - it’s unlikely to be confused! Some points to pay attention to:
- Before installation, you should treat the slats with an antiseptic - this will protect the wood from the appearance of microorganisms;
- the length of the slats should be at least a few millimeters less than the actual distance from the top to the bottom point of the structure.
Subsequence
- no matter what type of frame you are going to construct - metal or wood, in any case, first of all you need to fix the corner posts, and then the transverse ones and those that will be located in the openings;
- a step of 50 centimeters is optimal for all types of sheathing;
- To fix narrow and wide metal profiles, it is best to use self-tapping screws, since the so-called dowel-nails are less reliable for this type of fastening.
Fixing panels
- we cut off the ridge at the first panel and clamp it with the same side to the sheathing of the adjacent wall;
- we fix it to the horizontal planks using self-tapping screws, do not forget to retreat 1 centimeter from the very bottom;
- each subsequent panel is inserted in a similar way into the groove of the previous one and secured with nails or clamps;
- the most difficult element is the last one: it is cut to the required size, inserted and fixed on the vertical post of the frame with self-tapping screws.
A video detailing the key points of the operation is below.
Glue method for installing MDF slats on the wall
With the adhesive installation method, more stringent requirements are imposed on the base. The surface must be strong, smooth and dry. It is advisable to completely remove the remnants of old coatings, then prime them with a compound that increases adhesion.
Glue is applied to the back side of the panel in a zigzag motion, then the plank is applied to the wall and pressed. The next lamella is also lubricated with glue, connected to the previous one and pressed. After installing all the elements, the corners and edges are decorated with corners, cornices, and other fittings.
Source: drevpity.ru
Slope finishing
Finishing slopes with MDF panels is done in the same way, but two options are possible: pieces of MDF panels along and across the slope. If the slope is narrow, less than 1.8 times the width of the MDF panel, then it definitely needs to be sheathed across. With wide slopes, the choice of cladding method is a matter of taste. Slopes sheathed across alternately with pieces of dark and light colors look good. In general, it is at the discretion of the master and his family.
Corners and crevices
There are no difficulties here: there are many corners and baseboards for MDF of different profiles, sizes and tones on sale. Installation comes down to cutting to size, rounding the corners, sanding the cuts with sandpaper and gluing with liquid nails or any wood glue.
Which installation do you prefer?
In general, it is recommended to attach wall sheathing to a system of galvanized or timber profiles. This allows you to avoid preliminary leveling of the wall surface and makes it possible to lay up to 50–70 mm of internal insulation or sound insulation. The choice between a wooden and metal frame is determined by the specifics and conditions of the room, as well as for finishing gypsum boards. In a modern variation of this installation, profiles and slats can be replaced or supplemented with plastic mounting strips, which provide for quick and easy installation with snap-on brackets.
A special case of a frame system is the construction of a solid base as a rough preparation for walls. The method is relevant in the case of using thin (5–6 mm) panels in rooms with high operational load. If there is a sufficiently rigid substrate (OSB 6 mm, gypsum plasterboard), the panels will not be pressed through, and their warping due to changes in humidity is guaranteed to be excluded - a typical disease of cheap products. At the same time, the wall receives additional insulation and remains ventilated.
Sheathing without a frame is carried out by gluing panels to the walls after they have been pre-aligned. This can be gypsum, cement plaster or a rough base from the method described above. The method is recommended for installing panels with a width of over 160 mm; fastening along the entire plane gives an advantage to the durability of the coating, but eliminates fragmentary repairs and disassembly of the sheathing.
Final operations
Once the frame is assembled, electrical cables are connected to the lamp installation locations. When choosing a wire, you should pay attention to the fire characteristics. MDF is a flammable material, so the electrical wiring hidden underneath it must, in addition to a sufficient cross-section, have appropriate insulation. Cables that are marked with the NG index, indicating increased non-flammability, are better suited.
How to attach MDF to metal profiles: the panels are fixed using specially designed parts - clamps. They are secured to a wooden frame with nails, and mounted to a metal profile with self-tapping screws. To prevent corrosion, choose galvanized fasteners.
The advantage of fastening with clamps over gluing is that the panels have free movement, which compensates for changes in size due to exposure to moisture and heat. Another advantage is the ability to dismantle and reuse the panels without damage.
The use of MDF materials for interior decoration not only creates a cozy and beautiful environment, but also reduces repair costs.
Frame system structure
The principle of constructing a frame for finishing with panels is the same as for gypsum plasterboard, but the profile installation scheme is completely different. Depending on the method of mounting the panels, the configuration may vary.
In the most typical version, the panels are attached directly to the profile; accordingly, the direction of the rack elements will be horizontal, this is the main difference from the gypsum board system. External cladding allows you to give the room the correct geometry, but for this you must follow the correct assembly sequence.
Start with long walls: attach vertical sections of UD 28 mm guide profile in the corners. The two planes of the frame must be strictly parallel, so that the wall sheathed first is taken as the base one. In the future, the distance for installing profiles on the opposite wall will be set aside from it.
Insert sections of 60 mm CD rack profile between the guides. When laying horizontally, you will most likely encounter a lack of length of the molding. In these cases, the crossbars can be spliced by inserting inside two sections of the guide profile and additionally strengthening them with LM screws. Since the linearity of the frame is not critical, it is also not forbidden to fold the profiles with an overlap of 30 cm and fasten their adjacent shelves with self-tapping screws.
Soft sheathing
Double-sided foam tape
Installing plastic panels over a soft sheathing seems flimsy, but in fact it is precisely these sheathings, which came out of the hands of the greenest but neatest beginners, that last for 10-15 years without signs of damage. Why? The soft sheathing is made of double-sided foam tape, see fig. In terms of thermal deformation properties, it exactly matches PVC, and its adhesive layer is very viscous and elastic: it stretches behind the board and then returns it to its place.
For soft sheathing to be truly reliable, three conditions must be met:
- Clear the wall of wallpaper, paint and level it with a rough, durable putty (Hercules, Prospector, etc.) to within half the thickness of the tape, 2-4 mm. Sharp small protrusions and depressions are acceptable, so puttying, which is already not difficult, is even easier.
- Stock up on a high-quality finishing profile; without it, sheathing over soft sheathing cannot be done. However, see the penultimate section.
- Reduce the contact time of the adhesive layer of adhesive tape with air as much as possible, up to an instant. This is something we need to talk about in more detail.
Installation of sheathing
The lathing scheme is the same as for the others. It is better to take the width of the adhesive tape from 25 mm, and best of all – from 60 mm. Technology:
- From the initial end of the tape in the roll, 300-350 mm of the upper (outer) protective tape is removed, and the tape with the bottom tape is cut off, as shown in the figure;
- The master (it’s him!) presses the initial end against the wall, and the assistant pulls the final strip;
- The master peels off the lower (adjacent to the wall) end of the protective tape and carefully pulls it out from under the tape, immediately pressing the tape against the wall;
- At the final end, a tail of the upper protective tape of 100-120 mm is left;
- The remaining strips of tape are applied in the same way.
Installing profiles
The principle is the same - the shortest possible contact of the “bare” tape with the air:
- The long tails of the protective tape are pulled back and the strips are stuck to the “back” with ordinary, narrow and cheap stationery tape;
- Apply the upper installation profile (horizontal), carefully pull out the protective tape from under it by the tail, immediately attach the profile with pressure, and an assistant supports it;
- The lower installation profile is also glued;
- The starting profile (vertical) is applied, the assistant holds it, and the master one by one pulls out the protective tape from under the profile, immediately pressing the profile to the tape, the operation proceeds from the bottom up so that the profile does not hang on the tape even for a short time;
- The finishing profile is also installed.
Panel installation
The panels are mounted similarly to profiles, but with some subtleties:
- You need to cut to size very cleanly and precisely to avoid jamming.
- The next panel is brought into place by hand using two ends in agreement; You cannot use a mallet and rule.
- After installing each board, the tails of the protective film are re-glued, and those that are too long so as not to interfere with work are cut off.
Frameless installation - covering walls with panels
There is an alternative installation method that involves the use of “liquid nails” glue. The panels can be glued either to the frame or directly to the walls, if the unevenness on them does not exceed 2 mm/m. Often this is the method chosen for cladding unfinished brick or block masonry; it is only important to choose the correct adhesive composition.
It is recommended to use quality products. The glue must remain flexible after drying; give preference to compounds based on rubber or polyurethane. For occasionally heated dachas, you should choose frost-resistant glue; other features are determined by the surface material for gluing.
Don't forget to properly prepare the walls. Masonry and plaster must be thoroughly impregnated with primer mixtures to increase adhesion.
Surface preparation
One of the main advantages of MDF panels is that there is no need to completely level the surface to which you are going to attach them. In this case, it does not matter at all whether the wall was pre-painted or not, and what material it is made of (brick, concrete, blocks, wood). It is enough to simply coat the plastered or wooden surface (2 times) with a primer (or a special composition for protecting wood), and then either immediately attach the lathing for mounting MDF panels, or first attach a layer of thin thermal insulation to the wall (using “liquid nails” glue) (such as folgoizol).
Corners and connections - we use a full range of fittings
The main advantage of working with MDF panels is that the fittings for cashing out the corner joints are mounted superficially, that is, after the installation of the sheathing is completed. It is highly not recommended to use plastic fittings with grooves for PVC panels. Trimming the panels must be done quite accurately, the gaps in the internal corners should not exceed 1.5–2 mm/linear. m, which is quite enough to compensate for temperature expansion.
The main element of the fittings is a universal corner profile. It consists of two thin MDF strips, bonded with laminated film, and can be used to decorate both internal and external corners. To ensure correct and beautiful alignment of the overlays at the corners, their edges are cut in a miter box at 45° with a general bevel outward. When finishing corners on slopes, the angle will not be correct, so local trimming is recommended. Installation is carried out using glue for wooden products based on polyvinyl concentrate.
Another element of the fittings is the joining strip. It is used for splicing sections of cladding when the length of the molding is insufficient or for combining panels of different colors in one plane. A mounting strip should be provided at the installation site of the connecting element.
Options for joining planks
Option #1
Connection of plastic and MDF panels:
- H-shaped PVC profile. Most often, joining along the length of plastic and MDF linings is done using H-shaped PVC profiles, as in the photo below. In this version, the planks are simply inserted into the profile on both sides. The downside is that such a profile is visible, and in the case of MDF it also differs in texture.
The H-shaped profile is considered universal, but it is visible
- Thin straight and corner strips. Manufacturers of MDF panels produce thin strips that are glued to the connection line; these strips can be straight or angular.
- T-shaped moldings . They are inserted into the gap between the panels.
T-shaped moldings for hiding the joints between MDF panels are very easy to use
Option No. 2
A decorative overlay at the joint is considered the simplest way to connect wooden cladding along the length. You simply fit 2 rows of planks and nail a piece of wood on top. The configuration and dimensions of the slats can be any, and most importantly, there is no need to adjust the slats too precisely; the slats will cover the entire defect.
To decorate the joint on the Blockhouse lining, a planed board with chamfers is usually used
Craftsmen use wooden T-shaped slats, they are also called mushrooms. There the rail is inserted into the gap, which must be precisely adjusted to the size of the fungus. Plus, this joint must be on the supporting lath of the sheathing.
The gap between the slats should correspond to the thickness of the fungus stem
Option #3
Installation in a running manner. This option is the most difficult to install with your own hands.
It is being built in several stages:
- No one is going to hide the joints; on the contrary, they are highlighted , so they must be perfectly even. To do this, the ends are cleaned and ground at 90º before installation.
- To ensure that there is no gap at all when joining, lay the planks on top of each other and use a miter saw to cut off the edges of both at once.
- A grinder or electric planer is used to chamfer the outer part of the cut ; the bevel should be the same as the side bevels on the plank itself.
- The planks are connected end-to-end and the cut no longer spoils the view, but is part of the interior.
When installed staggered, symmetrical seams look better
You can do it simpler - when you reach the end of the row, you cut off the excess plank and start the next row with this trimming. But here it will not be possible to build a perfectly symmetrical picture of the joining seams.
Installation of skirting boards
Skirting boards for MDF panels deserve special mention. For the most part, they are used to cover the corners between the wall and the ceiling, or to decorate the upper end of wall panels. The plinth is installed in the same way as other fillets; the installation is carried out using transparent silicate glue.
The issue of fixing the floor plinth remained unresolved. There will be no special problems if the lower guide of the frame is lowered to 10–15 mm from the floor. If there is a rough base or the walls are covered with panels, fastening can also be carried out using standard means. The practice of chemically attaching skirting boards using liquid nails is common: the front surface of the panels has excellent adhesion.
Source: www.rmnt.ru
How to attach a wall panel in the kitchen to the sheathing
The workflow is divided into three stages. The starting point is marking.
Marking
Using a building level, a tape measure and a pencil, mark the surface of the wall where the sheathing will be located. Usually the main frame is screwed around the perimeter, and horizontally or vertically located slats are placed on it. The distance between the jumpers should be 50-60 cm for MDF, chipboard and 30-40 for PVC elements (this increases the strength of the structure, the plastic will not bend much).
Cutting and assembling the frame
Most often, the frame is made of wood, since it is more economical than plastic or metal profiles. Wall panels in the kitchen are fastened using slats with a cross-section of at least 20*20 mm, without bends or other defects. Before installation, they must be treated with an antiseptic and water-repellent impregnation. After the wood has dried (this will take about one day), you can begin to work. The distance of the lower part from the floor should be 1-2 cm.
- Install the base - four planks around the perimeter. If necessary, place bars under it for leveling.
- Attach additional guides using self-tapping screws or self-tapping screws. Do not skimp on fasteners to ensure the structure is reliable.
- If thermal insulation was provided, place the material in the resulting cells. MDF can be insulated with polystyrene foam and polystyrene foam.
Metal sheathing is considered the most reliable. It is made according to a similar principle, but the process is more complex. This video shows a detailed example of installing such a profile.
With plastic guides, as with wooden ones, everything is quite simple. According to preliminary markings, they are attached to the wall with dowels. The elements must be located perpendicular to the PVC sheets.
Creating the frame is the most labor-intensive stage. When it is finished, you can begin the final part of the work.
Sheathing
The planks can be fixed to the frame horizontally and vertically. Craftsmen advise starting installation from the bottom and from the corner to the window or door. If the top part has to be cut off, it can be hidden behind the wall set.
Step by step instructions
- Trim the sheets if necessary.
- Attach the corner element with self-tapping screws and close it with a corner.
- The plastic corner strip is inserted into a pre-installed corner and attached to the frame with a stapler.
- Insert the second sheet into the groove of the first and attach it to the profile with clamps, screws, glue or staples.
At the final stage, the floor plinth is installed. The video shows a clear principle of installing the frame and PVC planks.
What mistakes are often made when joining MDF panels along the length?
Interior design using MDF is an opportunity to rationally use space, making it more attractive and cozy, but during installation, as a rule, certain technical difficulties arise that cannot be left without detailed consideration. With its help, the walls in the interior are decorated, thanks to which it is filled with coziness and comfort, and environmental cleanliness is also considered an important advantage, due to which the safety of the room is not compromised.
Completing the installation process
The finished look of the interior is given by fittings for MDF, with which you can close the corner wall joints between the panels. The best way to cover shortcomings in installation work are folding corners, which for installation from the inside are coated with mounting glue and pressed tightly against the panels in the corner. To hide the joints with the floor, use a plinth. Thus, decorating a room with your own hands using MDF panels is a very simple and straightforward task. In addition, when finishing slopes, there are two ways to decorate well. The first is to install the panel with a horizontal section, the second – vertical. It is better to use a horizontal section when the distance from the edge of the window or door frame to the corner of the wall is sufficiently large.
vote
Article rating
What is MDF?
MDF is a wood material made from sawdust, which has been specially treated with antiseptic agents and assembled into full-fledged boards using various adhesives. Pressed manufacturing technology is an important advantage, which ensures strength, mechanical resistance and reliability.
Manufacturers are constantly improving the technology for manufacturing MDF panels, but one thing is common - the use of exclusively environmentally friendly and safe raw materials. As a rule, these are sawdust of precious woods that have been sorted and processed to avoid compromising the final quality.
There are several model options depending on the installation method - with joint locks and tongue-and-groove systems, so you select something that meets your requirements and preferences. But the option with docking locks has a high cost, which creates characteristic financial inconveniences.
Important! Despite the high cost, it is better to give preference to models with special docking locks.
Required tools and materials
The dimensions of MDF boards allow you to calculate consumption with minimal losses. The thickness of the slabs is from 3 to 60 mm, depending on the purpose of the material. Along with ordinary MDF, there are laminated or veneered surfaces, the use of which can be used to advantage in the interior. Glossy or matte, panels for painting - almost any type of this material can be used for cladding the interior space.
What you need for work:
- Drill - hammer drill.
- Screwdriver.
- Building level.
- Wooden beams for sheathing.
- Profile for installation of drywall.
- Kleimers.
- Suspensions.
- Corrugation for laying electrical wires.
- Decorative slats and corners.
Do-it-yourself installation of MDF panels on the wall is carried out using a pre-assembled sheathing or adhesive. Panels of only small thickness can be glued; preliminary leveling of the concrete walls will be required (defects will affect the quality of fastening). Almost all types of MDF boards can be attached to the sheathing; the cladding will support the weight of shelves and furnishings installed after installation.
Basic mistakes when joining panels
As a rule, non-compliance with technological features and rules causes the appearance of places of delamination and deformation of the material, which creates certain operational inconveniences.
Experts identify the following main mistakes when joining MDF panels in height:
- Incorrectly chosen installation method, which creates not only difficulties during arrangement, but also inconvenience during the subsequent use of the finished space.
- There is no step between the panels, due to which incorrect joining subsequently causes deformation of the coating. The fact is that under the influence of temperature or high humidity, not only the comfort in the room is disrupted, but also the shape of the material.
- Incorrectly selected panels depending on the height are the main reason for inaccurate joining on the wall, which creates not only visual, but also practical inconvenience.
The correctly chosen method of installing MDF panels is a guarantee of the attractiveness and comfort of the room, so you should not neglect even the smallest details when arranging the walls. It is also important to familiarize yourself with the intricacies of the installation method in order to avoid inconvenience in the future.
Source: freegameinfo.ru
Decorative gypsum board wall panels
Products based on plasterboard sheets are used as a budget option to level or decorate walls. And also, install soundproofing partitions in the room. They are made using a hot press from gypsum and construction paper, so they are used mainly for interior decoration of rooms.
Thanks to a special coating, the panels retain their appearance for a long time. They make maintenance easier. No special knowledge or skills are required to install them. Everything is easy and simple. Moreover, due to the environmentally friendly material used for production, gypsum board panels are used in kindergartens and schools.
Features of the panels:
- High-quality coating;
- Reliability;
- Original interior solutions;
- Ensuring fire safety.
To create an interior you don’t have to paint the walls or glue wallpaper. It will be enough to install plasterboard decorative panels. They are highly popular in the construction industry as a cladding material. Thanks to the automation of the process, installation of decorative cladding panels is carried out quickly.
About thermal insulation
Installation of insulation
The installation of the sheathing is complete, but before moving on to the installation of MDF panels, the walls should be insulated. This will allow you to save a lot on heating the room, and also increase its thermal insulation. In addition, insulation additionally prevents the formation of mold, mildew and moisture in the voids of the sheathing. It is recommended to fill the cells in the sheathing with one of the following insulation materials:
- Penofol is a relatively new multilayer insulation material that consists of polyethylene foam and polished foil with a reflectance coefficient of 97%. It is fireproof, environmentally friendly, has good noise insulation and low vapor permeability.
- Mineral wool. The material has gained great popularity due to its high thermal insulation and moisture resistant properties.
- Styrofoam. Air is the best heat insulator, and this material consists of 98% of it. All this is thanks to the polystyrene granules that are formed in the foam during the production process. The material has high moisture and vapor resistance.
- Extruded polystyrene foam. This type of foam is obtained by melting with extrusion. The seal is not cheap, but it fully justifies its price. The material has excellent thermal insulation, as well as a high compression ratio. Therefore, it is often used to insulate floors.
Installation of this thermal insulation material is very simple:
- Sheets are cut from a roll of insulation in accordance with the cell sizes (lathing pitch).
- After this, they are attached to the wall using construction foam or silicone glue.
- The resulting protrusions of the polyurethane foam are removed using a utility knife.
After insulating the walls, we move on to the most interesting part - the technology of wall cladding with panels.