A wall mounted TV shelf not only has functional qualities, it also complements the design of the room. With its help, you can save space in your apartment, as well as create a stylish, aesthetic look for a transformed wall. In addition, you don’t have to spend money on buying wall shelves, because you can make them yourself.
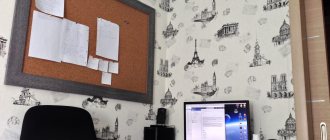
Wall mounted TV shelf
Homemade shelves in the kitchen, bathroom and other rooms
The use of plasterboard shelves in the kitchen will make it possible to replace the usual furniture, although more often such structures serve as decoration.
GCR is not famous for its durability, so heavy items should still be stored in wooden cabinets.
Video:
But you can make a built-in cabinet for storing spices or a tea set from plasterboard. As a rule, plasterboard shelves are made of small sizes and are located away from the sink.
The design of shelves can be very diverse, so in the kitchen you can place both corner shelves and built-in ones; the manufacture of pull-out shelves and drawers has become especially fashionable.
To do this, make a niche out of drywall into which the retractable mechanism is placed. Such shelves are suitable for storing cereals, vegetables or small utensils.
The retractable design will help save space, and therefore will be useful in small kitchens in Khrushchev.
For lovers of good wine, you can place a bottle holder in the kitchen to help store the drink correctly.
With the help of drywall, you can turn an ordinary kitchen into a designer one, just by showing a little imagination.
The use of moisture-resistant drywall will be appropriate in the bathroom, because there is always a large accumulation of moisture there.
In the bathroom you can make the most original devices, even make a sink and a niche for a washing machine, combining them into one continuous element.
Corner structures for a combined bathroom and bathtub will also look beautiful, which will not only help save free space, but will also become a piece of furniture.
You can place household chemicals on the corner shelves, and for plumbing fixtures or other large items it is better to make a built-in structure.
Plasterboard shelves in the bathroom are often made using lighting, which is placed at a certain angle.
You can make a frame for the mirror on the wall, and install additional lamps along the edges - this option will be useful for girls who do their hair.
Not only small shelves are suitable for the bathroom, but also entire niches that span the entire wall.
The main thing that needs to be taken into account is the presence of good ventilation in the room, which will help avoid the formation of condensation, and therefore extend the service life of the units.
The finished structure should be coated with waterproof acrylic paint with high adhesion.
Plasterboard shelves in the living room will be a good addition to the interior. Indoors, you can make a work area with a window for a TV or create a small structure for a library.
Partitions with through windows are often made to accommodate souvenirs and small items.
You can place fresh flowers or other indoor plants on a decorative partition with windows.
If there will be indoor plants on a gypsum board shelf, then it is necessary to use moisture-resistant plasterboard in the construction.
A positive quality of plasterboard products is that the structures can be manufactured after the repairs have been completed.
But if the renovation has just begun, and the walls are leveled using gypsum boards, then you can combine the structure of the wall and built-in shelves - this way you can transform your living room beyond recognition.
Video:
For an experienced person, making various shelves from plaster will be quite simple and will take one or two days, and the result will delight you for years.
Advantages and disadvantages
The main advantage of gypsum plasterboard structures is their lightness. The rack weighs less than cabinet furniture and wooden products, although it is capable of performing all their functions. The panels do not burn, do not melt or emit toxic substances even when exposed to high temperatures.
For self-installation of a shelf in a plasterboard wall, the flexibility of the material is important. A person without experience, complex tools or furniture maker skills can assemble the frame and cover it with gypsum plasterboard parts. The parts are easy to cut with a sharp knife, and the metal profiles are connected using self-tapping screws and a screwdriver.
The design of the shelves can be anything. To assemble a curved structure (arched, round, etc.), you need to use special profiles that can be bent along any contour. GCR does not require complicated preparation; it is easy to add a slight curvature to any part, and for strong bending the material only needs to be slightly moistened with water. Built-in plasterboard shelves and partitions can be covered with the same materials that are used for finishing the walls and ceiling, creating a harmonious interior of the room without much effort.
Among the disadvantages of gypsum boards:
- fragility;
- ability to bend under heavy weight on spans of more than 50 cm;
- low resistance to moisture.
TV between cabinets and shelves
A screen mounted in furniture is a great idea to make the room not only a comfortable place for an exciting holiday, but also a functional area. For example, a TV can be placed among bookshelves. With this approach, even a three-dimensional monitor will become a secondary accent in the interior. This is an excellent solution for lovers of classic style, when you want the fireplace to be the central place in the living room.
The plasma panel can also be placed between cabinets. This option is suitable for lovers of minimalism. There are fewer shelves, all sorts of details, and only a clear, laconic wall, divided into sections and with doors on a mechanism that relieves the facades of unnecessary handles. A minimum of contrasts and additional elements will make the living room ideal.
Finishing touches
The sheathed frame must be subjected to final finishing. The joints of the sheets in the plane are reinforced with a special mesh for connecting the seams and which will increase the strength of the connection. External corners can be masked with special profiles for corners or treated with putty, having previously sanded the end parts of the plasterboard sheet with a plane or large sandpaper. There is no need to process the entire surface of the shelf - the cardboard is perfectly flat. For further finishing, it is worth lightly rubbing the surface with fine sandpaper and covering it with a primer for painting or other coating.
Shelves in a plasterboard bathroom should be treated with water-repellent compounds, which will additionally protect the plasterboard sheets from destruction. For finishing in rooms with high humidity, mosaic tiles with a fine pattern in the color of the main walls are excellent. This method of coating provides reliable protection of the structure from moisture; such a shelf is easy to care for and clean. Painting with moisture-resistant compounds is also suitable.
Shelves made of plasterboard are in perfect harmony with other materials: glass, metal, wood. Since assembling a product yourself is a completely original work, no one limits your imagination: try different combinations. The more original the shelf will be and will serve not only as a functional item, but also as a decoration that no one else will have.
Options for homemade designs: general principles
Depending on the distance between your TV receiver and the transmitting antenna of the television center, the signal level will change. Another negative factor affecting the quality of television wave propagation is the presence of obstacles. Ideal reception occurs when there is a direct line of sight between the two antennas. That is, you can see the mast of the television center, even through binoculars. If there are buildings or tall trees in the path of the TV signal, there will be no reliable reception. However, waves reflected from other objects can be received by a TV antenna amplifier. If even weak waves do not “break through” to your house, you will have to make a mast. The network of television and radio broadcasting stations is located in such a way that you can receive a signal in any locality.
- Indoor antenna.
Operates without an amplifier in relative proximity to the transmitting mast. If you can see the television center from your window, some of the channels can be caught literally with a piece of wire. How to make a television antenna with your own hands can be seen in the illustration. The quality of workmanship in such conditions affects only the aesthetic component. But if you live on the 1st–3rd floor, and even surrounded by concrete boxes of a residential neighborhood, a simple design will not work. An indoor antenna, especially one made by yourself, will require a signal amplifier. The advantage of this design is that there is no need for weather protection. - An outdoor TV antenna can look exactly the same as an indoor one. In this case, a prerequisite is high strength (so that the wind does not change the geometry) and protection of the contact group from corrosion. It is usually placed in close proximity to the window (in high-rise buildings) or on the roof of a private household. The connecting cable is relatively short, so an amplifier is not required to reliably receive a digital or analog signal. Except for the case when the transmitting center is far away. The design is accessible for maintenance and repair, this is an undeniable advantage of being located nearby.
- Outdoor antenna for long-range TV. As a rule, this is a rather bulky design with a screen and additional elements that amplify a weak signal. An electronic amplifier is welcome, but with proper design it may not be needed. Perhaps to compensate for a long cable (there will definitely be losses in it). Such devices are mounted on the roofs of high-rise buildings or on masts in private households. The fastening must be strong, otherwise the wind can easily destroy the structure.
- The antenna type is selected based on the reception characteristics and wind load in the region. For example, the Kharchenko antenna (the most popular homemade option) should not have a high windage. It may be necessary to choose another, more complex project.
Next, let's look at examples of making antennas at home using scrap materials, from simple to complex.
Homemade TV mounts
Even simple brackets for mounting TVs on the wall cost a lot, so it makes sense to save money and make a TV mount for the wall yourself. For this purpose, universal building materials are used. Even simple metal corners allow you to mount the TV on the wall without a special bracket.
Made from aluminum corners
You can make a device for mounting the TV on the wall from corners. It is better to choose aluminum ones, as they are easier to cut and process. Recommended metal thickness – from 3 mm, shelf width – 25 mm, quantity – 4 pcs.
The length of the segments is chosen in such a way that it is possible to make holes for fastening at the top and bottom, that is, the length should be equal to the distance between the mounting holes plus approximately 2-3 cm on each side
It is important to drill the holes so that they match the mounting holes on the back of the TV. Another pair of corners will be attached to the wall. The gap between the elements should be slightly smaller or larger compared to the distance between the corners attached to the back panel of the equipment. Before attaching the TV to the wall, make appropriate markings, checking the vertical installation of each part. Now, in the corners intended for installation on the wall, holes are drilled for fixing fasteners (in those corners that are installed on the back cover of the TV, such holes also need to be made). Then the mount is installed on the wall, the holes are aligned and the homemade bracket is secured by inserting studs or bolts into the contacting holes.
With minimal effort
Using the same principle, a wall mount for a TV is installed, made of metal corners with perforations. Reinforced fasteners are used to secure beams and house frames. They already have holes. They will naturally match on each product. You will need 4 elements for installation on the back wall of the TV and four for the wall. In most cases, such corners are attached to the wall with dowels and self-tapping screws (depending on the wall material), and they are fastened together with bolts.
Swivel pipe bracket
To make fastenings from metal pipes, you will need a welding machine, drill, pipe bender, and grinder. The work will be labor intensive. Prepared from materials:
- Two small metal sheets - one of them will be screwed to the wall, and the other to the TV.
- Two small sections of pipe - one of a smaller diameter but longer, the other of a larger radius and shorter. The first will be welded to a sheet of metal that will be installed on the wall, the second to the plate for the TV. The second pipe must fit over the first.
- 8 bolts.
The individual parts are welded, and then the fasteners are applied and screwed to the wall, which has been previously marked. Fundamentally, the method of mounting a bracket, whether purchased or made with your own hands, is no different.
This is how TV mounts are selected and installed. In order for the fastening itself and the equipment to last longer, you should take into account all the listed installation rules, choose reliable hardware and other components.
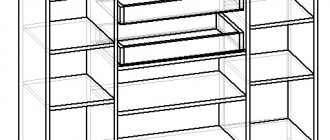
Assembling the frame
The most difficult and responsible stage of all work. It is better to use a PN profile. It has small dimensions (50 x 25 mm). This is enough to withstand household loads. Although for heavy weights you can purchase a wider profile.
1. We set up the side racks that will hold the shelves.
- We take the profile and cut it to the required vertical size using metal scissors.
- On the vertical marking, we make holes using a drill or hammer drill for dowels at the top, bottom (30 cm from the floor and ceiling) and in the middle. Next, we attach the profile to the wall in these places.
- We install profiles perpendicular to the wall, which determine the depth of the shelves: insert the profile into the wall and fix it to the floor, the same on the ceiling.
- We insert the outer profile for the rack into the floor and ceiling. We secure it with a puncture at the joints of the profiles.
The side stand is ready. This is how we do the rest.
2. We install the frame of the shelves themselves.
- We attach profile strips that will perform a supporting function: we cut off an element equal to the distance between the vertical posts. We install them at the required level and attach them to the base.
- We measure the distance between the vertical posts, cut 2 according to the resulting length and attach one of them to the wall, the second on the opposite side of the frame.
- We repeat the algorithm the required number of times according to the number of tiers of the rack.
Model selection
Before you make a TV stand with your own hands, you should decide what size it will have, what shape it will have, and what additional elements it will be equipped with. It is decided what material will be used during the work.
When creating a TV stand, wood is usually chosen, since a plasterboard structure for a TV may not withstand significant loads from heavy equipment. If drywall is chosen, the frame must be well reinforced.
The most commonly selected materials are:
- a plasterboard TV structure may have unusual shapes, but needs careful reinforcement, and also requires the ability to work with this material;
- Chipboard is selected in the absence of significant funds that can be allocated for the planned work, and the material is produced in numerous shades and is easy to process;
- MDF is considered an excellent choice for creating a bedside table on which you plan to install a TV, since the material is environmentally friendly, durable, with a uniform structure and light weight;
- natural wood is the best choice, since a do-it-yourself wooden structure is strong, durable, incredibly beautiful and fits well into almost any interior style.
When it is decided what material will be used in the work, you should decide on important questions:
- the shape of the cabinet depends on the preferences of the owners;
- the dimensions are determined depending on the installation location and the dimensions of the TV itself, and it is taken into account whether the design will be used not only for installing this equipment, but also for any other purposes, since if you plan to store various small or large objects on it, then it is advisable make it with special storage elements.
Before the actual work, drawings and diagrams are certainly made, according to which all successive stages of the process will be implemented, otherwise there is a high probability that numerous errors will be made that will be difficult to eliminate.
TV frame made from pallets
The idea is to turn the TV into a beautiful living picture, in which people move and talk, cartoon characters have fun and the news is shown. To do this, a thick wooden frame is created from a pallet.
The width of the frame is selected depending on the size of the boards from which the pallet is made. The boards are fastened together in such a way as to realize the design concept. Then the surface of the frame is processed. There are many different design methods. The surface of the frame is made smooth using sandpaper. Then it can be painted, varnished or silver paint. All this reflects personal taste and style.
Types of shelves for TV
Modern flat-panel TVs come with wall brackets. This is convenient, but only when the TV screen has a sufficiently large viewing angle - at least 120 degrees. Opposite a window or other light source, such a mount is not justified - the display glares, and there is no way to rotate the TV. For small “cubes” such shelves are produced, but CRT TVs are becoming a thing of the past along with bulky VCRs.
Factory model for CRT TV
If you set yourself the goal of making a universal TV shelf with your own hands, then nothing simpler than the classic “almost invisible” option has yet been invented. Two purchased furniture boards 500x500 mm, an electric jigsaw and a little fiddling - an ordinary universal shelf can be made in an hour, including installation time.
Classic shelf option
However, in my opinion, the optimal model of a TV shelf should combine the following functional features:
- The ability to rotate the screen, that is, not a rigid mount on the wall, but a classic stand.
- Corner location. In the kitchen and small rooms, it is most convenient to place the TV in the corner.
- Additional shelves for a DVD player (Blu-ray, Transgalactic transmitter, magic ball or whatever else they invent) and all kinds of control panels.
- The possibility of hidden wiring to all this crap, that is, the absence of a back wall.
Decorative or functional?
Drywall is an easily processed material; to work with it you do not need to have special complex equipment and skills. Therefore, it is great for making various interior elements. Since shelves can perform different tasks - be a decorative decoration or perform household functions, accordingly, they are also loaded differently. It is important that the material from which they are made can withstand the weight of the items for which the products are intended. Drywall has a sheet thickness of 6 to 12 mm, which allows you to choose the right option for a particular case: for a decorative rack for books or souvenirs, you can use a thin sheet of 6-10 mm, and for a shelf under a TV, a thick sheet of up to 24 mm is suitable.
Shelves made of plasterboard can be of any shape, they are able to bear various loads in all rooms of the house.
Overview of species
If the plasma panel is mounted below on the wall, additional electronics elements can be placed on the shelves: a CD player, a satellite TV tuner. When the user bought a TV with an LCD screen, it was time to purchase modern furniture, because it is unlikely to fit into the “grandmother’s” wall, and even if it does, it will look extremely unaesthetic.
Thus, it makes sense to list the main furniture models used as a TV stand:
- TV stand;
- furniture module;
- built-in headset;
- modular section;
- various consoles;
- wall shelf.
Design and functionality should be chosen based on the interior style of the room and the presence of auxiliary electronic devices. If the TV is located in the nursery, it is necessary to consider the issue of environmental safety.
Cabinets
Many users actively use just such a furniture attribute to install a modern TV. Most of the models presented are practical, stylish in design, and inexpensive. Therefore, choosing a cabinet according to the current family budget and for a specific interior direction will not be difficult.
Modern cabinets have many small shelves, opening drawers, and convenient niches. Models come on legs or wheels, are usually made from high-quality materials, come in beautiful finishes in a variety of shades, and are designed to accommodate additional electronic devices.
Racks
Quite an interesting and modern solution that allows you to beautifully position your TV and other accessories. Device stands are more suitable for a minimalist style in the interior. Despite a certain simplicity, they have a number of advantages:
- low cost;
- emphasized restraint;
- brevity.
They also stand out for their great functionality. Racks are made in various sizes, designs, with different numbers of shelves. Exterior finishes come in both dark and light shades. Therefore, every connoisseur of a strict, laconic style in the interior has the opportunity to buy a stand and not only beautifully decorate the wall, but also conveniently place the TV, discs, and remote controls.
Elevators
Relatively new devices designed more for plasma panels. Thanks to the design feature, it will be possible to mount the TV vertically. On the reverse side there is a laconic or rich decor. Using the remote control, you can control the mechanism: raise the structure, lower it, rotate it, tilt it. Such an unusual device differs from all similar solutions for TVs not only in its great functionality, but also in its magnificent, impeccable design.
Cabinets
In spacious rooms, TVs, set-top boxes, audio systems and other attributes of modern electronics are placed separately from elements of massive furniture, but when there is a shortage of free space, wardrobes are installed nearby. In order for them to look good and aesthetically fit into the interior concept, such furniture items must be carefully selected.
If you purchased a chest of drawers with drawers or a wardrobe with a stand and its appearance corresponds to a modern design, it will look justifiable next to the TV. But if the woodworking product is tall, massive, with shelves, and is not original, then it is necessary to choose a special place so that the piece of furniture does not spoil the interior style and does not violate the integrity of the surroundings.
Types of TV shelves
Taking into account current technologies, almost all TVs are small in thickness and weight, so they can be conveniently mounted on the wall using special brackets.
Wall shelf-bracket
The option is good, and can be easily done with your own hands, but there is one big “but” - if the viewing angle is at least 120 degrees
In addition, it is important to take into account light rays, so you cannot place the TV anywhere. There is no provision for turning the TV left or right on such a shelf, and looking at the reflective screen is somehow not interesting. On the other hand, if the design of the room follows a minimalist style, then a wall-mounted shelf-bracket is a good solution for placing a TV
On the other hand, if the design of the room follows a minimalist style, then a wall-mounted shelf-bracket is a good solution for placing a TV.
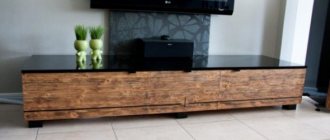
Standard TV shelf
Well, this is closer to the classics - a shelf-stand for a TV that fits perfectly into the design of the room. There are many options with materials (glass, wood, plastic, metal, etc.), and this shelf is multifunctional. You can store remote controls, discs in it, place a home theater on it (if it has several levels), etc.
Ideal wall shelf
This option falls more into the category of “do what you want with your own hands.” Such a shelf should include the following features and features:
soft mount that allows you to rotate the TV in different directions. This does not mean rigid mounting on the wall, but a shelf made in the form of a stand; location in the corner. In the kitchen or in the children's room, it is best to place the TV in the corner, so you need to make a shelf taking into account third-party parameters (angle of incidence of sunlight, comfortable viewing, tilt angle, etc.); several levels for storing auxiliary items (remotes, DVDs, etc.); supplying power and antenna wires
It is advisable that such a shelf does not have a back wall, so that all the wires can be brought in without any obstruction (it is important to maintain visual appeal, and protruding wires will somewhat spoil the appearance).
How to make a wall shelf with your own hands
So, if you want to try your hand at making furniture (well, at least a wall shelf for a TV), then you should first select the source materials.
You will need several furniture panels (taking into account the desired color), a tool for working with furniture and “straight” hands.
The size of the shields to be used is standard, the preferred thickness is 16 mm. In addition, you need an edging that will give the shelf elegance and uniqueness.
For a two-color shelf, it is best to use the following parameters:
Color #1
Three shields measuring 600x600 mm are future blanks for the levels. Will have to work with an electric jigsaw
By the way, wall-mounted shelves for a TV attract attention precisely by their external form, and only then by their functionality. So the first color needs to be chosen correctly - it is the main one
Color #2
One rear insert with dimensions 450x200 mm and two side panels - 450x400 mm. This color brings a certain contrast, adding originality to the shelf. Cutting out inserts of this size with your own hands is not a problem - the main thing is to know how to use a power tool.
It is especially important, when making furniture for a TV with your own hands, to fix it on the wall. Here you will need large dowel-nails (starting from 6x120), since an insufficiently strong fastening will lead to the fact that all the equipment will fall and break. As for the wires, they can be connected to the TV secretly, hidden in cable channels
As for the wires, they can be connected to the TV secretly, hidden in cable channels
Here you will need large dowel-nails (starting from 6x120), since an insufficiently strong fastening will lead to the fact that all the equipment will fall and break. As for the wires, they can be connected to the TV secretly, hidden in cable channels.
Naturally, it is impossible to put all the variations of making a TV shelf with your own hands in one article, because everything depends on a person’s imagination and his practical skills. We can only say one thing - furniture made independently will last much longer and, naturally, will be doubly pleasing to the eye.
DIY wall shelf - easy
13 Jan 2014 | Section: Useful little things
Hello dear readers of the site sesaga.ru. I want to share my experience and tell you how you can make a wall shelf with your own hands that is no different from an industrial one.
Now this has become possible thanks to building materials hypermarkets, where you can buy everything you need for renovation and construction, from nails to bathrooms or kitchens.
After purchasing the SONY Play Station game console, the question arose about its further use. Buying a floor shelf for the set-top box to stand on was not included in the plans, since the TV was specifically mounted on the wall to save space. And constantly putting the console on a chair and putting it away at the end of the game is also not a good idea.
And then somehow, in a building materials hypermarket, chipboard blanks caught my eye. They came in different shapes, colors, sizes and were intended for assembling furniture. Moreover, there is no need to cut anything, everything is cut to standard sizes. Just choose and sculpt whatever you want, like a construction set.
I purchased this blank from which I decided to make a shelf for 210 rubles.
Here, in the store, two brackets were purchased for attaching the shelf to the wall. The cost of one bracket was 10 rubles. The rest of the fasteners were my own.
To attach the shelf to the wall, I used self-tapping screws for dowels with a diameter of 5 mm, and to attach the brackets to the workpiece, I used ordinary self-tapping screws 14 mm long.
Then everything is quick and simple. It took me about 30 minutes to assemble and attach the shelf to the wall. First, we attach the brackets to the workpiece. I recommend attaching it with the short part. The part of the bracket that will be attached to the wall should be flush with the back so that the shelf fits snugly against the wall.
Now all that's left to do is secure the shelf. Use a level to mark the horizontal position of the shelf on the wall.
We make holes in the wall, drive dowels into them and screw the shelf.
This is the simplest DIY wall shelf we have made. Moreover, it is no different from industrial. And even better :smile:.
Manufacturing
Having prepared everything you need, you can start making a TV stand with your own hands.
First of all, you need to saw off all the parts according to the drawings and carefully fold them. By the way, before you start cutting materials, make a cutting diagram to make sure there is enough material.
If the choice was made in favor of laminated chipboard, then the next step will be gluing the ends. Before this, you will need to sand the ends with sandpaper for better adhesion.
Gluing the edge is quite simple, just apply it and run a hot iron along it through a thin fabric
You should pay attention to the fact that the edge is always wider than the end, so you need to glue it so that it extends beyond the edges, this is necessary so that you can then cut it off with a knife, in which case it will not come off over time
Now we take a set of products and mark the places where we need to drill holes to fasten all the parts into a single whole. Having marked the places where the holes will be, you can begin. Those who have already drilled when hanging something on the wall know that it is difficult to immediately place the drill where it is needed, and it often happens that the hole is drilled in the wrong place. In this case, you need to make a dent; to do this, you need to place a nail in the center of the mark and lightly hit it with a hammer, or use special wood drills with a sharp tip.
Having made all the holes and repeated measurements, you can proceed to the last stage - assembly. It is necessary to assemble the product carefully, because if you assemble and then disassemble it, then all the holes for the screws will increase and will no longer connect the elements of the TV stand tightly.
This particular drawing of a TV stand implies the presence of drawers, which are assembled separately and be careful when installing guides on the walls and on the drawers themselves. Even changes of 1-2 mm can affect the final appearance of the product
Pallet shelf
Using wooden pallets, you can create a shelf in any style, saving thousands of rubles.
- When creating this model, three pallets are used. They are cleaned, washed under pressure with hot water and vinegar, and dried.
- After the pallets are cleaned and dried, they are shortened. It is necessary that all three pallets are reduced to a size of 120 cm x 47 cm. Next, they are sanded with sandpaper, paying special attention to the corners that need to be rounded. The pallets are then placed on top of each other and secured together using long screws.
- After choosing a favorite color, the shelf is painted by mixing water-soluble paint with water. Then they let it air dry and carefully sand the edges to create the illusion of antiquity. Finally, a brush and water are brushed over the surface to achieve a waxed finish. The design can be supplemented with glass, the thickness of which must be at least 4 mm. You can also arrange lighting in it. If desired, the shelf is varnished.
Corner shelf design
This type of shelves is practical and is used in small rooms, as they take up little space and allow you to decorate a corner in an interesting way. They can be mounted both inside the corner and outside, going around it
They help expand the functionality of the room and increase its ergonomics, which is important for decorating a small room - kitchen, hallway, bathroom
The corner shelf can accommodate a large number of items
They are often used instead of a corner cabinet and small household appliances, dishes, and souvenirs are placed on them.
Since such shelves have three attachment points, they are more reliable and can withstand greater weight. They can be made from various materials: wood, glass, metal, plastic.
An external corner shelf made of wood decorates the corner of the room in an original way.
Drywall for different rooms: types and advantages
Gypsum is a fragile mineral, easily susceptible to moisture, so a sheet covered with cardboard is not suitable for any room. Taking this into account, manufacturers produce different types of this material.
The main types of plasterboard sheets used in residential premises:
- GKL (ordinary plasterboard sheet) is used for the manufacture of items intended for dry rooms (living rooms, bedrooms, kitchens, hallways).
- For wet bathrooms and toilet rooms, gypsum plasterboard (moisture-resistant plasterboard) is used, which is impregnated with antifungal and moisture-resistant compounds.
The main advantages of using drywall compared to other materials include:
- The ability to give the product any shape and paint it in any color.
- Easy to install the structure (frame + casing).
- The appearance of such shelves definitely outperforms wooden ones.
- Cost price. Consumables are inexpensive, so a self-assembled structure will be much cheaper than a ready-made one purchased in a store.
- Absolutely environmentally friendly. This material is not impregnated with any harmful substances.
Recommendations
Before you make your own TV shelf, you need to choose the appropriate model. At home, you can make both hanging, retractable, and rotating models. Shelves that are installed on the floor look beautiful in the interior of living rooms. If the room is small, then it is best to choose a suspended option with brackets; they are attached either to one support beam or to multiple beams to the ceiling. The advantage of hanging shelves is that they are out of reach of children.
Pull-out designs are considered a good choice when the equipment is planned to be installed in an existing cabinet. Such shelves will move on rails, ensuring accessibility to equipment. As for rotating models, it is recommended that they be made in addition to other pieces of furniture to facilitate the location of the screen. Floor shelves are not much different from ordinary TV stands; they are the easiest to make.
When choosing a shelf shape, it is best to choose square and rectangular models; designs with semicircular and curved shapes are rare. To increase the functionality of the shelf, you need to supplement its design with several compartments
When creating a sketch of shelves for a TV, it is also important to take into account the following nuances
- In the living room, it is advisable to install wide and large structures, since the TV in this room acts as the center of the interior. The choice of material and shelf design also plays a huge role; wood products in warm colors are considered a good choice. In the bedroom, it is best to place hanging compact shelves made of plasterboard or chipboard. For children's rooms, you need to make original designs in bright colors.
- It wouldn’t hurt to decorate the finished shelf with decorative elements; this will give it some chic. In a classic style, you need to use a bracket and complement the structure with glass inserts. The brackets can have both strict geometric patterns and floral designs; the same goes for glass elements; they can be beautifully painted. Carvings will also look unusual on wooden shelves; they are usually applied to the end in the form of various patterns. If the shelves have metal inserts, you can engrave them, this will give the product an interesting look.
- Any shelf for a TV should be provided with good lighting, which will highlight the corner under the equipment. As a rule, wooden structures are equipped with spotlights; round small lamps are placed on the ceiling above the shelf in such a way that, when turned on, they highlight the cinema area in a special way and relieve the eyes from unnecessary strain. The intensity of such lamps can be adjusted using a special switch.
A combination of a TV shelf with an LED strip would also look good in a modern interior; it should be placed along the edges of the structure. In the dark, such illumination will create a mysterious flickering, changing the intensity and color of the lighting.
It is worth noting that LED strip is best suited for glass structures, giving them an expensive look.
To learn how to make a TV shelf with your own hands, see the following video.
Classification
The width of the shelves directly depends on the size of the TVs being installed, so if you have a wide TV of an older model, then the shelf should be appropriate. Flat models are attached with special brackets and plugs that allow you to position the TV screen at a certain angle for the eyes. But if we talk about old “boxes”, then for their installation large structures are used that can withstand heavy weights.
Samples of shelves for TV
When choosing a future design for a TV, you need to start from the size of the device. But if for old TVs shelves with simple designs that do not turn or tilt are mainly used, then for modern models there is a wider choice. Below are the main options for hanging shelves that you can make yourself.
Wide hanging shelf
Table. Types of hanging shelves.
| Shelf name, photo | Description |
| Corner | A simple shelf, made in external or internal version. Making a corner shelf is not difficult, so many beginners choose this option. |
| Wall-mounted | An excellent presentable shelf that allows you to conveniently and beautifully install a TV or other items. But if the TV is an old model, then it will not look so stylish on such a modern shelf. |
| Hanging | Another type of wall shelves. This option will fit perfectly into the interior of small rooms where you need to save space. The disadvantages of hanging shelves include the complexity of their design. |
| With bracket | This type of shelf is used quite rarely, although it looks very attractive. It is very difficult to make such a product yourself, especially without special skills or experience working with wood. |
| Shelf-stand | A small cabinet that does not stand on the floor, as is usually the case, but is attached to the wall. The design of the shelf-cabinet has additional shelves where you can store useful things, for example, a tuner or discs with films. |
Wall shelves in the interior
Note! There are multi-tiered TV shelves, combined or using back walls. The same can be said about the mounting methods - brackets or corners. The structural variety of hanging shelves is very large, so before starting work, the master must know what exactly he needs.
Feasibility
To make an “intricate” shelf you need to purchase additional tools
If everything is clear regarding the material of the shelves and other classifications, then some difficulties may arise with the tools. Therefore, to make something extravagant, you will need to visit the construction market to purchase a tool.
The modern construction market is not only about building materials and tools. This is still an extensive service sector. Therefore, if the cost of the service is significantly less than the price of the tool, it is worth thinking about this factor and making the right, appropriate decision.
Another aspect of difficulty lies in personal skills. Of course, you can cut a wooden or plastic shelf with a regular hacksaw without buying a jigsaw. But not every craftsman can make a high-quality radius glass shelf on his own; Even gluing edges to a sheet of chipboard can be difficult.
Based on the feasibility and personal experience in the manufacture of products from selected materials, you should know that the construction market is ready to perform a number of works for little money. These are: cutting sheets of MDF, chipboard, wood, plastic, radius and straight cutting of glass, drilling holes according to customer drawings, cutting metal along the contour and others.
Understanding well what needs to be done, what to make it from, taking into account the interior of the room, you just need to approach this issue expediently and not clutter up the space with unnecessary tools. But further production and additions to the interior can be done independently by purchasing the necessary material.
How to make a dog house with your own hands: arrangement of housing in the yard and in the apartment. Drawings, dimensions and original ideas (55+ Photos & Videos) + Reviews
Stages of work
The first step is to make a drawing diagram of the future shelf, so as not to make a mistake in the size and quantity of materials. Consider the parameters of plasterboard sheets - 2500 x 1200 x 12.5 mm (standard sheet), length can vary up to 4000 mm, thickness - up to 24 mm.
Decide on the purpose. A plasterboard shelf for a TV or other heavy equipment should be reinforced with profiles to avoid destruction and deformation. The shelf for light loads does not need to be further reinforced. Consider the load when choosing sheet thickness.
Main types of TV mounts
Bracket for TV on the wall, rotating, retractable
The tilt-and-slide TV wall mount is the most convenient to use. It provides the maximum number of degrees of freedom for a flat screen.
Thanks to this fastening, the TV panel can be fixed in any position. In addition, the TV itself can:
Tilt-and-swivel type TV bracket
This type of fastening allows you to adjust the angle of the panel and change its position. No matter what room the panel is located in, the tilt-and-swivel TV bracket will make it possible to adjust the image plane vertically or horizontally for comfortable viewing.
Table 2. Advantages and Disadvantages of Pan-Tilt Brackets
| Possibility of comfortable screen adjustment | Difficulties during installation work |
| Quick selection of the most comfortable screen viewing position anywhere in the room | Large distance between wall and panel |
| Allows you to install an LCD panel in a corner and living spaces with a non-standard layout | High selling price. The fastening has different weight restrictions for panels |