The first thing a person sees when entering an apartment is how the hallway is arranged. This is the place that primarily shows the attitude of the owners towards their home. A poorly equipped and uncleaned hallway creates a negative attitude towards the entire apartment.
The owners themselves are interested in ensuring that the hallway is clean and tidy, and that things are arranged on their own shelves.
In this case, cleaning is easy and relaxed. Shelves for storing things can be of various shapes and made of different materials.
In the store you can find a large assortment of shelves in different price categories.
If you don’t like the store’s assortment or the price is too high in your opinion, you can make a shelf with your own hands using available tools.
Functionality of shelves
There are many small items that cannot be put in a drawer or closet in every home. I want the necessary little things to always be at hand; shelves are used for this purpose.
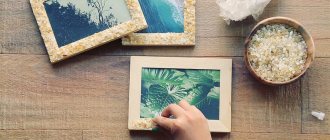
You can decorate the wall or floor space in an original way using a shelf. Place a designer vase or books, figurines or victory cups, a collection of objects or photographs.
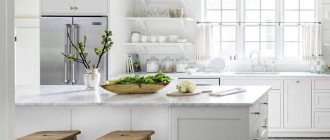
You can use the shelf in the bathroom, children's room, kitchen, bedroom, living room, and in each room it will fulfill its role.
Types of shelves
- Standard or classic rectangular shelves that are attached to the wall and come in various sizes.
- Corner shelves fit well into the corner of the room, decorating it. Such shelves are attached to two walls.
- Floor shelves can stand on the floor or be attached to the wall, depending on the purpose of their use.
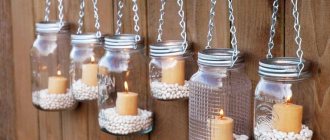
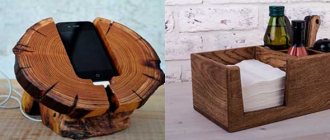
- Exclusive shelves using non-standard materials, for example, tree branches, ropes.
To decorate a room or premises, you first need to decide which shelf you want to see in your home. The shelf can be made with a closed back wall or made completely closed using glass doors.
Material for work
Before starting work, be sure to check the quality of the material. The boards must be smooth, without knots, cracks, dry and without traces of mold. Before work, treat them with an antiseptic primer.
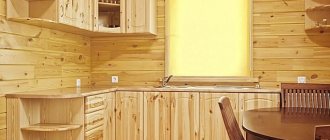
If you use tree branches for a shelf, then sand the trunk well so that during the work there are no surprises in the form of a rotten knot or traces of mold under the bark. You can also use chipboard and laminated chipboard for work.
Using copper pipe
The model is unique and practical; this master class on DIY hangers will be of interest to women who have accumulated a lot of hats. In addition to such voluminous accessories, hooks can be used to dry things after getting caught in the rain or simply beautifully decorate the room at the entrance to the living space.
To work you need to prepare:
- Copper pipe.
- A few clothespins.
- Tight cord.
- Scissors.
The manufacturing process begins with trimming the edges of the base material, after which a cord is passed through the body of the pipe. Both ends should be securely fastened to the ceiling, and several pieces of thread hanging down should be tied along the entire horizontal line.
Recommendation! You need to allocate an appropriate distance so that the hats do not wrinkle during storage; you can not tighten the loops tightly, but adjust their location as necessary.
Clothespins are attached to the ends of the cords; these are the components that will hold all the hanging accessories. If you move a little space away from the wall, and do not press the pipe as tightly as possible, then you can additionally put a plastic trempel on it.
Step-by-step instructions for assembling the shelf
- Marking. The entire course of further work and, accordingly, the result depend on the correct and accurate marking of the material. Draw a drawing of the shelf, accurately indicating all its dimensions. When marking, take into account the thickness of the board. Use a tape measure or ruler to transfer all measurements onto the boards. Before starting work, the boards must be placed on a flat surface.
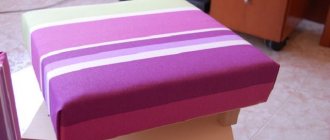
- Manufacturing of shelf parts. Using a jigsaw or hacksaw, carefully cut the boards to the desired size. The board cuts must be even. Clean the cut area with sandpaper. Sanding parts is an important element of the job. Sand the boards well using sanding paper or a sander. Cover the boards with stain and varnish or paint.
- Assembly of parts. On the top and bottom pieces of the shelf, mark lines with a pencil to attach the sides of the shelf. Using self-tapping screws, connect the shelf parts. If the shelf consists of several compartments, connect the entire structure in series.
- Shelf fastening. Brackets must be attached to the ends of the shelf so that the shelf can be hung on the wall. If the shelf is long enough, then it is necessary to evenly distribute the brackets along the entire length of the shelf for reliability. Hang the brackets on dowels, which must be placed horizontally on the wall, using a building level for this. Otherwise, the shelf will not be level, which will cause objects to fall. To give the shelf originality, you can use decorative brackets.
If desired, you can make open and closed shelves, with or without a back wall. You can make several shelves and place them on the wall in a certain order: in a ladder, in a checkerboard pattern, along the perimeter of the wall, or in another way.
When making floor shelves, depending on the purpose, it is necessary to consider their attachment to the wall for stability.
Corner shelves
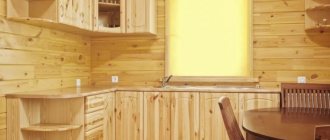
Corner shelves fit well into the interior of any room, making empty corners functional. Most often, such shelves are used in the kitchen or bathroom, where there is little space and you want to use all the free space as much as possible.
When making a corner shelf, it is necessary to take into account the angle of the wall of the room where the shelf will be located.
For a corner shelf, glue the two sides of the shelf together to form a corner and let the glue dry well. Can be secured using self-tapping screws or dowels into specially made grooves. Then, using brackets, they are attached to the two walls of the corner, placing the dowels horizontally in level.
Exclusive shelves
Tree branches can be used as side walls. Horizontal and vertical tree cuts can be used as shelves.
When making shelves with several tiers, you can use rope as side walls, which will give the shelf originality. You can cut an openwork shelf from plywood, which will give it lightness and originality.
How to make a shelf and what tools you will need
Good tools and knowledge of technology compensate for the lack of practical skills when making simple furniture. Anyone can feel like an unsurpassed cabinetmaker and strengthen their authority in the family. The best way to start climbing to the heights of furniture technology is by making shelves. To acquire basic skills, you need little material, complex calculations when calculating sizes are not required, and any flaw can be called a bold design decision.
Operation of shelves
- Distribute items evenly on the shelf so as not to overload one side.
- Wipe the shelves with a damp cloth, as the wood may become warped.
- Calculate the weight of the items on the shelf and the fastening of the structure.
Making shelves with your own hands is not only about diversifying the interior of your home with original things, it is also an interesting process that can develop into a hobby or allow you to provide yourself with additional income.
You can give this shelf to friends and relatives. The convenience of a self-made shelf also lies in the fact that you can always repaint it to match the color of the interior, change the shape and design.
We prepare the necessary
You need to make your own shelf for the mirror from materials that are easy to process. Glass is good because it is impervious to moisture, but it is difficult to work with - you cannot cut it without special equipment.
The best option is wood or plywood . They are not moisture resistant, so for use in a humid environment they must be treated with enamel or varnish. It is easy to distinguish: the varnish is transparent and does not hide the wood texture, and the enamel is opaque; it is used if they want to mask possible surface defects. These compounds cover the wood material with a dense layer and prevent moisture from penetrating inside.
Tools and materials
For a stylish shelf you will need a board 25 - 30 mm . You can take pine, it is easier to process, but it is prone to chips, and if your hand trembles, the workpiece may be damaged. It’s great if you can get a piece of solid beech wood - it’s denser, but not as sticky, and the fibers in it are less pronounced. You can also take plywood with a thickness of 15 - 20 mm .
Tools you will need: